/


Latest Post

Multiple amazing ‘WOW’ cards featuring the Legendary Ride bundle!


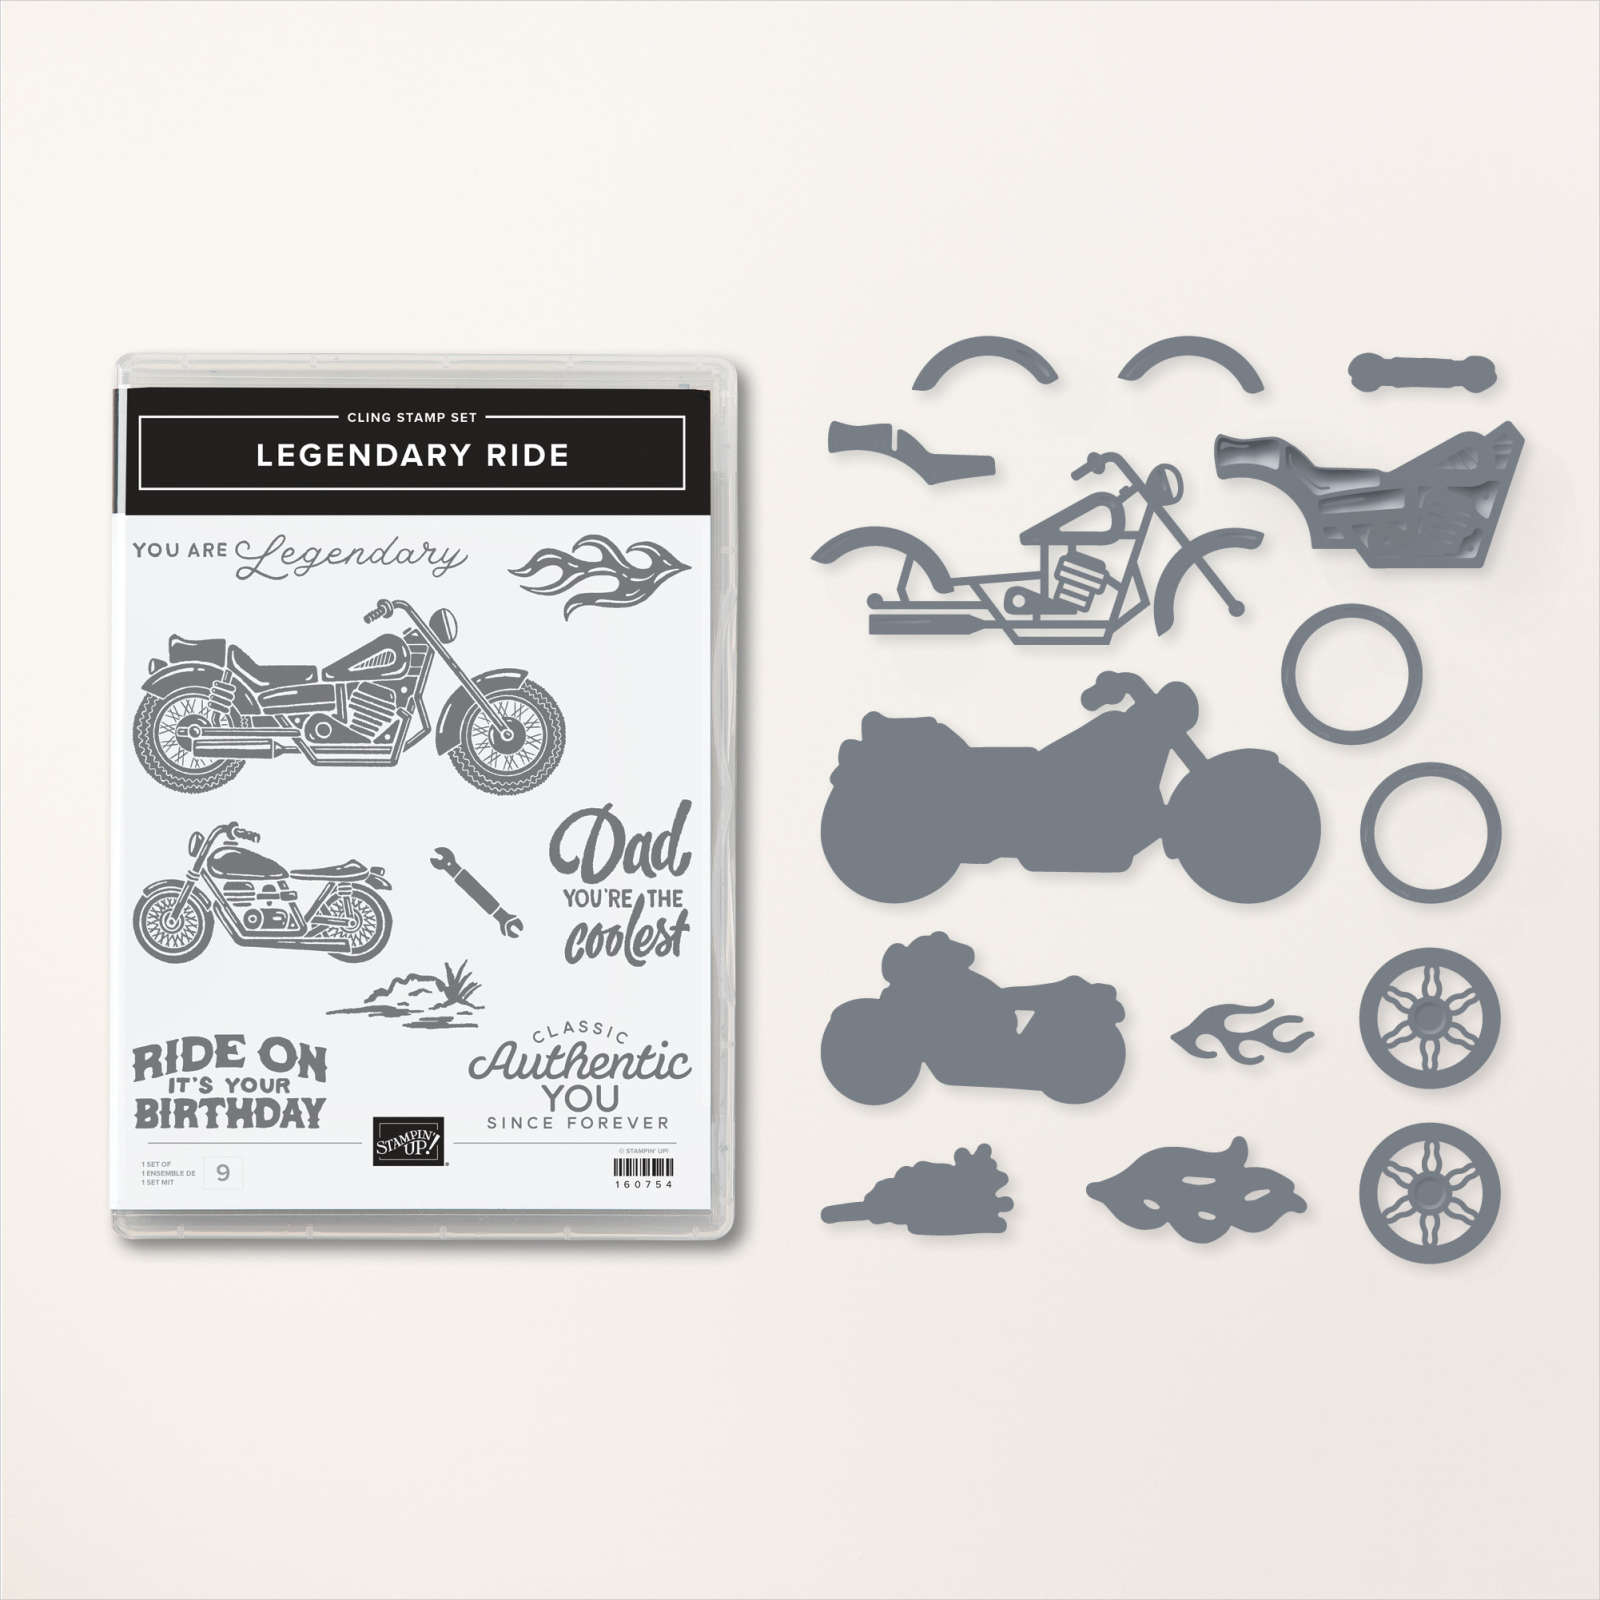
Each month in our Flowerbug's Team a member is featured as 'Artist of the Month' and shows off a bundle or suite of projects.  In February it was Jane and she chose to use the Legendary Ride bundle.  She did an amazing and creative group of cards!

Take a look at these incredible samples:


Do you see the orange racks holding up the bike?  She used the 'seat' dies to create it.  She also sponged on them a bit so they were 'well used'!  Ha!  

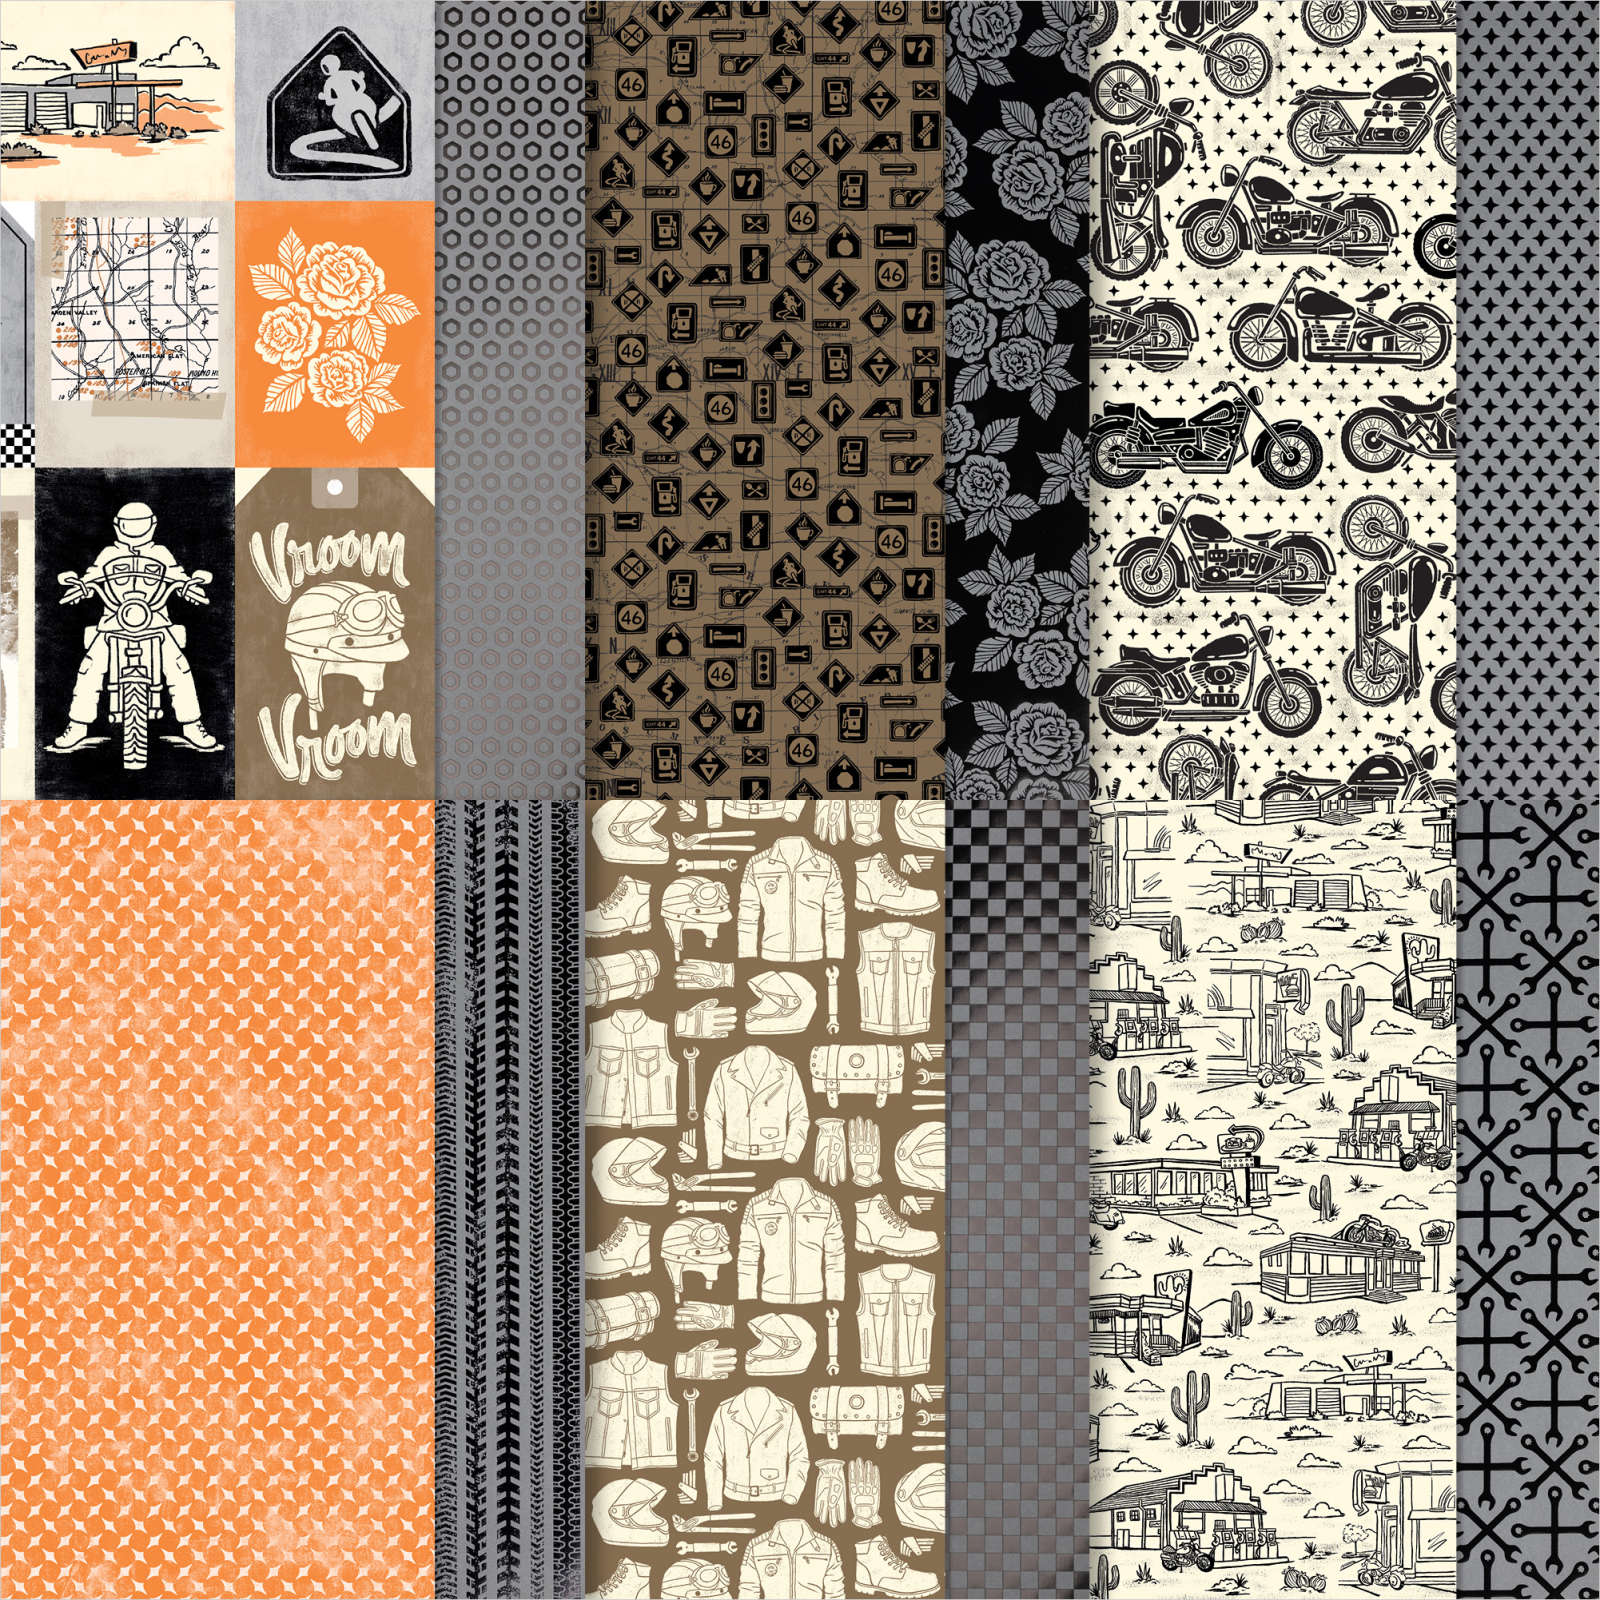
The background with clouds and the checkered bottom are all from the Ready to Ride DSP.  Look at the detail on her motorcycle!  The dies are incredibly detailed. 

This next card is a center step card.  It also features multiple pieces of the Ready to Ride designer paper. It's hard to see in the photo but she die-cut the seat from the Black foil in the DSP.  

She sure made the most of this unique Legendary Ride bundle by Stampin' Up!  You can see it here online. 

This next card features a pocket greeting on the front. You can pull it up and remove it to use as a bookmark. She textured the front panel with the Metal Plate 3D embossing folder seen here.  Perfect texture for this guy card.  

She added color to the Ready to Ride floral paper above using a Sweet Sorbet Blends marker. She really showed off this unique designer paper on her projects.  I LOVE the shiny black foil accents.  See it here.

Next is a great guy birthday card that doesn't feature a motorcycle at all. She added elements from the He's the Man DSP in the Annual Caalog.  

And last is this neat card with a road map and bike tread with a more colorful bike.  See the Adhesive Backed studs on the upper corners?  They pair wonderful with this suite.  See them here. 


Thanks for sharing your creativity with us Jane! Your creativity & talent is amazing! 


~~~

March Specials:

See the new Online Exclusives here! 

*current host code:  TMJXFR2T or BFE4C2KM

Get a free class kit with online orders over $55 when using the host code above!

Earn free products with my loyalty rewards! 

Click here to download yours and earn a $50 shopping spree!

All Posts

  • Retiring items on the Last Chance list & info on discontinued items & price changes


    Today I'm sharing lots of information on the upcoming Annual Catalog plus the retiring items.  

    The new Annual Catalog goes live on May 1st. The current Annual & Spring Catalogs retire April 30th. 

    These retiring items are now while supplies last. Some items are discounted but the discounts do not start until April 9th.   

    However I wanted you to have the list beforehand because some of these products will already be gone once the list goes live.  So now is your chance to get the items on your 'gotta have it' list.  

    Click here for the Annual Catalog last chance list PDF. Here's the Annual Catalog list in Excel format

    Click here  for the Spring Catalog last chance list PDF. 

    I thought I'd mention a few items from the Annual catalog that I am surprised are retiring & will dearly miss:

    • Vanilla Envelopes & Vanilla Thick card stock
    • Vellum card stock
    • Double Oval punch – a big favorite!
    • Basic Border dies
    • Scalloped Contour dies

    Please remember to grab any of the In Color items that are retiring. This set of colors was a favorite of many. These could run out of stock at any time. 

    We all dislike seeing price increases.  But like everything else these days some prices are going up in the new Annual Catalog. Costs are rising everywhere and Stampin' Up! has to raise there's to stay solvent. There are many companies that are struggling or closing and I'm happy to say that SU is still in good shape and in no danger of closing. I'm so glad they are proactive! 

    Below is a list of items where prices are increasing.  I tell you this now so you can stock up while the prices are lower.  Remember to use the host code links below when ordering. 

    ~~~

    March Specials: 

    See over 20 brand new Online Exclusive products here!

    *current host code links:   ZDUGF6KY or TQWBXR4T

    ~~~

    Get a free package of Rainbow Dots

    with online orders over $55 in March

    All online orders in March will receive this free Hot Air Balloon tutorial with 8 projects!

    Leave a Reply

    Your email address will not be published. Required fields are marked *

  • A striking technique with the Naturally Gilded specialty paper; with video & free project sheet!


    I shared how to make this card on last week's video. It features the Naturally Gilded designer paper seen here.  

    This pretty paper has a white background and Silver, Gold or Copper foil patterns. You can see it in the Online Exclusives while supplies last. 

    I decided to do a direct to paper resist technique and change the White background to Black.  You can do this technique on any foil printed designer paper. The foil resists the ink so you can wipe it off once the background is saturated. 

    I used a Black Memento ink pad which is water-based. You can use any water-based ink but not Stazon. Stazon ink would cover the foil patterns. 

    How did I do it?  I had my paper laying face up and rubbed or tapped my Memento ink pad all over the specialty paper. Once you're done adding ink simply wipe the ink off the foil prints with a tissue or paper towel.  

    I created a free project sheet for these cards; you can download or print it here: Download Naturally Gilded Ink Resist technique

    *Below is the video where I shared this technique.  I also shared my new Annual Catalog products and lots of amazing swaps too.  Be sure to follow me on YouTube here. 

    ~~~

    March Specials: 

    See over 20 brand new Online Exclusive products here!

    *current host code links:   ZDUGF6KY or TQWBXR4T

    ~~~

    Get a free package of Rainbow Dots

    with online orders over $55 in March

    All online orders in March will receive this free Hot Air Balloon tutorial with 8 projects!

    Leave a Reply

    Your email address will not be published. Required fields are marked *

  • Poetic Expression fun fold swap card


    Last week I shared this image on Facebook.  It was a bit of a tease to guess what the finished card would be like. 

    It has Pool Party, White, Lost Lagoon and some Poetic Expressions designer paper (retiring in April). 

    It also shows the greeting die-cut from the Thoughtful Moments Hybrid embossing folder seen here.  I feel like it makes my greetings extra special.  They're a pretty font and give texture and dimension to your projects. (I shared how to use this folder here in a video.)

    And that is the finished card.  I made 12 of these for an organized fun fold swap. I am a huge fan of monochromatic cards and these colors are at the top of my favorites list.  

    The tag is from the Something Fancy dies seen here.  I love the many label & greeting shapes this set has. 

    Here's the inside view. 

    Measurements are so simple!  Once you cut off the end of the card front you flip it 90 degrees and use it as the front layer. 

    • Card base – 11" X 4 1/4" score at 5 1/2"; cut off one end at 2 3/4"
    • DSP – 1 piece at 2" X 4", 2nd piece at 4" X 3" 
    • Inside White 5 1/4" X 4" 

    Here's the inside view.  This greeting is from the Simply Zinnia set seen here. 

    ~~~

    March Specials: 

    See over 20 brand new Online Exclusive products here!

    *current host code links:   ZDUGF6KY or TQWBXR4T

    ~~~

    Get a free package of Rainbow Dots

    with online orders over $55 in March

    All online orders in March will receive this free Hot Air Balloon tutorial with 8 projects!

    Leave a Reply

    Your email address will not be published. Required fields are marked *


Notice: LeeAnn Greff, Independent Stampin’ Up! Demonstrator, Manager. The content of this website is my sole responsibility as an independent Stampin’ Up! demonstrator and the use of, and content of, the classes, services, or products offered on this website is not endorsed by Stampin’ Up! Copyright 2025