/


Latest Post

Last of the amazing swaps by my Flowerbug’s Team; Black & White with a ‘pop’ of color!


Today's post features the rest of the Team swaps.  Our theme was Black & White with a 'POP' of color.  I love this theme so much; adding a bit of Black on a card provides a wonderful contrast to other colors and attracts the eye. 

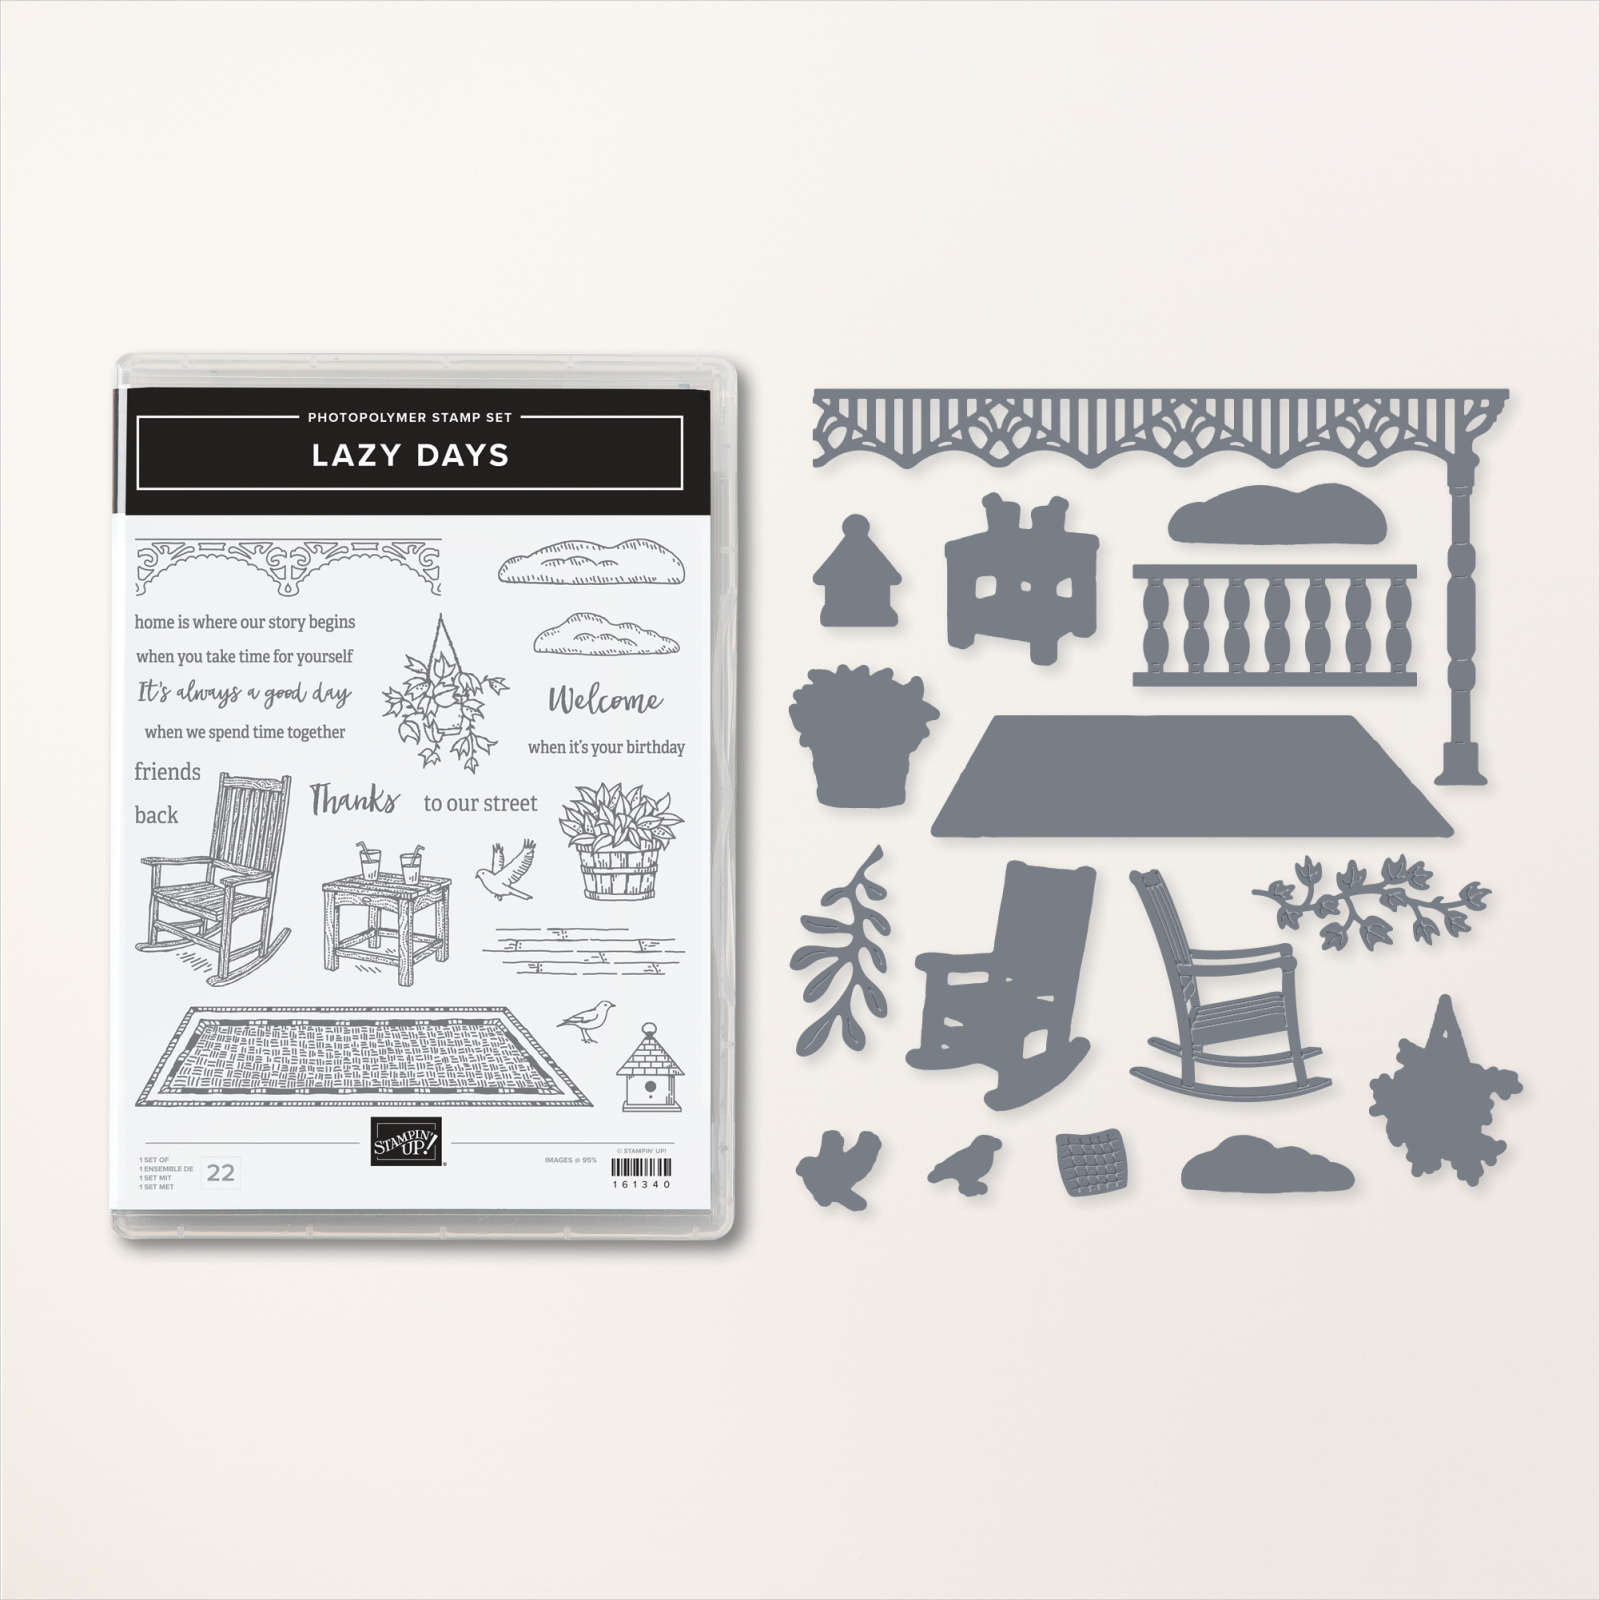
The first card was made by Candace; she used the Kite Delight stamp set along with Highland Heather, Granny Apple Green & So Saffron.  See the set here. 

She stamped her background and then stamped and fussy cut the kits separately to pop them up on the card.  Her greeting is heat embossed with White embossing powder on the Black CS strip.  Beautiful! 

Tammi made the next one featuring the happy color combo of Magenta Madness & a bit of Granny Apple Green.  

The stamped images are from Hello Ladybug; after stamping on the die-cut scalloped circle she used the Tasteful Textile embossing folder.

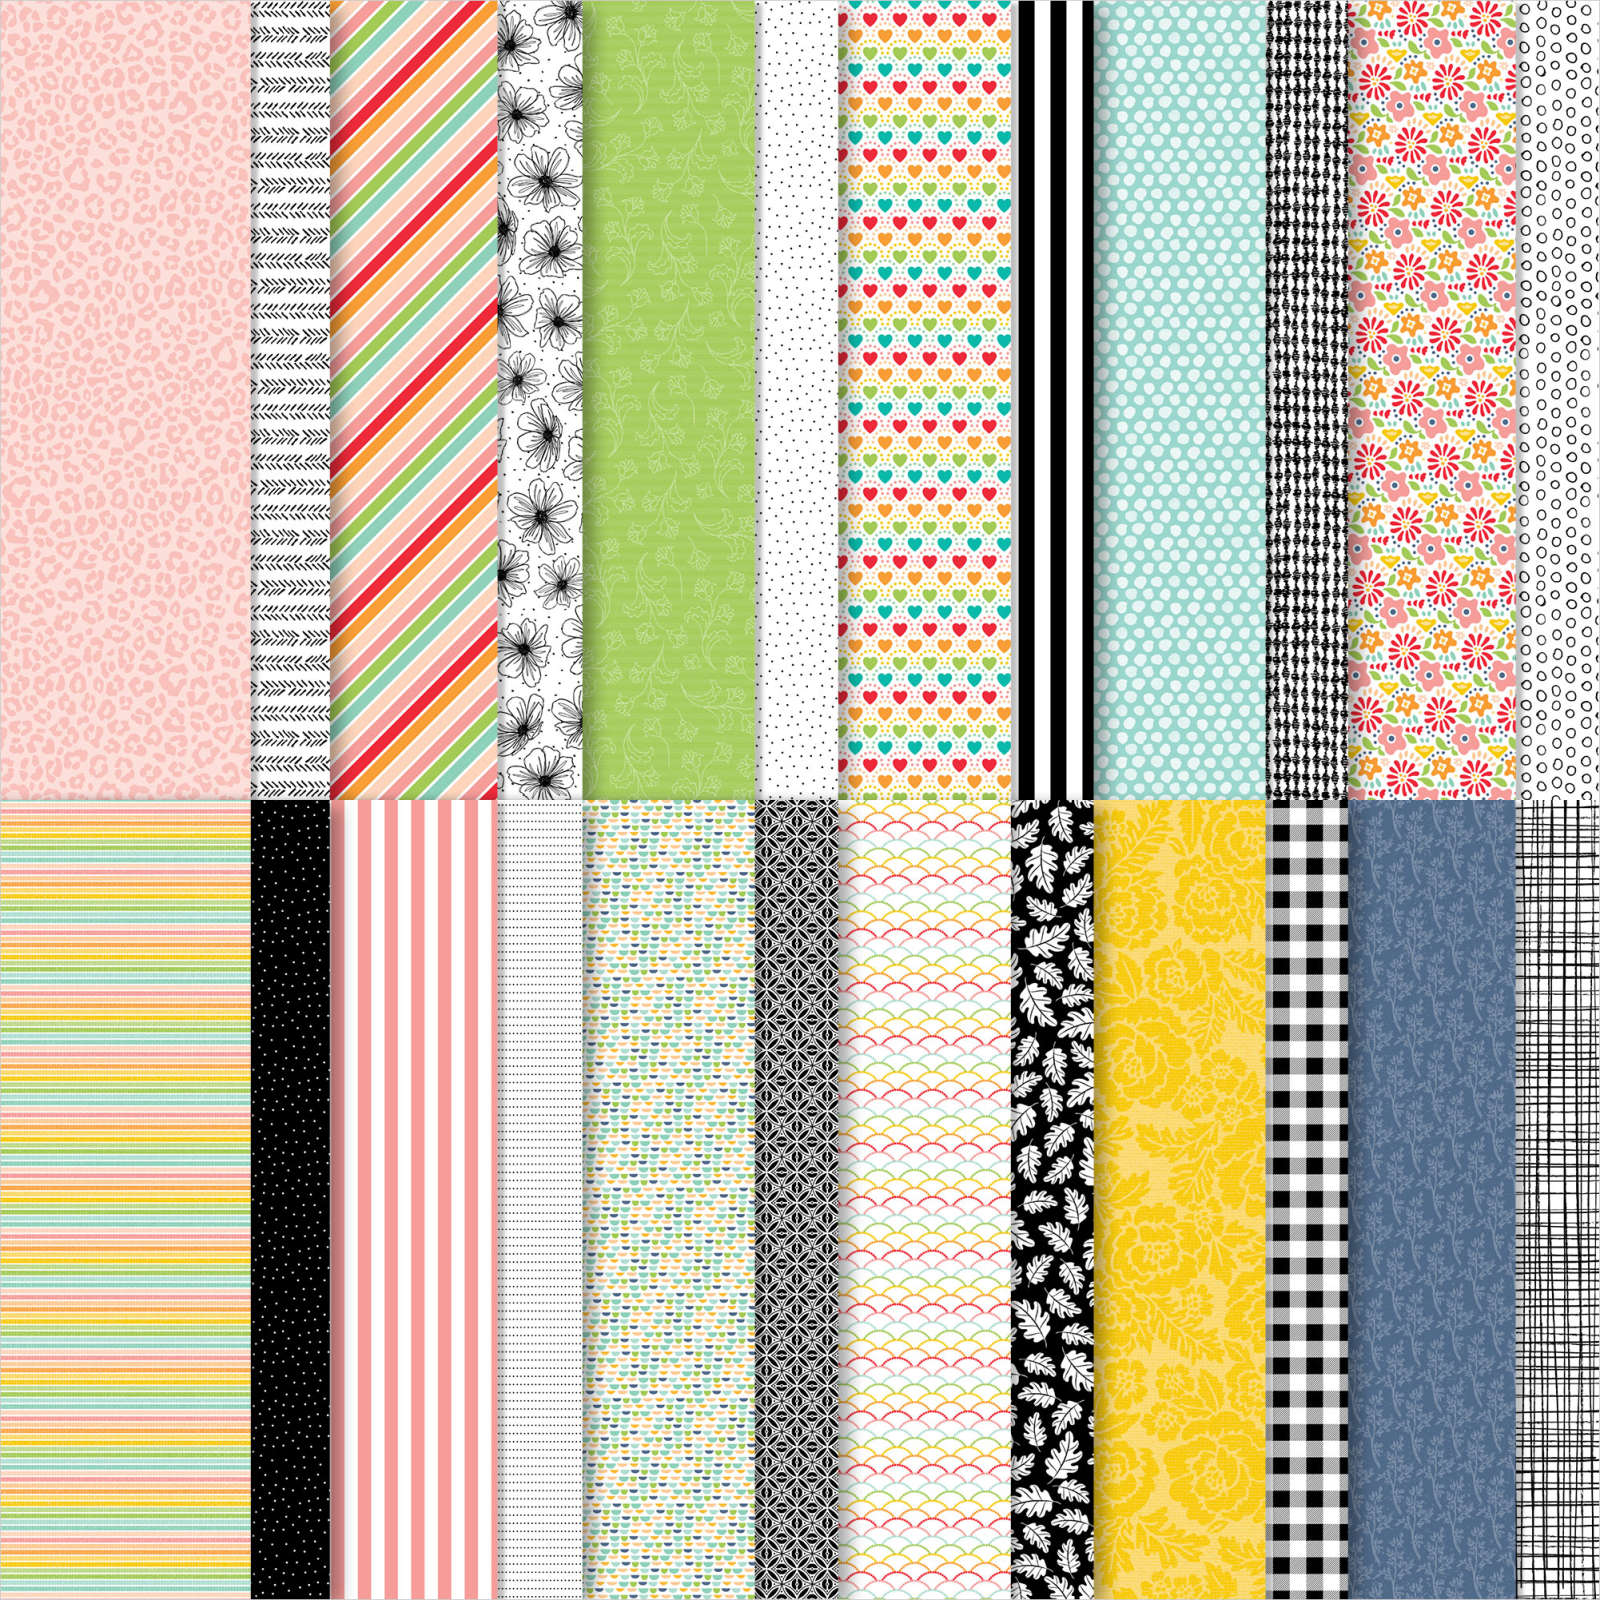
The Black & White patterned paper is from the Pattern Party DSP – a host paper you can get FREE with host benefits.  Once your order goes over the $150 mark you can choose free product!  This amazing pack of paper has 40 12 X 12" sheets and is just $18. See it here. 

Marilyn made this pretty card using Daffodil Delight.  

She die-cut the flower 'window' from the White 'Stitched So Sweetly' die-cut (largest one in the set) to reveal the dotted designer paper underneath.  This die is from the Meadow dies seen here.  The polka dot DSP is also Pattern Party host paper.

She colored the white seam binding ribbon yellow with a Daffodil Blends marker. Her greeting is from the Sharing Sunshine stamp set. 

The greeting is on a 'Stitched So Sweetly' die-cut too.  These dies are retiring!  I'm so sad; they are one of my favorite 'go to' dies for labels and layers.  See them here. 

Next is a fun fold card made by Jacki using a striking pop of Red for this wedding card. 

The greeting is from the Celebrating You stamp set in the Jan-June mini catalog; see it here.  Again her DSP is the host Pattern Party; can you tell we love this pack!!?  The hearts are both punches in the Annual Catalog.  They are returning in the new annual catalog.  

Her measurements are:

  • Black card base 5 1/2" X 11", scored at 1 1/4", 3 3/8", 7 5/8" & 9 3/4"
  • DSP front dots – 2 pieces at 1" X 5 1/4", front hatch design – 2 pieces at 1 3/4" X 5 1/4"
  • White layers under dots – 2 pieces 1 1/8" X 5 3/8", under hatch design – 2 pieces at 1 7/8" X 5 3/8", White inside 4" X 5 1/4"
  • Black belly band 1" X 9 1/2" 

Next is a Tracey's card featuring the pretty In Color of Polished Pink. 

She used the Artistic dies for the beautiful Black die-cut. She stamped images from the Artistically Inked stamp set under the die-cuts for a neat watercolor look.  The stamp & dies will be returning in the new catalog but they will not be in a bundle at 10% off then.  

Her White layer is textured with the Gingham embossing folder from the Jan-June mini catalog; see it here. 

~~~

The Last Chance list is out!
Tons of items from the 2021-22 Annual Catalog are retiring and many are deeply discounted from 20-50% off.
 
Remember that these items are while supplies last and may run out. 
Click here to see it all online along with the discounts.

Host codes: 6QFA66WT

 *click here to order 

If your order is over $50 you'll receive free Polished Dots (or other embellishments) and 3 hand made cards from me.


Don't forget about my loyalty rewards! 

Click here to download yours and earn a $50 shopping spree!  

All Posts

  • Look at this incredible Lazy Days card swap!


    I was blown away by the card swap Paula made for our Flowerbug's Team swap in May.  Check it out…..

    See what I mean?  The scene she created is so real & life-like!  This card features the new Lazy Days bundle seen here.  And she used many of the stamps & dies in the bundle.  I counted them – 9 stamps or dies! 

    Here's a photo of the bundle she used: Lazy Days seen here. 

    I think her soft colors set the tone for a real porch scene. That rug, lattice, fence and sponged sun – well just everything works! I'm so very proud of her talent.  AMAZING!  

    Her background is white but she lightly blended blue ink for the sky and likely crumb cake for the porch. 

    What do you think?  I think it's incredible well done. 

    ~~~

    May Specials:

    *current host codes: ZHZ6CPYU or AJVB3B3V 

    Get a free updated cardstock color sampler with online orders over $55 using a host code.

    Offer good while supplies last:  

    Earn free products with my loyalty rewards! 

    Click here to download yours and earn a $50 shopping spree!

    Leave a Reply

    Your email address will not be published. Required fields are marked *

  • New Inked & Tiled in a Book Binding Easel fun fold card; video tutorial & measurements too!


    I'm just a little bit in love with this special fun fold layout!  I've made three versions of it this month…. 

    I featured two new colors in our Stampin' Up! catalog – Boho Blue & Pebbled Path with returning Misty Moonlight & White.  

    I hope you watch the video here or below to see how to make this neat card.  It's so much easier than it looks!  

    I knew this stamp set would be fun to play with.  The greetings are wonderful and of course the botanical images are beautiful!

    Details:

    • I stamped the large leaf repeatedly onto the Boho Blue layers using Versamark ink. I let it dry and then textured it with the Exposed Brick 3D embossing folder.  I love this new folder!!  
    • How did I get the two-tone colors on my flowers?  I used both an ink pad and markers. I inked the flowers first in Boho Blue. Then I colored the stems using a Pebbled Path Stampin' Write marker.  Huff and stamp!  Why huff?  Huffing with your moist breath re-moistens the ink on your stamp. This can be especially helpful with solid type stamps.  
    • After stamping I used the same Pebbled Path marker to add more detail to the base of each flower.  
    • For an easel card you need something to hold it open.  I stamped the flower in the set onto a piece of Boho Blue and punched it out with the Petal Park Builder punch. I curled and distressed the petals and added it with a few Mini Dimensionals.

    The card does lay flat for mailing.  

    I added a looped piece of the 2023-25 In Color Jute trim under my punched Oval greeting.  I did sponge a bit of Boho Blue on the edges first.  

    In the video I share two other beautiful cards made with the Inked & Tiled stamp set.  I made two of them for swaps on the Stampin' Up! incentive trip I'm on right now!  A Norwegian cruise!  

    You can watch me make this card on the video here. Or click on the photo below to watch. 

    ~~~

    May Specials:

    *current host codes: ZHZ6CPYU or AJVB3B3V 

    Get a free updated cardstock color sampler with online orders over $55 using a host code.

    Offer good through May 17th  

    I have one spot left in my new catalog designer paper share. 

    Get 80 sheets of 6 X 6" DSP – all from the new catalog for just $28.50 plus shipping.  Reserve your spot here. 

    Earn free products with my loyalty rewards! 

    Click here to download yours and earn a $50 shopping spree!

    Leave a Reply

    Your email address will not be published. Required fields are marked *

  • Inked & Tiled with a gorgeous background with video & blending tips!


    Today I'm sharing one of my favorite cards I've made this month. These colors are so me!  I needed to make 28 of these for the Norway cruise with Stampin' Up! We have to option of joining a card swap and I always try to do something unique for this special swap. 

    I chose the new Copper Clay with Black and Coastal Cabana. Aren't they beautiful together? 

    This card features the new Inked & Tiled stamp set seen here. It actually comes in a bundle with two punches. But I didn't use those here.  

    After I stamped the flowers in Black ink I used Blending Brushes to add both Coastal Cabana and Copper Clay ink.  We have both regular and small Blending Brushes now.  For a background like this I recommend the larger set of brushes. See them here.

    Tip: when wanting a smooth blend, I recommend adding ink to your brush and start off of your paper. Slowly work your way on with a soft, gentle swirling motion. Adding pressure can give you blotches or other marks.  It's also helpful to have a fully inked pad.  *Remember that is helps to add ink a little at a time. It can be a slow process! 


    Isn't that texture gorgeous with the blended background?!  

    When I was creating this card I made the card on the right first.  If you look closely the stamped panel does not have any texture on it.  Adding the Exposed Brick embossing created the perfect finish!  


    In the video I share two other beautiful cards made with the Inked & Tiled stamp set.  

    You can watch me make this card on the video here. Or click on the photo below to watch. 

    ~~~

    May Specials:

    *current host codes: ZHZ6CPYU or AJVB3B3V 

    Get a free updated cardstock color sampler with online orders over $55 using a host code.

    Offer good while supplies last:  

    I have one spot left in my new catalog designer paper share. 

    Get 80 sheets of 6 X 6" DSP – all from the new catalog for just $28.50 plus shipping.  Reserve your spot here. 

    Earn free products with my loyalty rewards! 

    Click here to download yours and earn a $50 shopping spree!

    Leave a Reply

    Your email address will not be published. Required fields are marked *


Notice: LeeAnn Greff, Independent Stampin’ Up! Demonstrator, Manager. The content of this website is my sole responsibility as an independent Stampin’ Up! demonstrator and the use of, and content of, the classes, services, or products offered on this website is not endorsed by Stampin’ Up! Copyright 2025