/


Latest Post

Joseph’s Coat technique video with the Botanical Layers


We're making these cards tonight on Facebook Live here on my FB page!  It's a technique that will WOW you with it's magic.  
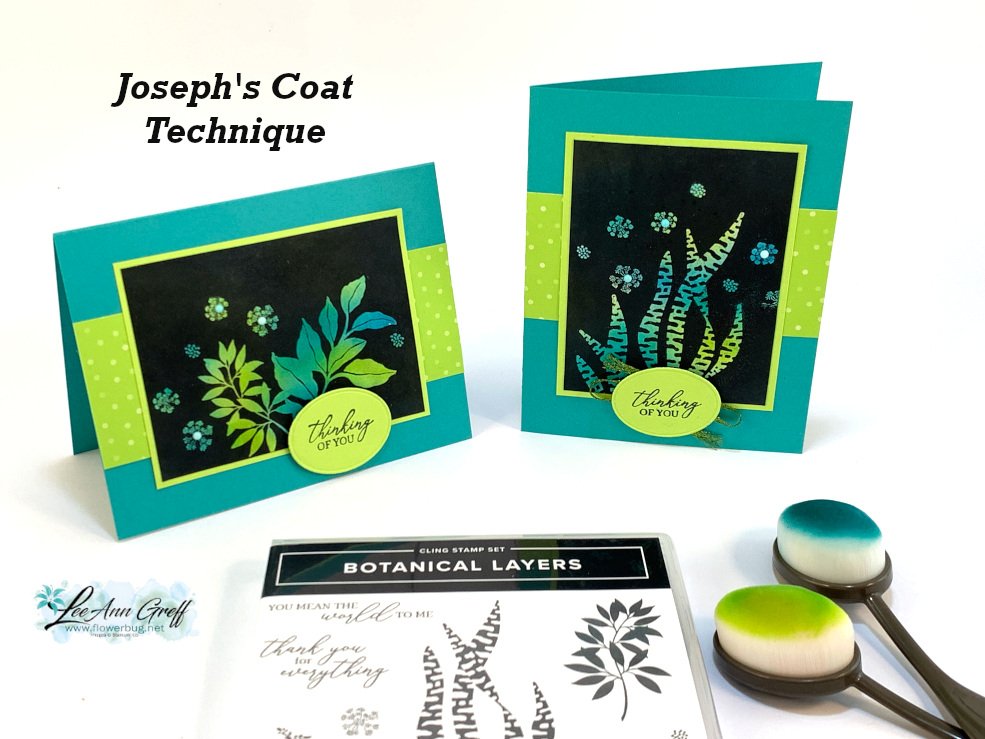
I chose to use the new Botanical Layers stamp set along with two new In Colors of Tahitian Tide & Parakeet Party.  I also added a bit of Bermuda Bay. 

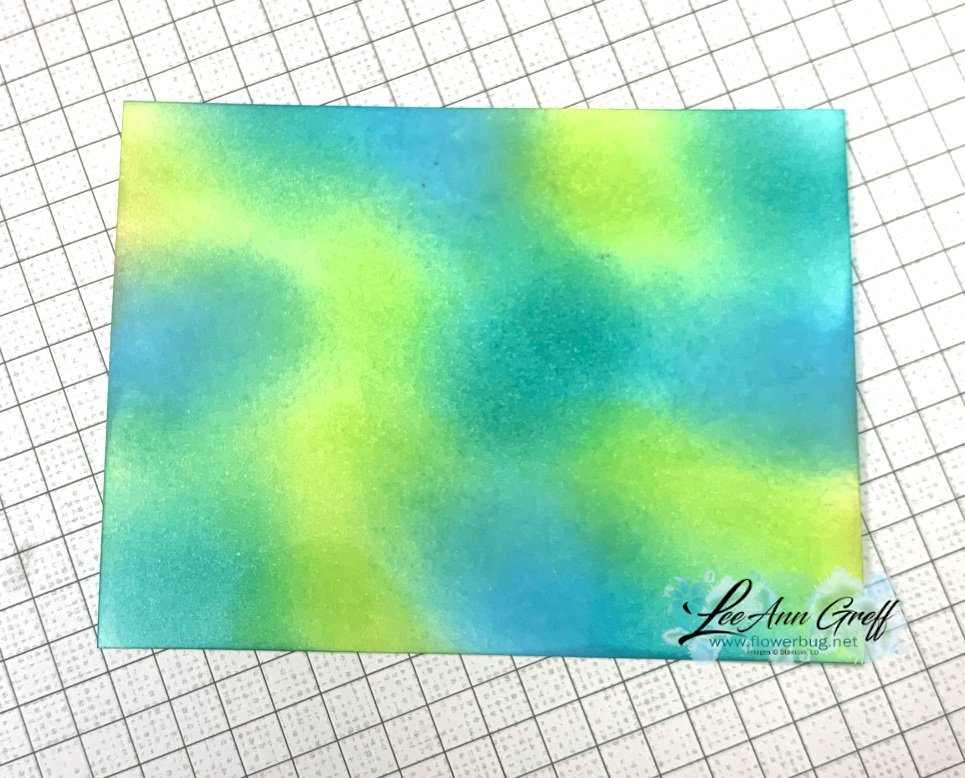
The first step is to add color to a Basic White piece of card stock.  I used our Blending Brushes and added it randomly like this: 
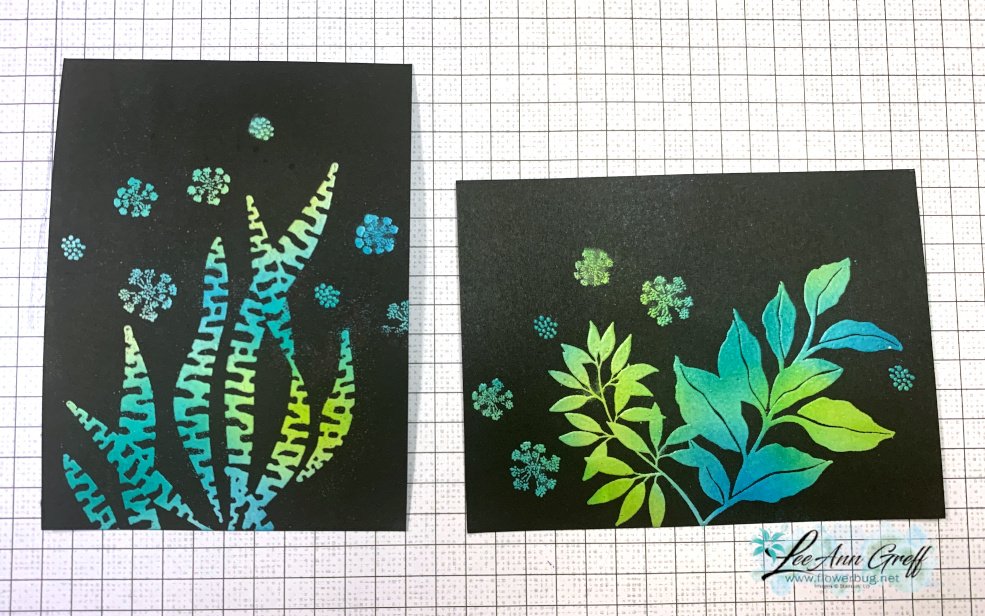
The next step is to stamp your images onto this colored card stock using Versamark ink and heat emboss using Clear embossing powder.  I highly recommend using an embossing buddy; although Stampin' Up! does not currently have them in our catalog.  It prevents excess powder from adhering to your paper before you stamp and heat emboss.  

After your heat embossing dries you need just two things to make these colorful, magical technique.  A classic 'dark' color of ink – I used Memento Black.  And a tissue or paper towel.  

You will take your classic/water-based ink pad (Black Memento for me here) and rub the ink pad directly over the heat embossed card stock.  Because the ink is water-based it will not adhere to the heat embossed areas but WILL adhere to the background that is NOT heat embossed. 

Next use a tissue or soft paper towel to rub off excess ink to reveal your colorful design.  

Here are my two pieces before I finished my cards: 
 

Here are the measurements:

  • Card base is 5 1/2" X 8 1/2"
  • stamped layer is 4" X 3", Parakeet Party green is 3 1/4" X 4 1/4"
  • 2 pieces DSP 2" X 1 1/2" and a greeting die-cut

In this photo you can see a bit of the shine on the leaves from the heat embossing.  It truly is magic!  Join me here tonight at 7:30 pm CT. 


~~~

Get a bunch of NEW In Color products FREE in your Starter Kit! 

It's $99 for $213 in products!!!  And Free Shipping! Click here. 

Host codes: HUNR9DB6

 *click here to order 

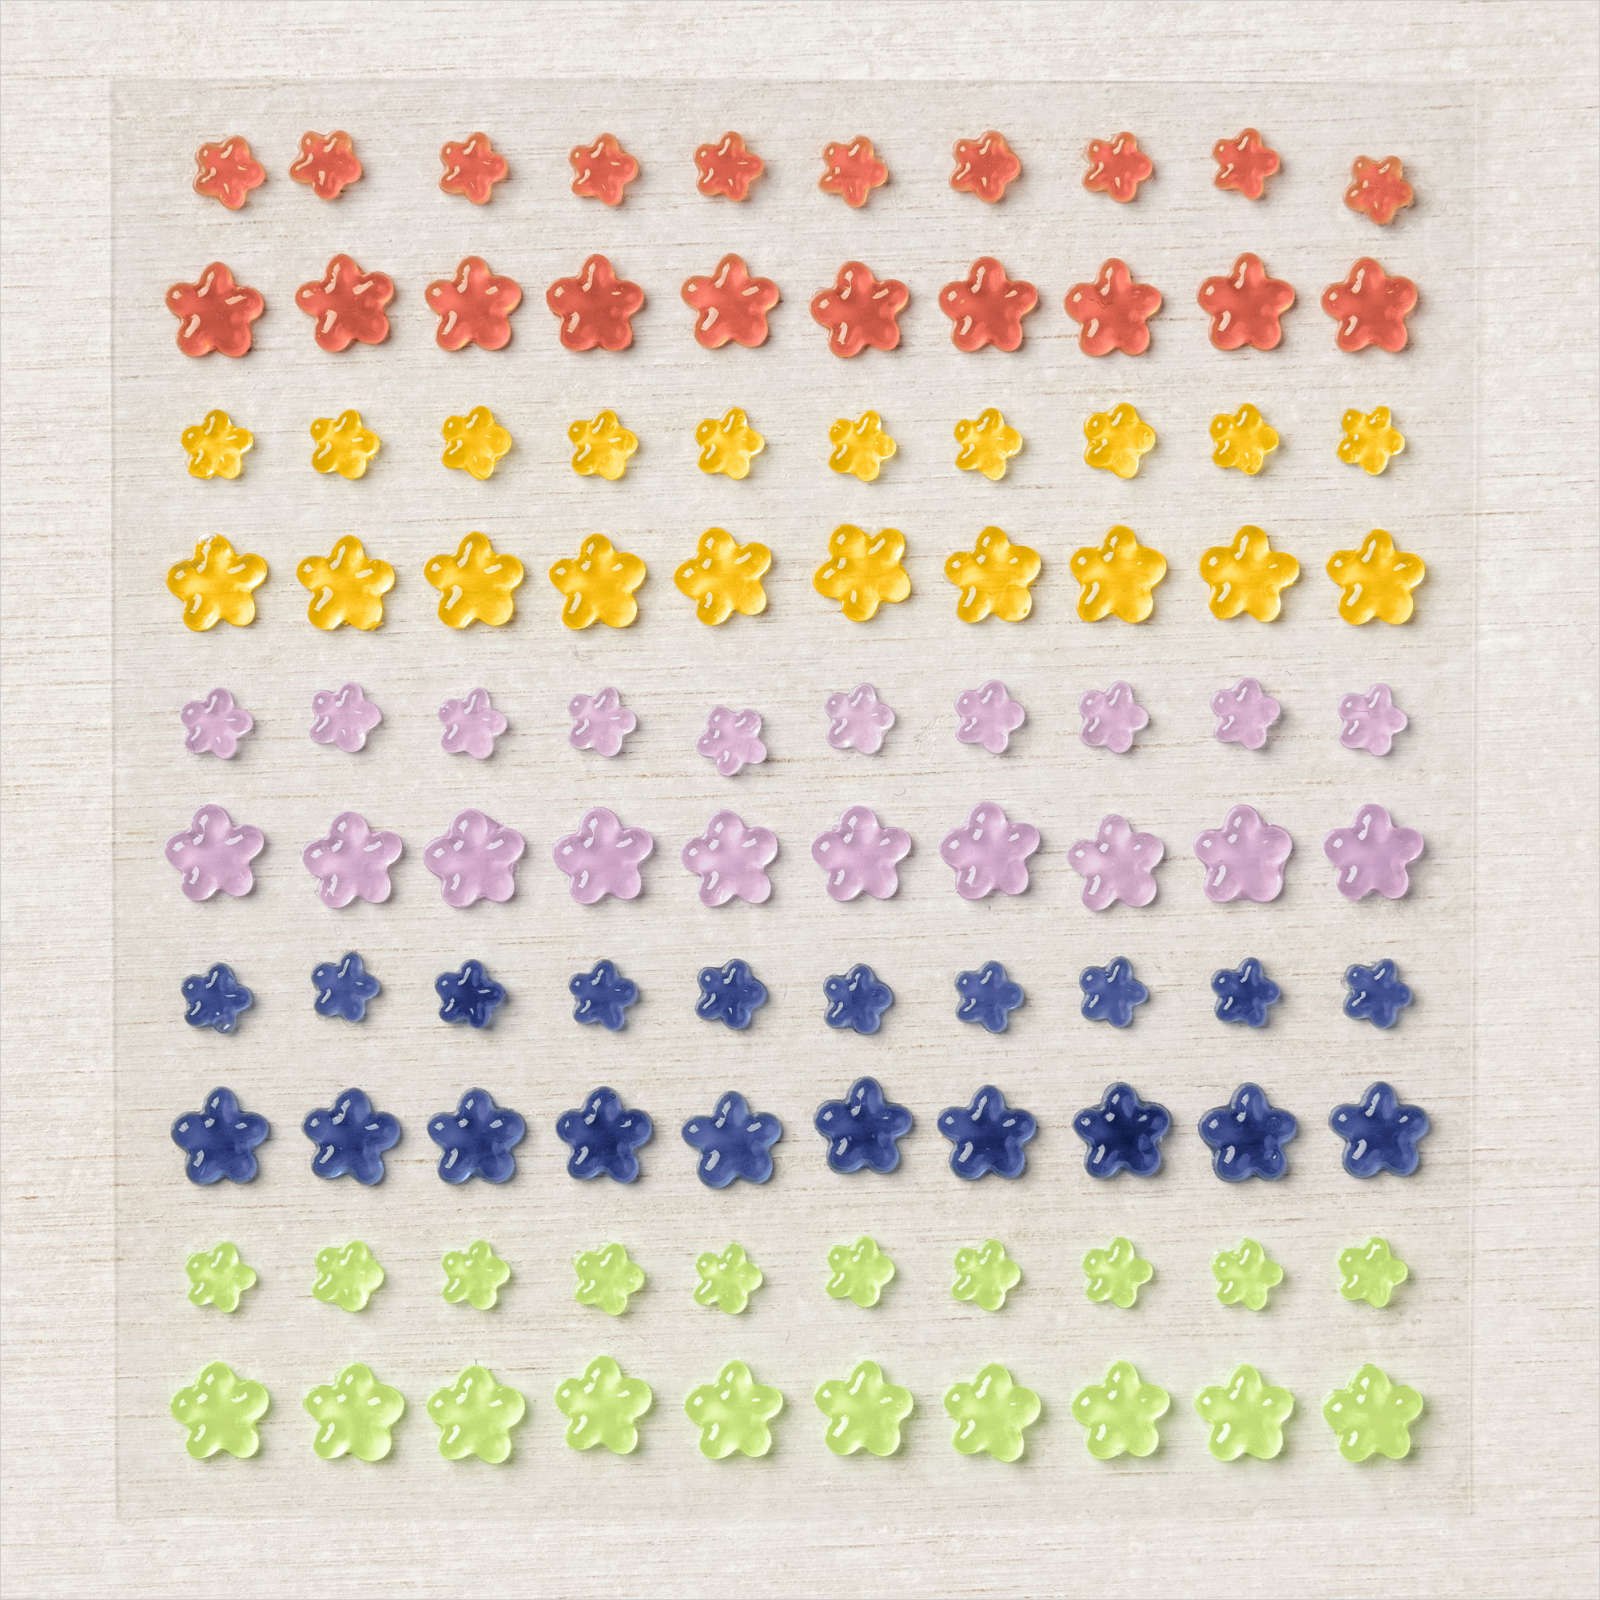
If your order is over $50 you'll receive a set of NEW embellishments from me.
Don't forget about my loyalty rewards! 

Click here to download yours and earn a $50 shopping spree!  


Opt in for my New Catalog Designer Paper Share

It's $26 plus shipping

All Posts

  • Create gorgeous backgrounds with just a few common stamping items! Video tutorial!


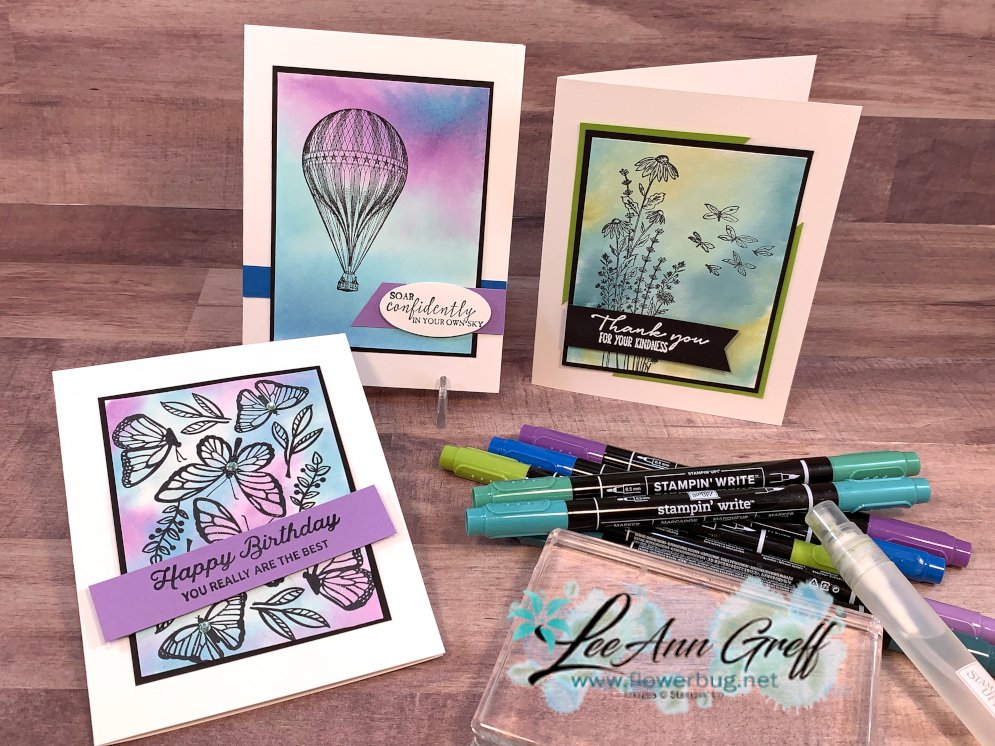
    On Tuesday's FB live I shared a fun and easy technique for gorgeous backgrounds.  Once you create them you can use them to create stunning, beautiful cards like these:

    This was my first try at this technique this week.  Honestly it's not a new technique at all but I hadn't done it for years! The stamp set is called Soar Confidently (seen here) and I hadn't used it yet.  I think it works wonderfully with a pretty background. 

    I used Highland Heather, Gorgeous Grape, Bermuda Bay and Pacific Point Stampin' Write markers on an E block and spritzed with plain water.  Then 'stamp' on our Basic White CS and let dry with the block on it (this prevents warping).  Then stamp on it with any black ink.  

    Here are a few more samples I shared: 

    The left card above features the Dragonfly Garden stamp set and the right is the Floating & Fluttering set. 

    See what I mean?  And it's fun too!  Each time you do it they turn out differently so it's kind of addicting!  Watch the video below to see how easy it can be.  

    ~~~

    Current Host code is 39A9QQZP

    Order online here

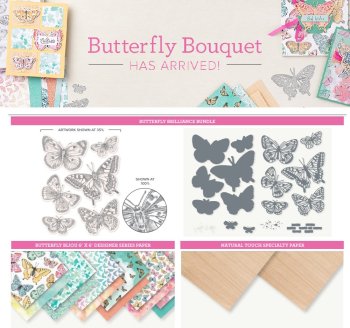
    All online orders receive a free PDF of the new Butterfly Bouquet bundle

    with 15 projects!


    ~~~

    Get a free adhesive package from me with an online order over $50 using the host code above. 3 sheets of Dimensionals and 1 for die-cuts!

    *If your order is over $150 do not use the code; you'll still receive a gift! 

    Below are the Multipurpose Glue stands we're making. They're $6 each and available in my Shop here.  

    Leave a Reply

    Your email address will not be published. Required fields are marked *

  • Gorgeous Butterflies with the Brilliant Wing dies


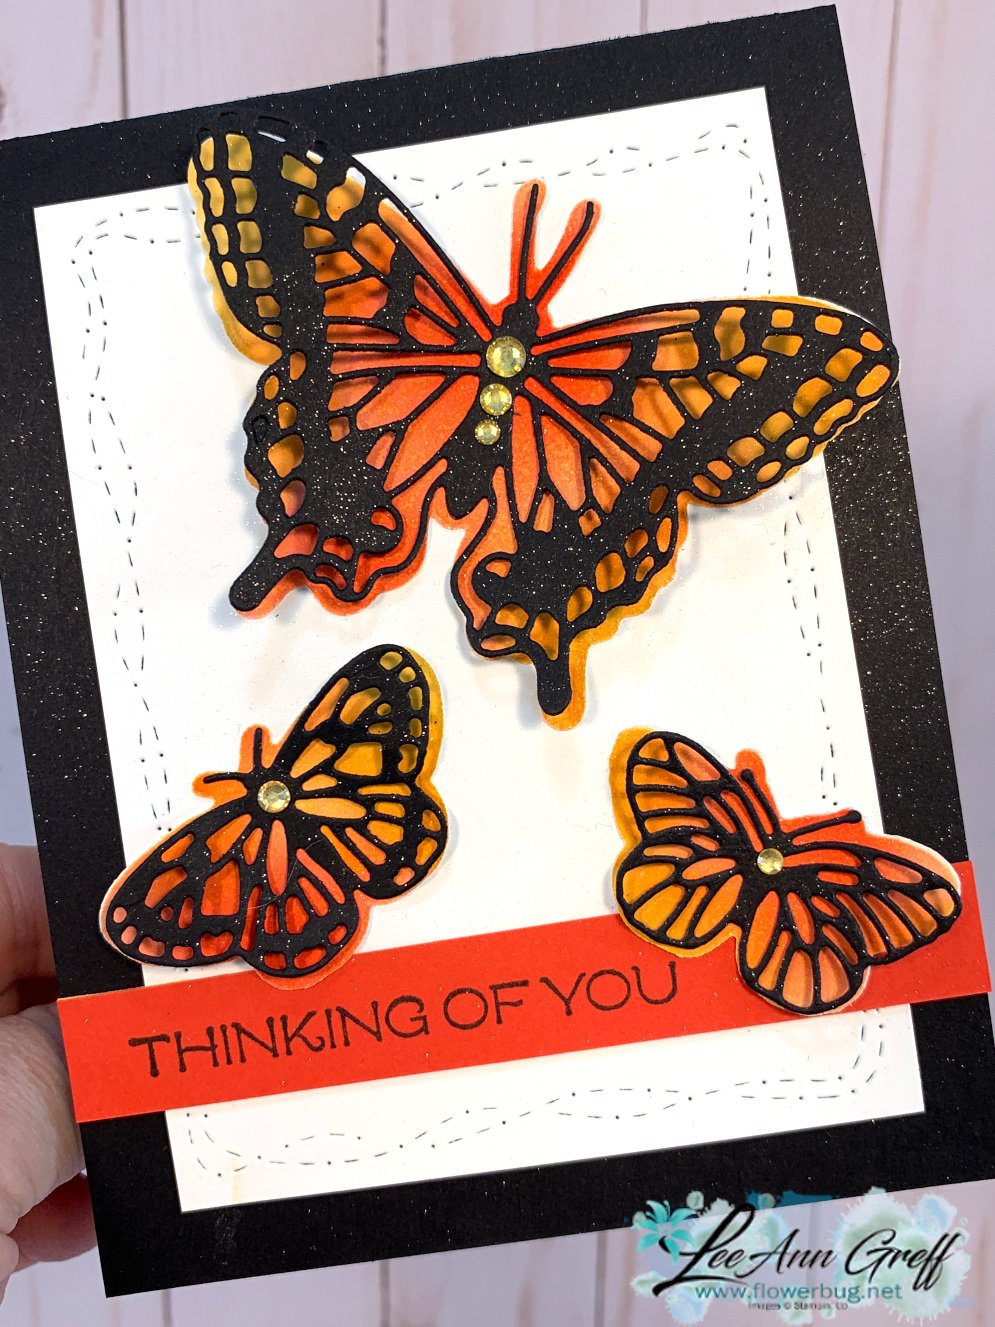
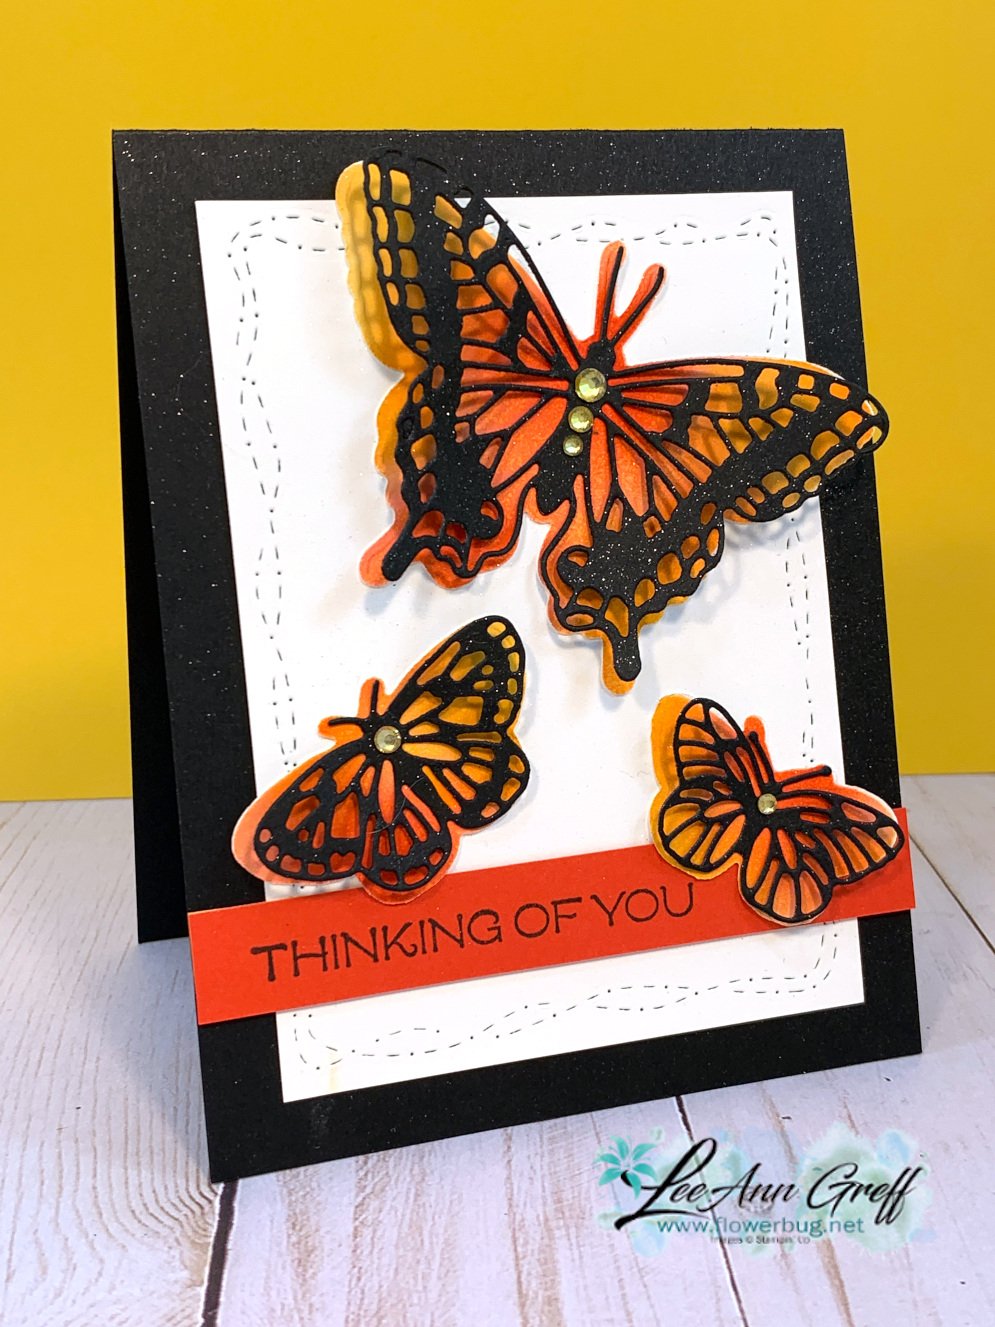
    I was playing around with these dies and came up with these striking colored butterflies.   

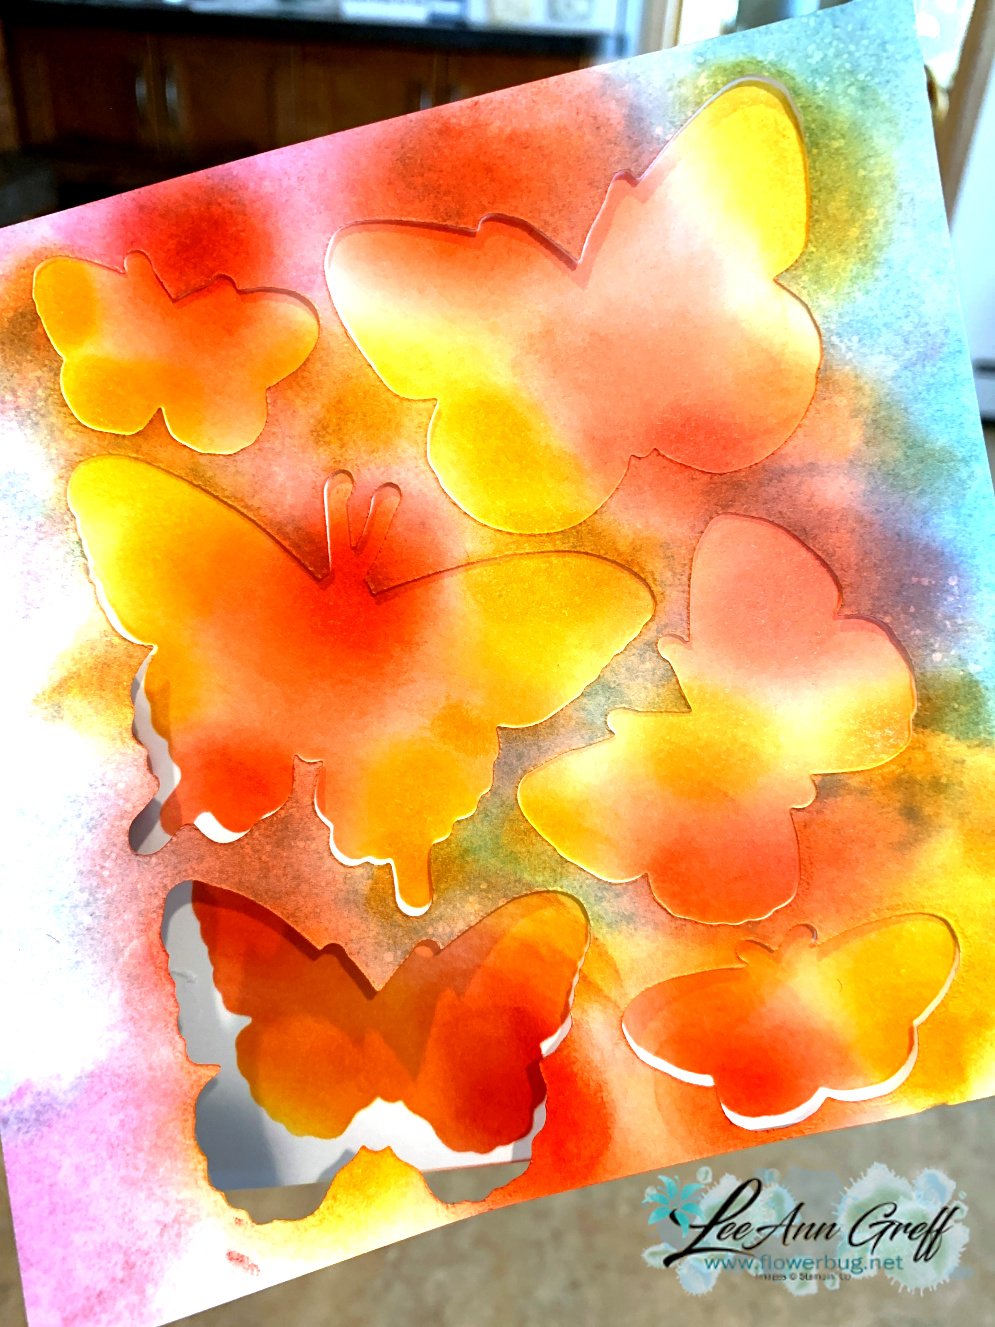
    I used the designer paper as a template to sponge through.  This is what's left after you use the Brilliant Wings dies to cut out the 6 butterflies.  Although in hindsight I should have sponged on the other side so the die fit.  It was upside down on the die; I had to hold it up to the light to get the die placed correctly.  

    I added a piece of White CS behind these butterflies and used the Stitched with Whimsy dies to add that pretty stitched edge.  See those here. 

    Click on the image below to see these items in my store. Remember this designer paper is available through May 3rd or while supplies last.


    The greeting is from the Vine Design stamp set on a 1/2" strip of Poppy Parade card stock. 

    ~~~

    Current Host code is 39A9QQZP

    Order online here

    All online orders receive a free PDF of the new Butterfly Bouquet bundle

    with 15 projects!


    ~~~

    Get a free adhesive package from me with an online order over $50 using the host code above. 3 sheets of Dimensionals and 1 for die-cuts!

    *If your order is over $150 do not use the code; you'll still receive a gift! 

    Below are the Multipurpose Glue stands we're making. They're $6 each and available in my Shop here.  

    Leave a Reply

    Your email address will not be published. Required fields are marked *

  • This week’s card sketch for a quick, cute card!


    Are you a collector of pretty papers?  I've heard that many of you are!  I equate it to my fabric collecting days.  

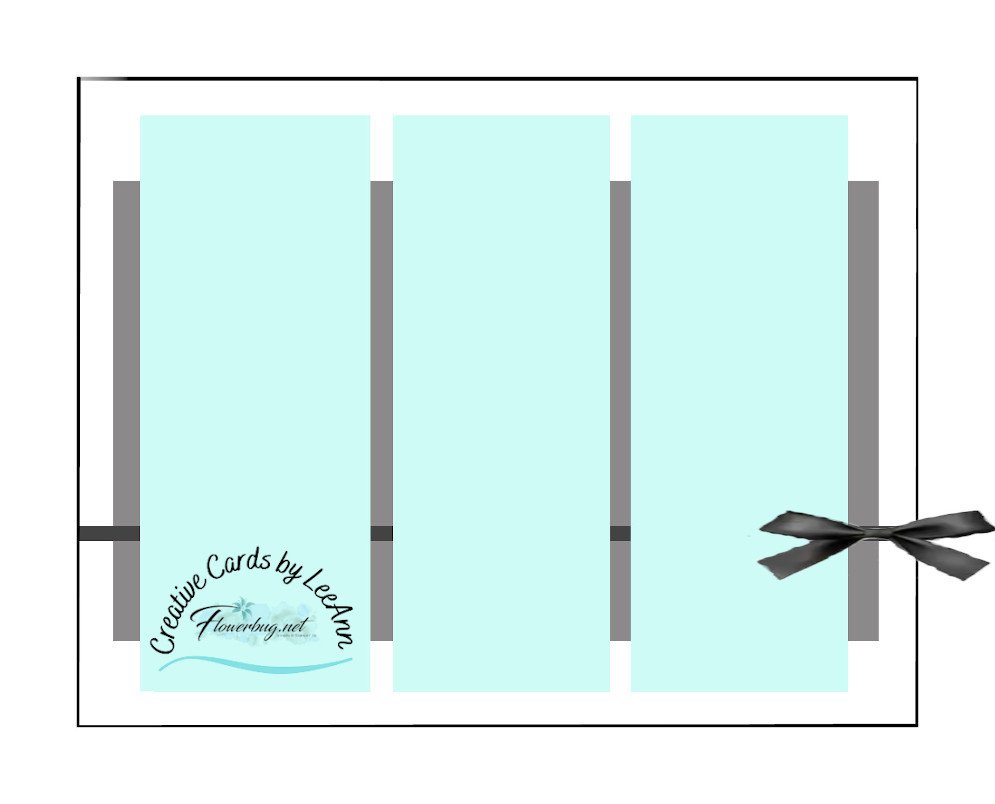
    This card sketch idea (seen below) will help you use some of it; it's so simple!   

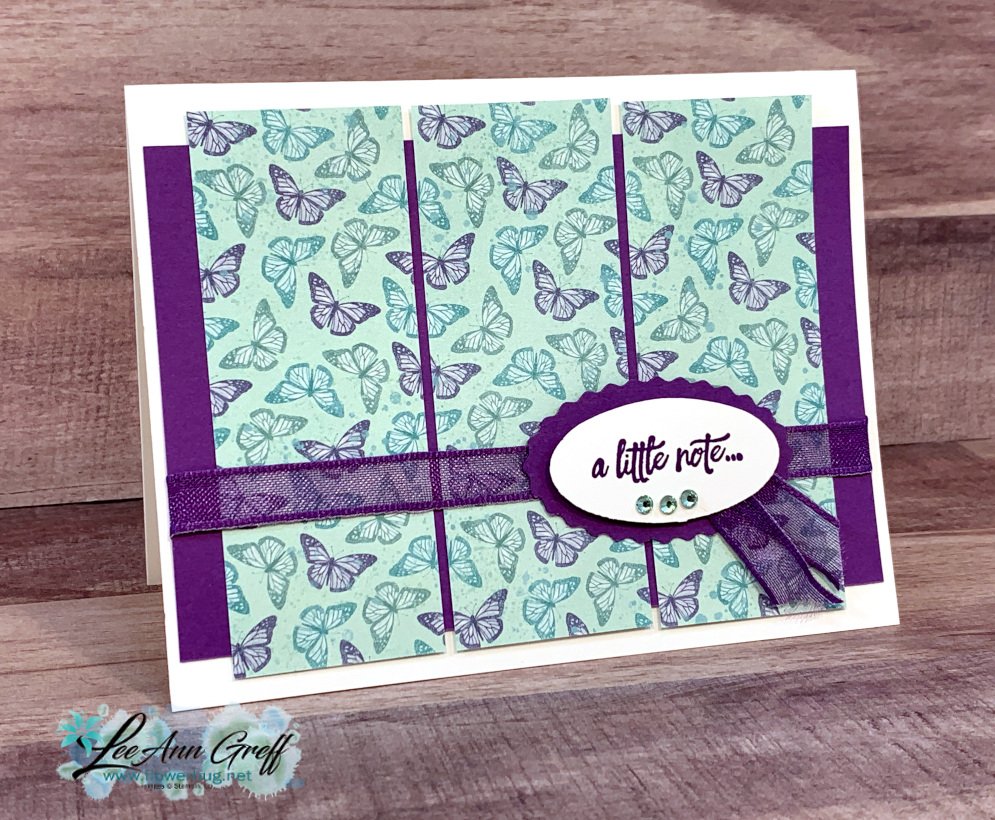
    I used the Double Oval punch for the greeting which unfortunately is unavailable right now; they've run out!  But it will be at the end of March.  The stamped greeting is from the Enjoy the Moment stamp set on page 59 in the Spring catalog. This pretty Grape ribbon is also unavailable; it should be back  next week. 

    I chose to use the new Butterfly Bijou designer paper; an exclusive paper not seen in any catalog.  It's available here through May 3rd or while supplies last.  It's a 48 pack of 6 X 6" papers.  I love the soft spring-like colors. 

    Measurements are:

    • Card base 5 1/2" X 8 1/2"
    • Gorgeous Grape 5 1/4" X 3 1/2"
    • Designer Paper 3 pieces at 1 1/2" X 3 7/8"

    You could use this sketch with stamped or textured card stock instead of designer paper.  I would cut a full 4 1/2" X 3 7/8" piece of card stock, stamp it and then cut it into 1 1/2" strips.  

    ~~~

    Current Host code is 39A9QQZP

    Order online here

    All online orders receive a free PDF of the new Butterfly Bouquet bundle

    with 15 projects!


    ~~~

    Get a free adhesive package from me with an online order over $50 using the host code above. 3 sheets of Dimensionals and 1 for die-cuts!

    *If your order is over $150 do not use the code; you'll still receive a gift! 

    Below are the Multipurpose Glue stands we're making. They're $6 each and available in my Shop here.  

    Leave a Reply

    Your email address will not be published. Required fields are marked *


Notice: LeeAnn Greff, Independent Stampin’ Up! Demonstrator, Manager. The content of this website is my sole responsibility as an independent Stampin’ Up! demonstrator and the use of, and content of, the classes, services, or products offered on this website is not endorsed by Stampin’ Up! Copyright 2025