Once your order reaches the $75 point (before shipping & tax) you get both Free Shipping AND can add a POTM for just $5. There are 3 choices right now – 2 packs of DSP and one stamp set.
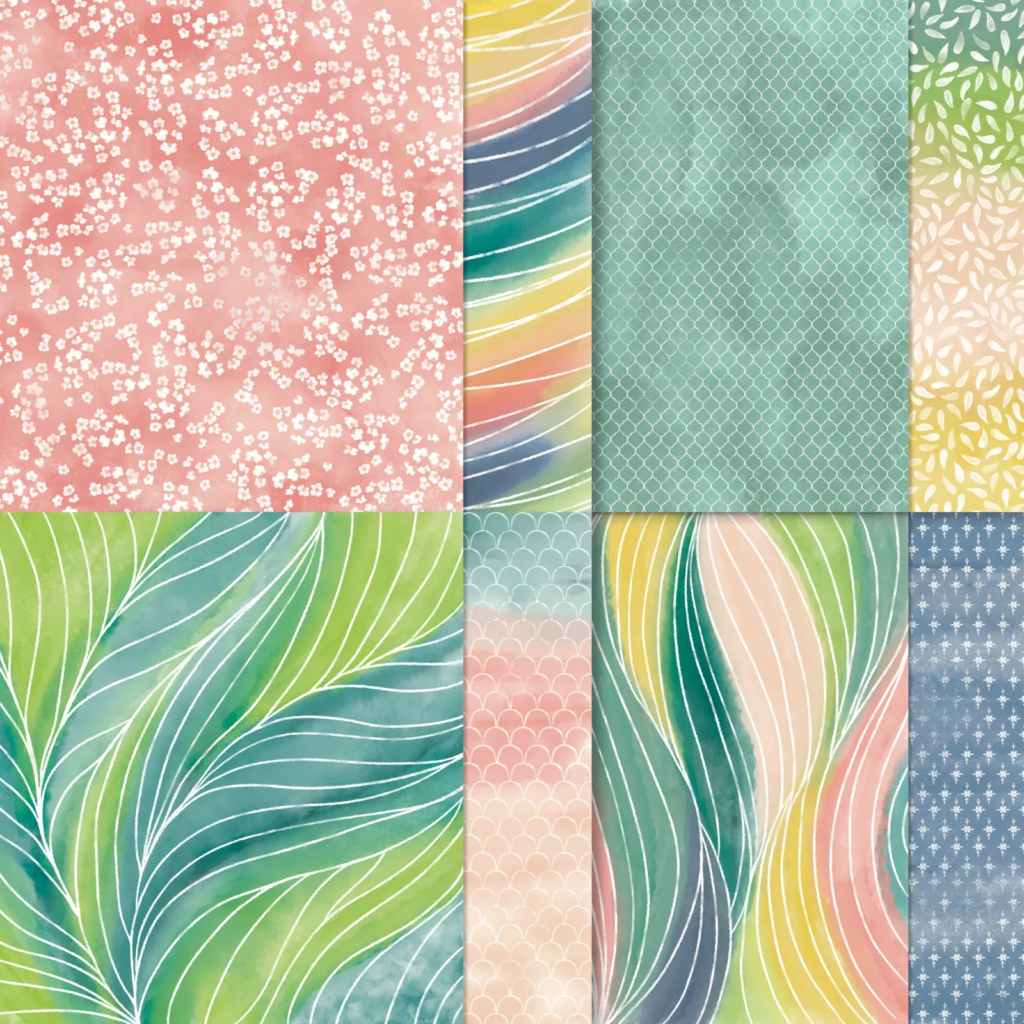
This first card features three of the new In Colors from the brand new Annual Catalog. They're Sweet Sorbet (red), Parakeet Party (green) and Tahitian Tide (turquoise). Aren't they vibrant and eye catching!
Check out my In Color bundle here; it's available just through May 7th. Get free product when you opt in for it like the In Color matte dots seen here. The Tahitian Tide DSP on this card is part of my In Color bundle too!
I call this card a Dutch Door card fold. It's pretty easy to do and makes great use of your card stock too. Watch how with my quick tip in the video here.
This next card is one we made at my April card clubs here in Minot. It's called a Split Panel card. The designer paper is from the recently retired Pattern Party host DSP. We have a new host DSP called Design a Daydream that is just as great in the annual catalog. I love these free paper options for hosts!!
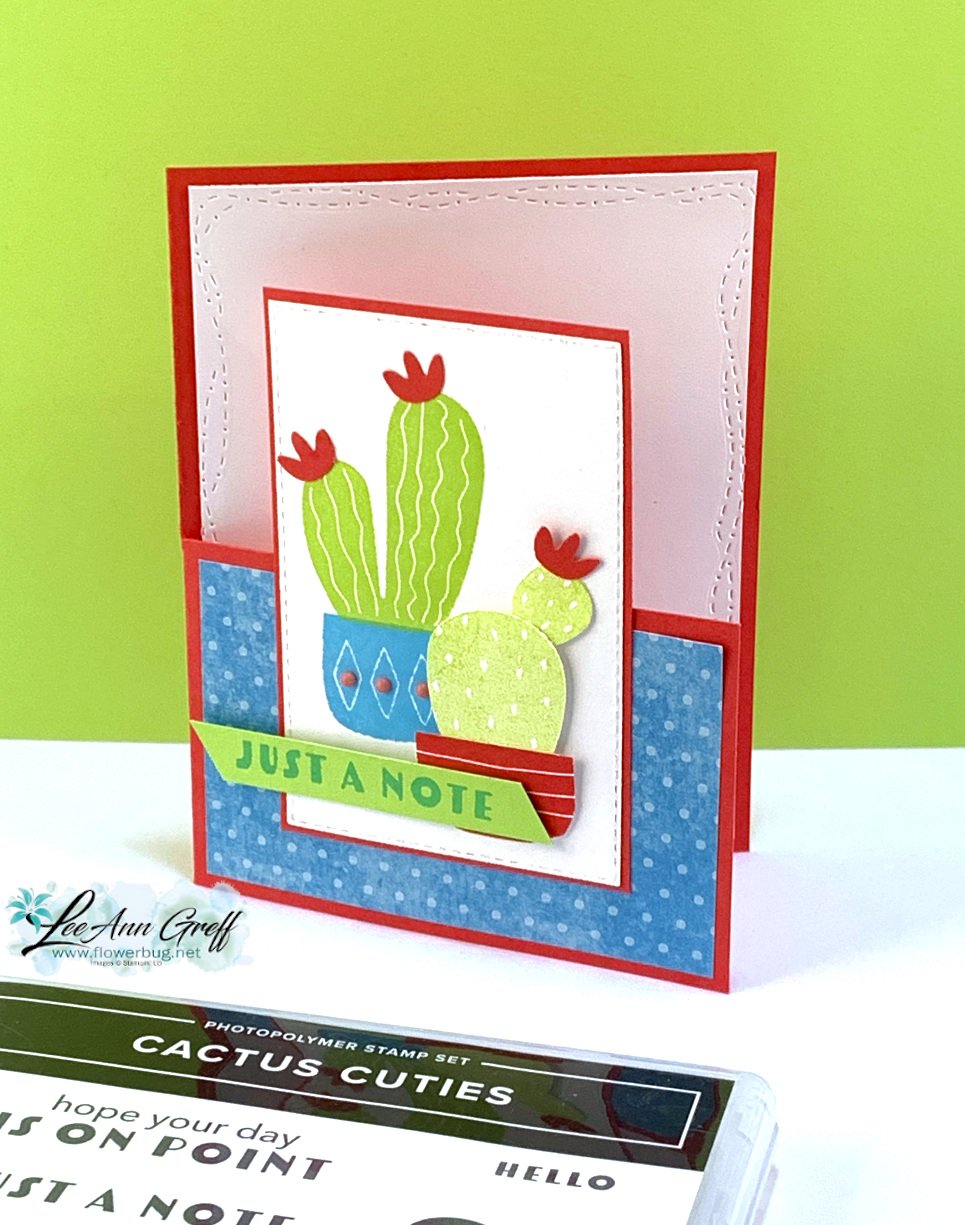
My colors include Granny Apply Green, Bermuda Bay and Mango Melody. A little bit of Coastal Cabana too. We used the Cactus Builder punch for the pot, cactus and flowers. You can see the measurements below.
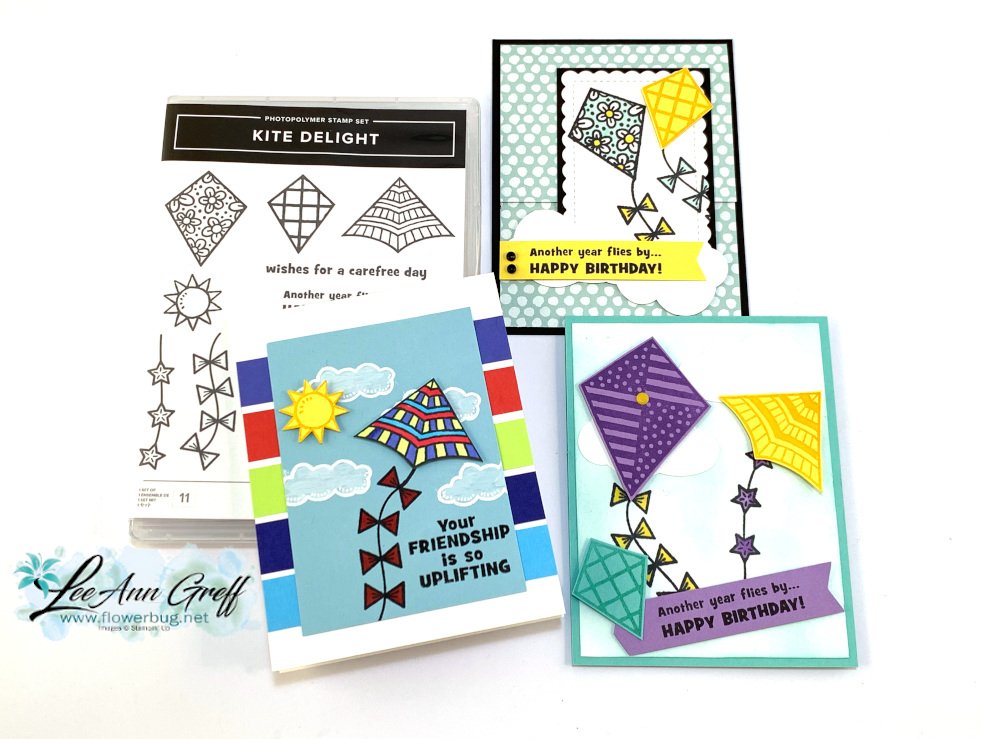
New In Colors paired with the Kite Delight stamp set
I shared this colorful kite card on a recent FB live video here. I wanted to use the Kite Delight stamp set and the newest In Colors coming out on May 3rd.
The kite and sun are fussy cut and the kite is colored in with new In Color Blends markers.
I've been sharing the new In Colors with my Club gals this month and everyone LOVES them! They are so bright, happy & will be perfect additions to our color line.
If you're interested in getting these new In Colors you can opt in for my In Color bundle now through May 7th. See the options here.There's also an add on option for our In Color Blends markers – buy 4 get 1 free and a Designer paper share too!
I heat embossed the clouds with White embossing powder. But the image is an outline image and I wanted my clouds to be 'white'. So I used the Chalk Marker to color it in. Unfortunately it was on the retired list and is unavailable now. But two other ideas are to use a White watercolor pencil or a blender pen and White craft ink.
Change is Beautiful Paper Pumpkin alternatives; plus discounted past kits while supplies last!
April's Paper Pumpkin kit is filled with butterflies, scenes & fun fold cards. Each month I enjoy creating alternative designs with the contents in the kits to share with my subscribers each month.
I couldn't wait to play with this kit! Here's a pretty card I made just an hour after receiving my box:
I cut the front of a card base to fit on the front of a Crushed Curry card base and used other elements in the kit (butterfly, flower, banner & gems) to create this scene. I love changing up the cards; the kits are great as is but the challenge of creating something new is fun!
This next card uses the other half of the original card base. The flower layer and the polka dot layer behind it are from the original card. I did trim them just a bit to fit on a White layer.
Heads up on May's Paper Pumpkin kit – it will feature each of our 5 new In Colors AND they are adding Golden Vouchers worth $25 USD to some of the boxes. The winners will find their Golden Voucher in their May 2022 Paper Pumpkin box.
Exciting news!! They just announced that they are discounting some previous Paper Pumpkin refill kits at 50% off! Below you'll see the kits and others available to current subscribers. Click on a photo below or click here to see all of the available kits.
Notice: LeeAnn Greff, Independent Stampin’ Up! Demonstrator, Manager. The content of this website is my sole responsibility as an independent Stampin’ Up! demonstrator and the use of, and content of, the classes, services, or products offered on this website is not endorsed by Stampin’ Up! Copyright 2025


Leave a Reply