/


Latest Post

How to achieve the Inked Block Technique; you only need 3 things!


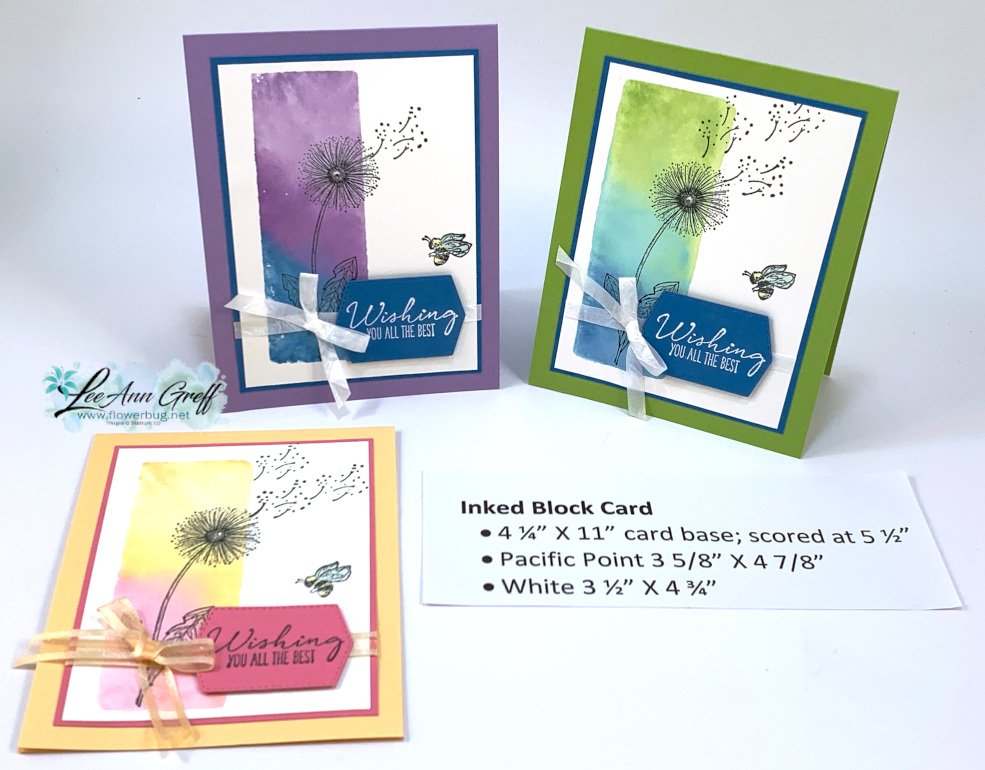
I shared the Inked Block technique on Tuesday's Facebook Live video.  It's fun, easy and you need just 3 things!

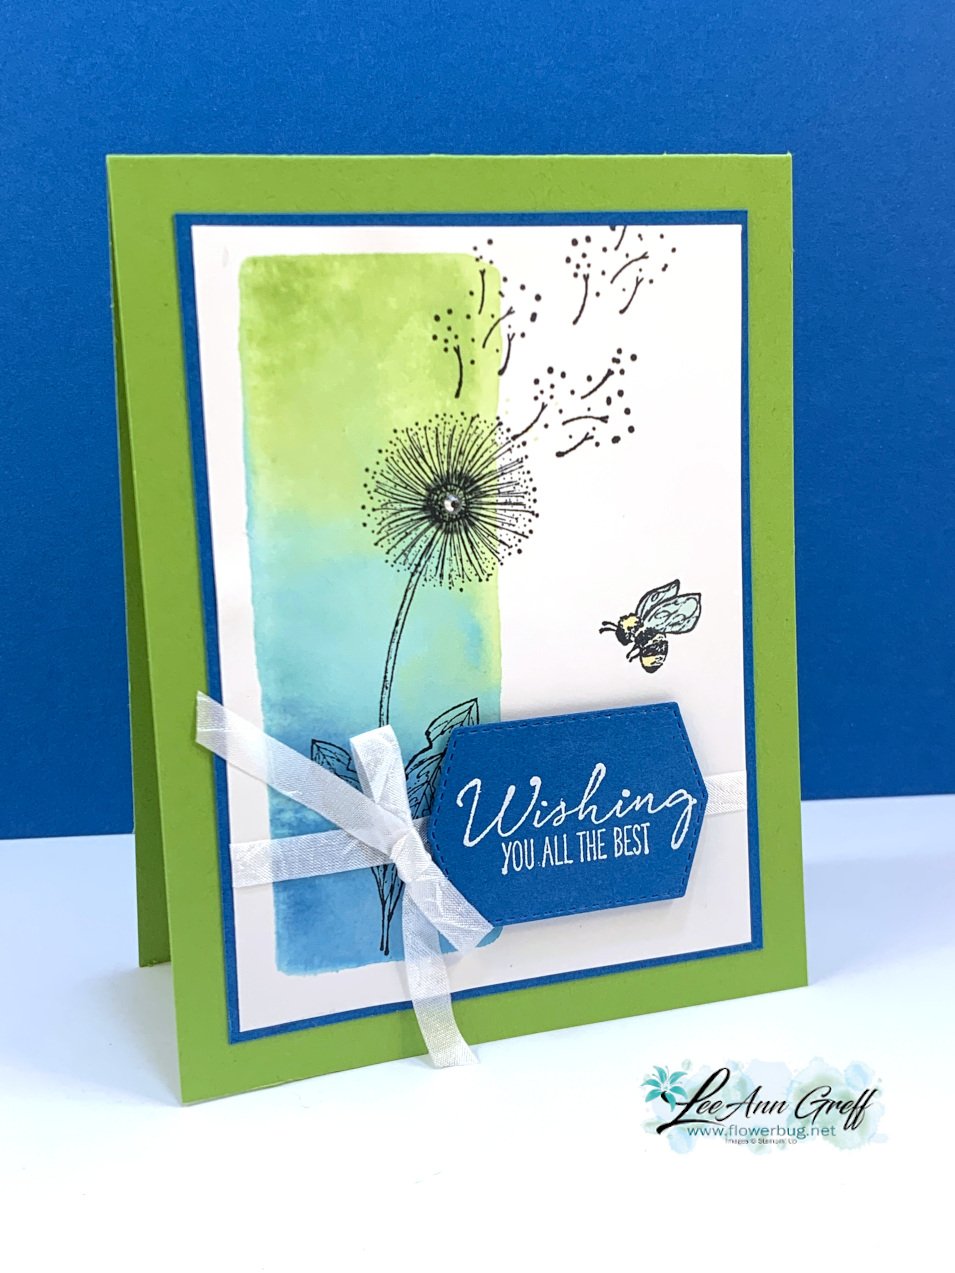
I chose to feature the Garden Wishes stamp set & a variety of colors. This first one is Highland Heather, Gorgeous Grape & Pacific Point. 

You need a clear block, Stampin' Write markers and a spritzer filled with water.  Below are the measurements for the cards. 
Watch the video here to see how it's done.  It's the first of 3 projects I share.   

Tips for success:

  • Use Stampin' Write 'water based' markers on your block; do not use Blends which are permanent markers.
  • Start with the lightest color first so you don't get a dark color on your marker tip
  • After filling up the block with ink (I colored on the diagonal) spritz it with water until dots form. 
  • The more water you add the better the inks blend.  But don't do too much or the colors blend too much. 
  • Press the block directly on your White card stock and hold for a few second. 
  • Have a tissue or paper towel ready to dab up excess water off the paper. 

The Stampin' Write markers I used on this next card are Granny Apple Green, Coastal Cabana and Pacific Point.
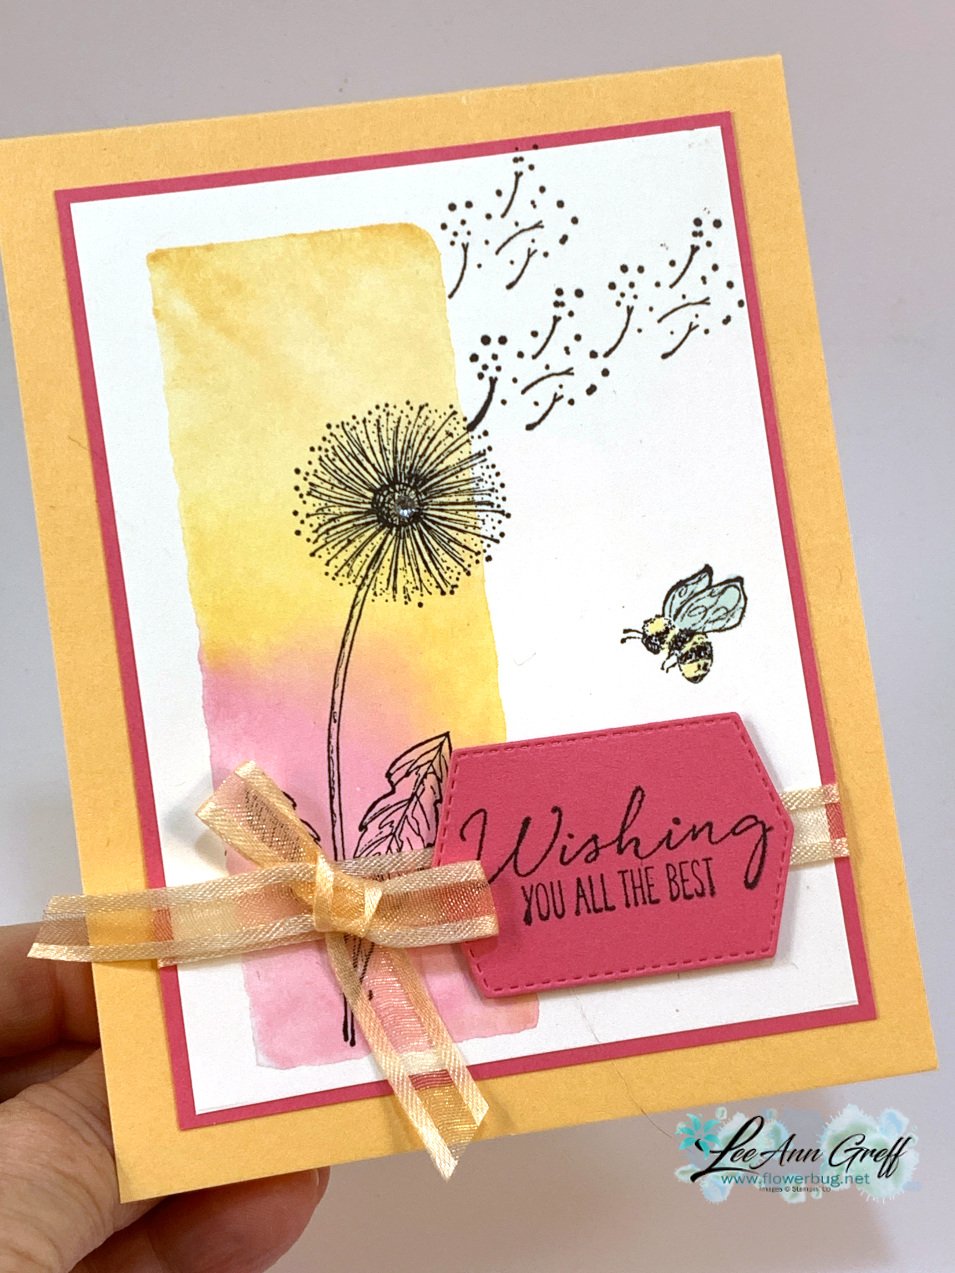
The card below has a softer feel.  The colors are Pale Papaya, Pumpkin Pie & Polished Pink. 
Which one is your favorite?  
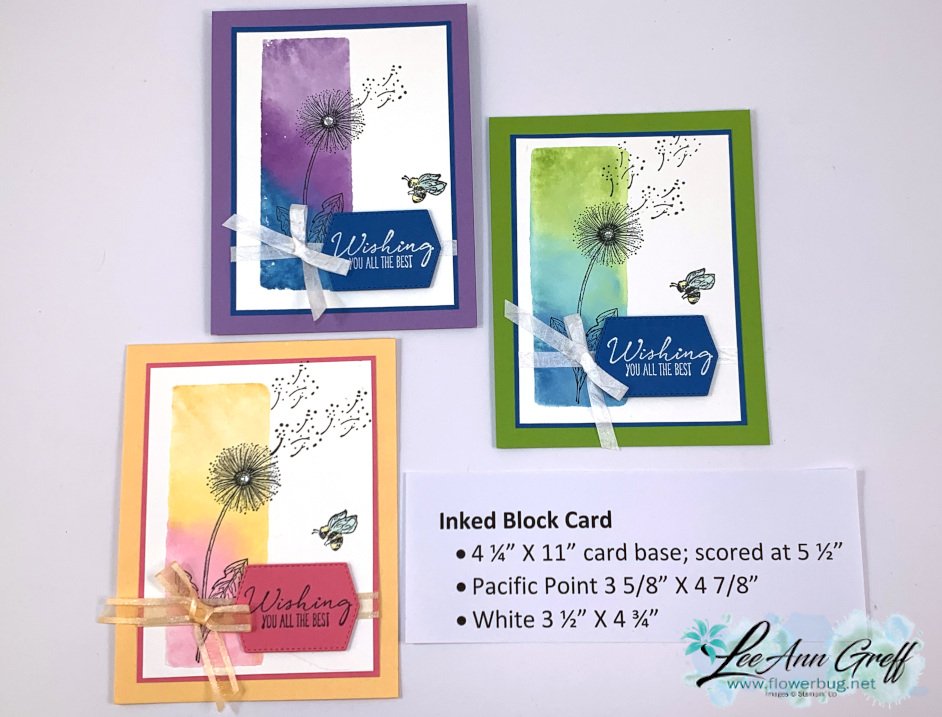
Click on the photo below to watch the video.  

~~~
The Last Chance list is out!
Tons of items from the 2021-22 Annual Catalog are retiring and many are deeply discounted from 20-50% off.
 
Remember that these items are while supplies last and may run out. 
Click here to see it all online along with the discounts.

Host codes: 6QFA66WT

 *click here to order 

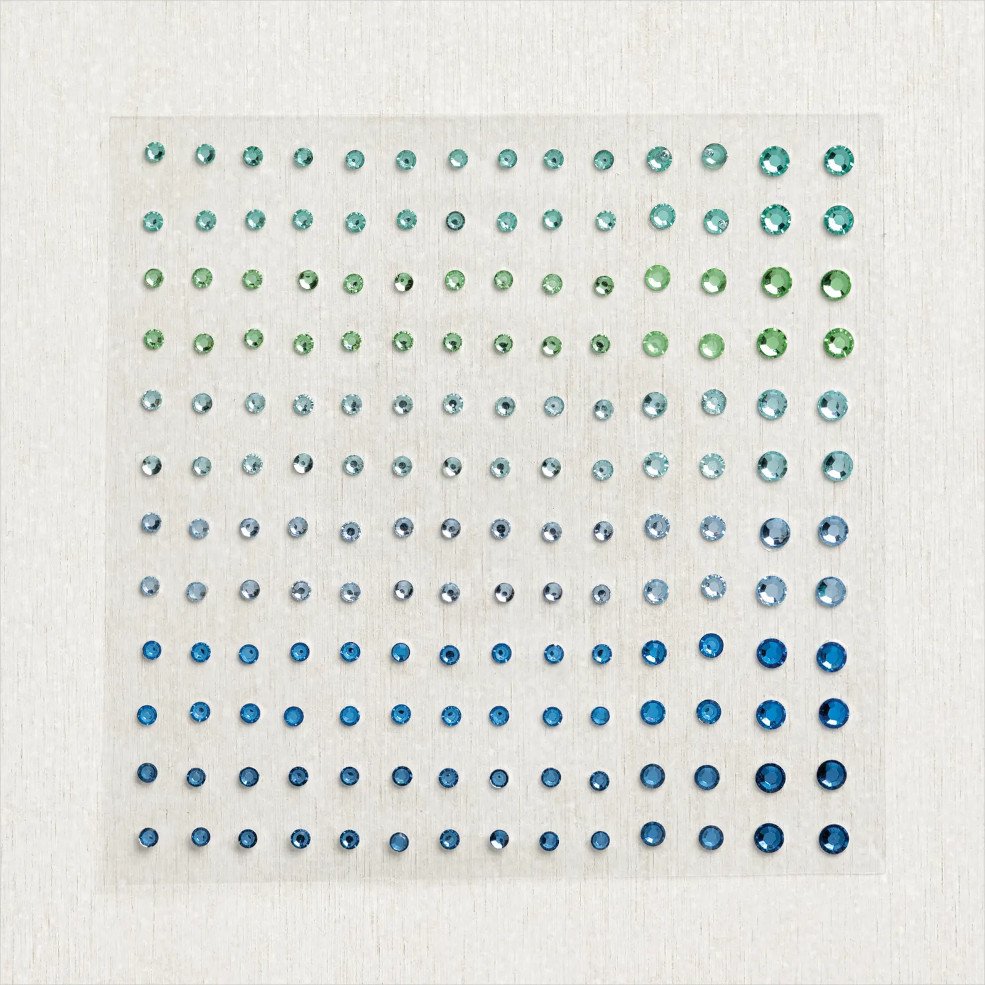
If your order is over $50 you'll receive free Polished Dots or In Color jewels and 3 hand made cards from me.
 

Don't forget about my loyalty rewards! 

Click here to download yours and earn a $50 shopping spree!  
All Posts

  • CUTE Pillowbox ‘treat box’ you’ll love!


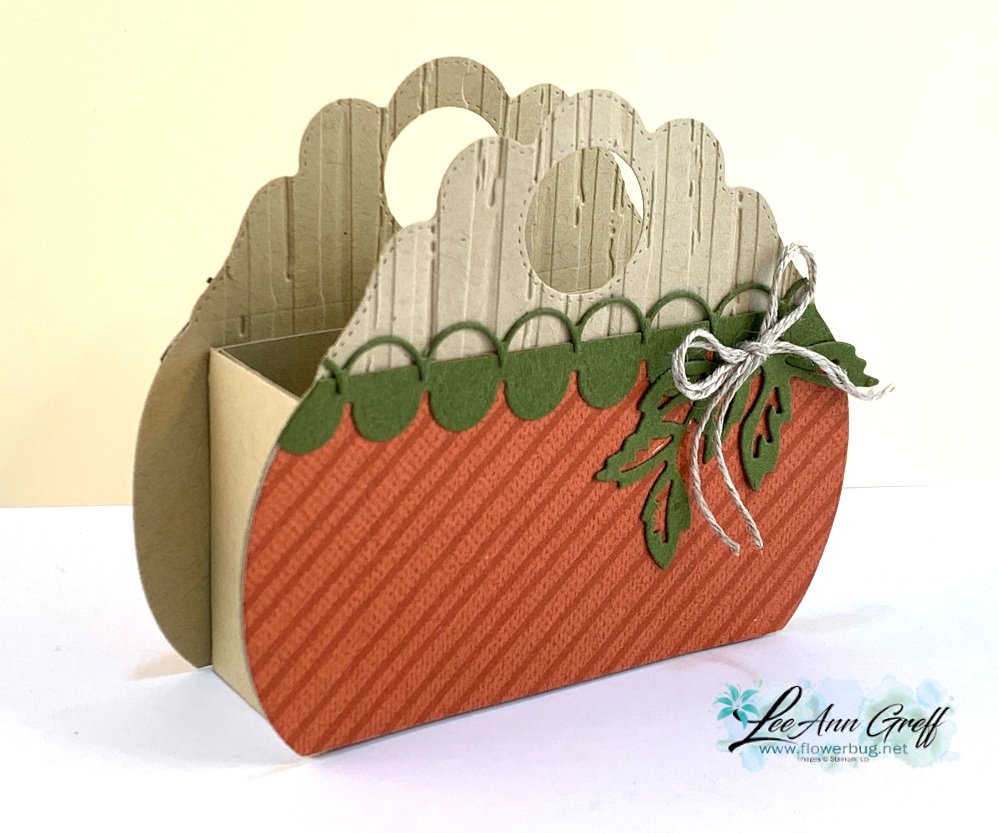
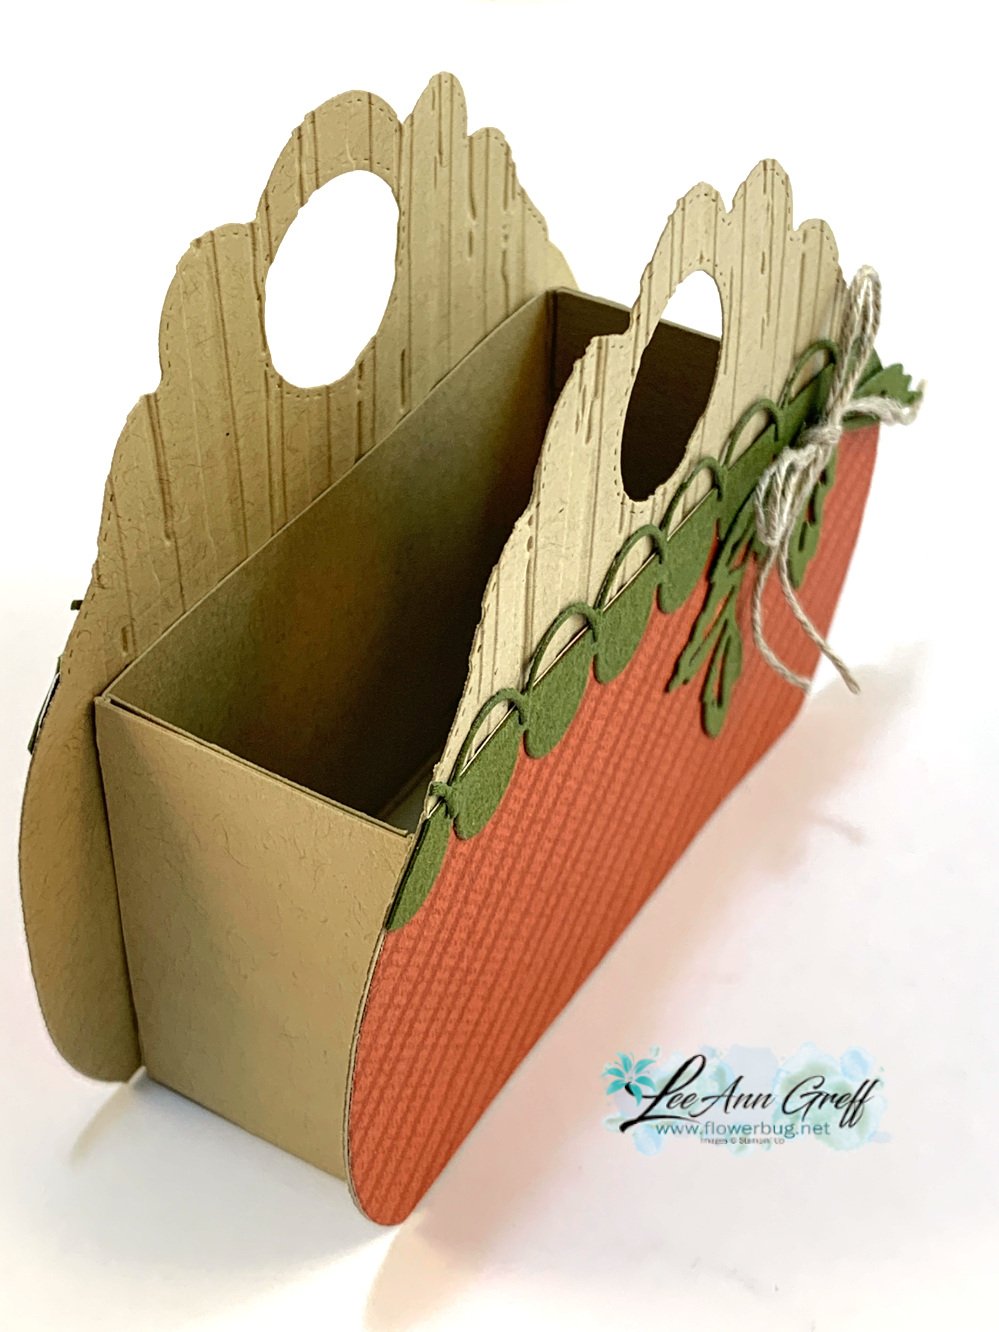
    I made this cute box using the Pretty Pillow Box dies.  Does it look like a pumpkin to you?  

    It does use the Pretty Pillow box dies for the flat shape of the front of this box, but the box itself is made from a piece of card stock (see measurements below). I found this idea from fellow demonstrator Lynda Emerson.  As usual I changed it up a bit from hers. 

    Products used:

    Crumb Cake card stock, He’s the Man DSP, strips of Mossy Meadow for apple die trim & for the leaves die-cuts, Pretty Pillow Box dies seen here, Stylish Shapes (for the circle die-cut), Penned Flower & Apple Blossom dies, Stripes & Spatters EF, Linen Thread for the bow, Simply Scored Scoring tool

    The inside of the box would hold quite a few treats; it's a good size!  

    Measurements:

    • Crumb Cake 5 ¼” X 7 ¼” scored at 2" on all 4 sides, plus two die-cut pillow box pieces
    • He’s the Man DSP 2 ¼” X 4 ½”

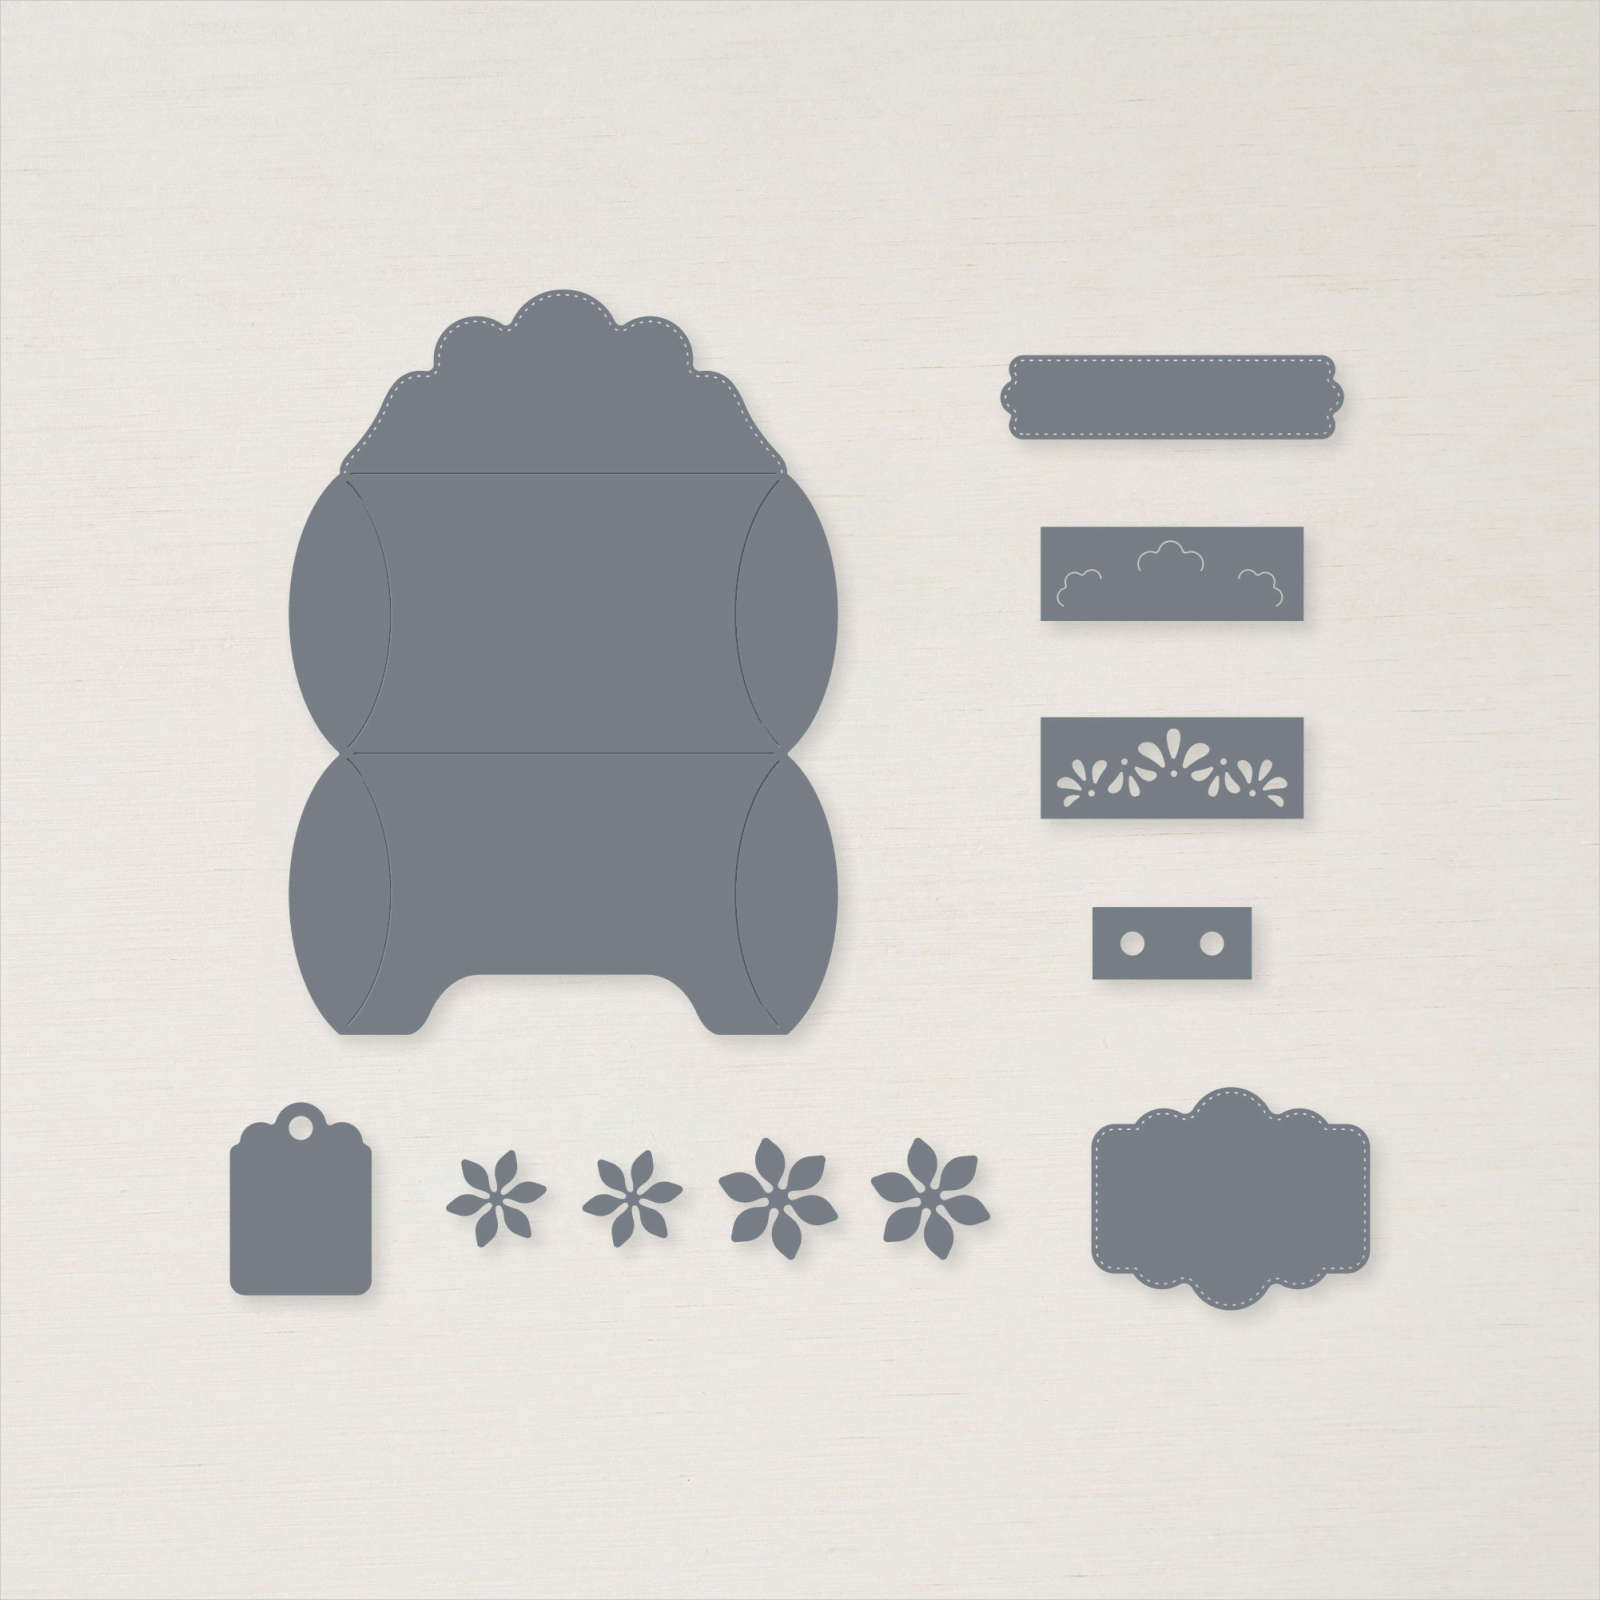
    Here is what the Pretty Pillow box dies look like: 

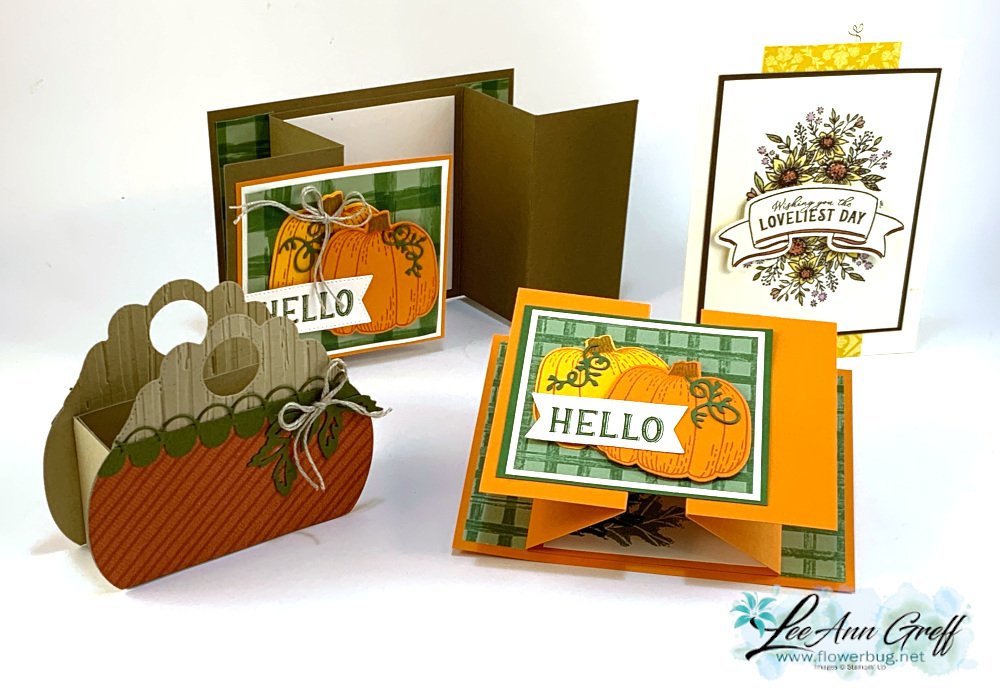
    Here are all of the projects I made. The other two cards feature the Hello Harvest bundle.  


    ~~~

    September Specials


    New weekly deals come out on September 1st, 8th, 15th & 22nd! 

    Order online here

    Host code links: KSAEED9Y or JPJ4FKYJ

    Get free cards from me with online orders!

    Earn free products with my loyalty rewards! 

    Click here to download yours and earn a $50 shopping spree!
    Leave a Reply

    Your email address will not be published. Required fields are marked *

  • Use the stamp in a new way on this card! Hello Harvest projects


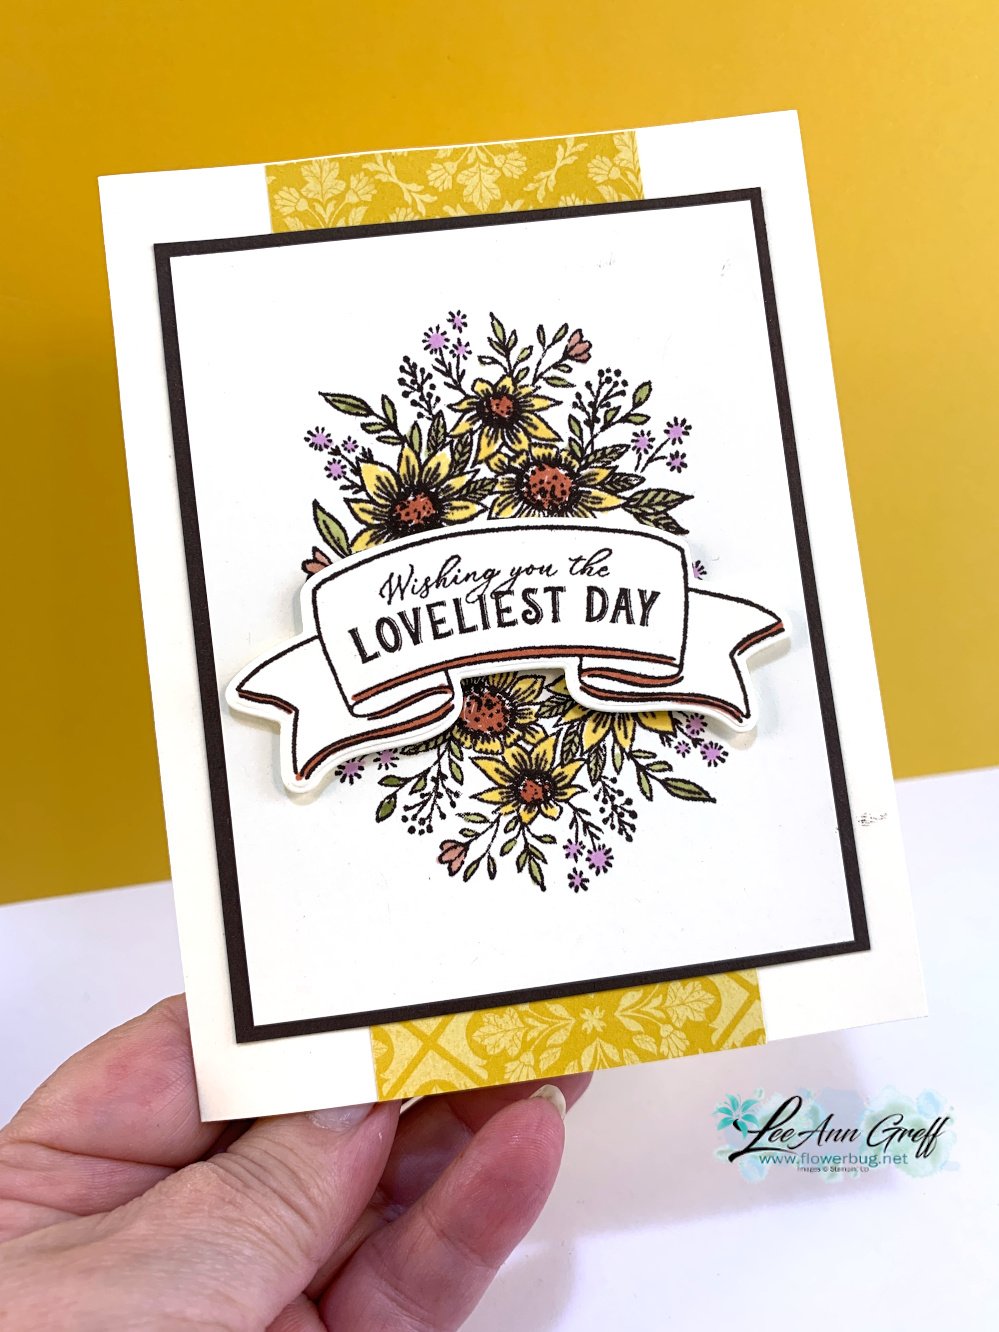
    Here's a pretty card I shared on last week's FB live video; it features the Hello Harvest bundle. 

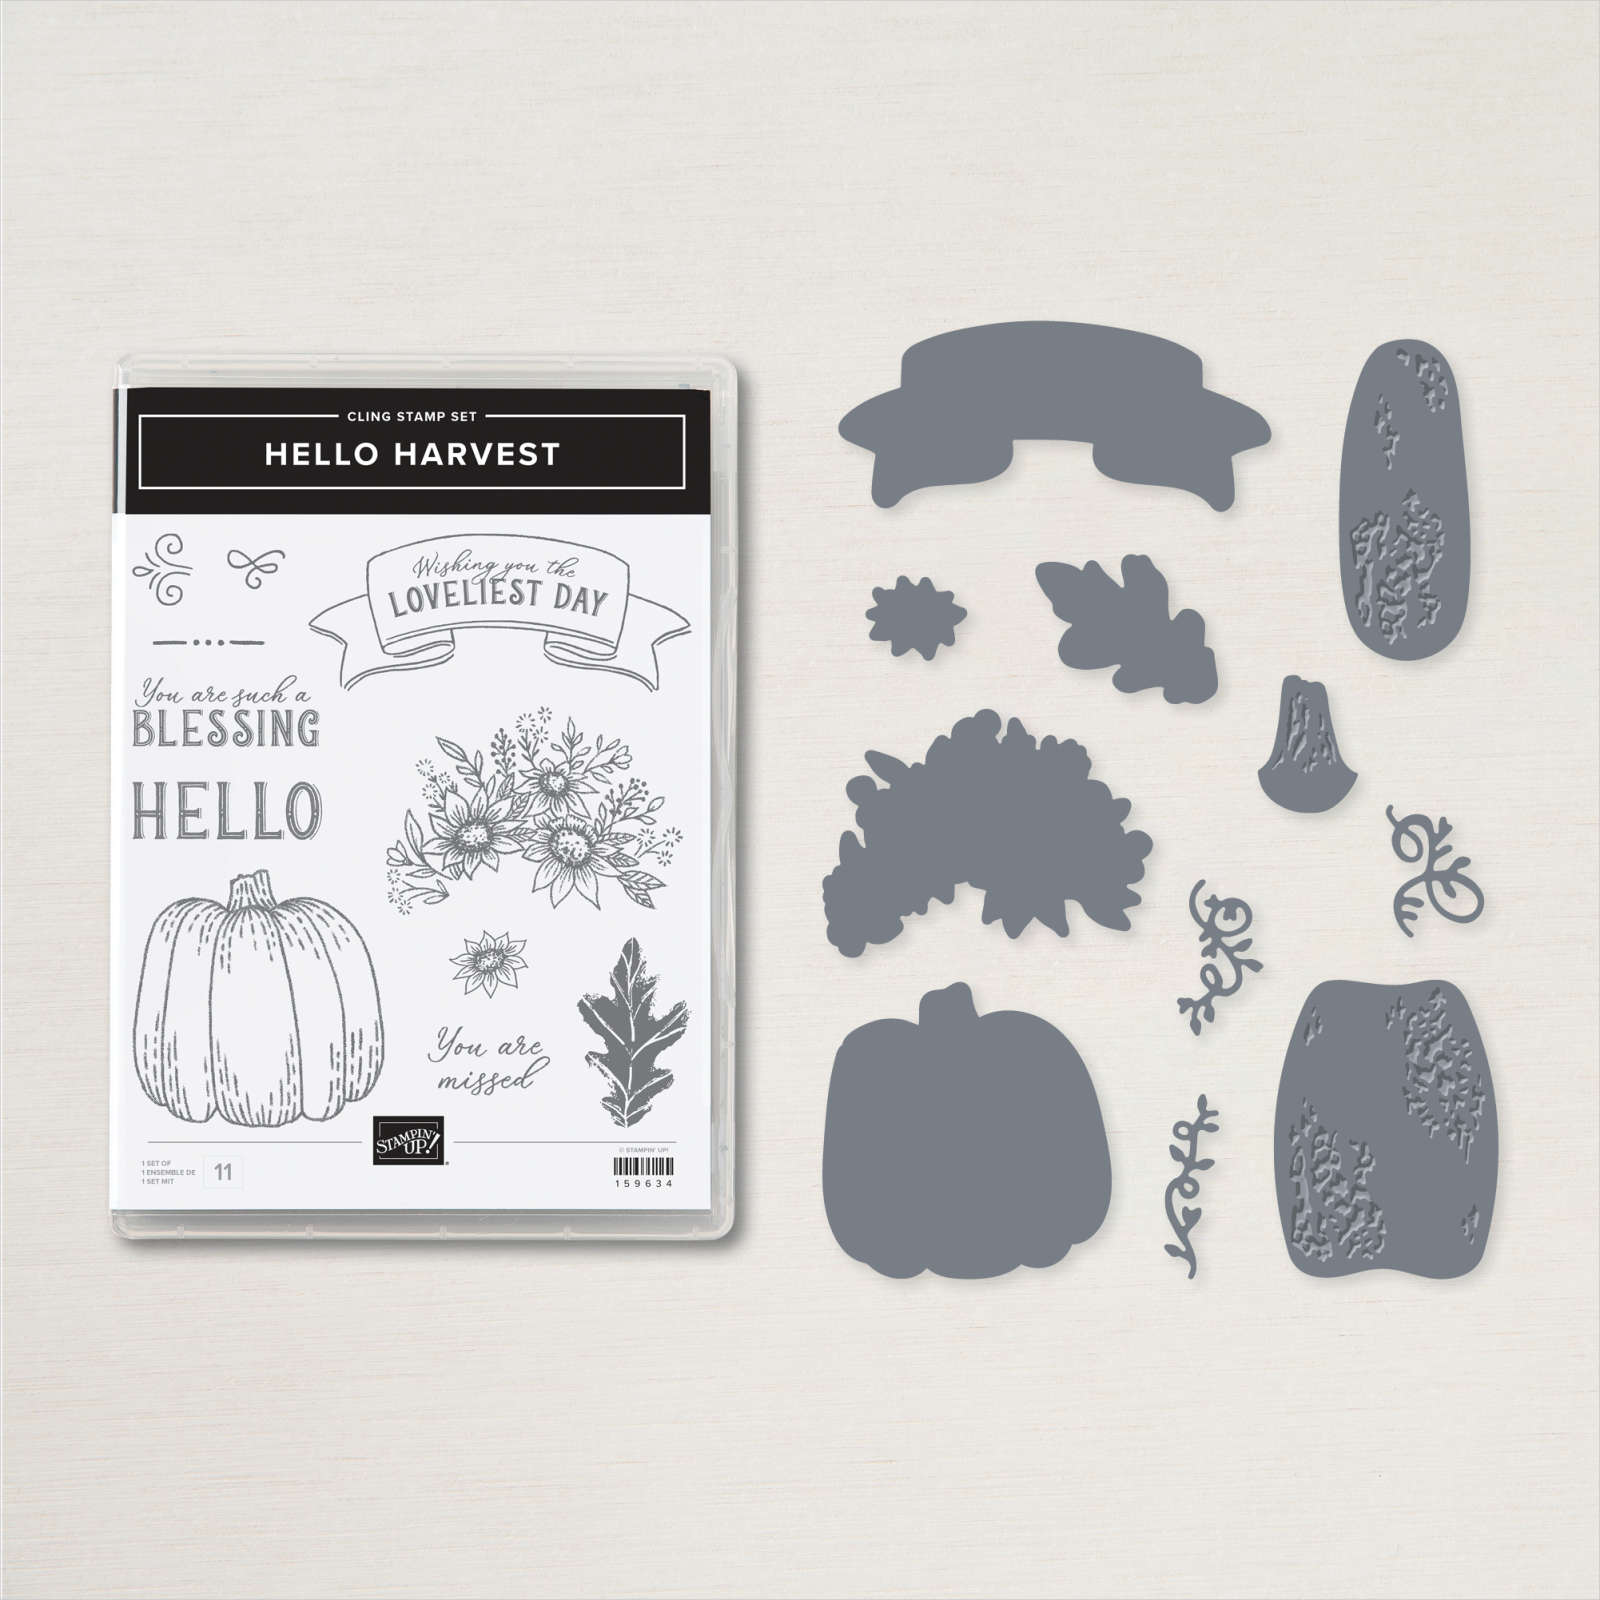
    I cased the idea from my friend Dawn Olchefske; changing it up a bit.  The main floral image is stamped twice (once upside down) and the greeting covers where they meet.  You can see this image in the stamp set below. 

    It might look like there's an entire strip of designer paper under the main card layers.  But it's just a few small pieces of the Rustic Harvest DSP at the top & bottom of the Vanilla card. Check out the Hello Harvest bundle here.  

    I colored the floral image in with Blends markers in Daffodil, Fresh Freesia, Light Old Olive and Calypso Coral.  I also added a bit of color to the pretty greeting banner.  

    Measurements are: 

    • Vanilla 5 ½” X 8 ½”, 3 ½” X 4 ½” & scrap for greeting
    • Espresso 3 5/8” X 4 5/8”
    • DSP is 1” X 2 ¼”

    ~~~

    September Specials


    New weekly deals come out on September 1st, 8th, 15th & 22nd! 

    Order online here

    Host code links: KSAEED9Y or JPJ4FKYJ

    Get free cards from me with online orders!

    Earn free products with my loyalty rewards! 

    Click here to download yours and earn a $50 shopping spree!
    Leave a Reply

    Your email address will not be published. Required fields are marked *

  • Unique Hello Harvest Fun Fold card with measurements!


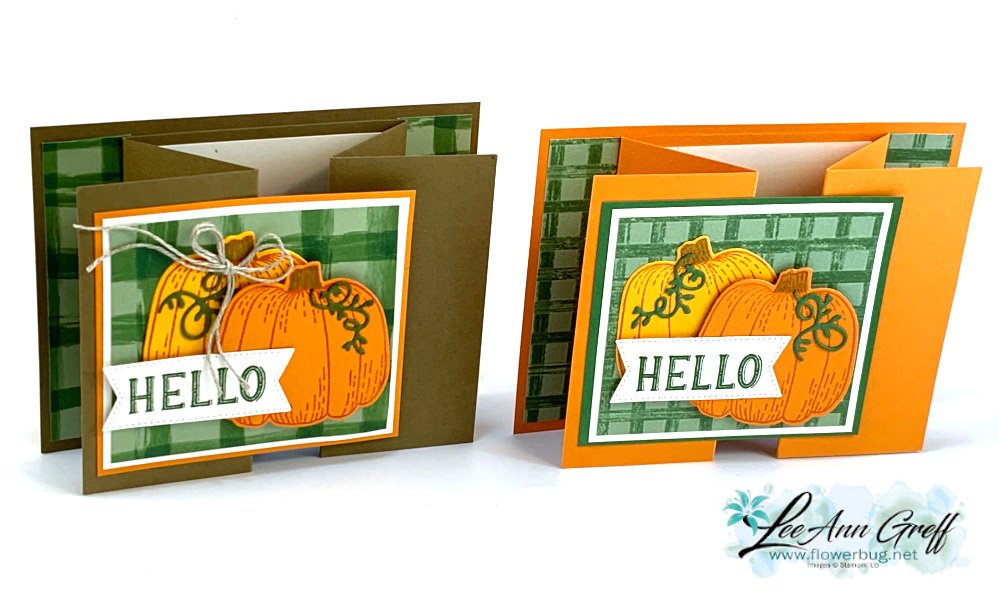
    I played with the Hello Harvest bundle on last week's FB Live video and this is one of the cards I made.  

    It's a unique fun fold that's quite easy. It's inspired by my friend Susie Wood. Check out her blog here; she does tons of fun fold cards!  I know you'll want to try this one!  

    I made the first card with a Soft Suede card base and then second guessed myself and made the second one in Pumpkin Pie. Which do you prefer?  

    Almost everything else is the same except the layers around the pumpkins & DSP layers.  

    Here are the measurements: 

    • Card base; 4” X 11” scored at 2” X 3 ¾” from each end, & 4 ¼” X 5 ½”
    • White 3 ½” X 3 ¼”, inside is 3 1/8” X 3 ¾” plus Stylish Shapes greeting die-cut
    • Gingham Cottage DSP 3 ¼” X 3” & 2 strips at 1" X 4", Green or pumpkin panel is 3 5/8” X 3 3/8”


    ~~~

    September Specials


    New weekly deals come out on September 1st, 8th, 15th & 22nd! 

    Order online here

    Host code: KSAEED9Y

    Get free cards from me with online orders!

    Earn free products with my loyalty rewards! 

    Click here to download yours and earn a $50 shopping spree!
    Leave a Reply

    Your email address will not be published. Required fields are marked *


Notice: LeeAnn Greff, Independent Stampin’ Up! Demonstrator, Manager. The content of this website is my sole responsibility as an independent Stampin’ Up! demonstrator and the use of, and content of, the classes, services, or products offered on this website is not endorsed by Stampin’ Up! Copyright 2025