/


Latest Post

How to achieve the Floating Technique? Lots of examples!


Our current Team creative challenge for my Flowerbug's group is to make a card using the Floating Technique.  It's a fun technique that uses a window sheet or transparency.  

Here are some of mine I shared on a recent Facebook Live video you can see here. 

This first one features Black & White with a 'pop' of color – Magenta Madness in this case. Magenta Madness is retiring next week!   
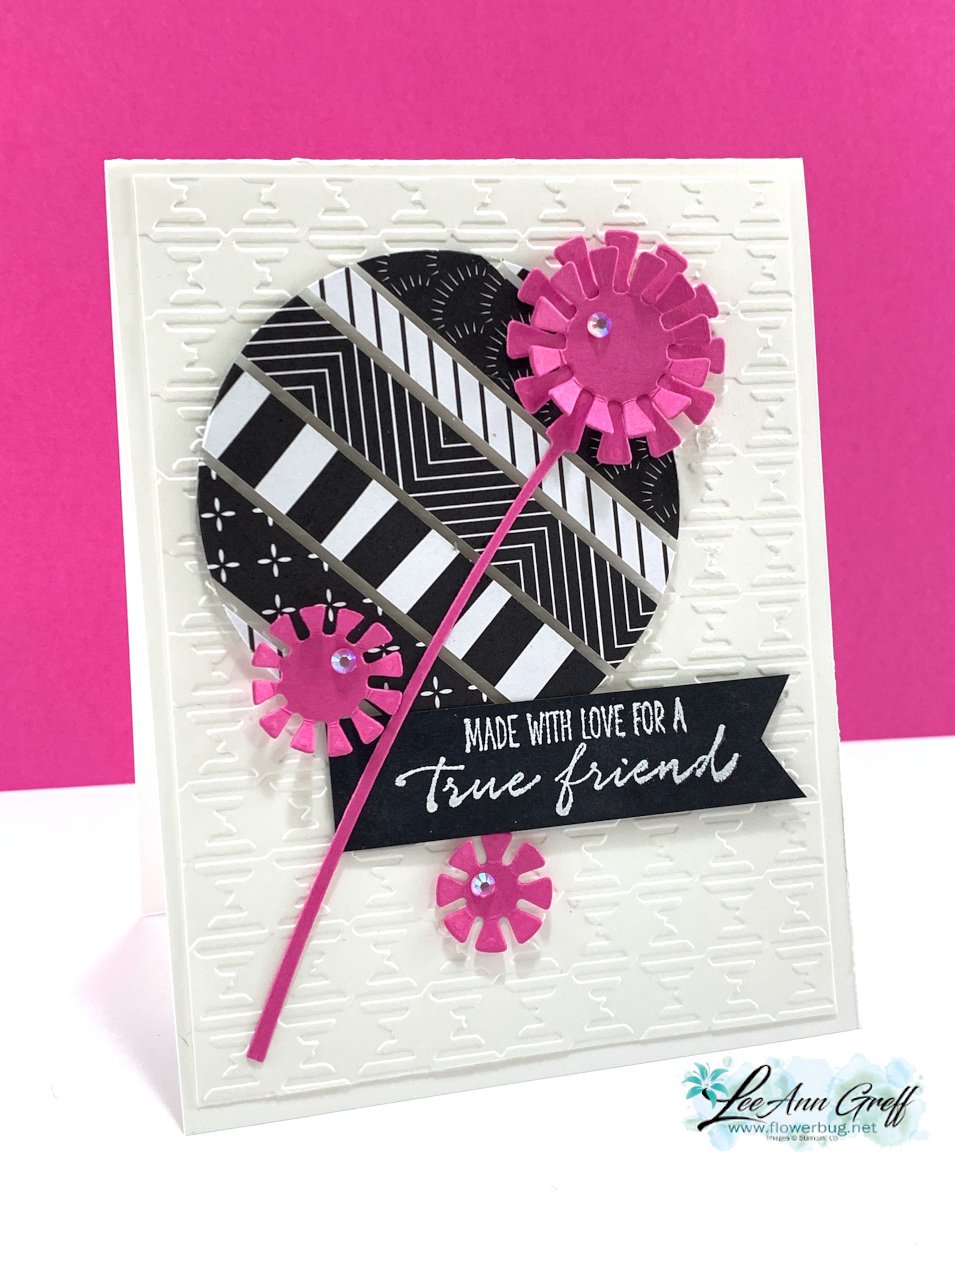
I used the Dandy Wishes dies and the Layering Circles dies here.  I adhered a bunch of strips of the All Together designer paper to a window sheet, leaving space between them.  I cut it out with the largest circle in the set and popped it up on a Gingham textured White layer. 

I added die-cuts from the neat Dandy Wishes dies and a heat embossed image from the Garden Wishes stamp set. This set is in a bundle with the Dandy Wishes dies and on sale in March!  See it here. 

This next card features Misty Moonlight and the Abstract Beauty DSP.  I cut the feathers from this pretty DSP that has touches of Gold on it using the Iconic dies seen here.  
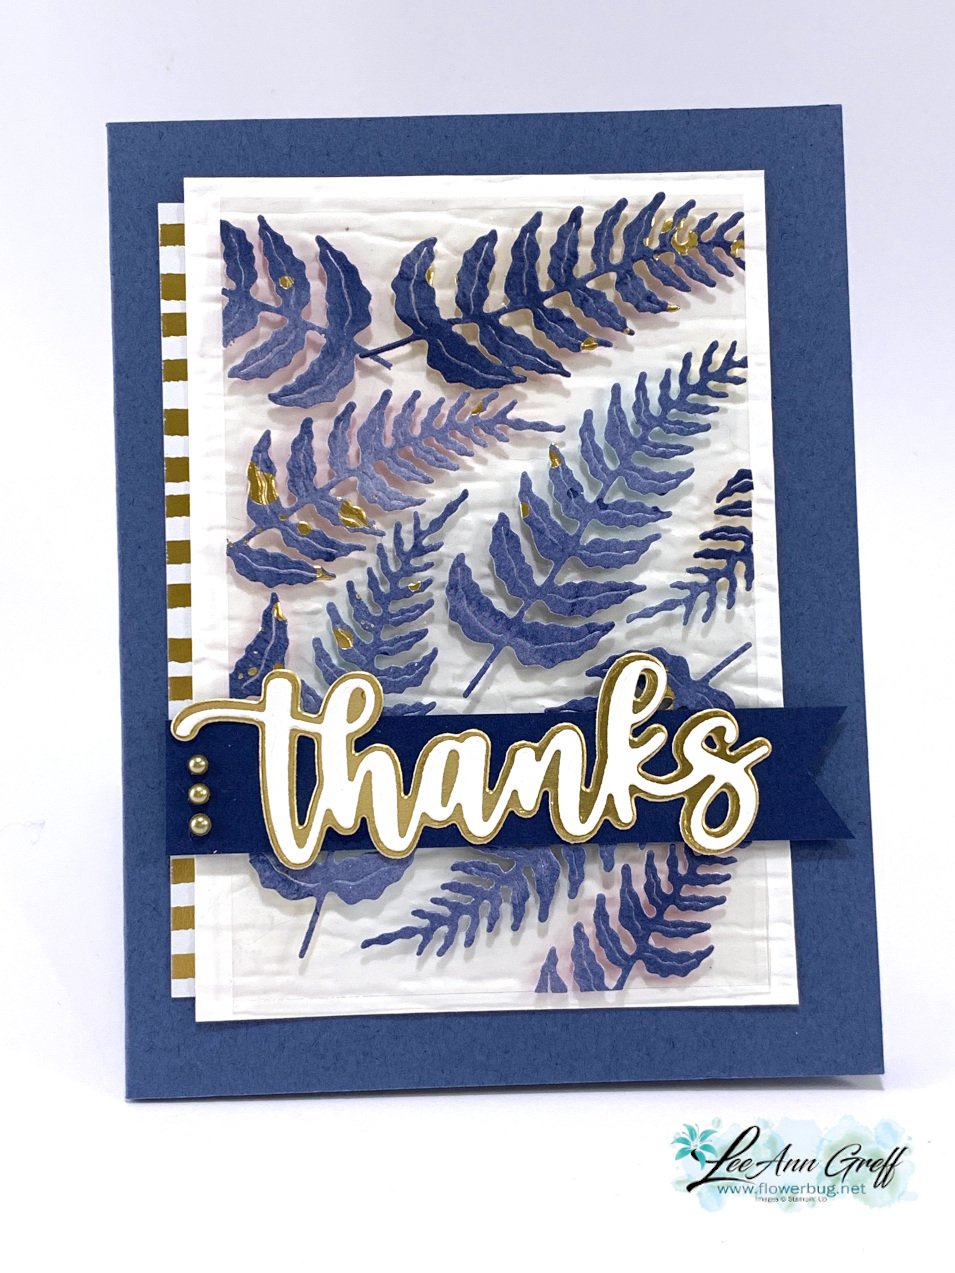
For this card the window sheet is a simple rectangle.  After adding the feathers I trimmed off the excess and added it to the card with mini dimensionals.  

Other details: 

  • the greeting die-cuts are the Amazing Thanks dies seen here.
  • The textured White layer is done with the Bark 3D embossing folder.
  • That strip of gold & white strips is also from the Abstract Beauty DSP. 
  • Colors are Gold, White, Misty Moonlight and Night of Navy

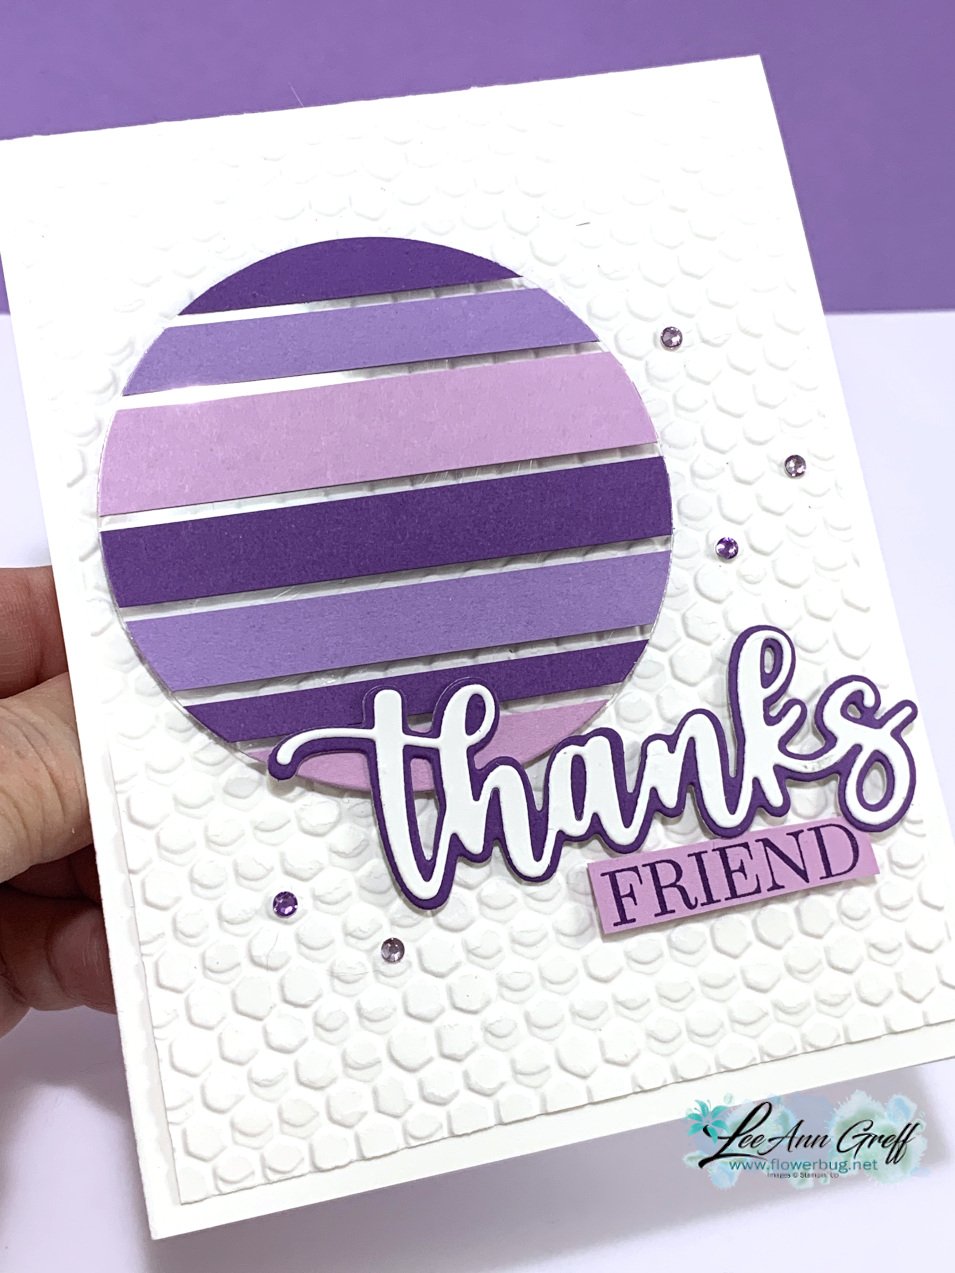
Next is a card done in purples – Fresh Freesia, Highland Heather & Gorgeous Grape.  
Details:

  • Layering Circle & Amazing Thanks dies
  • Greeting stamped from Special Moments SAB set
  • Texture is Hive 3D folder seen here 
  • Basic Rhinestone jewels were colored purple with Blends markers 

This next sample features the Artistic dies along with the SAB Simply Marbelous DSP. 

Colors are Basic Gray, White & Black; very monochromatic.  The greeting is from Friendly Hello SAB set, heat embossed.  

Tip; to adhere the finely cut die-cut pieces I used our Adhesive Sheets seen here.  They're the best solution for these types of die-cuts. 

You can see how I achieved these cards on the link below; just click on the photo to watch. 

~~~

March Specials: 

Host codes: FS239K9C

 *click here to order 

If your order is over $50 you'll receive a free embellishment

from the Jan-June catalog in your thank you card.

Annual Catalog Retiring List is out March 23rd!  Deep discounts coming! 

Don't forget about my loyalty rewards! 

Click here to download yours and earn a $50 shopping spree!  
All Posts

  • Incredible By the Bay suite projects by our Artist of the Month!


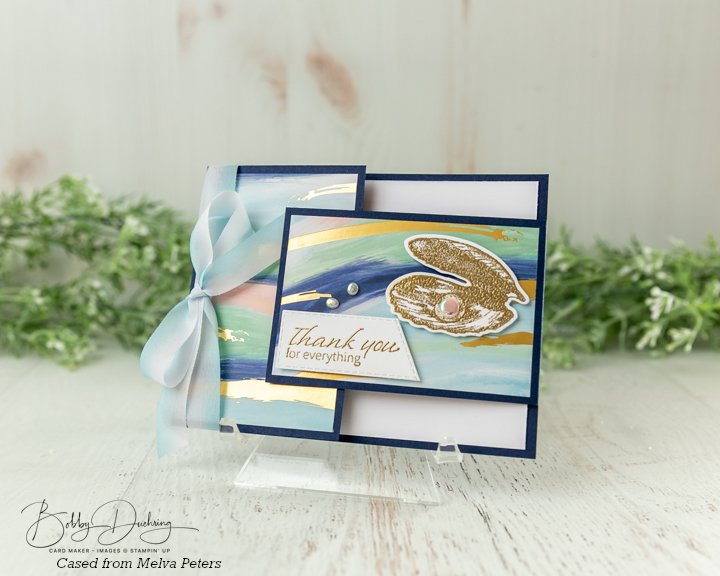
    Each month one of my Flowerbug's team is the 'Artist of the Month'.  This month Bobby is the featured Artist and she chose to use the Seaside Bay bundle with the By the Bay Suite seen here.  It's filled with beautiful fold & pearl foil specialty designer paper, Flat Adhesive-Backed pearls & blue & white variegated ribbon.  

    This pretty fun fold card was cased from Melva Peters

    The Thank you sentiment is cut out with the Stitched Rectangular Framelit dies; she ran the long edge of the die over the sentiment at an angle to get the angled effect.  

    Measurements:

    • Navy Card base 8 1/4" X 4 1/4" scored at 5 1/2"; second piece is 4 1/2" X 2 3/4" scored at 4"
    • DSP 2 1/2" X 4" and 3 3/4" X 2 1/2"
    • White inside is 5 1/4" X 4", scrap for greeting and clam shell die-cut

    Magnetic closures are used to secure the card closed.  

    Next is a pretty card cased from Leonie Stuart. 

    The pretty texture is done with the Seashells 3D embossing folder.  She also used a vellum circle, Night of Navy ink, Wink of Stella, the Natural Finish ribbon and linen thread.

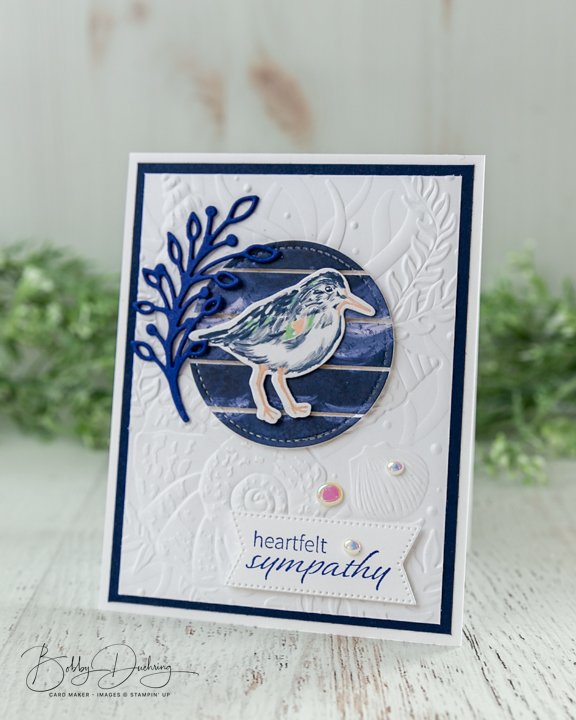
    This next card is her own creation; she did the floating technique with the By the Bay DSP seen here. 


    The floating technique is where you add strips of paper to a window sheet leaving spaces between.  Then die-cut it out and it looks like it's floating.  She used the Stylish Shapes dies for the circle.  

    More details:

    The bird is cut from the By the Bay Designer Series Paper. Leaf Sprig is from the Framed Florets and the embossing is from the Seashells 3D embossing folder in the annual catalog.  

    Here's the inside view – all done in Navy & Starry Sky inks.

    \

    Next is a gorgeous card cased from Gail Ellis.  

    She added 1 3/8" squares to a die-cut stitched rectangle measuring 3 3/8" X 4 3/4".  I love the white on white with that pop of gold and sea greens & blues!  The Faux Sea Glass shapes are added too.

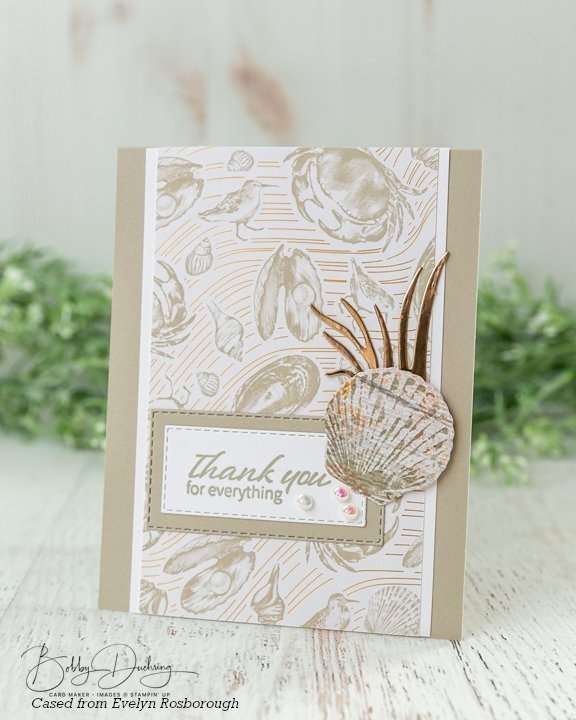
    Lastly for today is a card cased from Evelyn Rosborough. A beautiful monochromatic card – some of my favorites! 

    The DSP measures 3 1/4" X 5 1/2", the White layer is 3 1/2" X 5 1/2" on a Sahara Sand card base.  

    The seashell is cut from the Texture Chic DSP and the greetings are cut from the Stitched Rectangle dies.  Love that foil sea grass accent!  

    I'll share details on the other half of her cards tomorrow! 


    ~~~

    Sale-a-Bration & the Spring Catalog!


    Order online using the links below:

    January Host code links: FYRQ94HR or 69GXSA3B

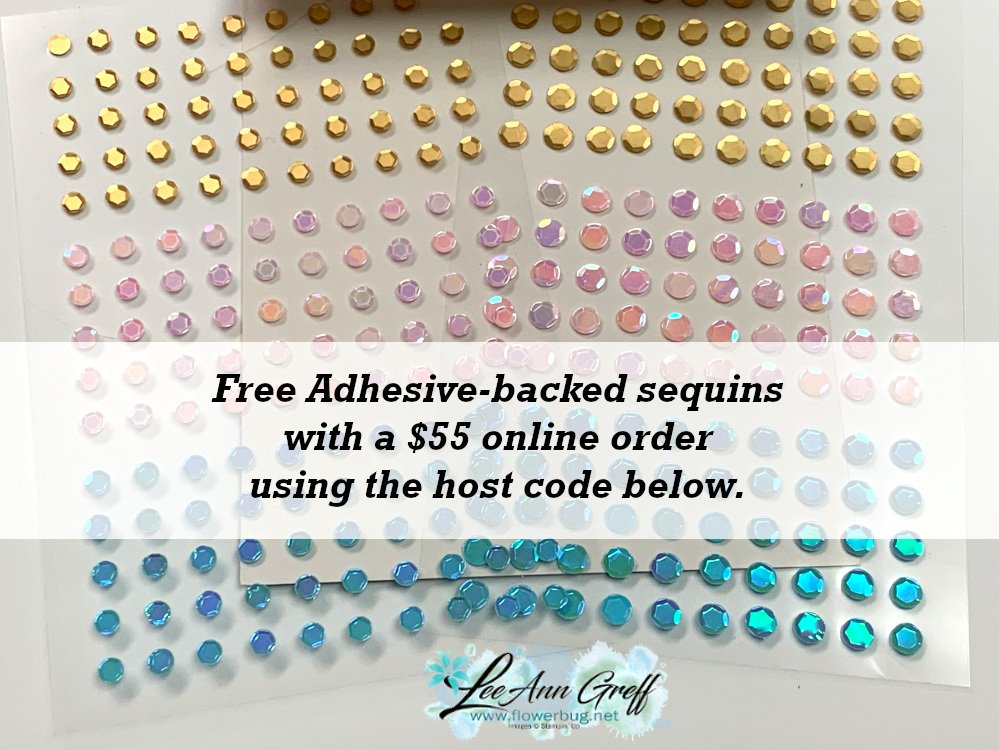
    Get free Pastel Sequins with online orders over $55 when using the host code above! 

    January Host code links: FYRQ94HR or 69GXSA3B

     Earn free products with my loyalty rewards! 

    Click here to download yours and earn a $50 shopping spree!

    ~~~

    Best Deal Ever on the Starter kit here!

    Choose $175 in products for just $129 plus the new mini machine!

    Or choose $175 for $99 without a new Mini.  AMAZING!

    Leave a Reply

    Your email address will not be published. Required fields are marked *

  • Stack & Cut cards with Dandy Designs & Something Fancy with PDF project sheet & template download!


    I LOVE the cards I'm sharing with you today!!  So much!  

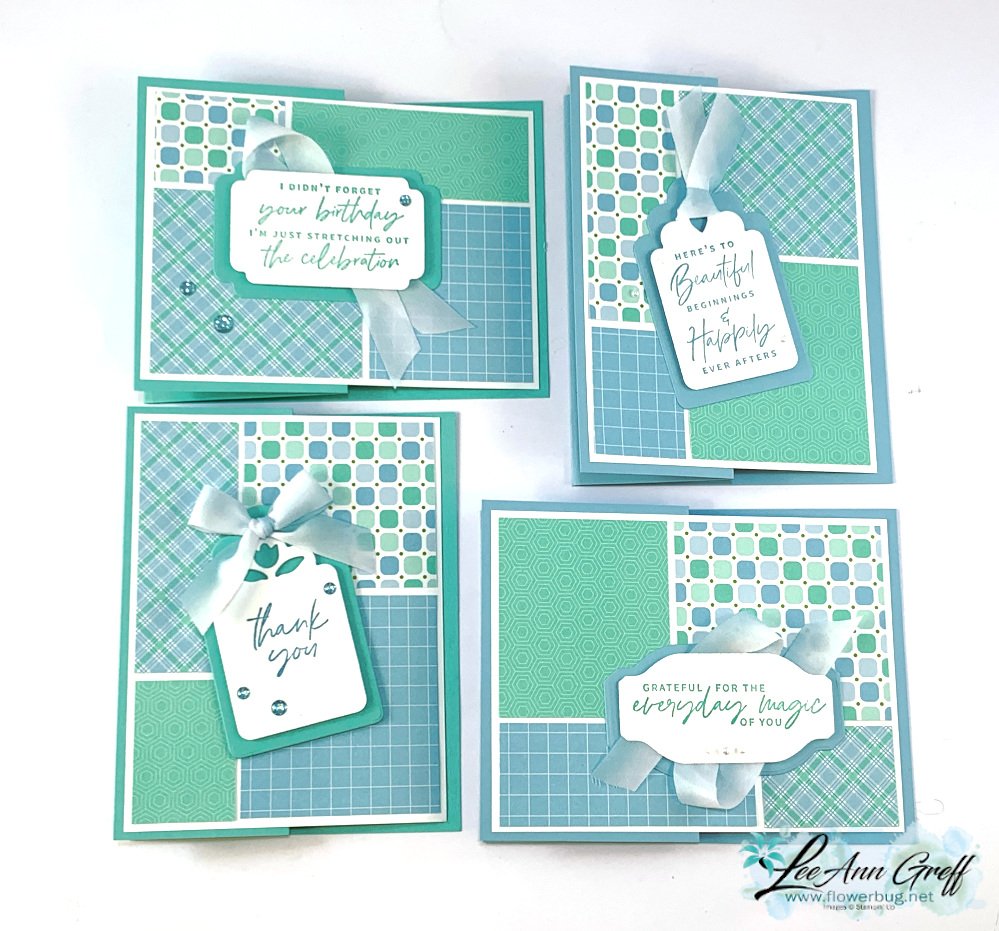
    They're 'Stack & Cut' cards using an easy template I'll share below.  I created these for last week's Facebook Live.  The Dandy Design SAB designer paper features gorgeous color combinations like this one: 

    Who would have thought Balmy Blue & Coastal Cabana would be so pretty together?!  I sure didn't.  But with the small prints and the addition of White & Pool Party it works beautifully. 

    Each set of cards feature this neat Dandy Designs designer paper seen here.  This huge pack of 48 12 X 12" sheets is free during Sale-a-Bration with any $100 purchase.  

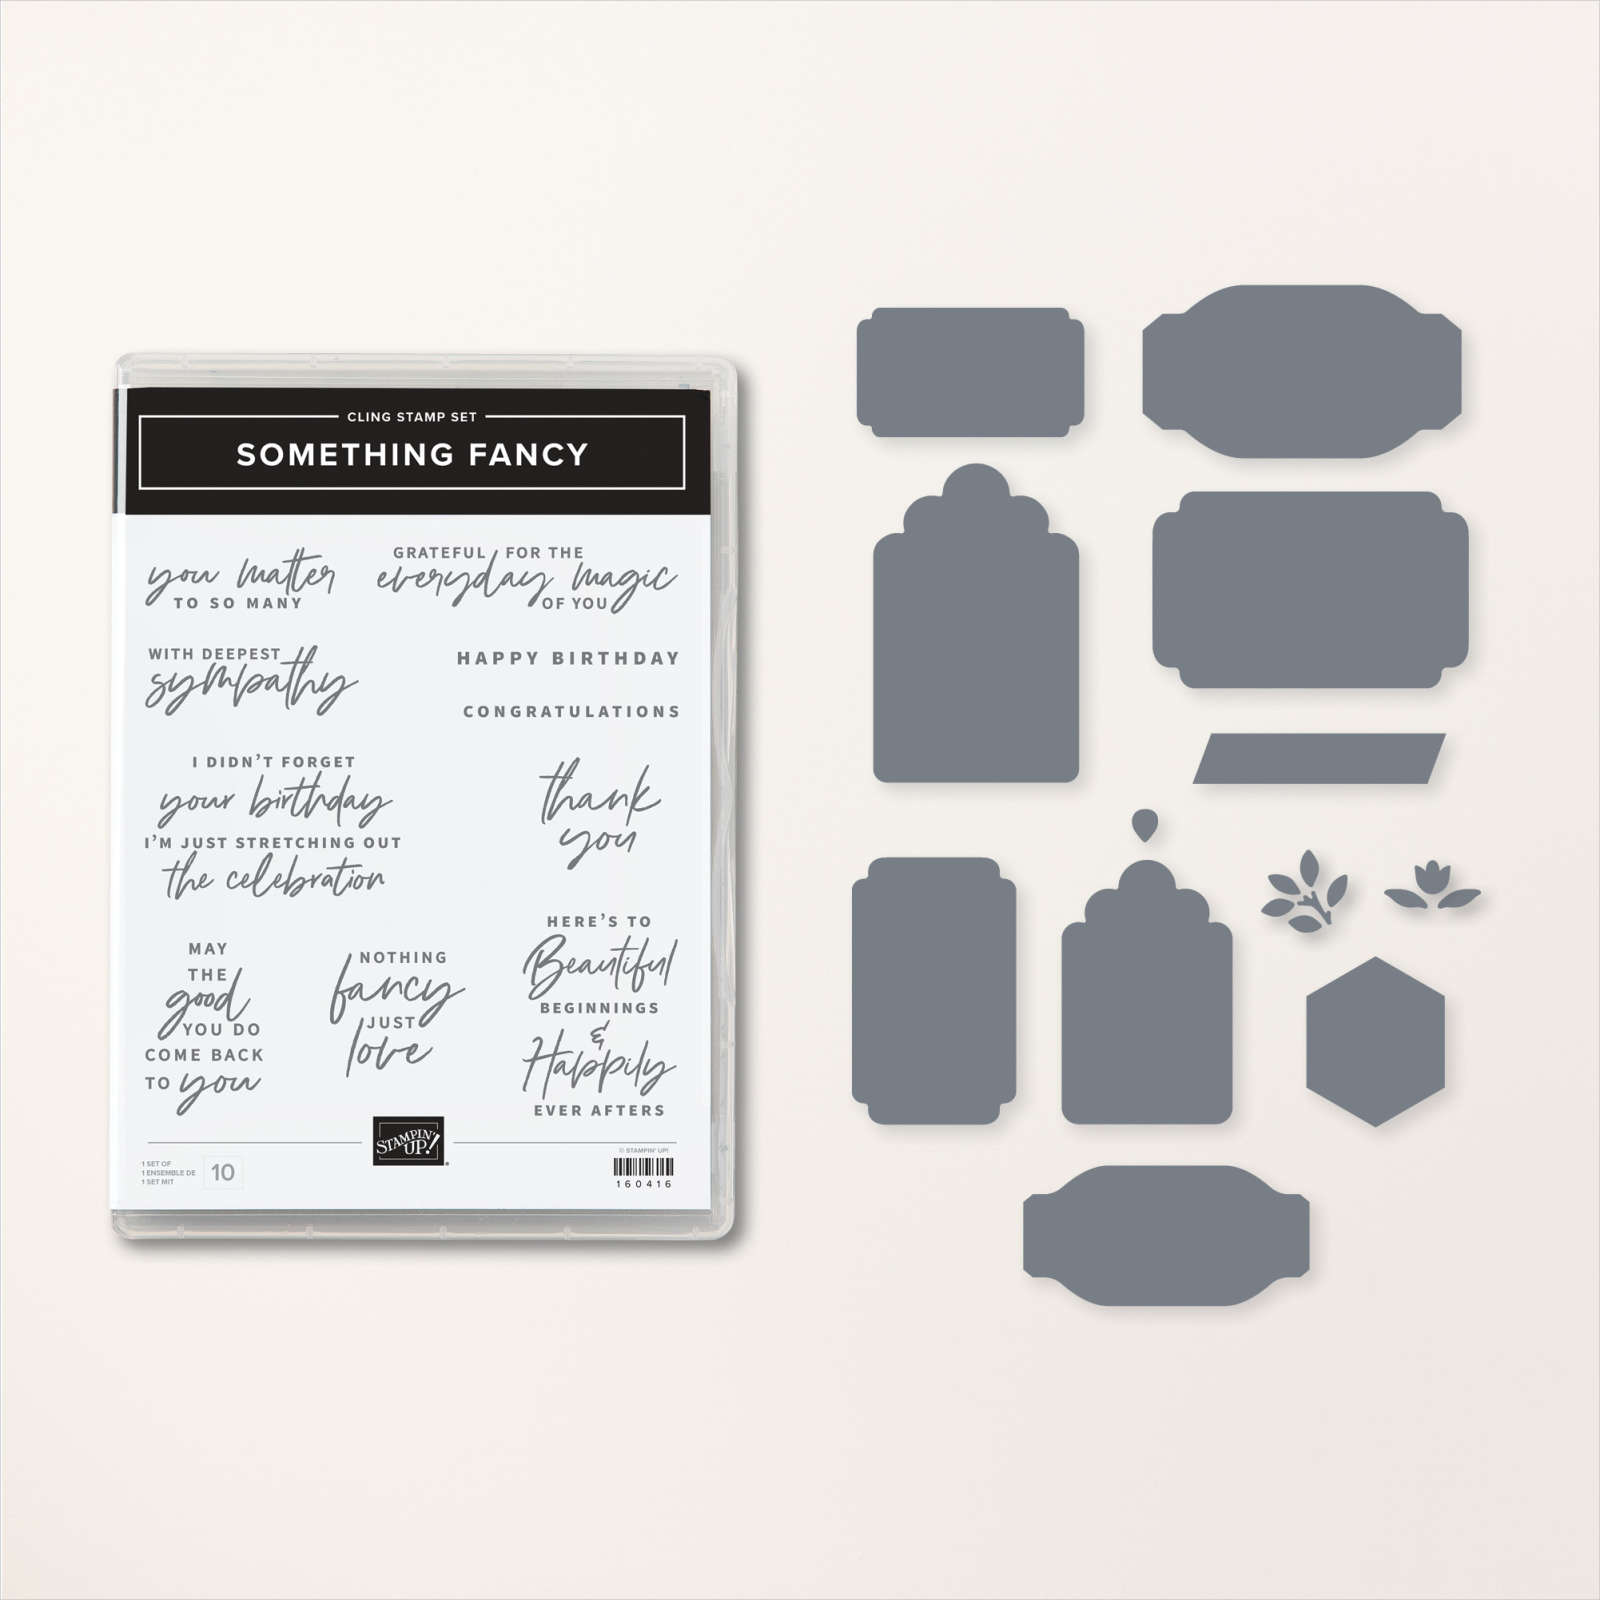
    For each of these sets of cards I also featured the Something Fancy bundle.  It's one of my top picks. See it here.  The greetings are great but the dies!  WOW; the tags and layers are perfect!  

    Add this bundle to your order and you're over half way towards getting the Dandy Designs paper pack free! All of these tags and greeting die-cuts are from these Something Fancy dies.  

    This next set is all pastels in Fresh Freesia & Petal Pink; another color combo I would never have put together.  But it works!  

    You also might notice that each card is a fun fold.  Here are the measurements:

    • Horizontal cards – 4 1/4" X 11" card base, scored at 2 3/4" & 5 1/2"
    • Vertical cards 5 1/2" X 8 1/2" card base, scored at 2 1/8" & 4 1/4" 

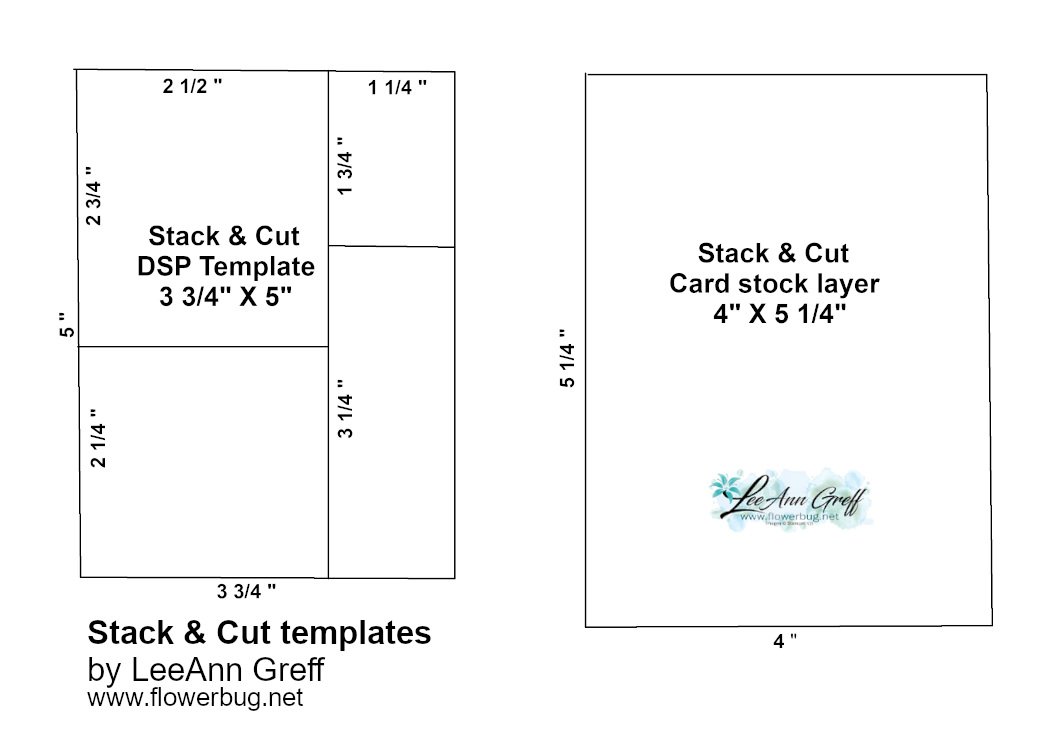
    Below is the template I used.  I started out with 4 pieces of designer paper measuring 3 3/4" X 5".  I cut two at a time using the measurements on the template.  Then I cut 4 pieces of card stock for the layer under the designer paper pieces.  It's so easy and a fabulous way to use up your designer paper AND get a bunch of cards done quickly.  

    *Save the photo or Download Stack & Cut cards & template here


    This last set features Calypso Coral with Mango Melody; a bright and fun combination.  

    You can see on the upper left and lower right a few of the optional die-cuts you can add to the tags.  The set actually features 3 options for details or a ribbon pull. 

    Here you can see all 12 of the cards I made with the Dandy Designs designer series paper and the Something Fancy bundle.  

    Click here to watch the video or click on the photo below. 

    Be sure to subscribe to my new YouTube channel here!  Unfortunately my previous channel was hijacked! 

    ~~~

    Sale-a-Bration & the Spring Catalog!


    Order online using the links below:

    January Host code links: FYRQ94HR or 69GXSA3B

    Get free Pastel Sequins with online orders over $55 when using the host code above! 

    January Host code links: FYRQ94HR or 69GXSA3B

     Earn free products with my loyalty rewards! 

    Click here to download yours and earn a $50 shopping spree!

    ~~~

    Best Deal Ever on the Starter kit here!

    Choose $175 in products for just $129 plus the new mini machine!

    Or choose $175 for $99 without a new Mini.  AMAZING!

    Leave a Reply

    Your email address will not be published. Required fields are marked *

  • Note my NEW YouTube channel, email address plus free project download!


    I've so much to do today that I'm posting a repeat project.  BUT, it's a huge favorite and if you haven't seen it or made one I'm sure you're going to add it to your list of projects in the future. 

    But first an update on my email and YouTube channel. 

    Last week my Google account was hijacked.  I lost some of my contacts, had to get a new email address (click here) and lost my YouTube channel and ALL of my 16,700 subscribers!  It's still a huge shock! 

    I have contacted Google and they may help me recover my channel.  Chances are low this will happen, but in the meantime I've created a new one.  PLEASE subscribe to it if you enjoy my videos.  Here's the link.  

    Now I'll share this easy card folio project. 

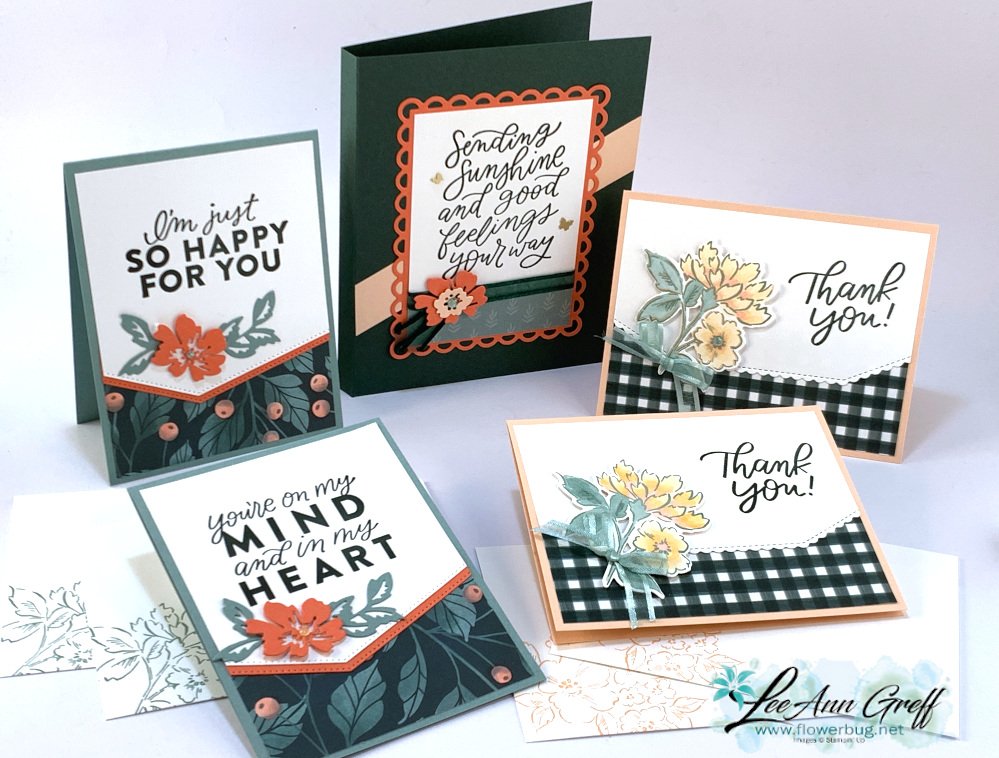
    It features the Good Feelings stamp set, the Hand-Penned petals stamp set, the Penned Flower dies, the Border Basics dies seen here, and the Contour Scalloped dies (front of folio).  

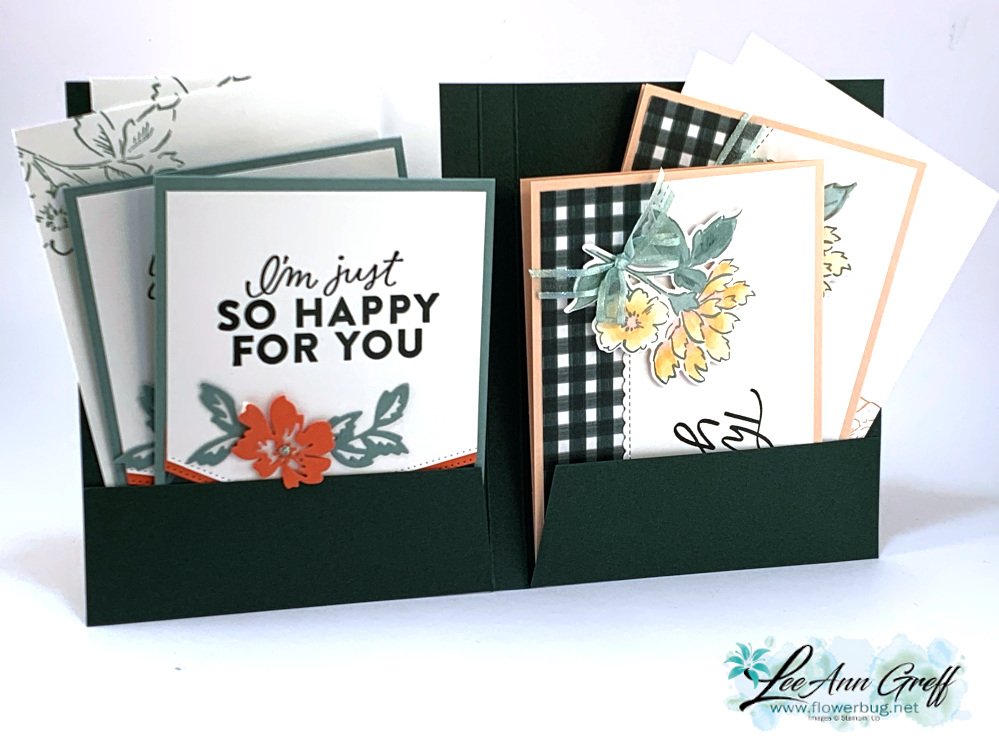
    We made it at a team meeting a few months ago.  I think it's a super cool way to gift cards to someone.  And it uses just one sheet of 8 1/2" X 11" card stock!  

    Here's what it looks like open and full of cards: 

    Here's the free project tutorial for this neat gift project.  Download Good Feelings card folio here.  

    This is the front view.  The colors include Calypso Coral,  Petal Pink, Soft Succulent & Evening Evergreen.  

    Please subscribe to my new YouTube channel here!  Click here or on the video below to watch how to make this easy card folio. 

    ~~~

    Sale-a-Bration & the Spring Catalog!


    Order online using the links below:

    January Host code links: FYRQ94HR or 69GXSA3B

    Get free Pastel Sequins with online orders over $55 when using the host code above! 

    January Host code links: FYRQ94HR or 69GXSA3B

     Earn free products with my loyalty rewards! 

    Click here to download yours and earn a $50 shopping spree!
    ~~~

    Best Deal Ever on the Starter kit here!

    Choose $175 in products for just $129 plus the new mini machine!

    Or choose $175 for $99 without a new Mini.  AMAZING!

    Leave a Reply

    Your email address will not be published. Required fields are marked *


Notice: LeeAnn Greff, Independent Stampin’ Up! Demonstrator, Manager. The content of this website is my sole responsibility as an independent Stampin’ Up! demonstrator and the use of, and content of, the classes, services, or products offered on this website is not endorsed by Stampin’ Up! Copyright 2025