/


Latest Post

How to achieve the Floating Technique? Lots of examples!


Our current Team creative challenge for my Flowerbug's group is to make a card using the Floating Technique.  It's a fun technique that uses a window sheet or transparency.  

Here are some of mine I shared on a recent Facebook Live video you can see here. 

This first one features Black & White with a 'pop' of color – Magenta Madness in this case. Magenta Madness is retiring next week!   
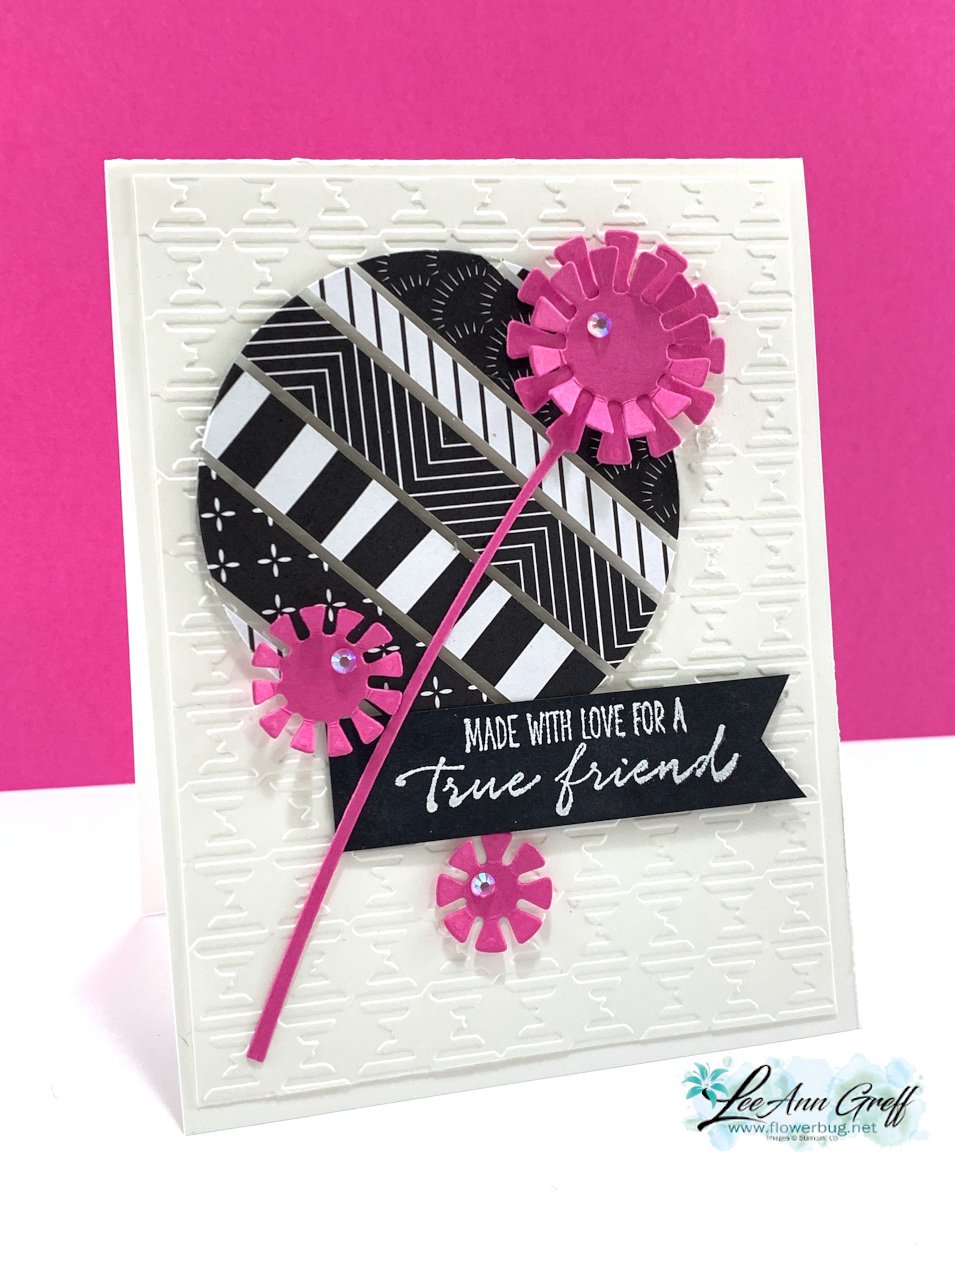
I used the Dandy Wishes dies and the Layering Circles dies here.  I adhered a bunch of strips of the All Together designer paper to a window sheet, leaving space between them.  I cut it out with the largest circle in the set and popped it up on a Gingham textured White layer. 

I added die-cuts from the neat Dandy Wishes dies and a heat embossed image from the Garden Wishes stamp set. This set is in a bundle with the Dandy Wishes dies and on sale in March!  See it here. 

This next card features Misty Moonlight and the Abstract Beauty DSP.  I cut the feathers from this pretty DSP that has touches of Gold on it using the Iconic dies seen here.  
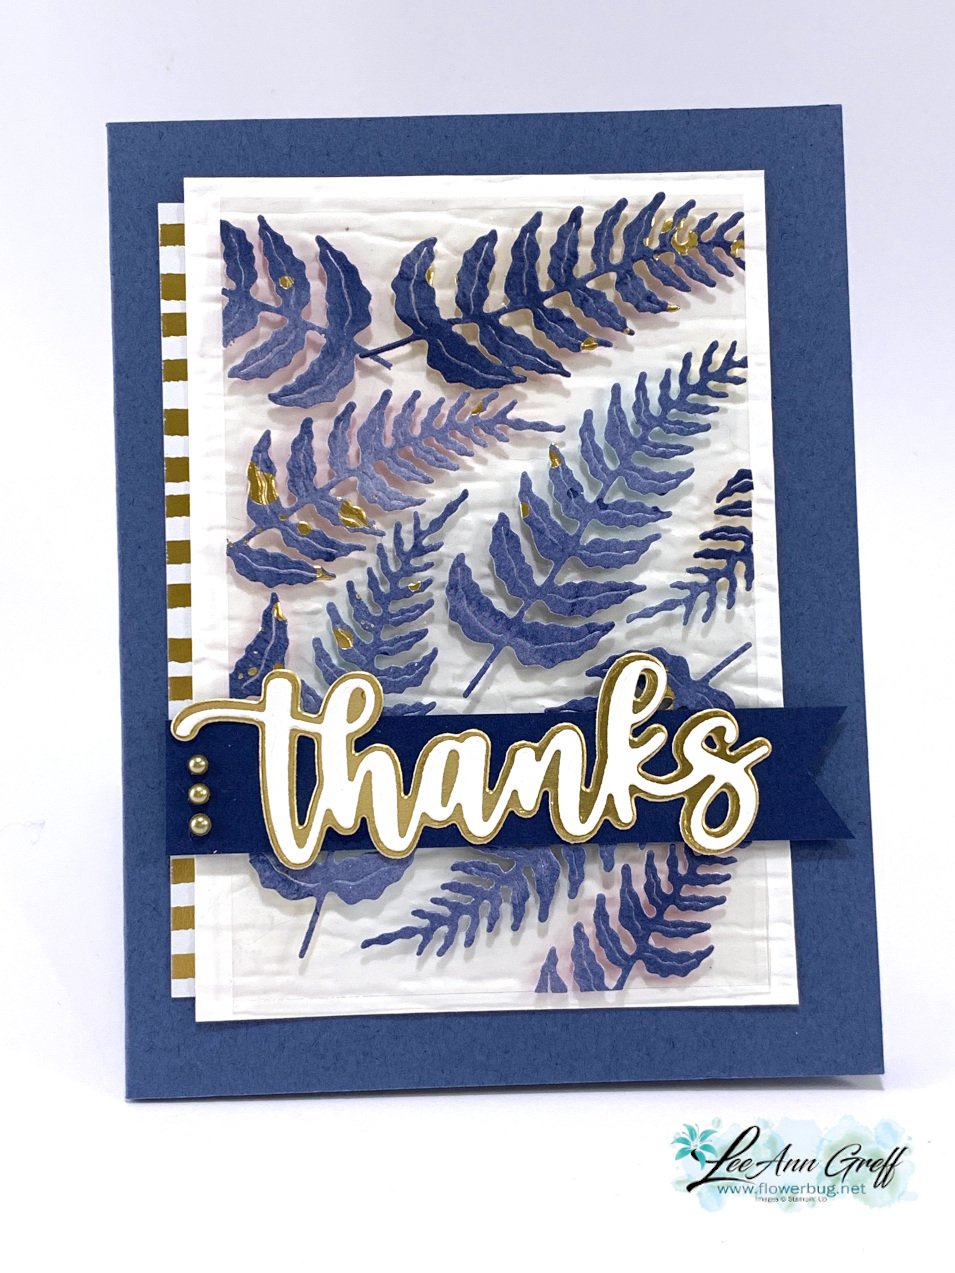
For this card the window sheet is a simple rectangle.  After adding the feathers I trimmed off the excess and added it to the card with mini dimensionals.  

Other details: 

  • the greeting die-cuts are the Amazing Thanks dies seen here.
  • The textured White layer is done with the Bark 3D embossing folder.
  • That strip of gold & white strips is also from the Abstract Beauty DSP. 
  • Colors are Gold, White, Misty Moonlight and Night of Navy

Next is a card done in purples – Fresh Freesia, Highland Heather & Gorgeous Grape.  
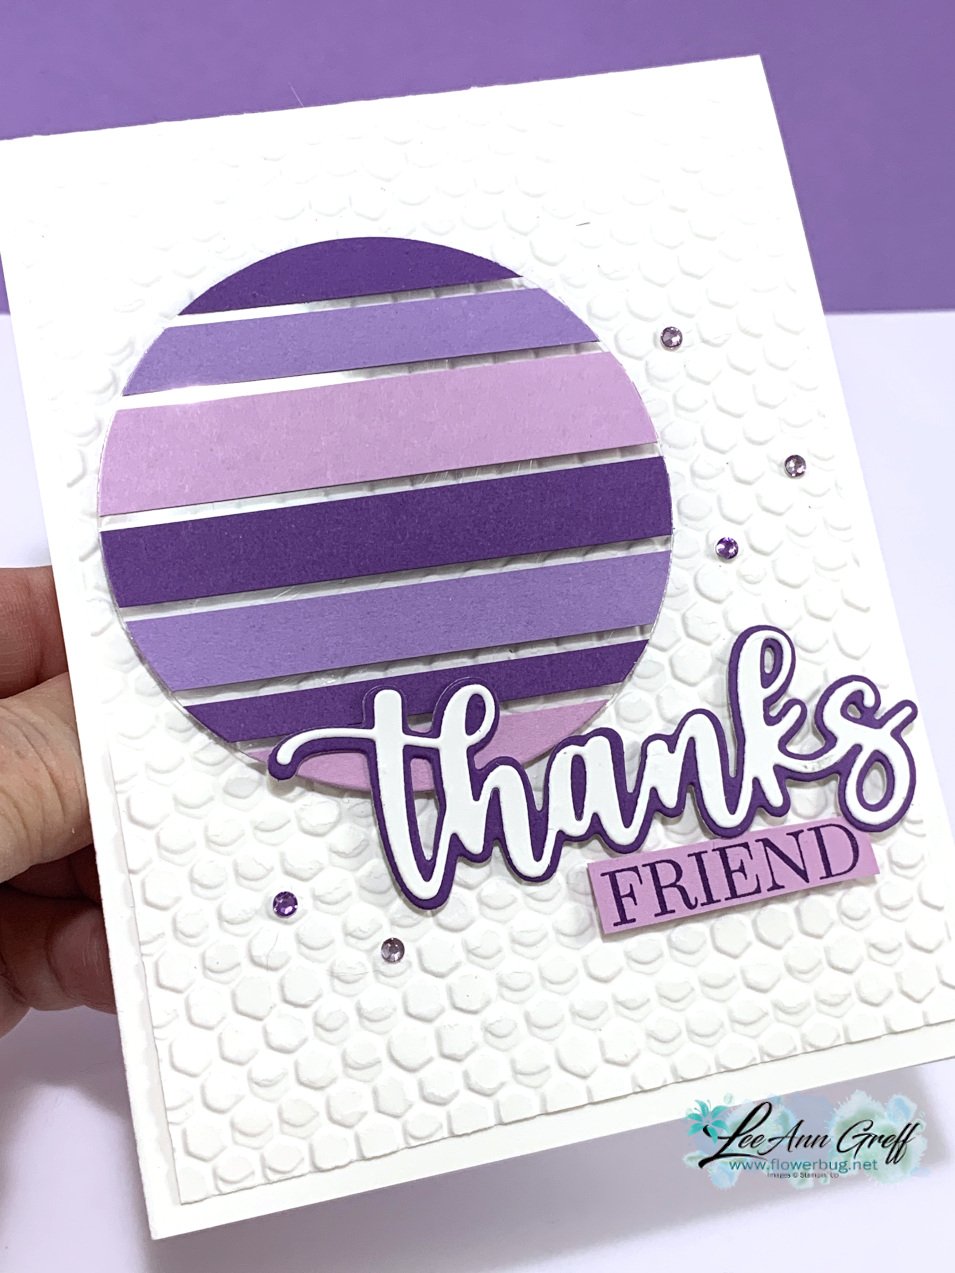
Details:

  • Layering Circle & Amazing Thanks dies
  • Greeting stamped from Special Moments SAB set
  • Texture is Hive 3D folder seen here 
  • Basic Rhinestone jewels were colored purple with Blends markers 

This next sample features the Artistic dies along with the SAB Simply Marbelous DSP. 

Colors are Basic Gray, White & Black; very monochromatic.  The greeting is from Friendly Hello SAB set, heat embossed.  

Tip; to adhere the finely cut die-cut pieces I used our Adhesive Sheets seen here.  They're the best solution for these types of die-cuts. 

You can see how I achieved these cards on the link below; just click on the photo to watch. 

~~~

March Specials: 

Host codes: FS239K9C

 *click here to order 

If your order is over $50 you'll receive a free embellishment

from the Jan-June catalog in your thank you card.

Annual Catalog Retiring List is out March 23rd!  Deep discounts coming! 

Don't forget about my loyalty rewards! 

Click here to download yours and earn a $50 shopping spree!  
All Posts

  • 3 unique techniques on these pretty swap cards


    I'll be sharing our July Flowerbug Team swaps this week and next.  Our theme was to create our own backgrounds.  They came up with some amazing ideas.  I absolutely LOVE seeing their creativity and style.  

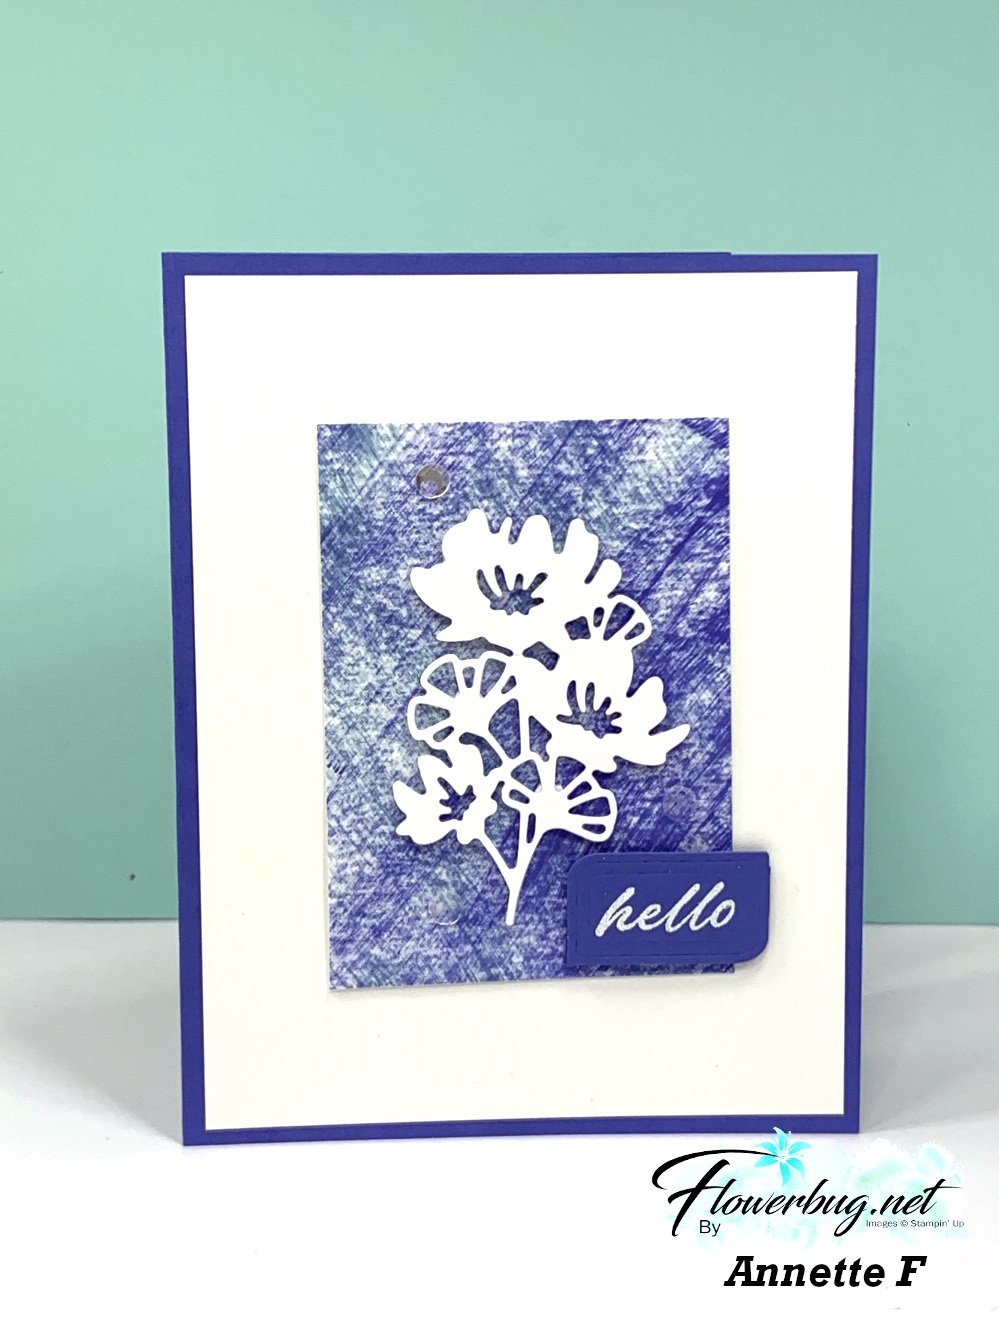
    First is a monochromatic card by Annette. I bet you'll never guess how she did this special background…..

    She used Orchid Oasis and Boho Blue ink spots and dragged the ink across her white card stock. One color in each direction.  I was shocked at how pretty and evenly colored it is. I think it looks like denim. It's the perfect way to highlight the pretty die-cut. I'm going to try this myself soon! 

    Her greeting is heat embossed with White embossing powder on a die-cut from this bundle.  

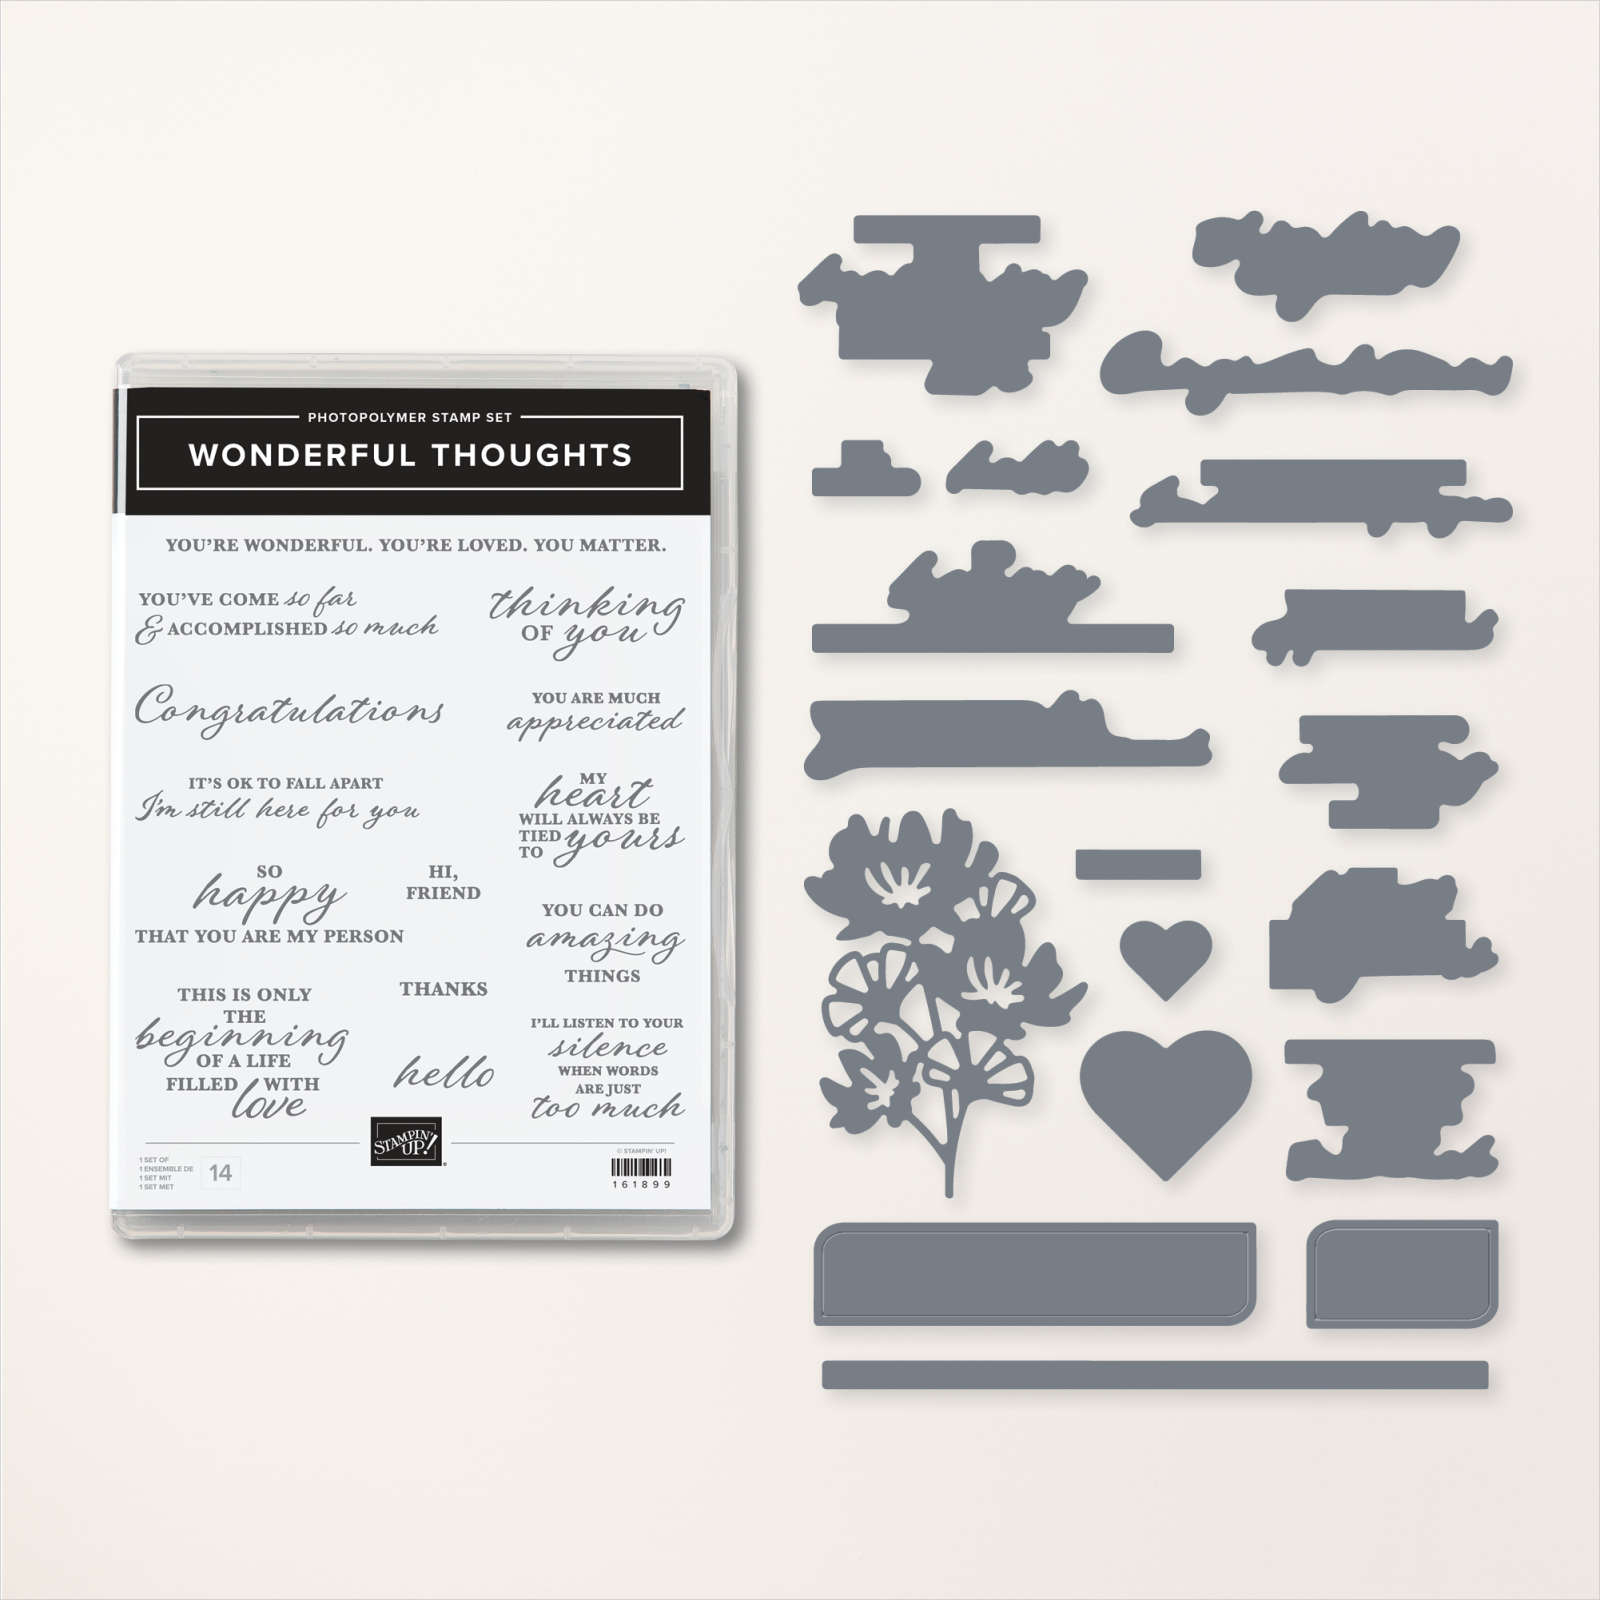
    She used the Wonderful Thoughts bundle seen here. 

    ~~~

    Next is a pretty card that Monica made with the Color & Contour stamp set & Scalloped Contour dies. 

    She created a blended and masked background using Orchid Oasis and Daffodil Delight.  She added a bit of Pool Party on the flower and the card base too.  I love these colors together! 

    ~~~

    And lastly today is a unique technique by Lori. I'm not sure I've done this one! Can you guess how she did it….?  

    She first scored her White card stock about 1" apart, on the diagonal. Then she folded the card stock on each score line and sponged Balmy Blue ink on each fold.  I know I've never done this one; at least in my memory I haven't.  So cool and very precise too!  

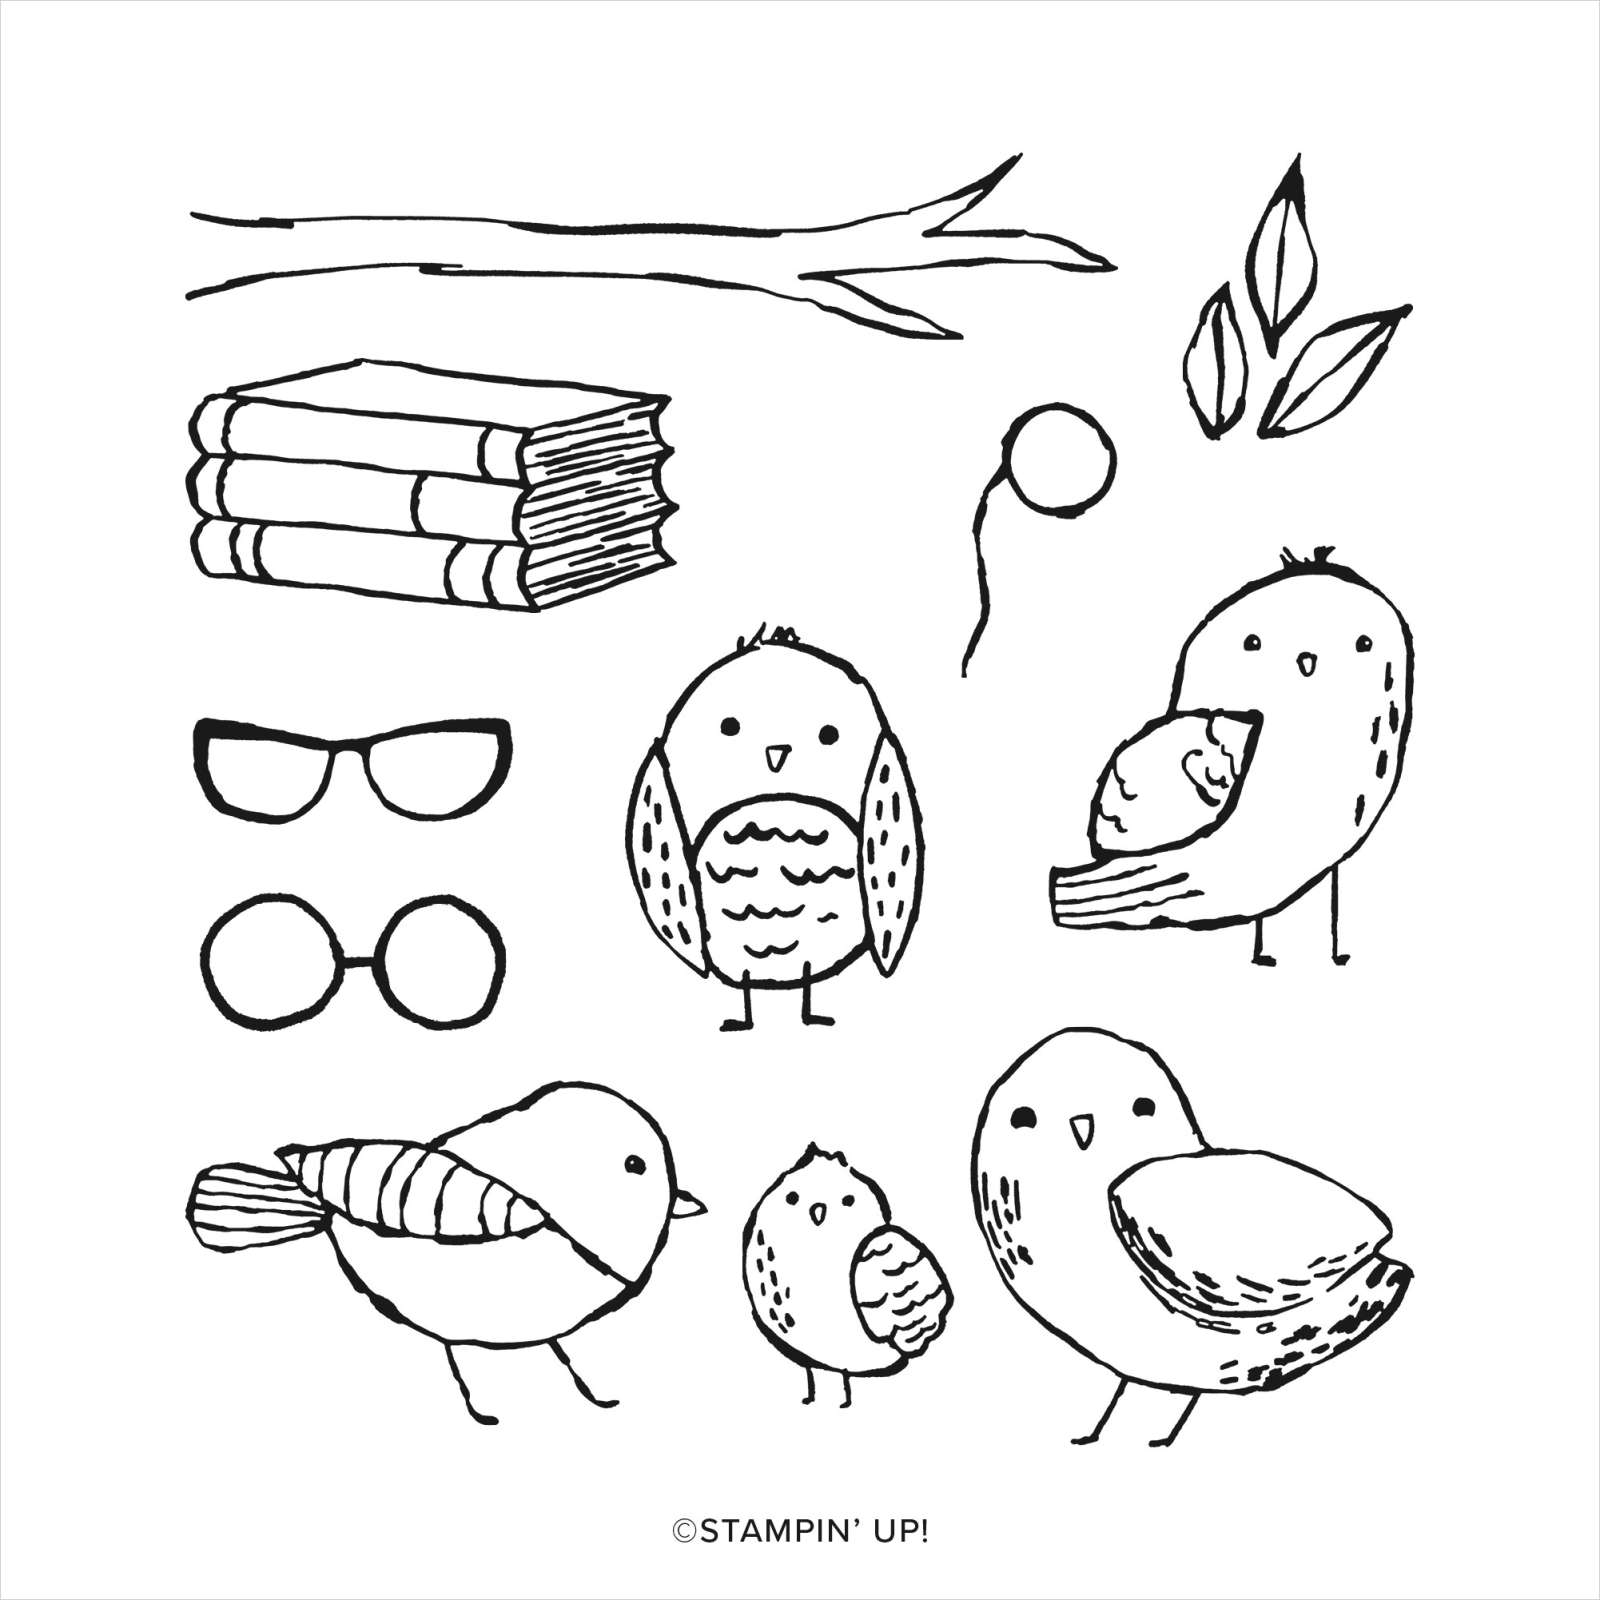
    She used the Circle Sayings bundle for her greeting & punch. The bird is water-colored with our watercolor pencils. 

    She used the new Bird's Eye View stamp set seen here.  She also stamped her envelope.  

    Stop back in for more Team swaps tomorrow! 

    ~~~

    July Specials:

    *Buy two past kits and I'll add a new/retired stamp set to your package.

    There are 7 choices! Go here to shop. 

     ~~~

    Bonus Days!

    Get a $5 coupon for each $50 order you place in July.  Use the coupon in August!

    There's a Clearance Rack update!

    See all items available here

    NEW Online Exclusives 

    See them all here

    ~~~

    My monthly special for online orders:

    Get a free card kit & a new Beautifully Happy stamp set 

    with online orders over $65; must use a host code.

    *current host code: MY4YDGEM

    Leave a Reply

    Your email address will not be published. Required fields are marked *

  • Beautiful One Horse Open Sleigh Fancy Fold in a card kit to go or tutorial; you choose!


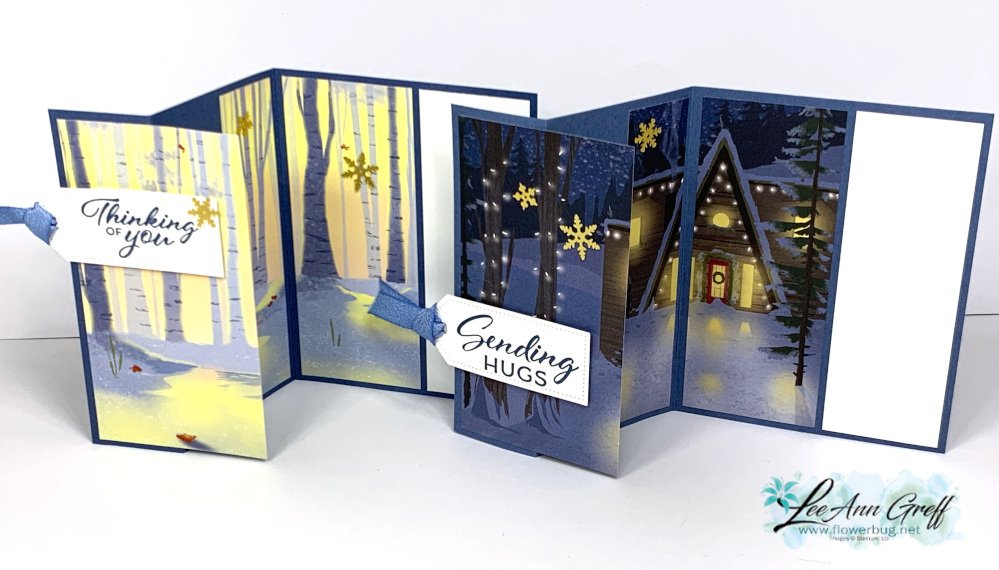
    My second card kit option in July features the new One Horse Open Sleigh 6 X 6" designer paper by Stampin' Up!  This new scenic paper is featured in our Online Exclusives here.  There are 5 designs and each is a fancy fold card.


    *this kit is not included in my July special of purchasing 2 past kits and getting a free stamp set (see below).

    You'll receive the following in the kit, which is sent out at the end of July::  

    •  A share of the 6 X 6" One Horse Open Sleigh Designer Paper
    • A share of Boho Blue ribbon
    • A share of the Adhesive-backed snowflake assortment
    • the pre-cut pieces to make the 10 cards including punched & die-cut pieces
    • the PDF tutorial

    The tutorial includes photos, step by step directions, a supplies list and measurements.  You'll receive the PDF tutorial in an email immediately after payment.  Please check your spam or junk folder. 

    Click here to order this pre-cut kit to go.  Or click here to get the PDF tutorial.  See all of my kit & tutorials here.

    You will need the following to make the kit to go cards as I did:  

    • greeting images
    • Early Espresso, Mossy Meadow & Misty Moonlight inks
    • a paper trimmer and adhesives.  

    Here's one of my favorite cards in this kit/tutorial. I love how it shows off the gorgeous scene in this beautiful designer paper.  


    *I used the Layering Leaves & Lasting Joy stamp sets for my greetings & other images. If you'd like to add on either set at a 10% discount, please message me here.  

    *add on one or more kits and save on shipping. 

    *If you're interested in my July special of purchasing two 'past kits' and getting a free stamp set see them here. This deal runs through Saturday, July 15th. The July kits (Masterfully Made & One Horse Open Sleigh) are not included in this offer. 

    ~~~

    July Specials: 

    Bonus Days!

    Get a $5 coupon for each $50 order you place in July.  Use the coupon in August!

    There's a Clearance Rack update!

    See all items available here

    NEW Online Exclusives 

    See them all here

    ~~~

    My monthly special for online orders:

    Get a free card kit & a new Beautifully Happy stamp set 

    with online orders over $65; must use a host code.

    *current host code: MY4YDGEM

    Leave a Reply

    Your email address will not be published. Required fields are marked *

  • Striking Masterfully Made pre-cut card kit to go; or choose the PDF tutorial option


    I chose to feature the Masterfully Made designer paper as the focus on this July card kit.  There are 5 designs and you'll make 2 of each. Two are fancy folds. 

    *this kit is not included in my July special of buy 2 past kits and get a free stamp set.

    You'll receive the following in this pre-cut kit, which is sent out at the end of July:

    • 1/2 pkg. Masterfully Made DSP (6" X 12")
    • two colors of baker's twine
    • a share of Adhesive-backed sequins trio
    • All pre-cut pieces for the 10 cards including punched & die-cut pieces
    • the free PDF tutorial 

    *This kit is what my monthly subscribers will receive. If you're interested in receiving a kit each month  Click here. My subscribers get a surprise product in their package every few months. 

    The tutorial includes photos, step by step directions, a supplies list and measurements.  You'll receive the PDF tutorial in an email immediately after payment.  Please check your spam or junk folder. 

    The pre-cut kit with tutorial is $28 plus shipping.  See it here. 

    The PDF tutorial is $15; see it here. 

    To complete the cards you will need the following: greeting images, Berry Burst, Pretty Peacock & Navy inks, a paper trimmer for your new DSP and adhesives.  

    I used the Layering Leaves & Gorgeously Made stamp sets for my greetings & other images. You can substitute other stamps.

    *If you'd like to add either one to the kit (or the Gorgeously Made bundle) at an extra 10% off, please message me here and I'll send you an invoice.

    *add on one or more kits and save on shipping. 

    *If you're interested in my July special of purchasing two 'past kits' and getting a free stamp set see them here. The July kits (Masterfully Made & One Horse Open Sleigh) are not included in this offer. 


    ~~~

    July Specials: 

    Bonus Days!

    Get a $5 coupon for each $50 order you place in July.  Use the coupon in August!

    There's a Clearance Rack update!

    See all items available here

    NEW Online Exclusives 

    See them all here

    ~~~

    My monthly special for online orders:

    Get a free card kit & a new Beautifully Happy stamp set 

    with online orders over $65; must use a host code.

    *current host code: MY4YDGEM

    Leave a Reply

    Your email address will not be published. Required fields are marked *


Notice: LeeAnn Greff, Independent Stampin’ Up! Demonstrator, Manager. The content of this website is my sole responsibility as an independent Stampin’ Up! demonstrator and the use of, and content of, the classes, services, or products offered on this website is not endorsed by Stampin’ Up! Copyright 2025