/


Latest Post

Fun Origami Folded Window cards for FB Live Monday!


Have you made an origami folded window?  They're so easy to do!  I'll be making cards like these on Monday night's FB Live 'Stamp with Me' here. 

How does 'Stamp with Me' work?  I share the projects a few days before the Live to give you time to prep your pieces.  You use the paper, stamps & ink you have to stamp right along with me!  

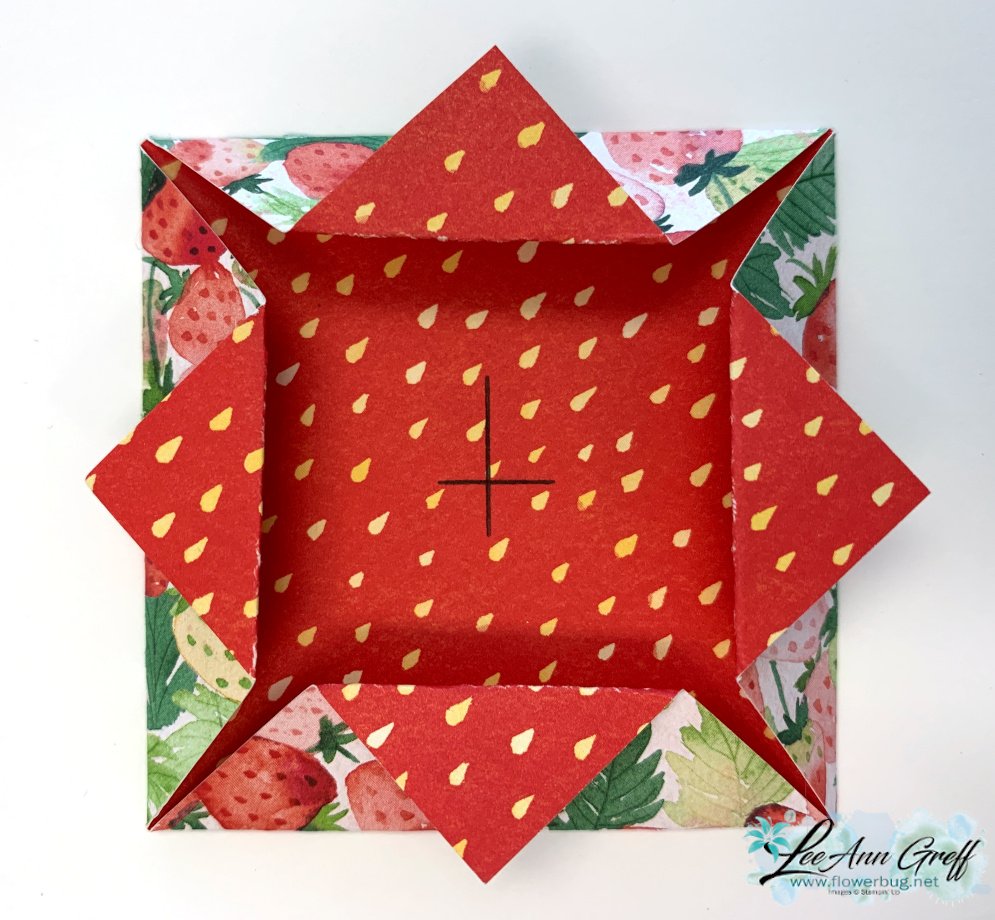
You'll start with a 4" square of Designer Paper.  I chose to use the Berry Delightful paper from the Sale-a-Bration catalog. 

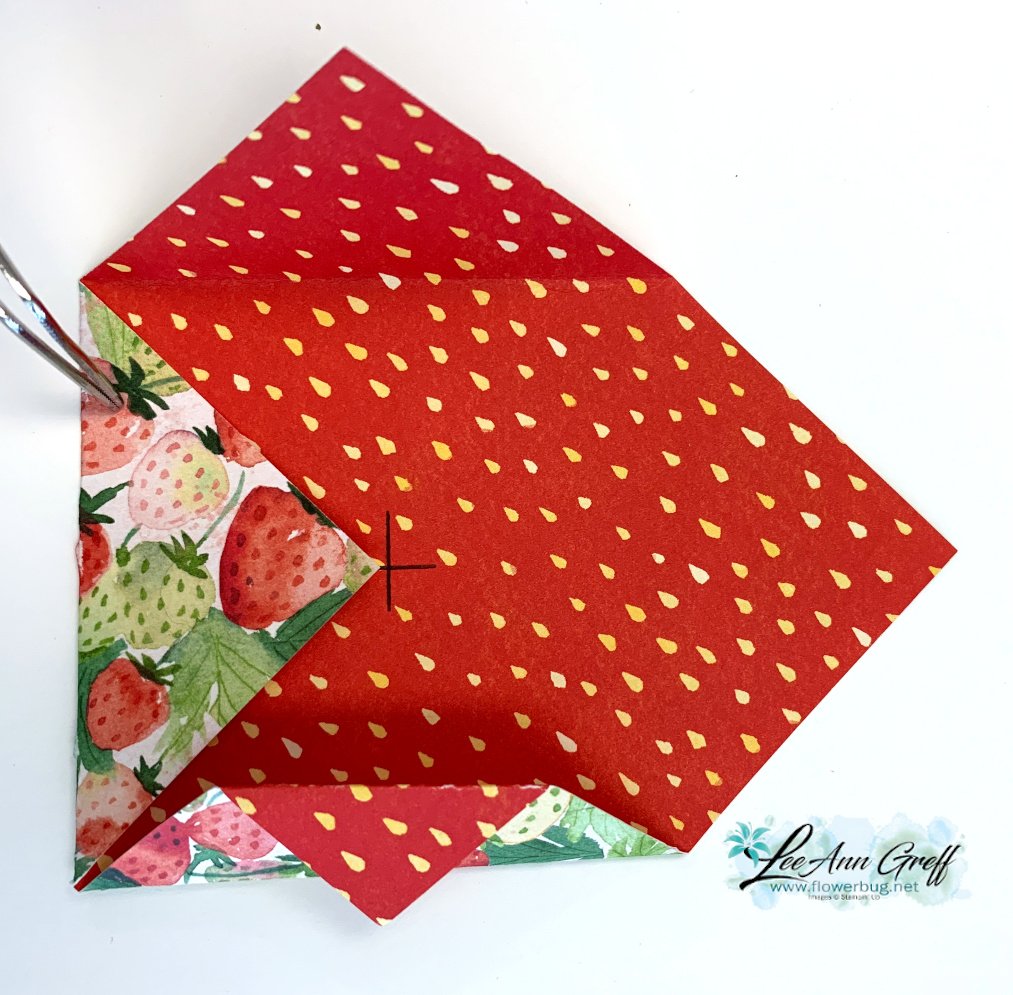
Then you draw an X in the center. Do this by placing a ruler from corner to corner.  Draw a line.  Do the same once more on the other corners.  This X is where you will bring the DSP point up to.  Press well and then fold back the tip to the fold. Do this on all corners!  


It looks like the tip hangs off the corner but it doesn't. I added a layer to some of these measuring 3" square.  If you add a stamped layer inside that is 2 3/4" square. 

The stamps are from the Berry Blessings stamp set; it comes with this super fun designer paper in a bundle.  It's FREE with a $100 order through February 28th.  If you place an order to earn this bundle you'll also receive a free 10 cards kit from me for my 12 X 12" one sheet wonder. See it here. 


Here's the link to this video.

~~~

February Specials:

Get the best deal during Sale-a-Bration with purchase of the Starter Kit!   Get $125 in products of your choice for just $99 and FREE shipping too!  

Plus you get 5 packs of NEW 6" Designer Paper FREE. 


Go here to read about it


~~~

Current Host code is CGSK9YDR

Order online here

All online orders receive both a Hydrangea Hill and Sand & Sea projects PDF!


~~~

Get a package of 150 Resin Hearts from me with an online order over $50 using the host code above. They're adorable and so tiny!

*If your order is over $150 do not use the code; you'll still receive a gift! 

Below are the Multipurpose Glue stands we're making. They're $6 each and available in my Shop here.  

Click here to follow me on Facebook! 

All Posts

  • Frosted Forest silhouette card – so pretty! Free project sheet too


    I'm sharing a gorgeous wintery card that I made on last week's video. I saw a few similar cards online and knew you'd like to see how to make them. 

    It's in Navy & White with a clean, crisp feel to it. Perfect for wintertime or the holidays.  I shared how to assemble this in the video here or scroll down to see it below.  It's a little tricky to get the pieces in place before adhering to the card base.  

    The trees die is from the Frosted Forest dies seen here.  It's part of a bundle with stamps, dies & stencils seen here.  


    The greetings and greeting die-cut are from the Peaceful Season bundle seen here.  I love this bundle!  

    Click on the following link to download or print the free project sheet: Download Frosted Forest silhouette card

    It's hard to see the texture on the White but I used the Snowflake Sky embossing folder on it. The ribbon is our sheer Navy & Gold glittered ribbon in the Annual catalog. 

    Below is the video tutorial for this card and three more!  I share a weekly Live video each Tuesday morning on my Facebook page here. Be sure to follow me on YouTube here. 

    ~~~

    October Specials:

    *current host code link:  3U6NZJFZ or EDFYB333

    Get a share of Woven Golden Leaves  

    ~~~

    Get an extra $30 in your Starter kit in October!  Click here to read more

    ~~~

    The Kits Collection is on sale!  Check it out here.

    ~~~

           All online orders in October will receive a free PDF tutorial featuring the Season of Elegance suite


    Leave a Reply

    Your email address will not be published. Required fields are marked *

  • Unique Frosted Forest bundle shown multiple ways! Free project sheet & video too


    On last week's Live video I shared multiple ways to use the Frosted Forest bundle.  Here are two of the cards I made. 

    I used Granny Apple Green & Shaded Spruce here. I stamped the outline of the trees in Shaded Spruce and then added color by using the coordinating stencils with ink and blending brushes. (Pecan Pie ink is used on the tree trunk).

    Here is an example of the dies with a few coordinating stamps & stencils. 

    See this special stamp, dies & stencil bundle here. 

    I hope you watch the video here or below to see the many ways to create with it. I share a unique way to add extra detail to the large tree. It gives an easy 'leafy' texture. 

    A layered banner greeting across the bottom finished it off nicely. The birds are also included in the bundle. I used Pecan Pie to stamp them and then a blender pen to spread the ink a bit. 

    Here's the free project sheet for these two cards; click on the following link to download or print it: Download Frosted Forest 2 trees cards

    I think the combination of these two colors for these pine trees works wonderfully. 

    Below is the video tutorial for this card and two more!  Be sure to follow me on YouTube here. 

    ~~~

    September Specials:

    *current host code link:  EDFYB333

    ~~~

    It's the last day for free gems in September!


    ~~~

    Check out the new Scrapbooking Line from Stampin' Up! 

    See the Brochure here

    ~~~

    All online orders will receive a free PDF tutorial featuring the

    Splendid Autumn suite

    Leave a Reply

    Your email address will not be published. Required fields are marked *

  • More New Catalog Product displays


    A few week's ago I held my Holiday Catalog open house and I shared a few of the displays earlier. Today I'll share the rest for you. 


    The Season of Elegance suite includes two bundles, the designer paper, an embossing folder, gems and ribbon.  See it all here. 

    The Season of Elegance specialty designer paper was a top seller at the event.  It's stunning! See it here online.

    I created a display for the Christmas Label dies that coordinates with the bundle seen here.  I love these so much!  The dies aren't just for the Holidays! 

    And here are the Peaceful Season dies at are part of the bundle seen here: 

    Next are the Reindeer Days & Sentimental Christmas displays: 

    Most of these are swaps I received; only the two on the right lower edge are mine.  I love swapping – especially to get samples of products I didn't buy and to show styles that are different from mine. 

    Here's a close up of the last display board – Snowy Scenes Suite, Humble Home bundle & Take a Bow DSP:

    See all of the new Holiday catalog products here. There's lots of new & exciting stuff! 

    ~~~

    September Specials:

    *current host code link:  EDFYB333

    ~~~

    Free gems in September!


    ~~~

    Check out the new Scrapbooking Line from Stampin' Up! 

    See the Brochure here

    ~~~

    All online orders will receive a free PDF tutorial featuring the

    Splendid Autumn suite

    Leave a Reply

    Your email address will not be published. Required fields are marked *


Notice: LeeAnn Greff, Independent Stampin’ Up! Demonstrator, Manager. The content of this website is my sole responsibility as an independent Stampin’ Up! demonstrator and the use of, and content of, the classes, services, or products offered on this website is not endorsed by Stampin’ Up! Copyright 2025