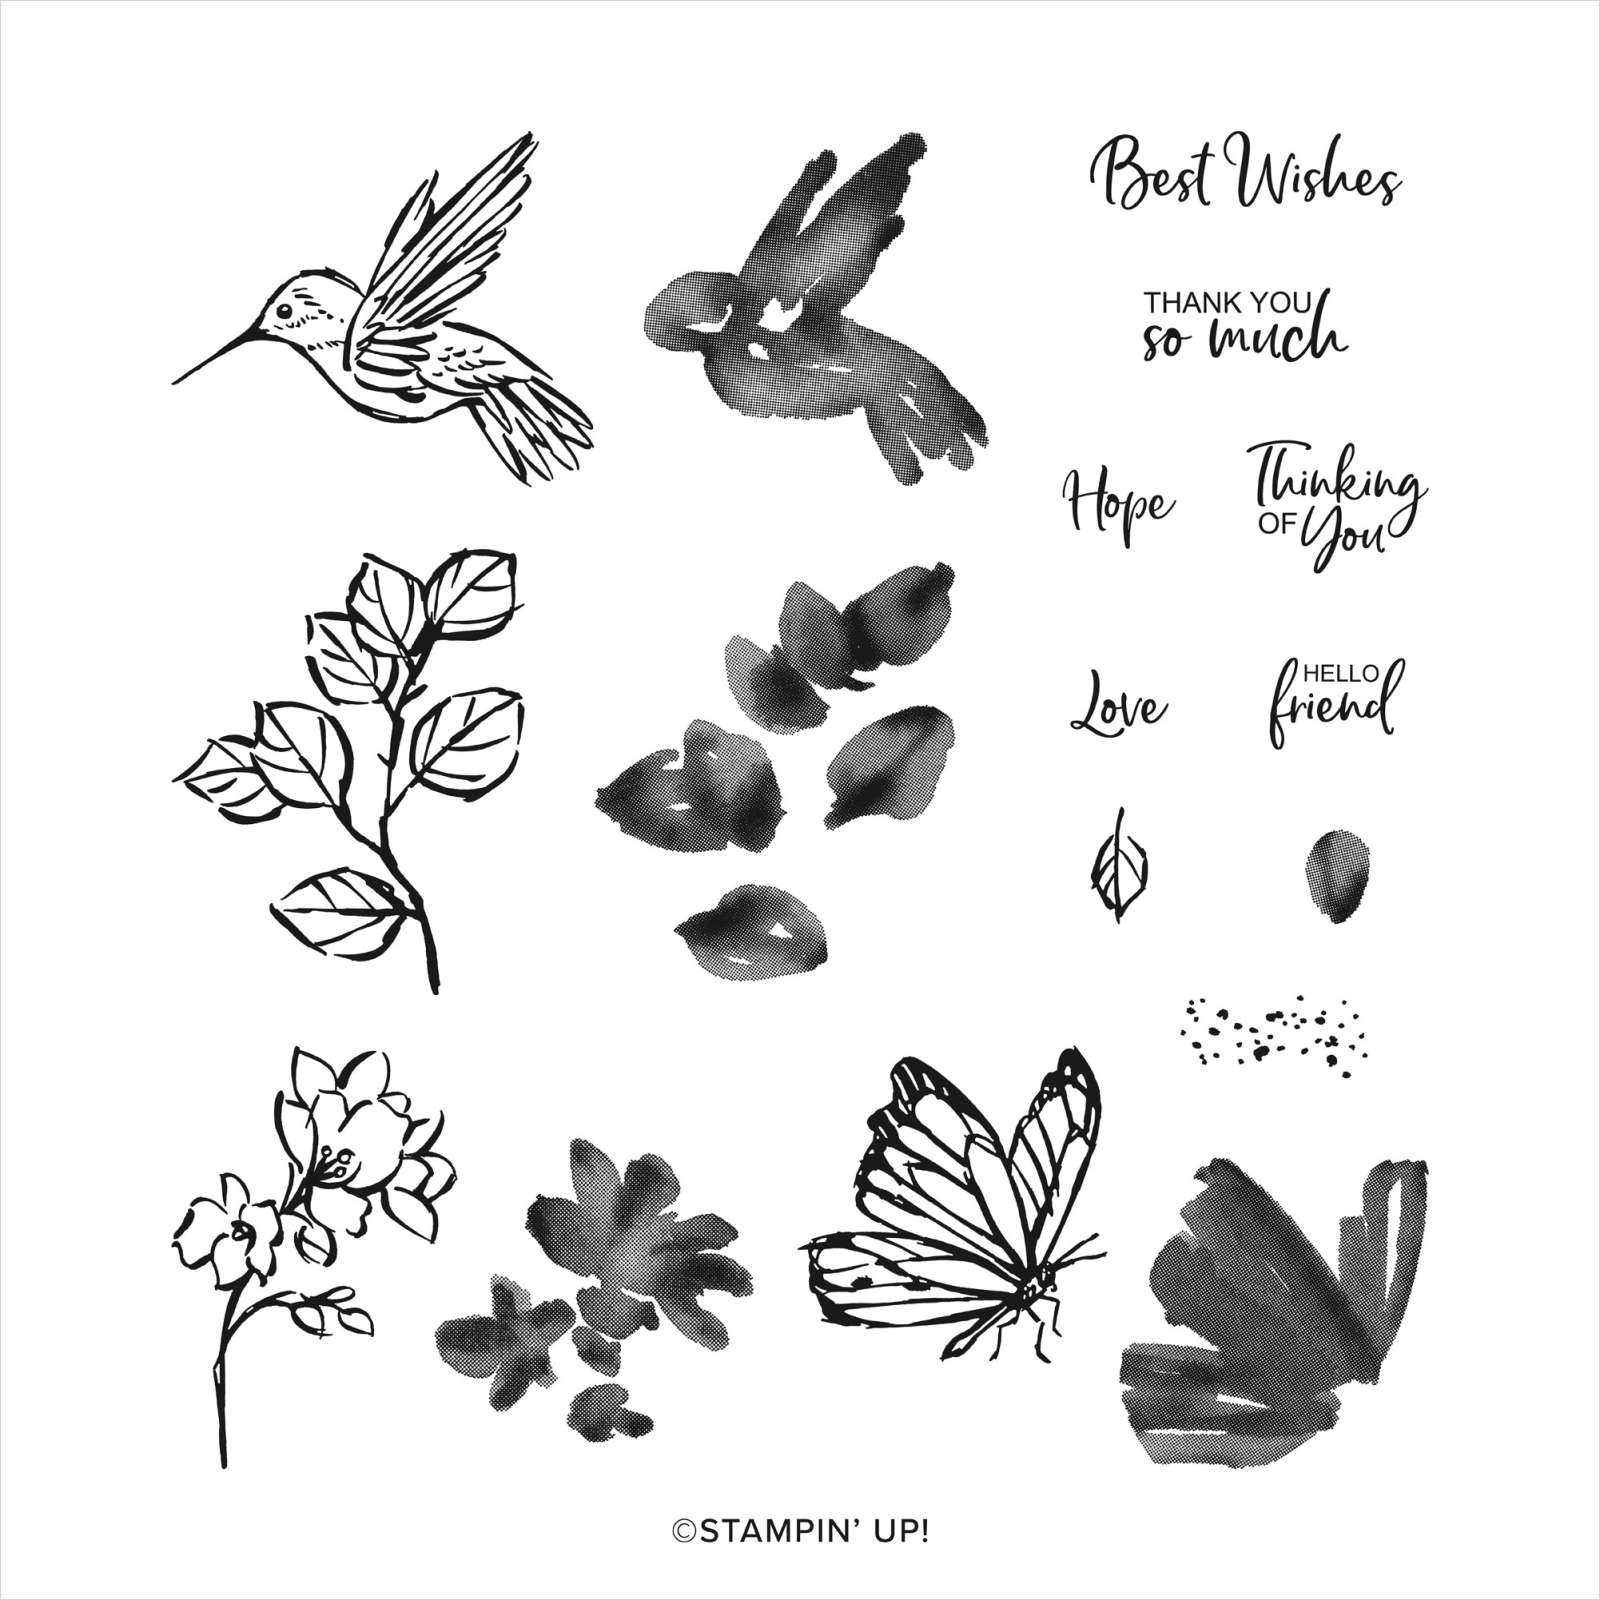
I haven't done a one sheet wonder for awhile and felt like using flowers. I grabbed the Beautiful Friendship stamp set and some of my favorite colors and created these cards:
The pre-cut cards & stamp set are included in my Easy 8 Card Wonder kit to go this month. I want to get it out before Christmas so the time to sign up for it is short; ending on December 14th.
Here's what you'll receive in the kit:
the Beautiful Friendship photopolymer stamp set
the PDF tutorial with photos, directions, products and measurements
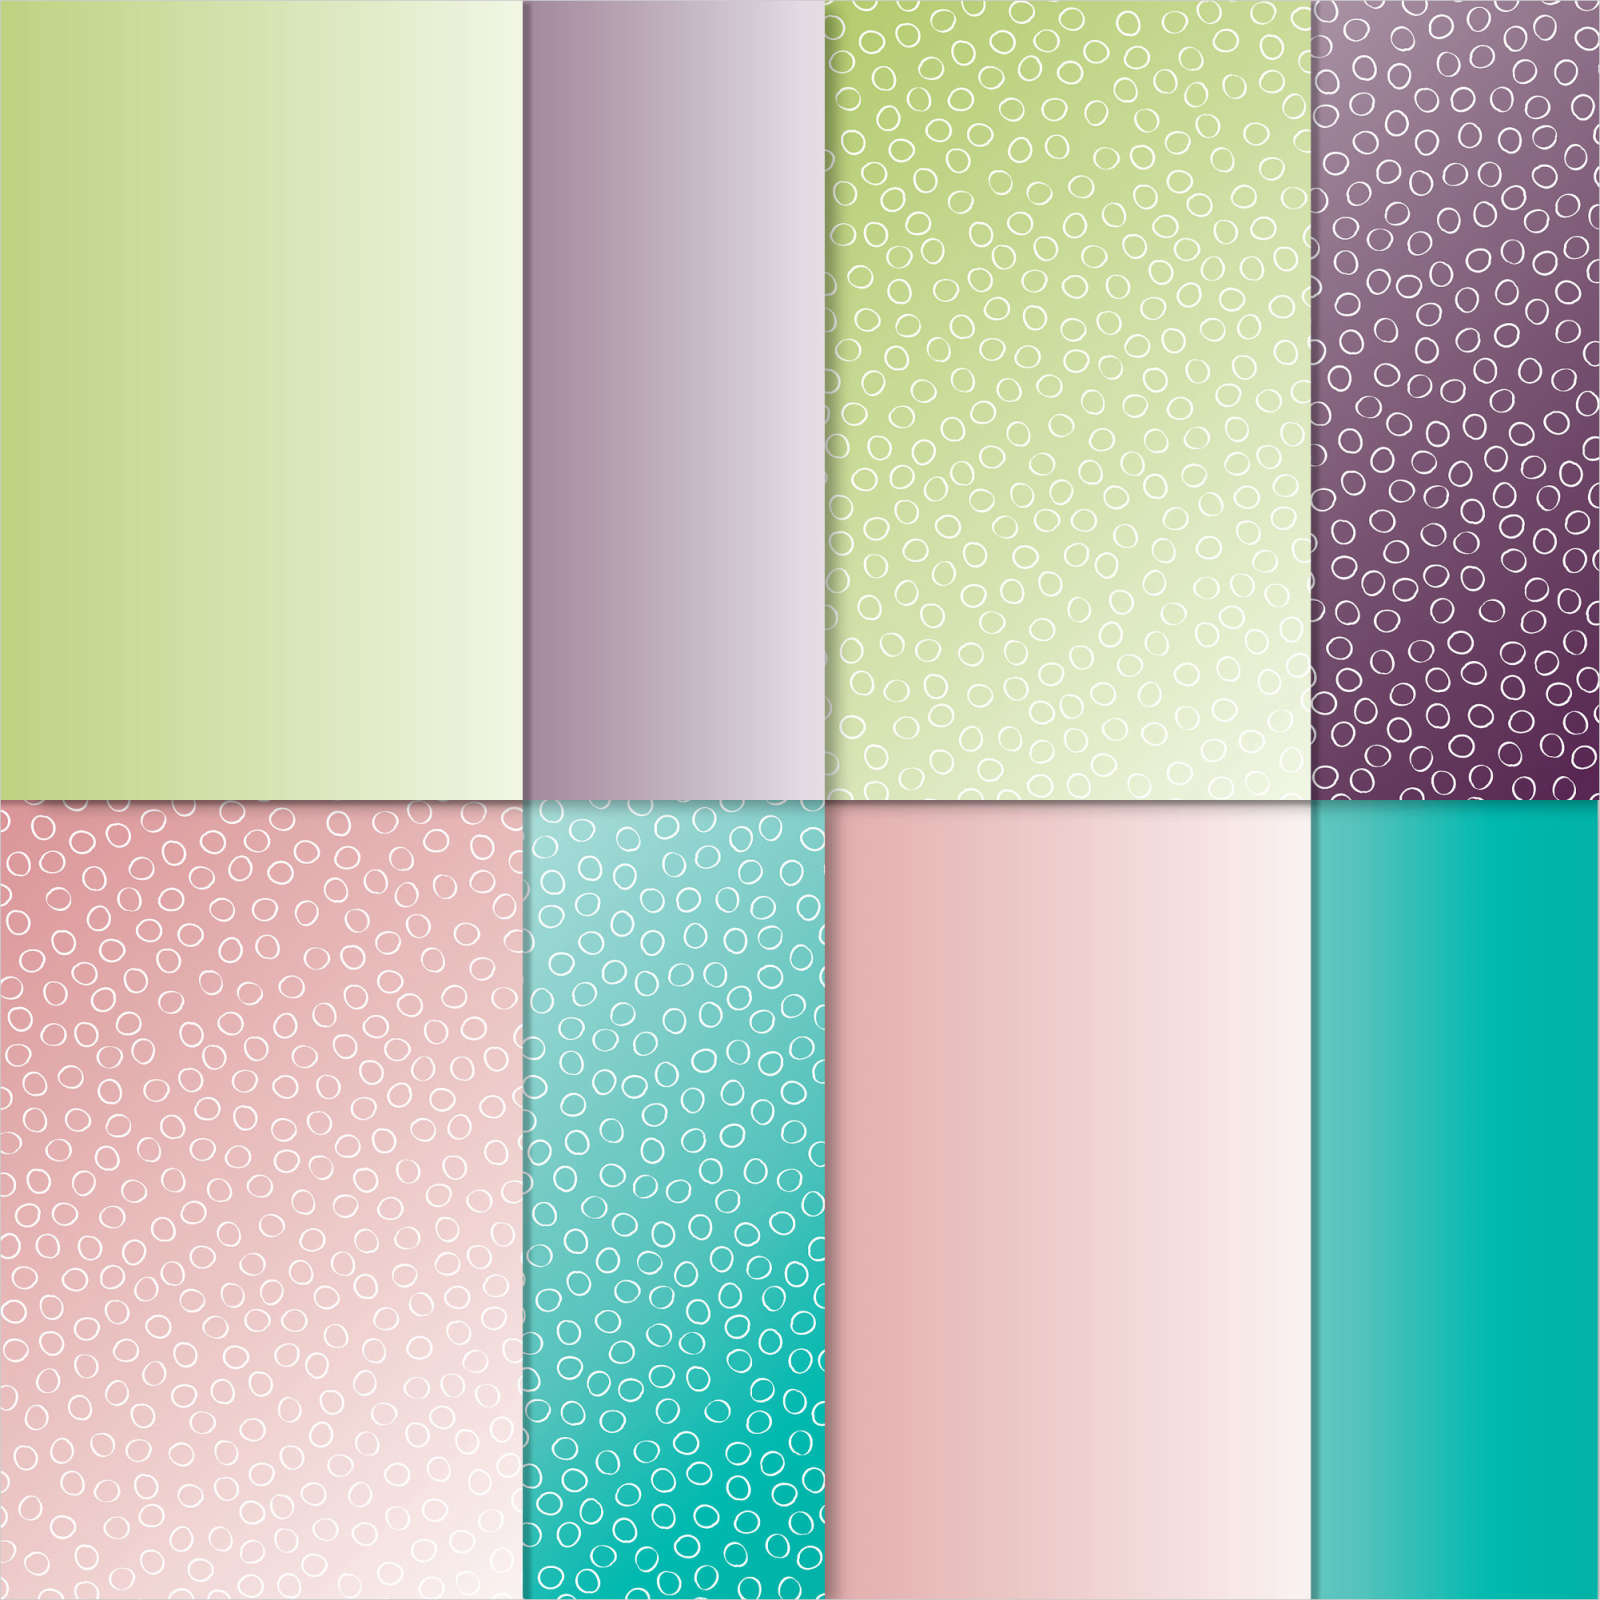
Pre-cut card stock including punched or die-cut pieces and 8 card bases
an 8 1/2" X 11" Whisper White 'wonder' card stock sheet that you stamp on one side and cut on the printed lines on the other.
To finish the cards you will need Navy, Gorgeous Grape, Granny Apple Green & Magenta Madness inks, rhinestones and adhesives. It does not include are stamped images, gems or adhesive.
**It's just $28 plus Priority shipping for this kit including the stamp set!
Be sure to order your kit by December 14th. The kits will be mailed out before Christmas.
**You can save on shipping and order both of my Snowflake Splendor card kits at the same time. See these cards here.
Message me by December 14th to get a combined shipping price at lagreff60@gmail.com.
Earlier this year I made a set of cards featuring the Forever Fern stamp set and offered it as a kit to go also. Here are those cards; they're included in the free Easy 8 Card Wonder tutorial seen here!
Unique ideas with the Oh So Ombre designer paper; Promo ends Sunday!
Here are a few more ideas with the gorgeous Oh So Ombre designer paper. It has been my favorite Sale-a-Bration item this year!
Playing with strips has always been fun for me. On this first card I started with one sheet of DSP and cut it first at 4 1/2" long. Then I cut strips off of the main piece at random angles.
Next I laid these strips on my grid paper and stamped the leaves from Forever Fern stamp set on them using Granny Apple Green ink.
I then glued these strips to a 3 3/4" X 5" piece of White CS leaving a thin 1/16" gap between. I didn't worry about the edges at all. After I was done I trimmed them off even with the main White CS.
Next is a fun card playing with the Playful Alphabet and 1/2" strips of this pretty Ombre paper. I adhered the letters to the end of the paper strip with rolled up mini glue dots and trimmed any excess off that showed around the letter.
More ideas with the Oh So Ombre DSP & A Touch of Ink stamp set; both FREE for just 5 more days!
The end of Sale-a-Bration is nearing and I had to get one more play in with these two amazing products. A Touch of Ink stamp set & Oh So Ombre Designer Paper. Both of these are free with a qualifying order through February 28th.
This sliding latch card is quite unique and fun too. My friend Karen shared it with us at a recent Team meeting and I had to learn how to make it. She found the idea from Chris Slogar. It's so cool!
I chose to use the flower and hummingbird images in this set. I stamped the flower using both the outline and solid images. For the hummingbird I stamped the outline image on a scrap of White CS and colored it in with Blends markers. Then I fussy cut it out and added to the circles.
I chose to use the Granny Apple Green and Bermuda Bay papers and inks here. Watch the video below to catch my matching tip to connect the four stamped leaf images perfectly.
A Touch of Ink Fun Fold card with Oh So Ombre; quick & easy!
We made these pretty fun fold cards at my February card clubs! I think the A Touch of Ink stamp set is incredibly versatile! There was an option for everyone's needs.
Aren't they pretty?! I feel like these two Sale-a-Bration choices go together perfectly. The Ombre DSP lets the stamp shine though. You can get either or both free with an order through February 28th. Sale-a-Bration ends then and there won't be anymore 'free' with purchase options.
Go here to see the A Touch of Ink stamp set and here to see the Oh So Ombre DSP.
I added some of our new Black Matte gems and the pretty Black Glittered ribbon too. That neat stitched die-cut is from the Stitched Nested Label dies seen here.
Designer Paper – 5 1/2" X 6". Cut in order from left to right so the pattern matches making sure the 6" side is along the top. 2 ¾” X 5 ¼”, 1 1/8” X 5 ¼”, 2 1/8” X 5 ¼”. Plus the last piece on the right is 1 3/4" X 5 1/4"
White inside 2 3/4" X 3 1/2", die-cut is 2" X 3 3/4"
Black strip 1" X 2 3/4"
~~~
February Specials:
There's just 5 days left of Sale-a-Bration and the Starter Kit promotion!
Get over $200 in product for just $99 and free shipping. The current bonus is 5 packs of NEW 6" Designer Paper FREE.
Notice: LeeAnn Greff, Independent Stampin’ Up! Demonstrator, Manager. The content of this website is my sole responsibility as an independent Stampin’ Up! demonstrator and the use of, and content of, the classes, services, or products offered on this website is not endorsed by Stampin’ Up! Copyright 2025
Leave a Reply