/


Latest Post

Desert Details WOW card


I spent time playing with the Delicate Desert suite and this is what I came up with: 

I LOVE how it turned out!  I really wanted to use the Dry Brushed specialty paper along with the Desert Details bundle seen here.  The dies in it are so cool! 

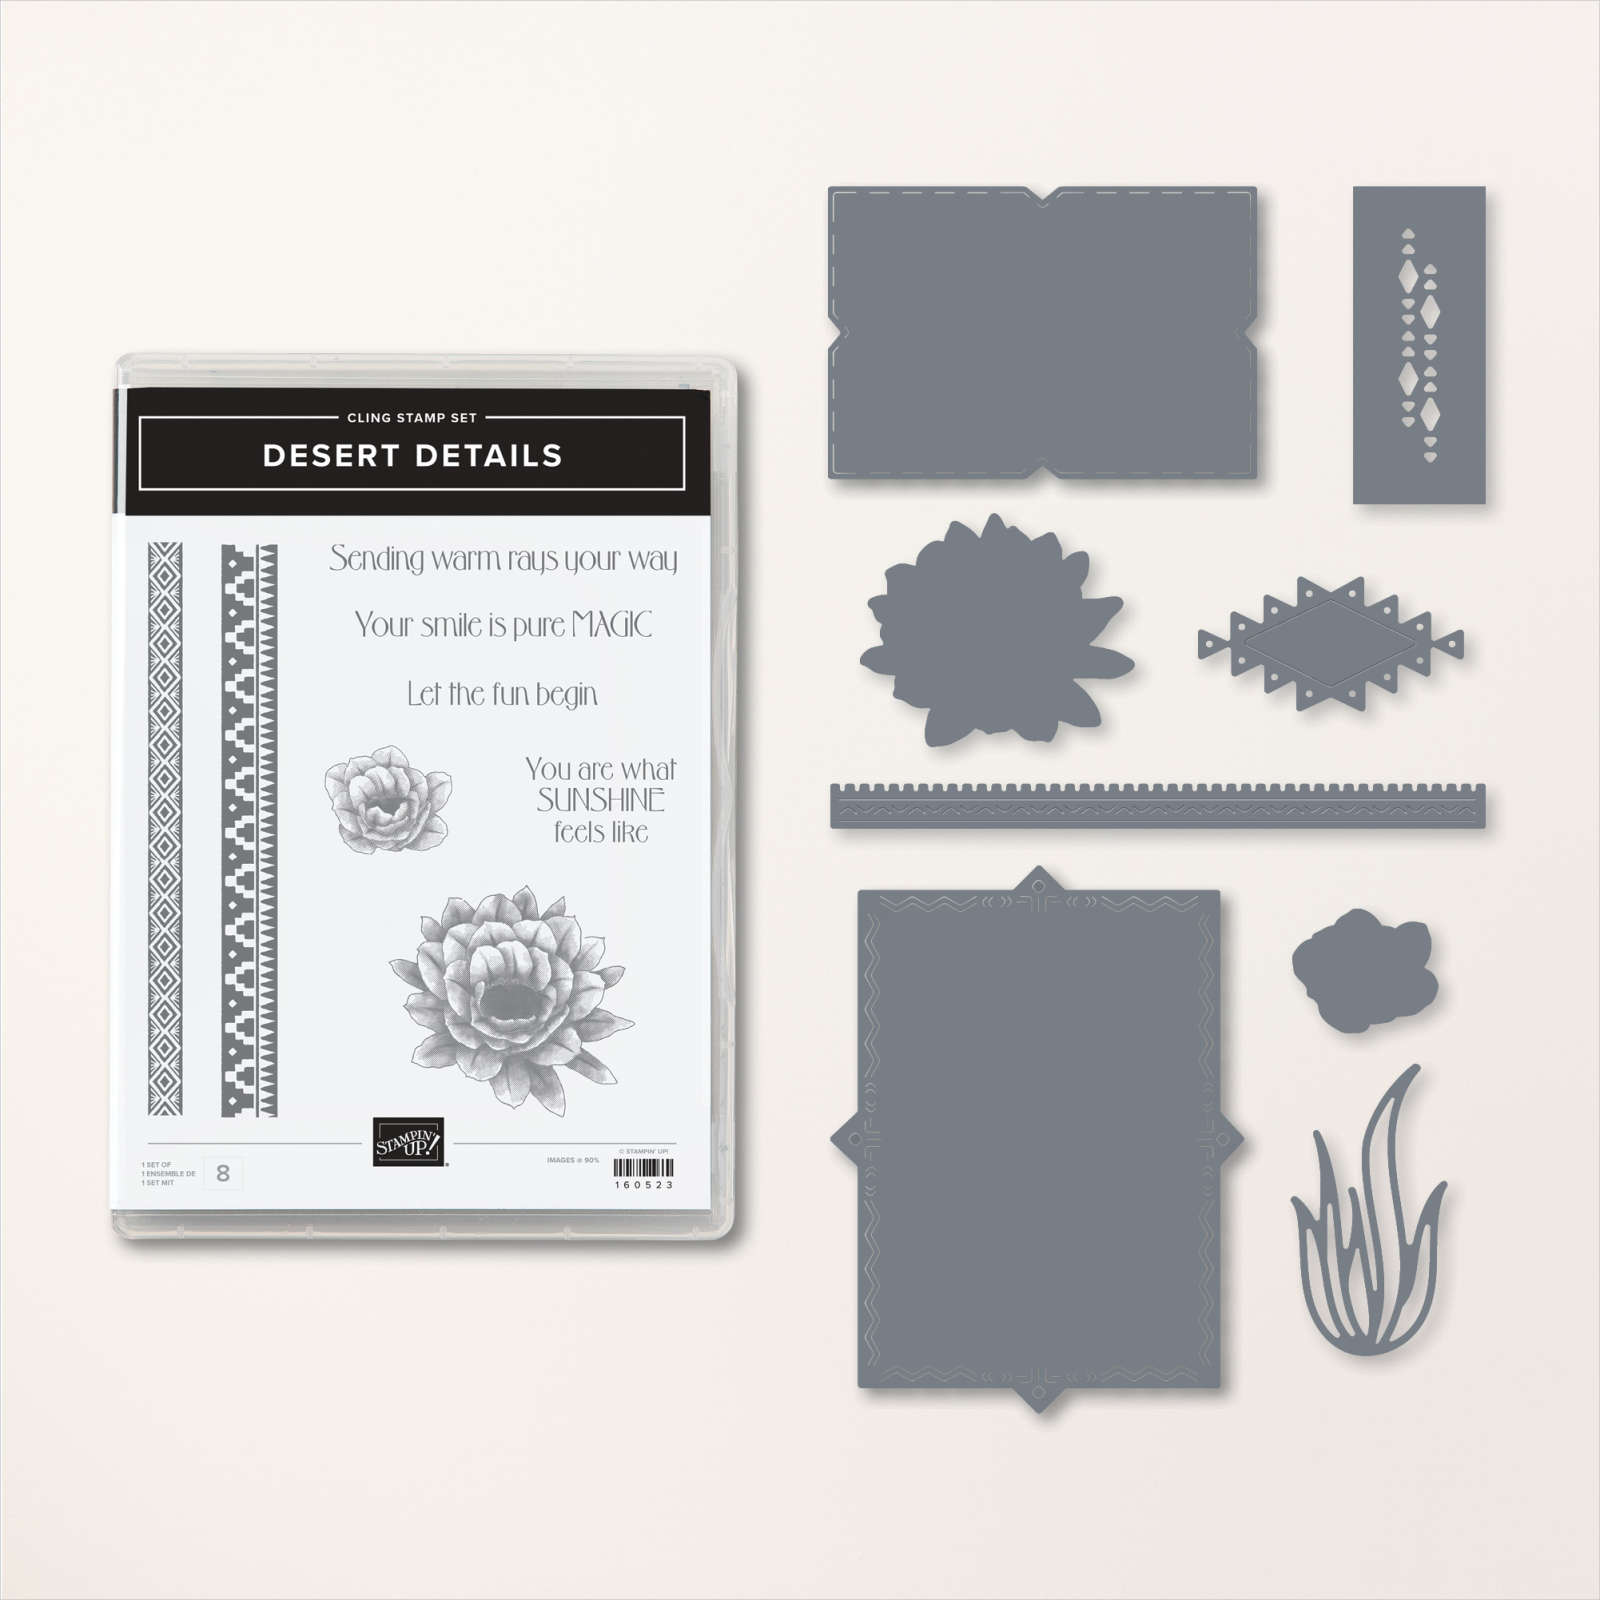
The two large rectangles and dies for the stamped flowers are just a few of the dies included.  

My colors include Petal Pink & Soft Succulent. I cut two of the open leaf dies from the center of the Dry Brushed large shape, leaving the outer frame intact. No one but me knows there are empty spaces under the White layer! 

You can see the Dry Brushed metallic specialty paper here.  It's simply stunning!  

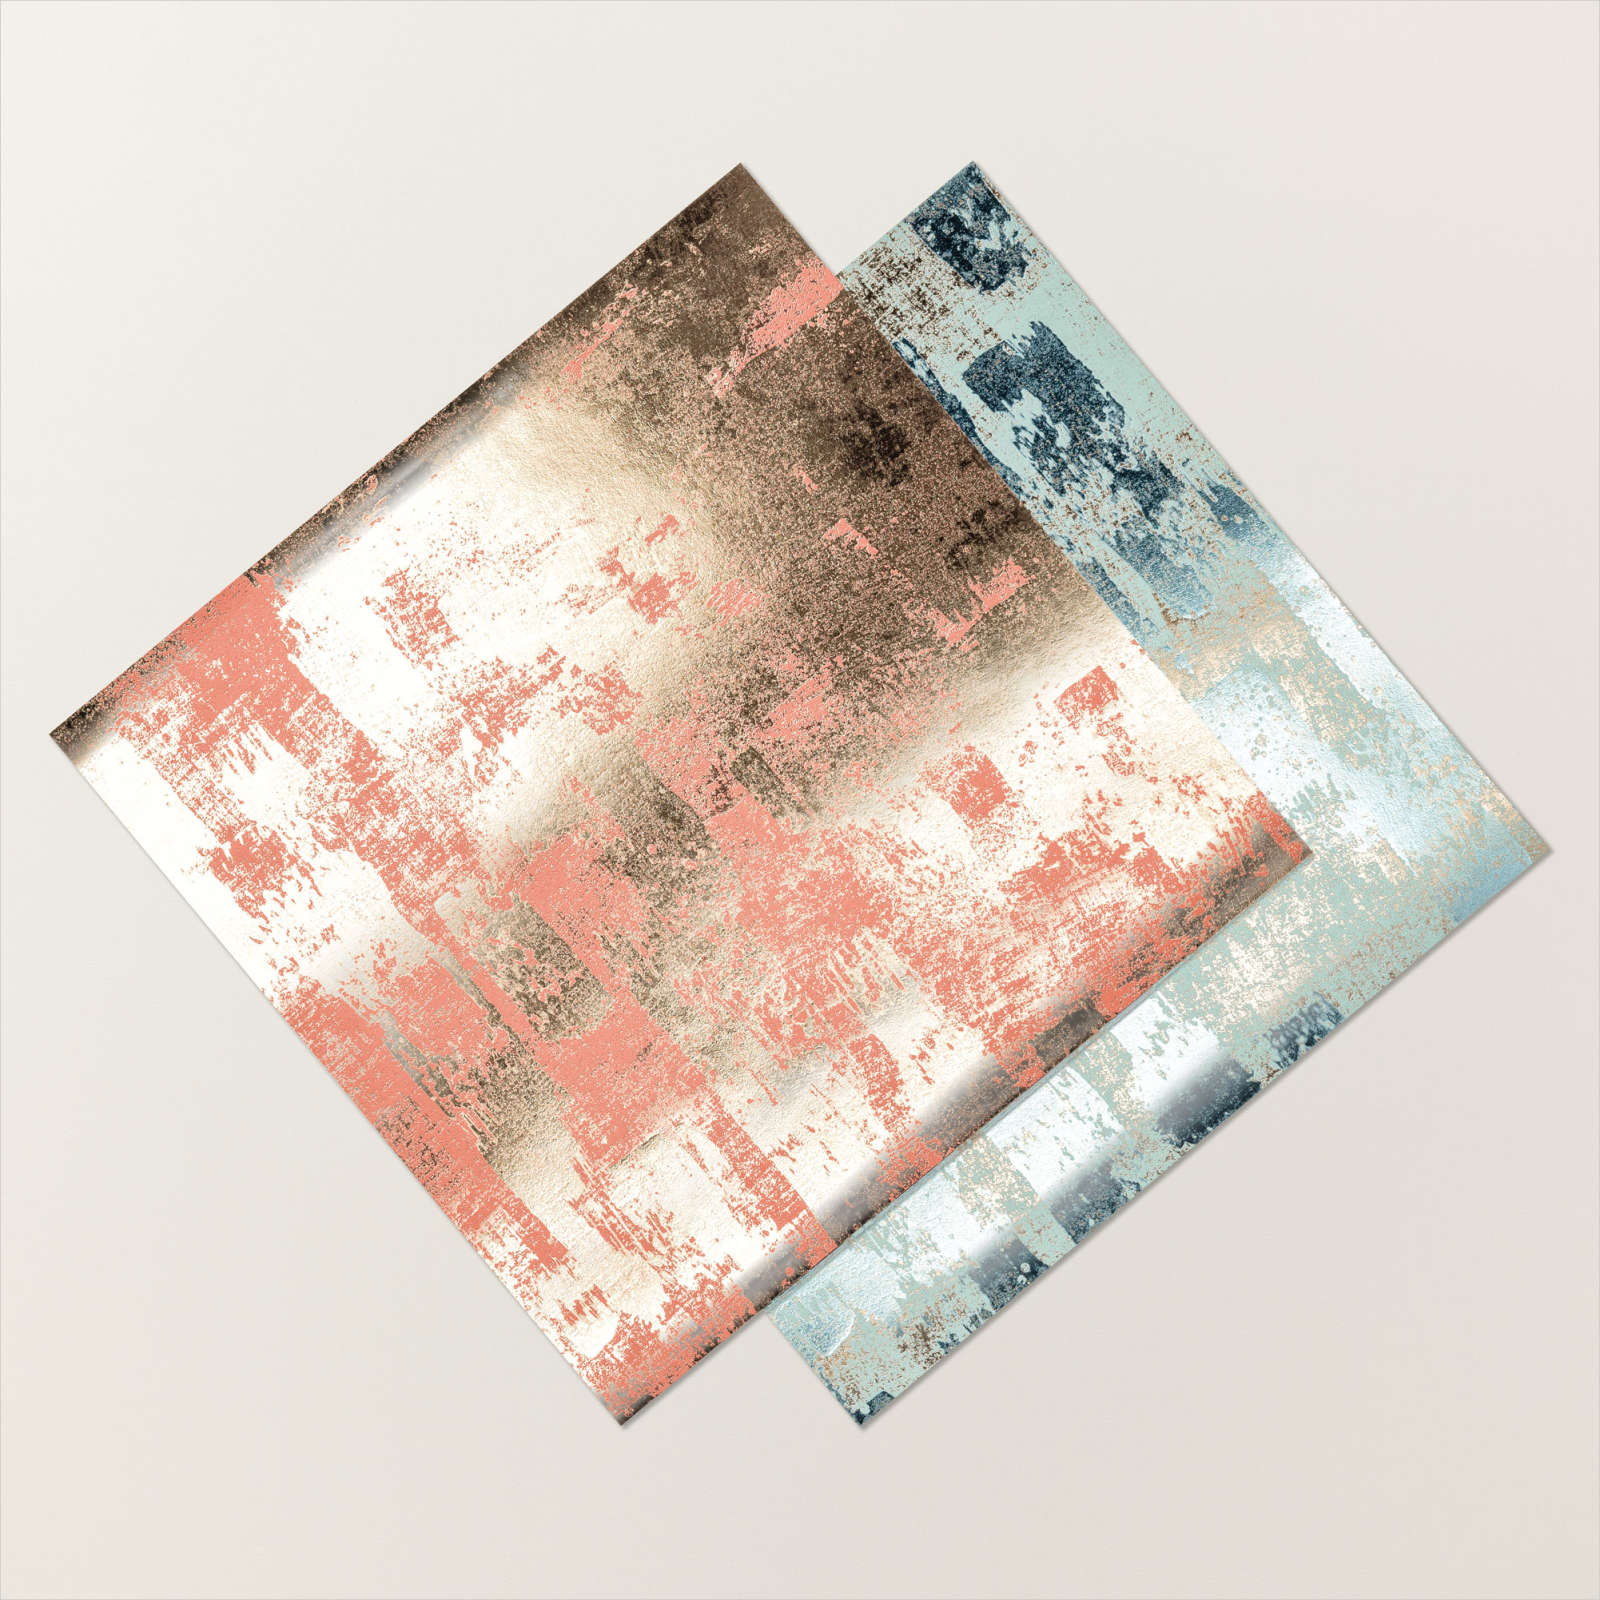
There are two of each sheet in this package of 12" metallic paper for $8. 

I added a few of the Gold Faceted Adhesive-Backed sequins on this card too.  They're also part of the Delicate Desert suite seen here.  

I hope you enjoyed this project; it came together so easily.  

~~~

Sale-a-Bration & the Spring Catalog!


Order online using the links below:

January Host code links: FYRQ94HR or 69GXSA3B

Get free Pastel Sequins with online orders over $55 when using the host code above! 

 Earn free products with my loyalty rewards! 

Click here to download yours and earn a $50 shopping spree!

~~~

Best Deal Ever on the Starter kit here!

Choose $175 in products for just $129 plus the new mini machine!

Or choose $175 for $99 without a new Mini.  AMAZING!

All Posts

  • Abstract Beauty; my January card kit to go with a PDF tutorial option too!


    I chose this gorgeous Abstract Beauty specialty designer paper for my January class kit to go because it's filled with striking colors & patterns.  I created these fun & unique cards; most of which are fun folds! 

    This kit to go includes all pre-cut pieces for 10 cards plus approximately $20 in Stampin' Up! product; 1/2 pkg of Abstract Beauty 4 X 6" specialty designer paper, some Just Jade & Gold ribbon & a share of Brass Butterflies. You'll get the PDF tutorial FREE (valued at $15). 

    The PDF tutorial is emailed to you immediately after payment from my Shopify site.  Check your spam or junk folder. 

    Order by January 17th. The kit to go will ship out in late January via Priority Mail. 

    I used the Slim Saying stamp set for my greetings.  Add it on and I'll include it with your kit at 10% off. Message me here for a PayPal invoice. Otherwise use a greeting set you already own. 

    I also used these inks: Just Jade, Black, Misty Moonlight, Crushed Curry, Balmy Blue & Versamark.  You will also need White embossing powder if you want to make your cards exactly like mine.  

    Click here to order the pre-cut kit to go.  It's the best value at $28 plus shipping. 

    Click here to get the PDF tutorial for $15.

    This is the kit my monthly subscribers will receive.  I have a second kit available here but it's in short supply.  See all of the available kits here.  You can purchase two or more and save on shipping! 


    ~~~

    January Specials:

    Host codes:  T9YW6QCC or S9WGFH9Z

     *click here to order 

    Use the host code above & get free Iridescent Rhinestones with

    a $50 order in January, 2022! 

    Free Heart & Home PDF projects with any online order!


    Leave a Reply

    Your email address will not be published. Required fields are marked *

  • Easy idea with your leftover paper strips with Artfully Layered


    I had a bunch of leftover Just Jade card stock strips I was determined to use. I believe it was from a fun fold card I offered in one of my kits to go. Luckily inspiration struck and I created this neat card for an online swap I participated in.  I love it! 

    I used the new bundle called Artfully Layered stamping the largest leaf multiple times in Just Jade ink.  The botanical images, dies and super fun greetings in this bundle were one of my top picks from the new 2022 Jan-June Stampin' Up! catalog.  You can see this bundle here. 

    Each of the strips are 1" X 3 1/4" and they are adhered to a White piece measuring 3 3/4" X 5".  I adhered them so they did not match up purposefully.  You could also stamp them as shown and place them onto the card in order.

    Simply add a greeting and a punch or die-cut.  I LOVE when I can use leftovers to create wonderful cards easily.  

    The greeting die-cut is from the Beautiful Shapes dies seen here.  They include circles, hexagons, a few odd shapes & triangles.  They're fun, modern & unique! 

    ~~~

    January Specials:

    Host code:  T9YW6QCC

     *click here to order 

    Use the host code above & get free Iridescent Rhinestones with a $50 order in January, 2022! 


    Leave a Reply

    Your email address will not be published. Required fields are marked *

  • Swedish Stars in both Shimmer Vellum & Simply Marbelous Designer Paper with easy video tutorial


    Have you seen some of these fancy folded stars online and thought you could never make them?  Well this one is so much easier than it looks and I made them on a FB Live recently.  

    Honestly they are quite easy.  Basically you need a 6 X 6" piece of Designer paper – twelve 1/2" X 6" strips to create them.  I did add a medallion in the center but it's not necessary at all.  Here I used the brand new Simply Marbelous designer paper from the new Sale-a-Bration catalog.  It's available in 6 different colors and absolutely gorgeous!!

    I also made a few in our 2021-23 In Color Shimmer seen here & Gold Shimmer vellum seen here. I used snowflakes from the So Many Snowflakes dies in the Stampin' Up! Annual Catalog.

    You can see the video below; I share these beautiful Swedish stars as well as a two cards featuring a brand new stamp set; Calming Camellia! 

    ~~~

    January Specials:

    Host code:  T9YW6QCC

     *click here to order 

    Use the host code above & get free Iridescent Rhinestones with a $50 order in January, 2022! 


    Leave a Reply

    Your email address will not be published. Required fields are marked *


Notice: LeeAnn Greff, Independent Stampin’ Up! Demonstrator, Manager. The content of this website is my sole responsibility as an independent Stampin’ Up! demonstrator and the use of, and content of, the classes, services, or products offered on this website is not endorsed by Stampin’ Up! Copyright 2025