Stamp the curvy trees image on the White CS using Shaded Spruce ink. Color the trees with a Light Shaded Spruce Blends marker. Add a tiny star using Cherry Cobbler ink on one tree. Adhere it to the Cherry Cobbler layer and to the main card.
Punch out three pieces of Classic Christmas designer paper with the Postage Punch seen here. Adhere to the White CS.
Stamp the greeting in Cherry Cobbler ink on a 1/2" strip of White CS. Punch the ends with the Banners Pick a Punch. Add it to the card with mini dimensionals.
Finish with a few Holiday rhinestones.
You can see this stamp set here; it's only available through January 4th. And the Classic Christmas Designer Paper is herewhile supplies last.
Remember that everyone who orders any of these products or places an online order with me in November will receive a free 22 project PDF tutorial featuring the Curvy Celebration products!
That pretty Gold paper is part of the Fine Shimmer Specialty paper in the Spring catalog. It has 2 each of 3 colors including Gold, Soft Succulent & Fresh Freesia. See it here.
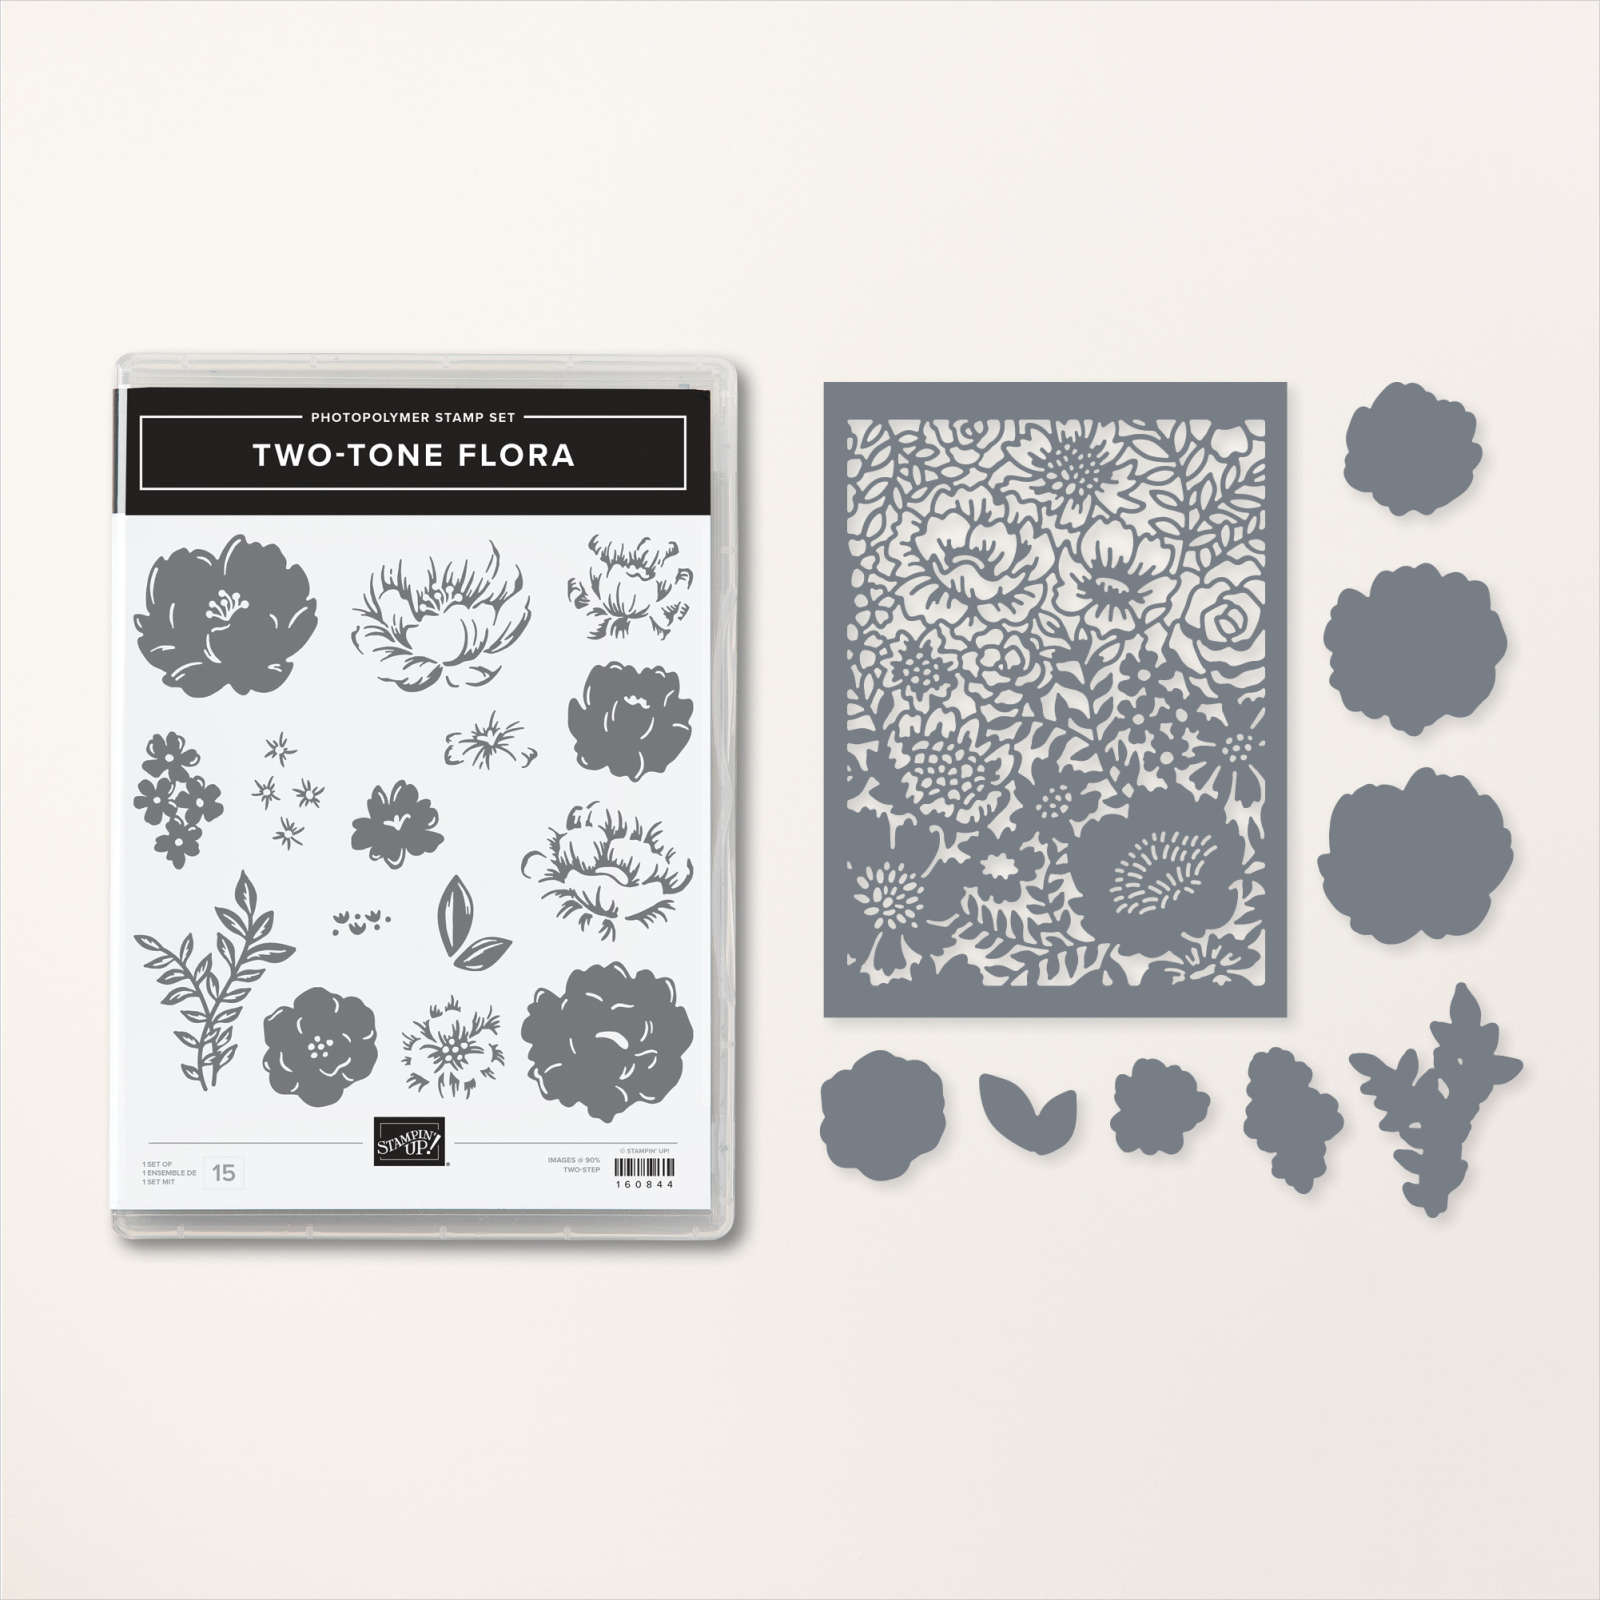
I stamped a few flowers and leaves from the bundle and die-cut them out with the coordinating dies. Then I added a 1" strip of Soft Succulent to anchor the flowers and the die-cut greeting onto. The greeting is from the Framed Florets stamp set.
Below is a photo of the bundle; it's a 2-step stamp set which means there are two images that match and are meant to be stamped over each other. One is a solid image and the other is a detailed image. You can stamp both with the same ink, the solid in a lighter hue (stamp off once first) and the detailed image over it without stamping off.
Some people stamp the solid image first and add the detailed over it. I found it easier to stamp the detailed first as it's a darker ink and more difficult to see through. Try it both ways to see what works for you.
This pretty bundle qualifies you to receive a free Sale-a-Bration choice if purchased during February. See all of the choices here.
Next is a gorgeous card featuring this same bundle but also adding in the Fancy Flora DSP. See it here. The patterns remind me of palette painting and the color combos are amazing! The Stampin' Up! artists are incredibly talented.
I added a bit of the new Navy Bordered ribbon from the Spring catalog and a stitched circle die-cut from the Stylish Shapes dies. These dies are so popular they cannot keep them in stock. They are currently in low inventory 'again'!
They've updated the Clearance Rack with more products! Including stamp sets! But beware that many are in French. Be sure you get English if you want it. See it all here.
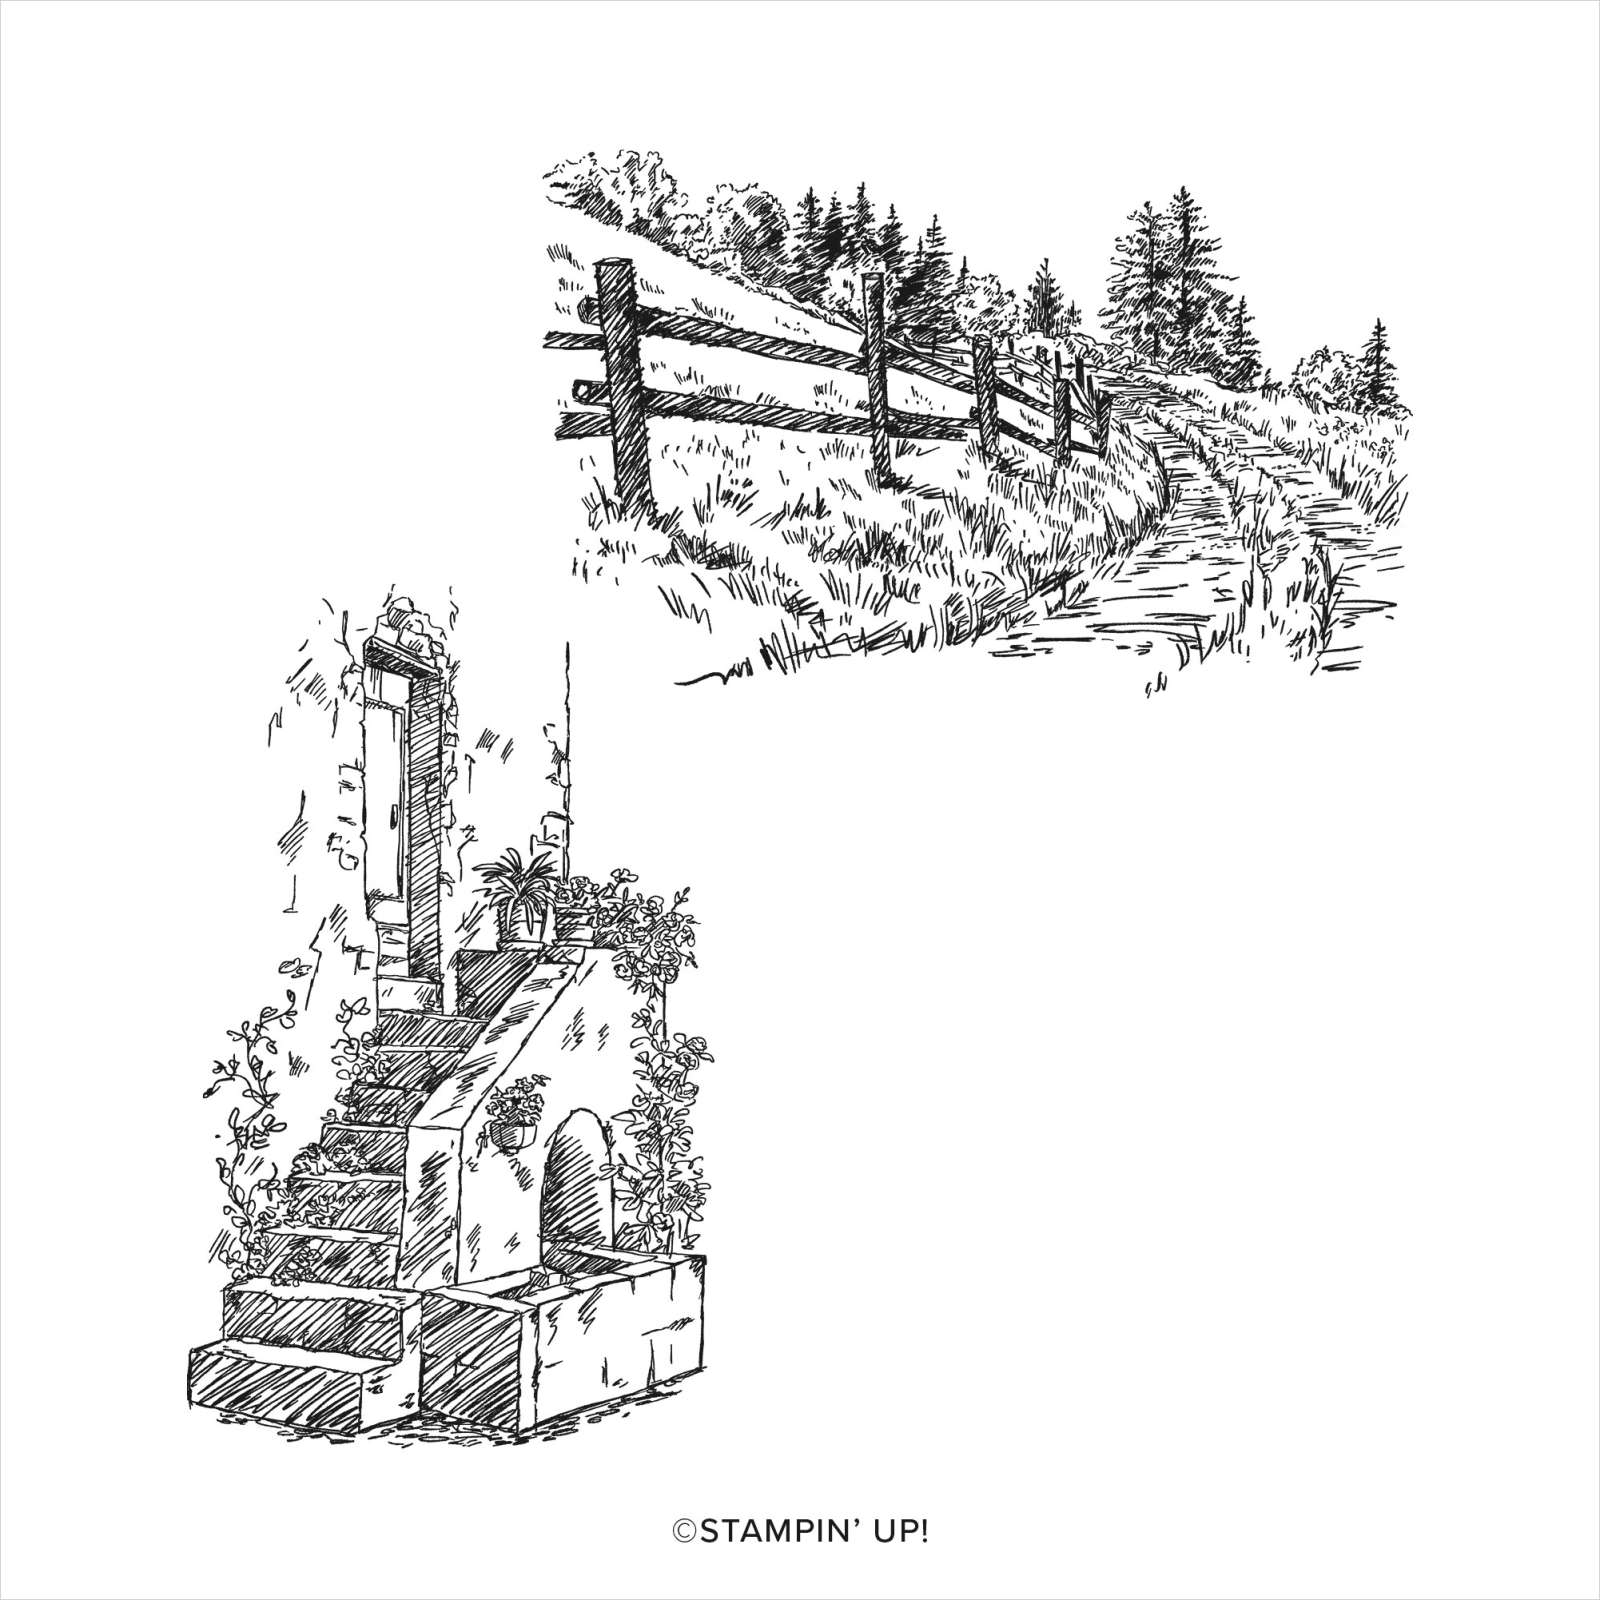
I made this pretty card using the In the Country stamp set from our Sale-a-Bration promotion. It's called a Triptych layout. It's a great way to showcase a detailed stamp set.
Notice: LeeAnn Greff, Independent Stampin’ Up! Demonstrator, Manager. The content of this website is my sole responsibility as an independent Stampin’ Up! demonstrator and the use of, and content of, the classes, services, or products offered on this website is not endorsed by Stampin’ Up! Copyright 2025


Leave a Reply