/


Latest Post

Corner Bouquet Triple Panel card & a tour of my studio & new catalog launch video


Tuesday I held my new 2021 New Catalog Launch party and shared a virtual tour of my studio and Sale-a-Bration & Spring project displays.  I did have a little issue with a catch in my throat at the end but most of it's good.  Ha! 

Below is a fun card showing you a way to use a large stamped image.  You can do it two different ways:

Stamp first and then cut into three strips.  Or cut into strips, arrange together and stamp all at once.  This is what I did using my Stamparatus so I could re-stamp a few times for a nice dark image.  I've sure been using my Stamparatus a lot lately.  Do you have one?  It's so helpful! 
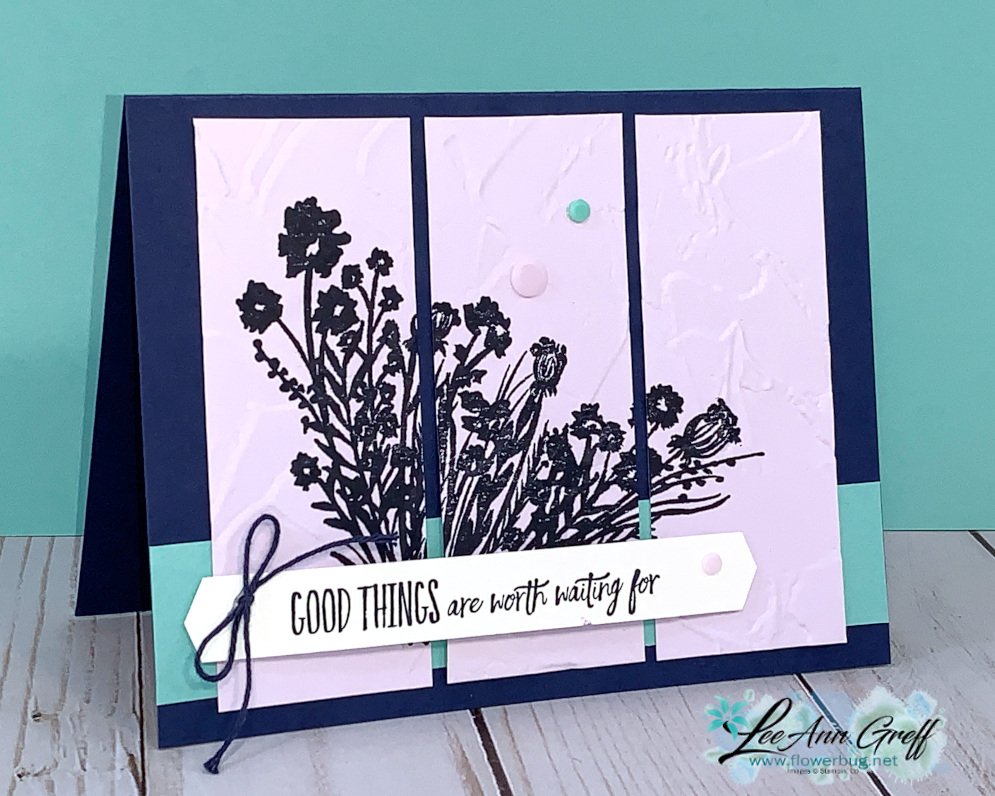
After I stamped the main image I let it dry a bit and then ran all three strips through the die-cutting machine to add texture.  I used a brand new 3D embossing folder called Painted Texture. 

These colors are Purple Posy, Night of Navy & Coastal Cabana.  I was inspired to combine these colors by one of our designer paper packs in the Annual Catalog called Playing with Patterns. 

The greeting is from the Enjoy the Moment stamp set in the new 2021 Spring Catalog. 

~~~

January Specials: 

Choose the Starter Kit for $99; pick out $125 in product of your choice!

During Sale-a-Bration you get 5 packs of NEW 6" Designer Paper FREE! 


Go here to read about it

~~~

Current Host code is JQAFYSUW

Order online here

Get a package of 200 Pastel Pearls from me with an online order over $50 using the host code above.

*If your order is over $150 do not use the code; you'll still receive a gift! 

Below are the Multipurpose Glue stands we're making. They're $6 each and available in my Shop here.  

All Posts

  • Harvest Meadow Fun Fold cards kit to go


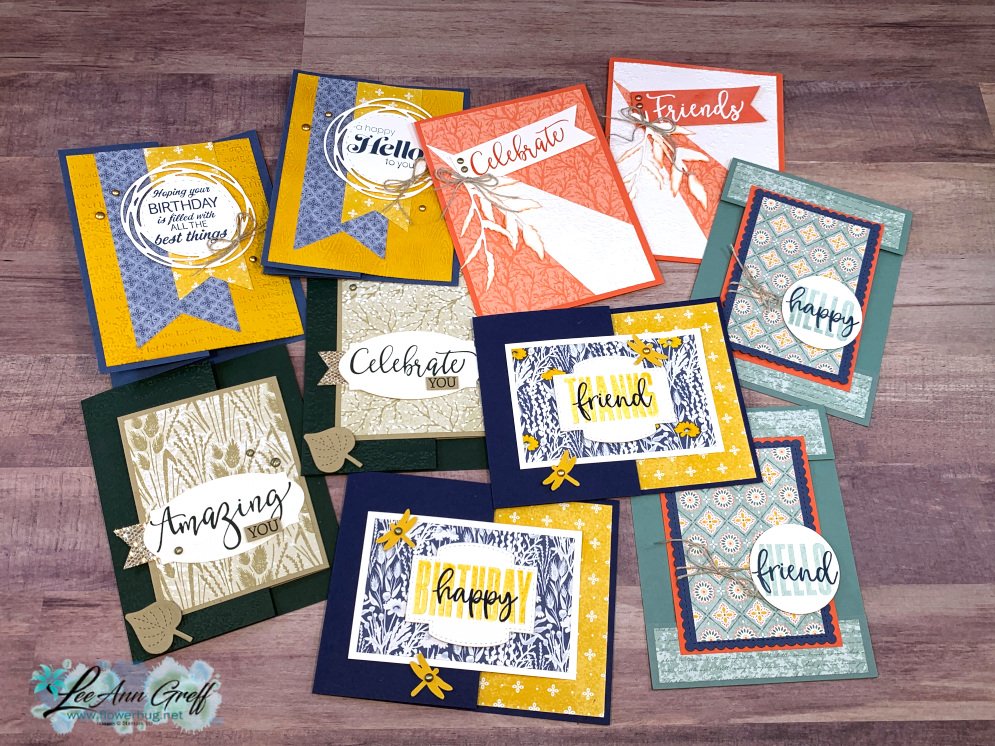
    Today I'm sharing one of my September cards kit with you. I actually have two and will share the other one tomorrow. 

    This kit includes 10 pre-cut cards (2 each of 5 cards), 1/2 pkg. Nature's Harvest designer paper (6" X 12"), Metallic adhesive gems & Linen Thread.  It's a fabulous value as the product is worth $20 (without tax & shipping) and the cost is just $28 and the tutorial is free! The PDF tutorial includes photos, step by step directions, measurements to make more and a supplies list. 

    8 of these 10 cards are fancy folds and with the tutorial you'll have measurements to make more using other products.  


    You will need your own stamps, ink, adhesive and a paper trimmer to cut your new designer paper using the measurements provided in the tutorial.  Everything else is cut & prepped for you. 

    *I make sure to use only greetings in my kits to go so you can substitute what you already own.  I used Sunny Sentiments, Biggest Wishes, Create with Friends sets here.  *Inks are Misty Moonlight, Night of Navy, Bumblebee, Calypso Coral, Soft Succulent & Versamark. 

    *Be sure to order by September 19th to get this kit!  

    This PDF tutorial will be sent to you via email immediately after payment. The kit is mailed out at the end of September, barring any back-orders. 

    Go here to order the pre-cut kit to go. $28 (See the 2nd September kit option here. Choose both kits here!)

    Click here to get the PDF tutorial. $15

    ~~~

    September Specials

    Host code: ASETFASJ or T7VSZQ64

    *click here to order

    All online orders will receive a free PDF tutorial filled with projects featuring

    the Painted Christmas Suite!

    Get a pkg. of Holiday Rhinestones with a $50 online order from me in September! 

    Order here

    BEST DEAL!

    Get a Free Bundle  from the Holiday Catalog when you choose the Starter kit!  Pick out $125 in product of your choice for just $99 and shipping is free!  

    Leave a Reply

    Your email address will not be published. Required fields are marked *

  • Poppin’ Pastels Technique with Delicate Dahlia


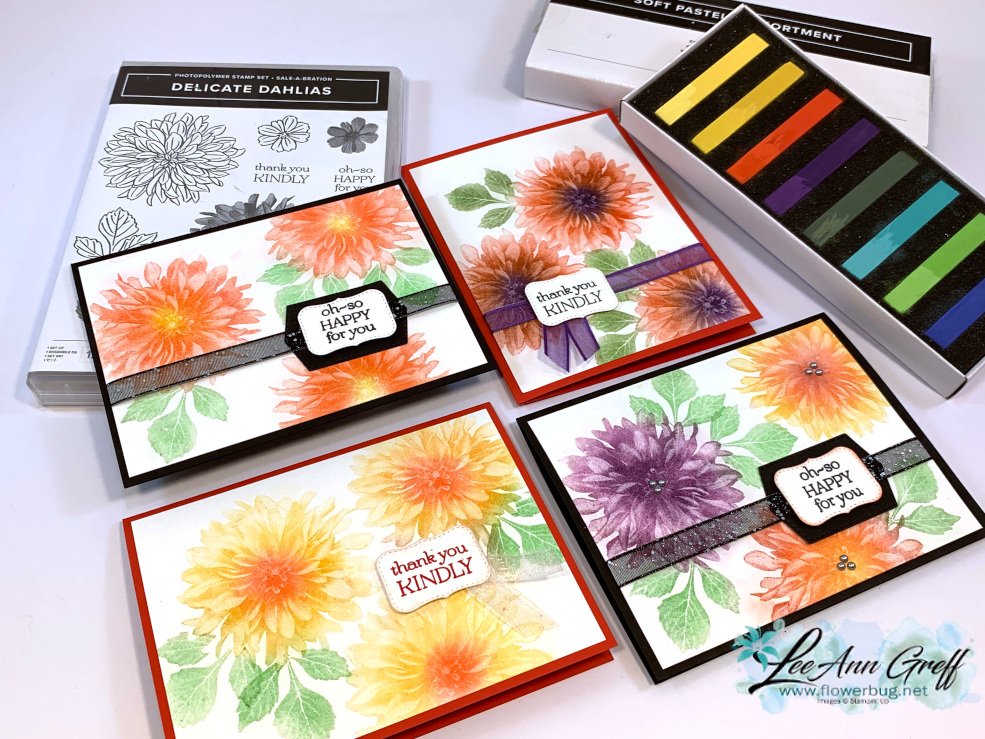
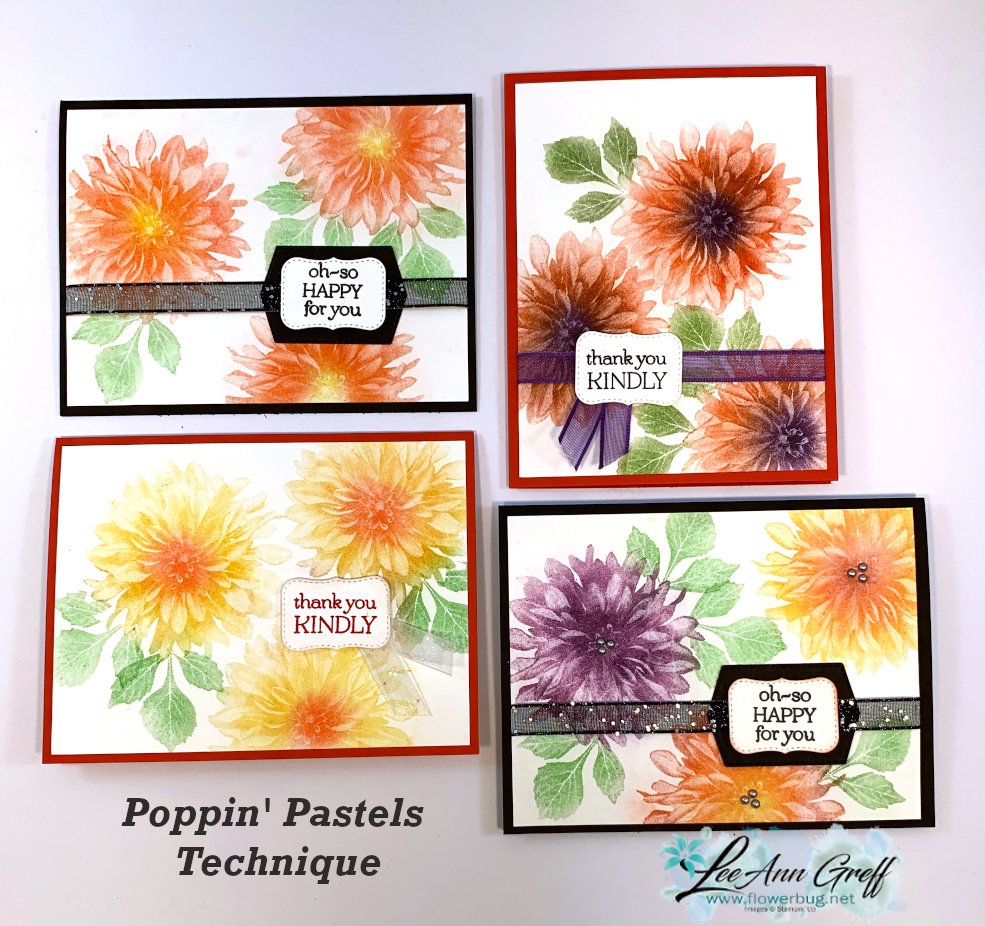
    If you've been a stamper for awhile you've likely played with chalks and the Poppin' Pastel technique.  If not, check this out!  

    You'll need just a few supplies – Chalks, Versamark ink and sponge daubers. Well, card stock too! 

    Tip – choose a solid image with a full surface.  Outline images won't work as well here. 

    Here's how it's done:

    1. Ink your image in Versamark ink and stamp on card stock. 
    2. Dab your sponge dauber in chalk (if it's firm like our new Soft Pastels you may need to scrape some off & use the dust *watch the video below).
    3. Dab over your stamped image repeatedly. Do not rub on the outer edges or it may show outside of your stamped area. 
    4. Blow or dust off excess chalk.  Done!  

    Here's the video:

    ~~~

    September Specials

    Host code: ASETFASJ or T7VSZQ64

    *click here to order

    All online orders will receive a free PDF tutorial filled with projects featuring

    the Painted Christmas Suite!

    Get a pkg. of Holiday Rhinestones with a $50 online order from me in September! 

    Order here

    BEST DEAL!

    Get a Free Bundle  from the Holiday Catalog when you choose the Starter kit!  Pick out $125 in product of your choice for just $99 and shipping is free!  


    Leave a Reply

    Your email address will not be published. Required fields are marked *

  • Easy Explosion card video tutorial with Penguin Playmates Designer Paper!


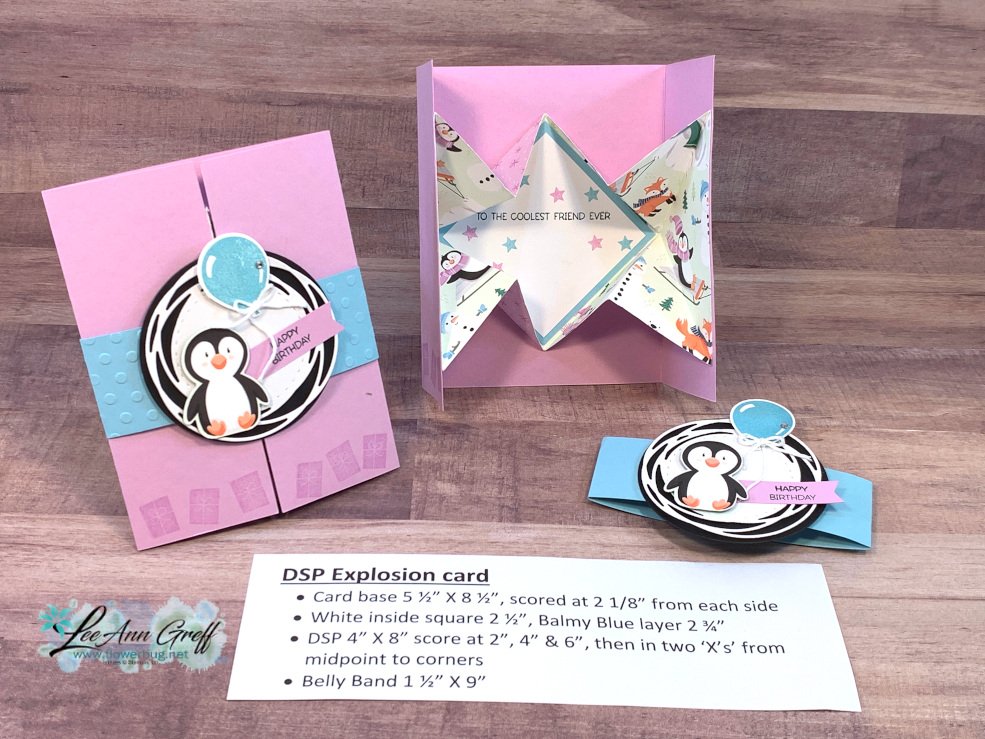
    On last Tuesday's FB Live I shared three unique fun fold cards featuring the Penguin Place bundle and the Penguin Palace designer paper.  *Follow me on Facebook here. 

    Today I'm focusing on the Explosion card. It sure looks complicated but it's just a few score lines on a 4 X 8" piece of DSP. 

    As you can see, it's not a Christmas card.  This bundle and designer paper works well for multiple occasions.  

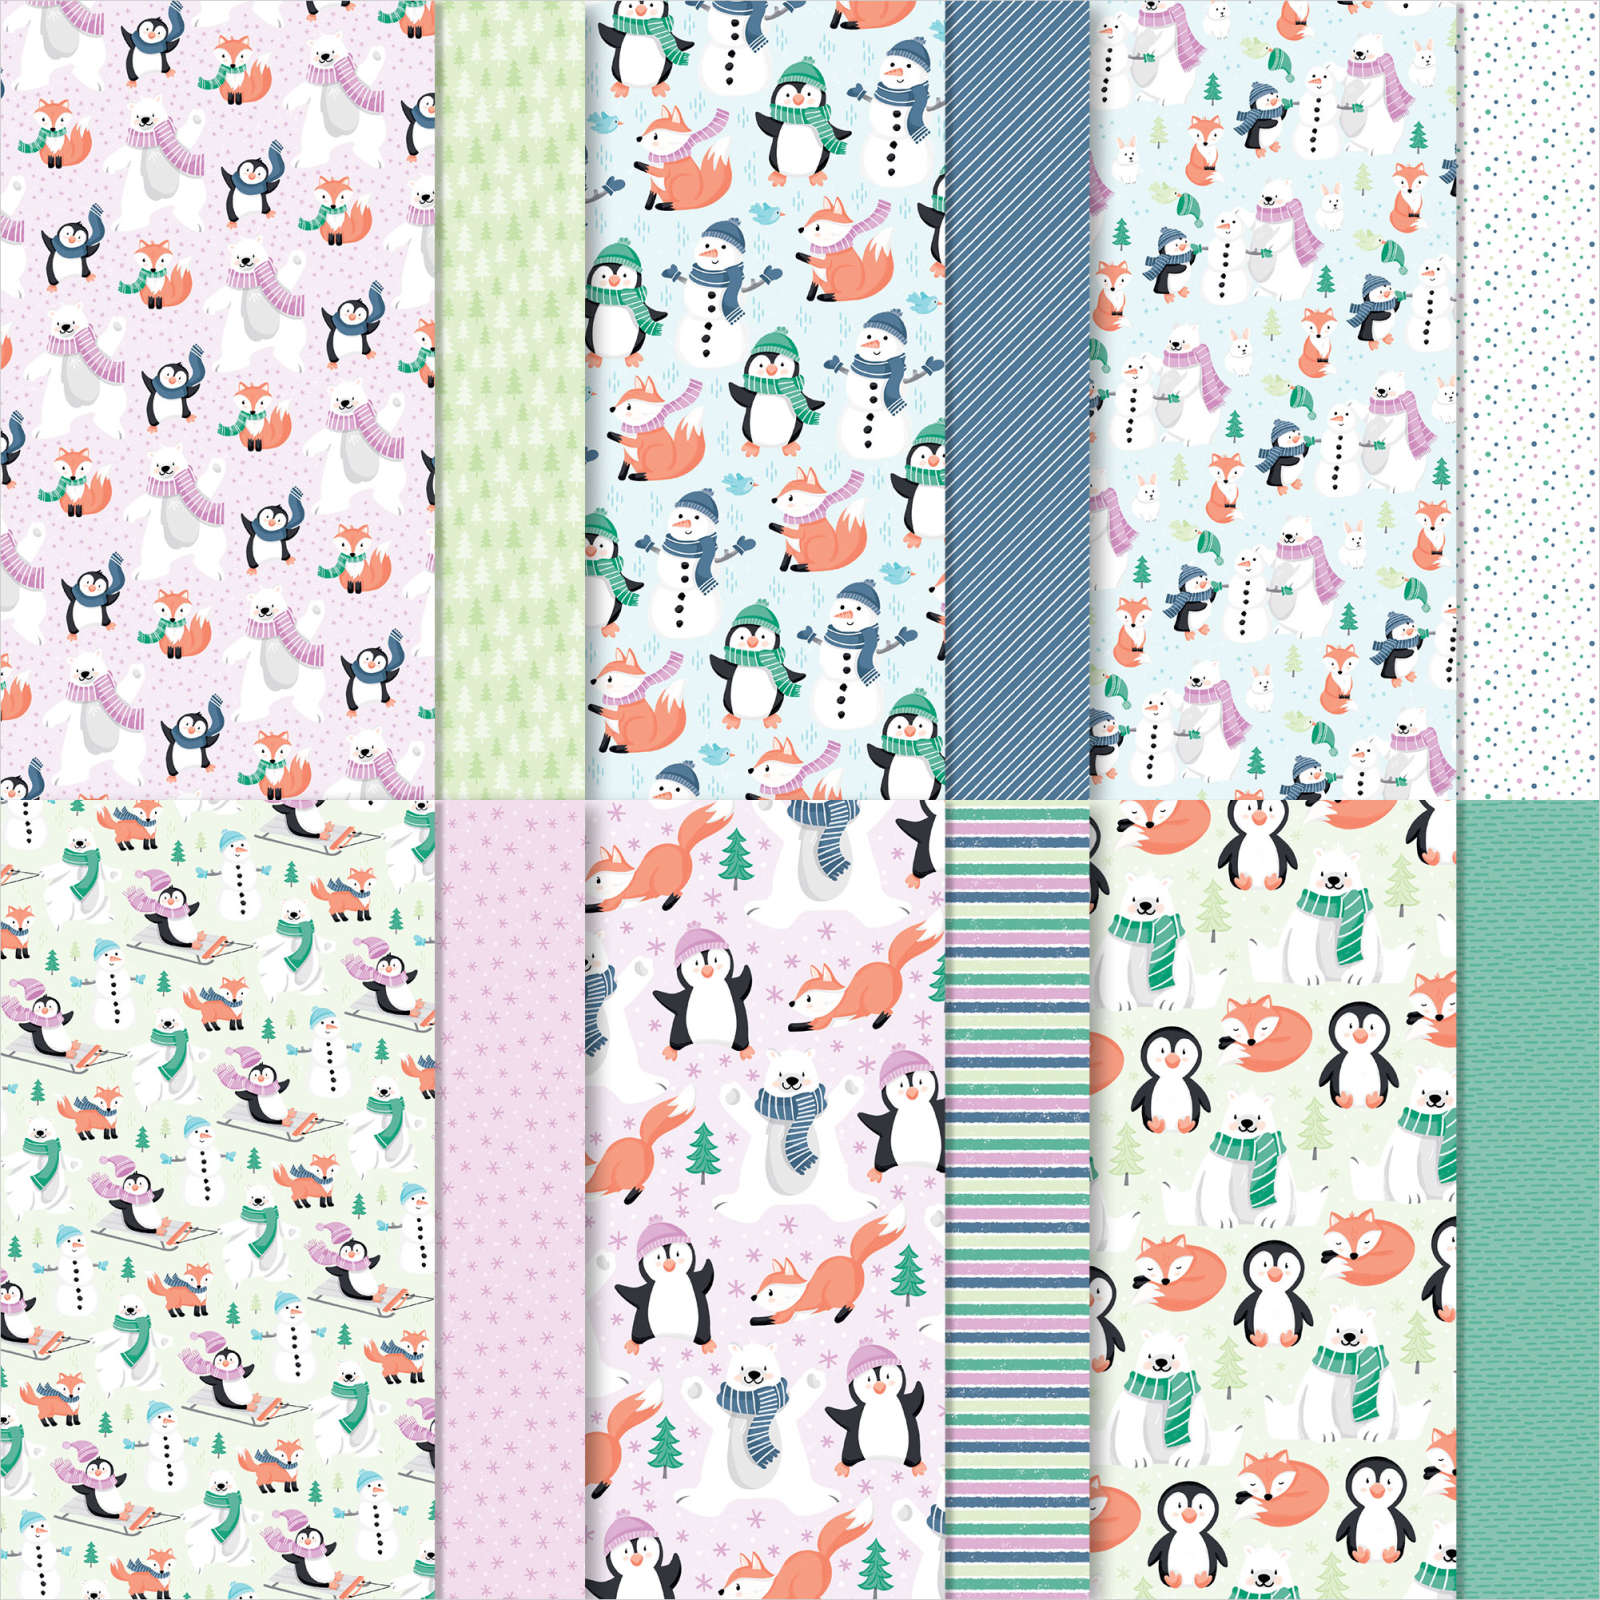
    The colors are Fresh Freesia, Black, White & Balmy Blue which coordinate with the adorable Penguin Playmates DSP seen here.  This paper is free during our Sale-a-Bration promotion with any $50 order.

    See that cute penguin?  It's punched out with the Penguin punch; right from the designer paper!  

    DSP Explosion card

    • Card base 5 ½” X 8 ½”, scored at 2 1/8” from each side
    • White inside square 2 ½”, Balmy Blue layer 2 ¾”
    • DSP 4” X 8” score at 2”, 4” & 6”, then in two ‘X’s’ from midpoint score to the outside corners
    • Belly Band 1 ½” X 9”

    Here's the video; I actually show three unique fun fold cards!

    ~~~

    September Specials

    Host code: ASETFASJ or T7VSZQ64

    *click here to order

    All online orders will receive a free PDF tutorial filled with projects featuring

    the Painted Christmas Suite!

    Get a pkg. of Holiday Rhinestones with a $50 online order from me in September! 

    Order here

    BEST DEAL!

    Get a Free Bundle  from the Holiday Catalog when you choose the Starter kit!  Pick out $125 in product of your choice for just $99 and shipping is free!  

    Leave a Reply

    Your email address will not be published. Required fields are marked *


Notice: LeeAnn Greff, Independent Stampin’ Up! Demonstrator, Manager. The content of this website is my sole responsibility as an independent Stampin’ Up! demonstrator and the use of, and content of, the classes, services, or products offered on this website is not endorsed by Stampin’ Up! Copyright 2025