/


Latest Post

Control Freaks New Catalog Blog Hop


It's time for our monthly Freak's blog hop!!  Our focus today is the new Annual Catalog.  We have lots of amazing projects to share with you using brand new products. 

You may have arrived from Tami's blog; I'm sure you loved her projects!  Or maybe you just started here.  To see all 12 posts be sure to click on the icon at the bottom of each post. 
It's been so fun to play with exciting new products from the 2020 Annual Catalog!  Are you ready for some glitz & shine?

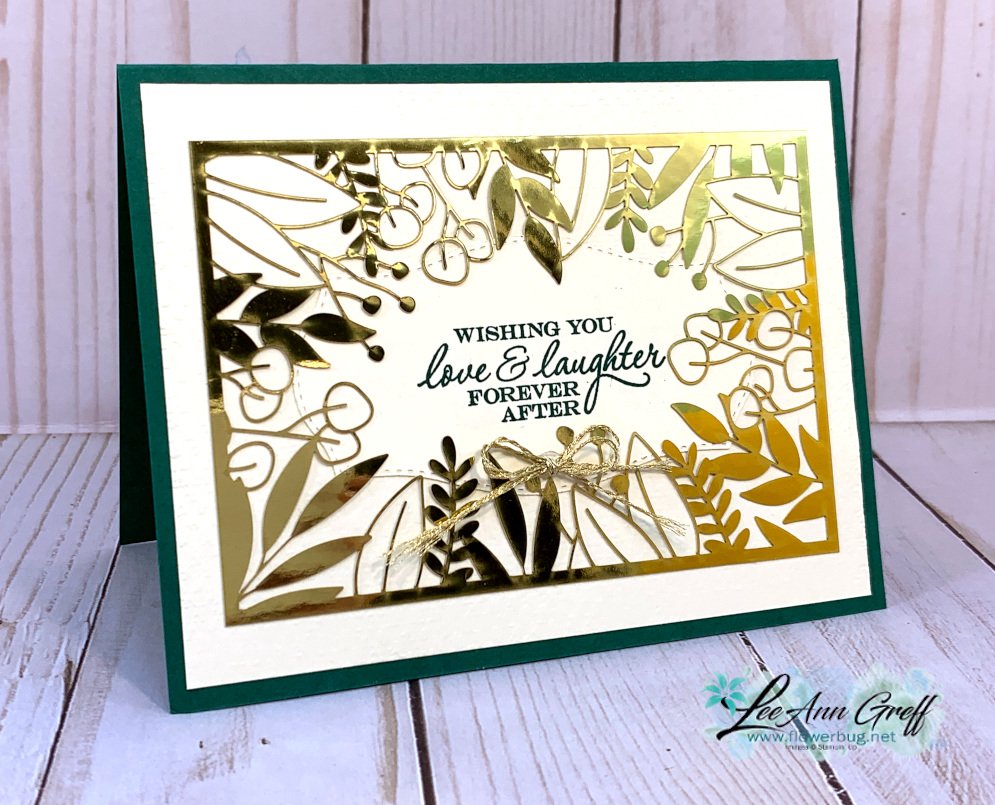
I chose to play with the Forever Gold Laser-cut Specialty Paper today.  It's part of the Forever Greenery suite of products.  You can see it best on page 152 of your annual catalog. It has 6 sheets; 3 each of 2 single sided designs. One side is gold and the other is white which you can color, spritz or sponge.  I chose to use the gold sides for my projects here.  

You can see the details & measurements for each one under the photo. 

I chose to use jewel toned card stock for each card; I think it looks rich & regal with these colors.  The card above is Blackberry Bliss with Very Vanilla.  The pretty golden leafy medallion is all one piece; just punched out from the pack.  I added a 1" X 4 1/4" strip of Vanilla under it and a stamped die cut above with a few metallic pearls.  The stamped image is from Dandelion Wishes and the die is from the Stitched So Sweetly dies. 
This card is Shaded Spruce with Vanilla.  It's hard to see but the large 4" X 5 1/4" vanilla is textured with our Tasteful Textile embossing folder. The greeting is stamped on a die from Tasteful Labels using the Heart to Heart stamp set.

Once I had these pieces adhered I could add the laser cut piece on top. I added a bit of liquid multipurpose adhesive to the edges and a few leaves and it's done!

The laser cut card front pops out so easily from the rest in the sheet. No fussy cutting or die-cutting with these! 

This is probably my favorite one of the three. This laser-cut piece is delicate and leafy; it leaves a perfect area for a greeting in the stitched center. The card is Night of Navy with a 2" strip of the World of Good designer paper across the middle. 

I stamped the 'Always' greeting (Field of Flowers set) on a 1 1/2" X 2 1/4" piece of Very Vanilla card stock and sponged the edge with Misty Moonlight ink.  The 'In My Heart' greeting is embossed with Gold embossing powder on Misty Moonlight card stock and punched out with the Classic Label punch. 

Did you spy the cute little flowers on this card?  They're from the new Confetti Flowers Border punch. Each one has a Metallic pearl on it.  

I hope you enjoyed seeing these pretty cards with the beautiful Forever Gold Laser-cut Specialty Paper.  If you like shine and glitz you'll love it! 

~~~

Thanks for stopping in to see my projects.  Now you're off to see what Cindy has to share.  I know you'll love it; I always do.
 

All Posts

  • Quick card Ever Eden designer paper strips; just a few days left!


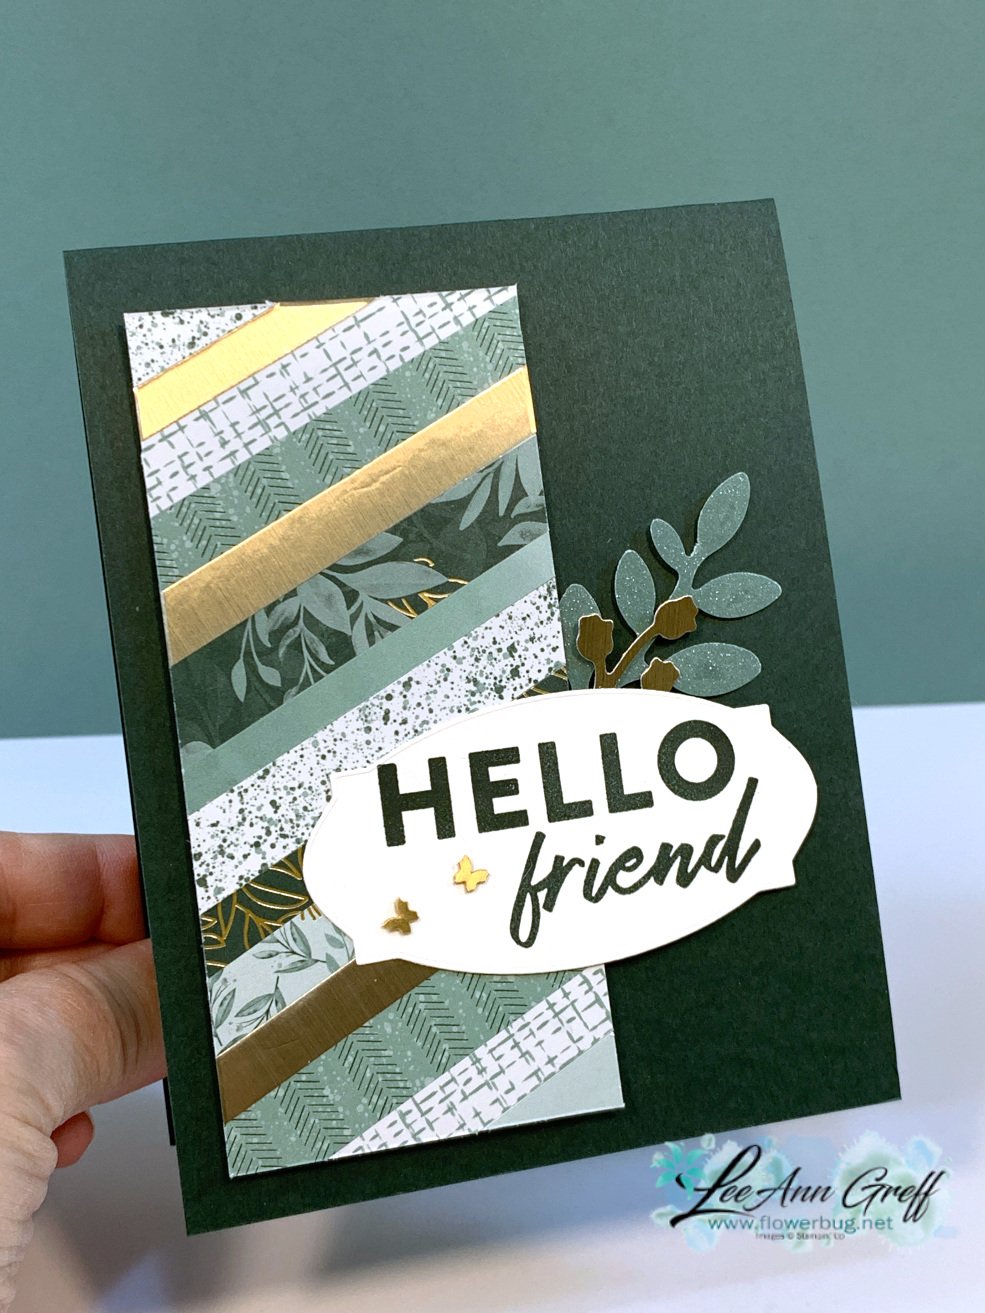
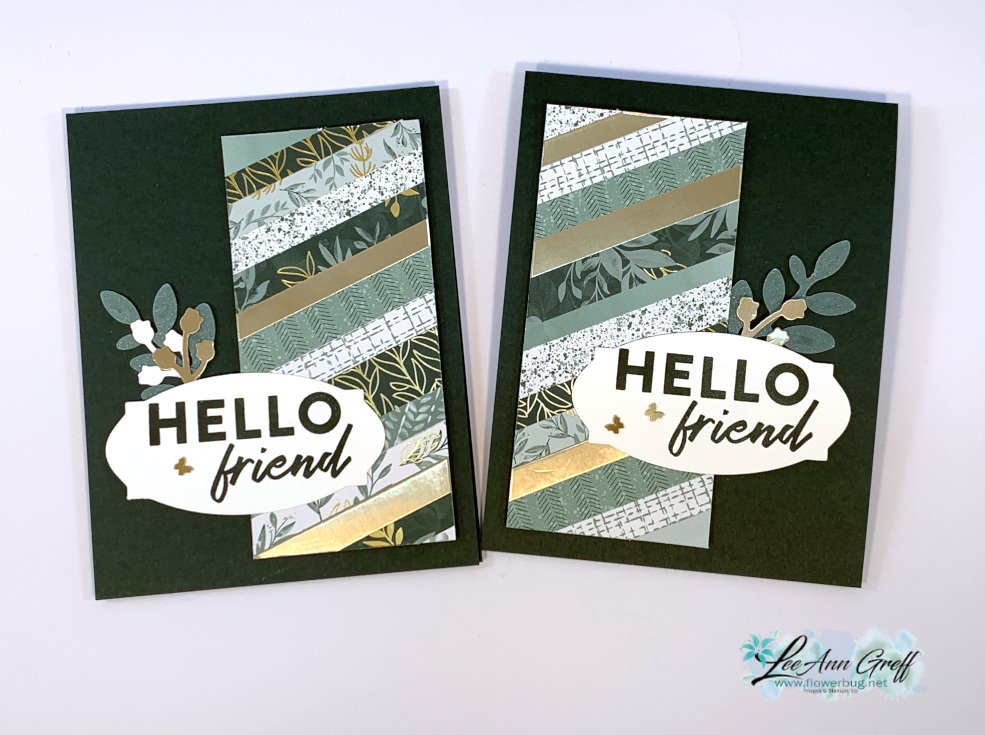
    On my last Monday's FB Live I shared these pretty cards; they feature the Ever Eden specialty designer paper. Click here to watch the video. 

    The greeting and butterflies are from upcoming catalogs in January.  The stamp is called Friendly Hello and the butterflies are little, bitty brass adhesive-backed gems. There is one more new items on this card; it's a punch called the Bough punch. Above it's in Soft Succulent shimmer vellum & Metallic card stock.  It punches both! 

    This pretty paper is a special promotion.  You won't find it in any catalog and it's retiring on January 3rd. It's available while supplies last. The colors are gorgeous together – Soft Succulent, Evening Evergreen, Gold & White.  See it here. 

    I shared another version of this strip technique here.  Totally different! 

    Tips: 

    • I start out with a 2 1/4" X 4 3/4" piece of neutral CS.  This is what I adhered the strips of Designer Paper to. 
    • I added Seal adhesive over the entire piece and added the strips one by one. 
    • Apply one strip across the middle at an angle first. Then keep filling in. 
    • I trimmed the excess off the edges once I had it well covered with strips.  
    • My DSP strips measure between 1/4" and 5/8" wide and about 3" long.  It doesn't matter how wide your strips are; it looks great if they're different widths.  
    • Add dimensionals to the back of this piece for added dimension. 
    • Add a greeting and accents if desired. 

    Here's the video with details: 

    ~~~

    December Specials:

    Host code:  T9YW6QCC

     *click here to order 

    Use the host code above & get a free card stock sampler ring with a $50 order in December! 

    See the last chance list here

    See the July-December catalog carry over list here

    Leave a Reply

    Your email address will not be published. Required fields are marked *

  • Geometric fun with an Ombre’ effect; video tutorial too!


    I've been sharing ideas & techniques featuring the Plenty of Patterns masks from a recent FB Live video. 

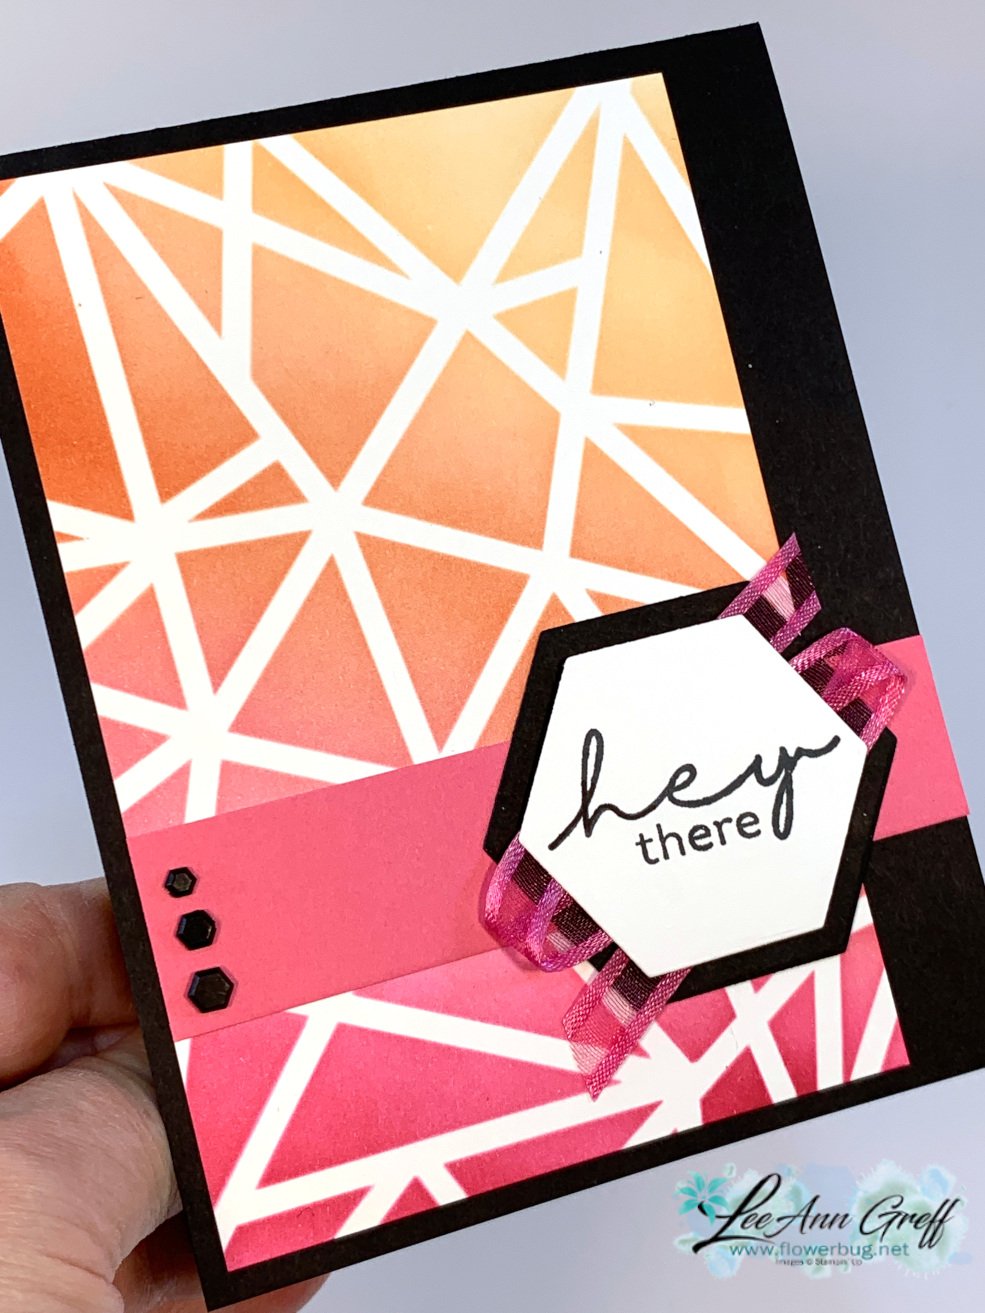
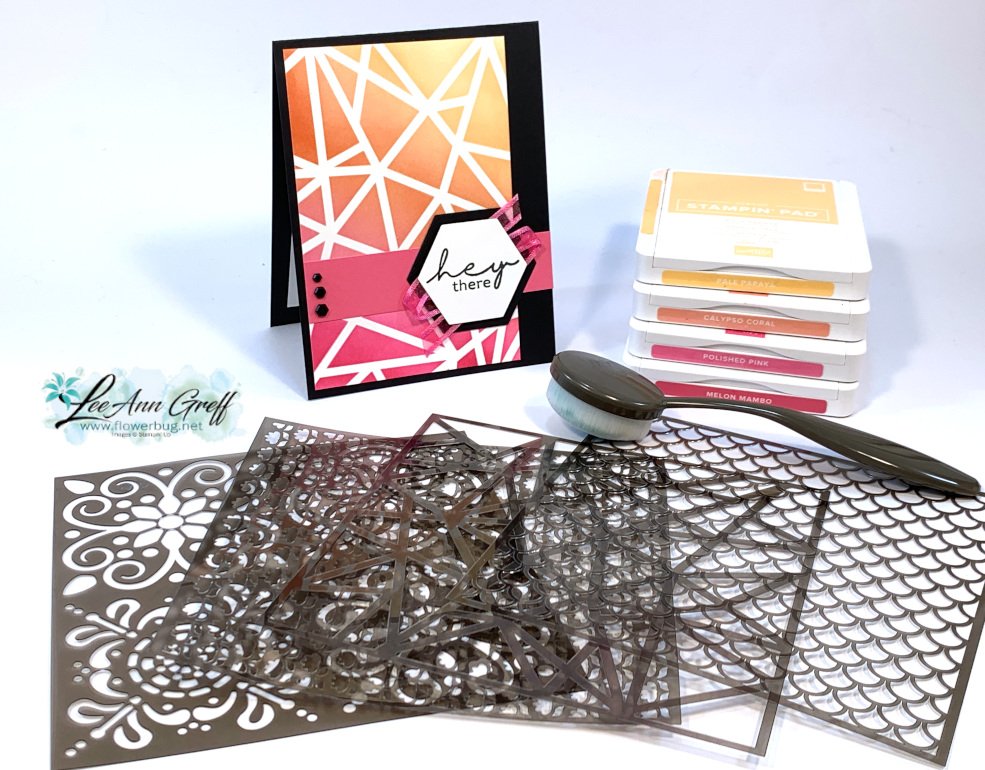
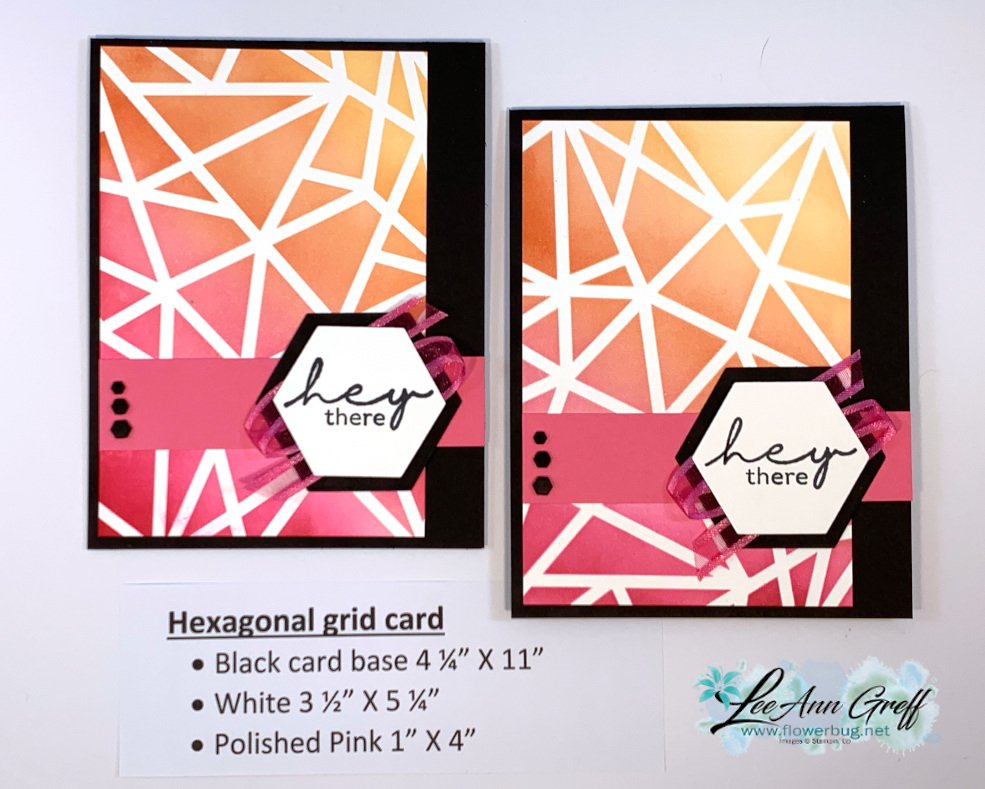
    Today it's an Ombre' effect created with a grid mask, 4 colors of ink and Blending Brushes. 

    The colors I used are from top to bottom: Pale Papaya, Calypso Coral, Polished Pink and Melon Mambo. I used our Blending Brushes to achieve this smooth blended look.  See them here. I love them; they're so worth investing in.  And the nice thing is that the ink can be rinsed out to use them in any color next time. 

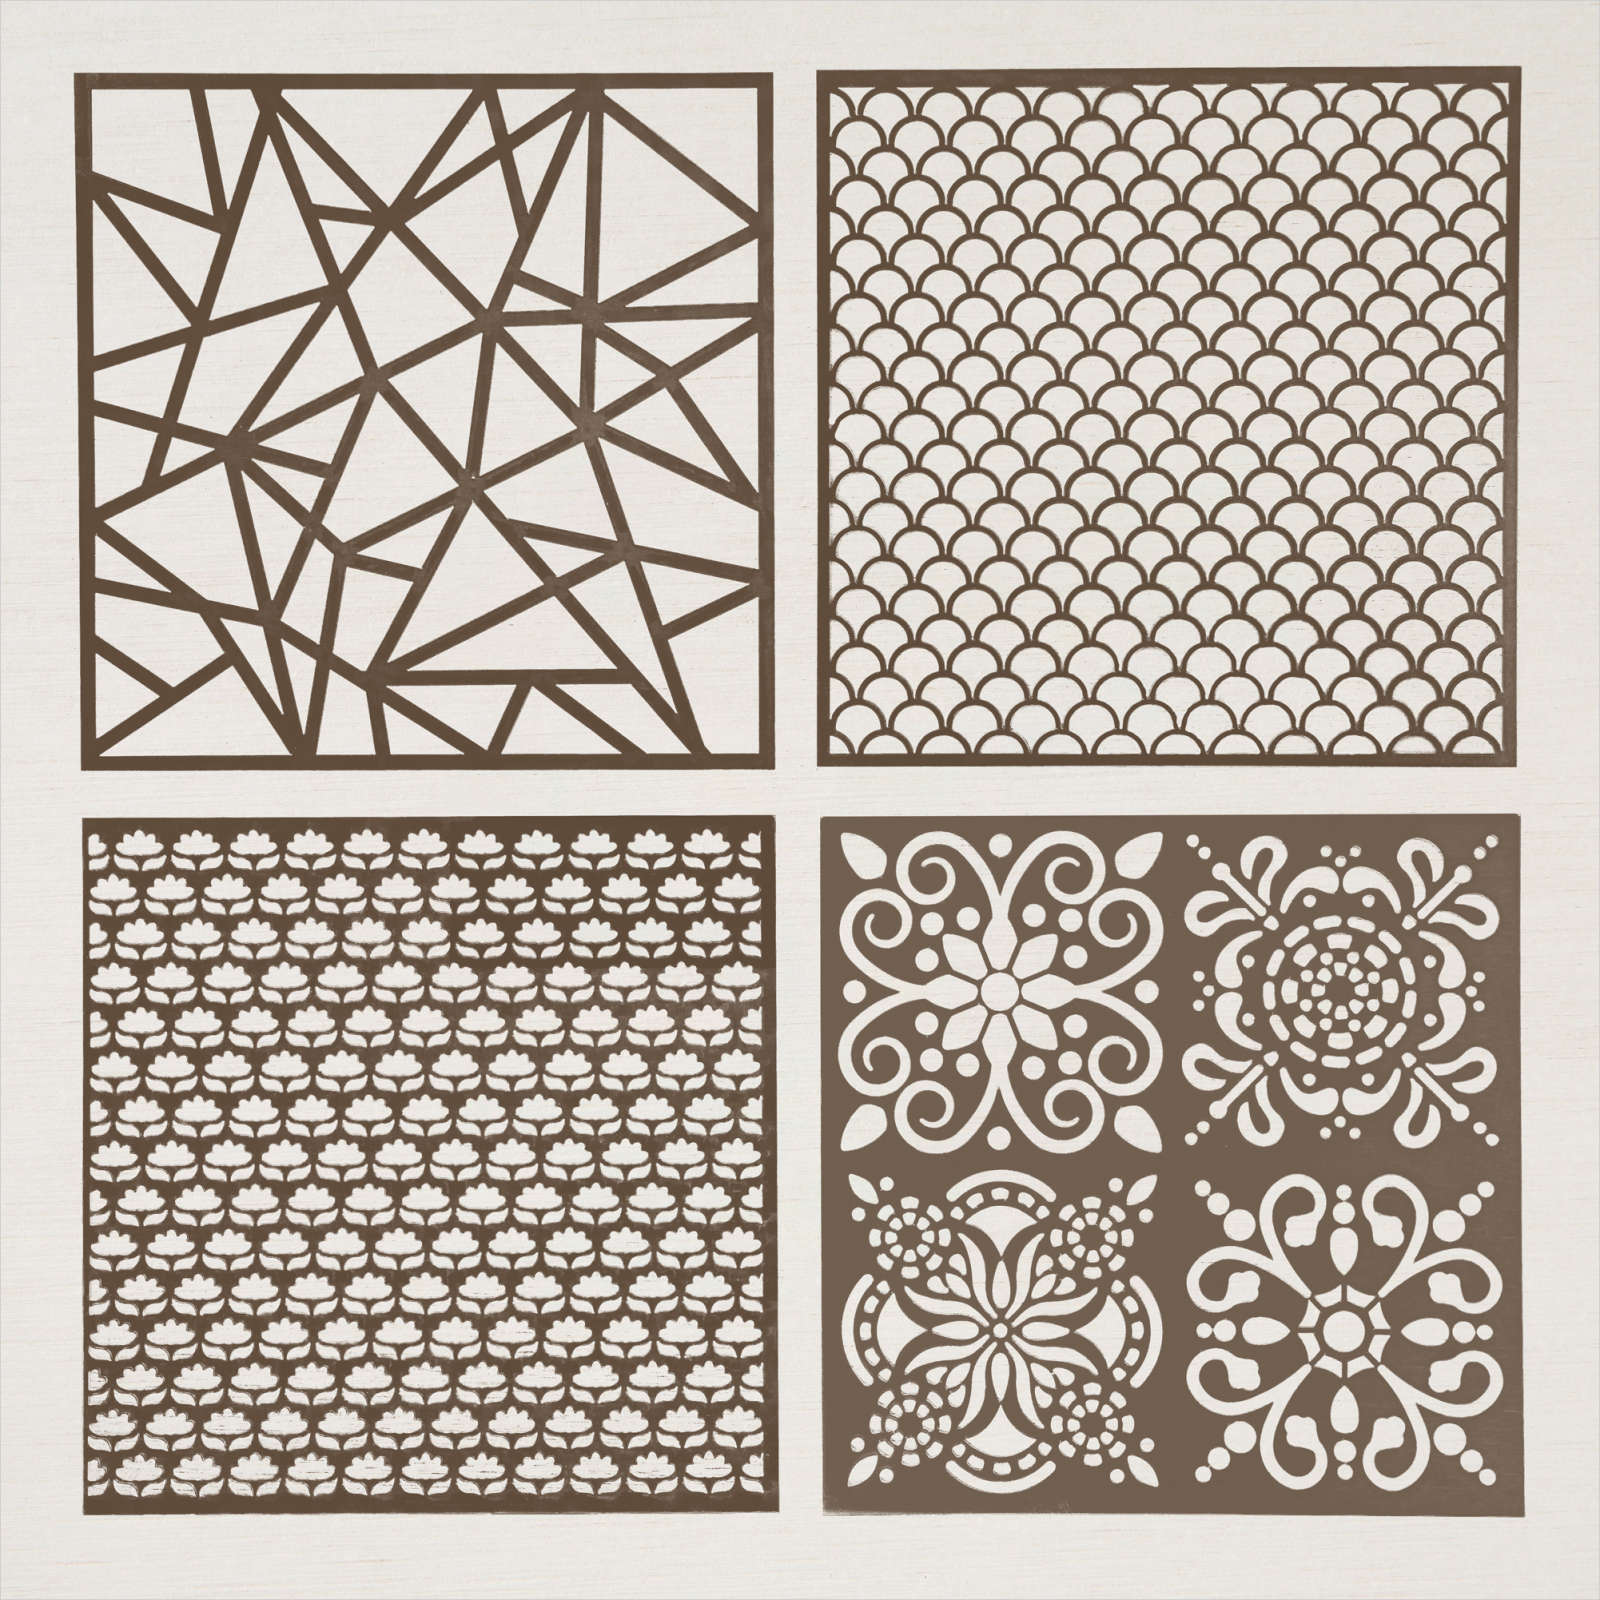
    I used the grid mask in the set of 4 seen below & here. 

    I'm sure you noticed the hexagonal greeting die-cuts.  This is part of a new die-cut set called Beautiful Shapes dies coming out in the upcoming 2022 Jan-June catalog.  And the Adhesive-Backed Hexagons coordinate wonderfully.  These embellishments come in a package of three colors – Black, Blushing Bride & Just Jade. 

    I added a zig-zag of ribbon behind my greeting image; see my easy method in the video.  

    Below is the video with these projects & lots more! 

    ~~~

    December Specials:

    Host code:  T9YW6QCC

     *click here to order 

    Use the host code above & get a free card stock sampler ring with a $50 order in December! 

    See the last chance list here

    See the July-December catalog carry over list here

    Leave a Reply

    Your email address will not be published. Required fields are marked *

  • Fun with Plenty of Pattern masks with techniques & video too


    I hope you enjoyed your holiday weekend!  We sure did. The kids come home for Christmas from other cities in North Dakota and we have some fun traditions like an appetizer showdown, presents, lots & lots of games & yummy food.  My kids are still here so the fun continues another day yet! 

    ~~~

    Here is another card idea with the Plenty of Pattern masks I shared on last week's FB Live here. 

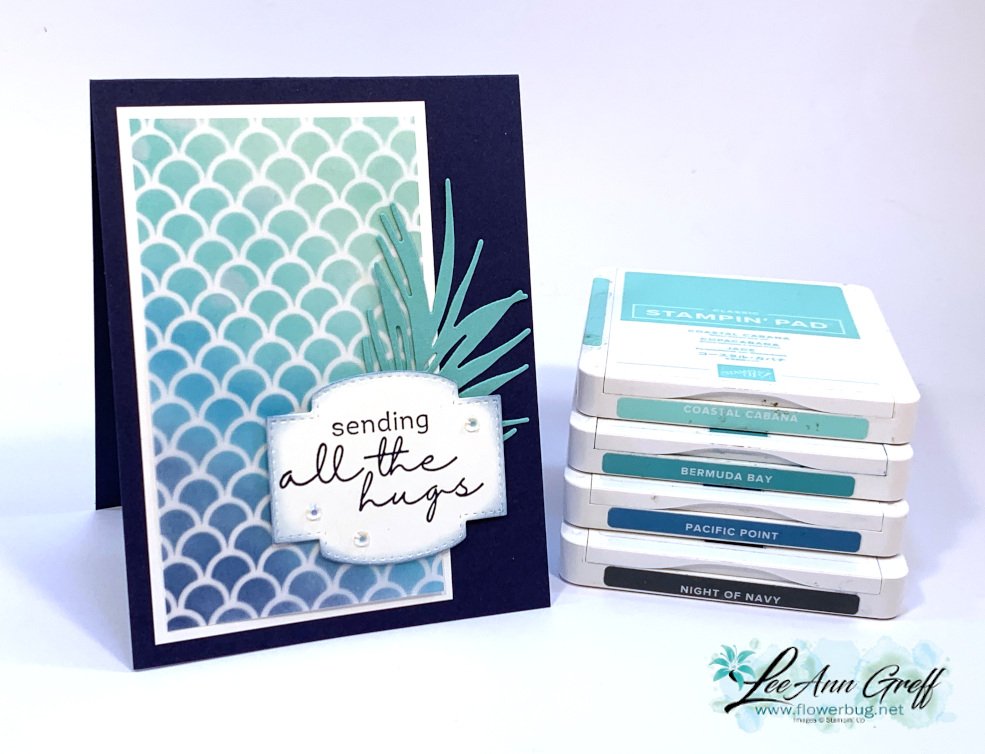
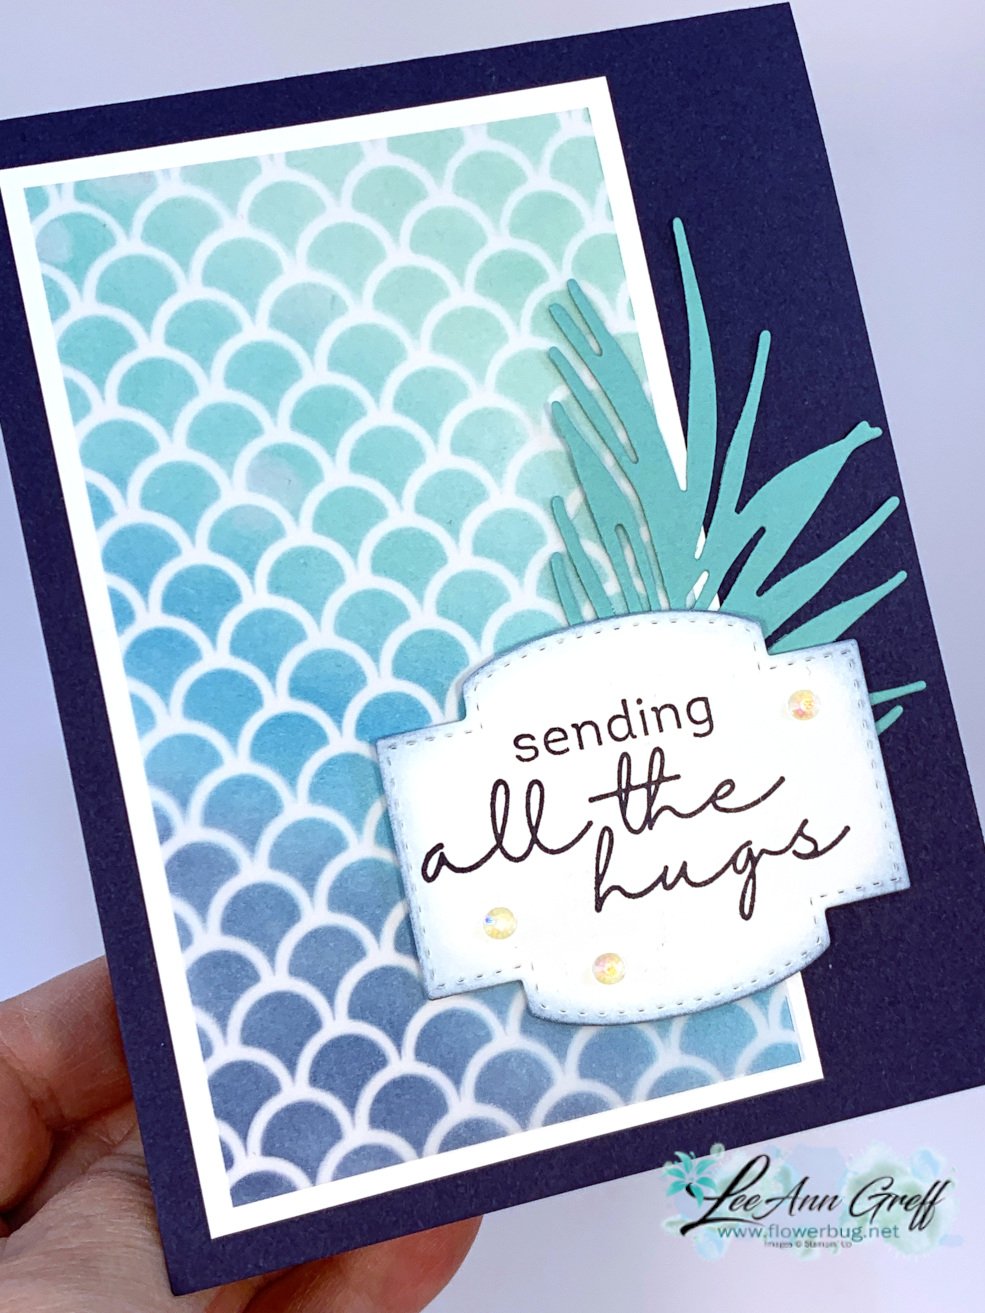
    This card features an ombre' effect on Vellum card stock using the Plenty of Patterns masks and a new bundle from the upcoming 2022 Jan-June catalog

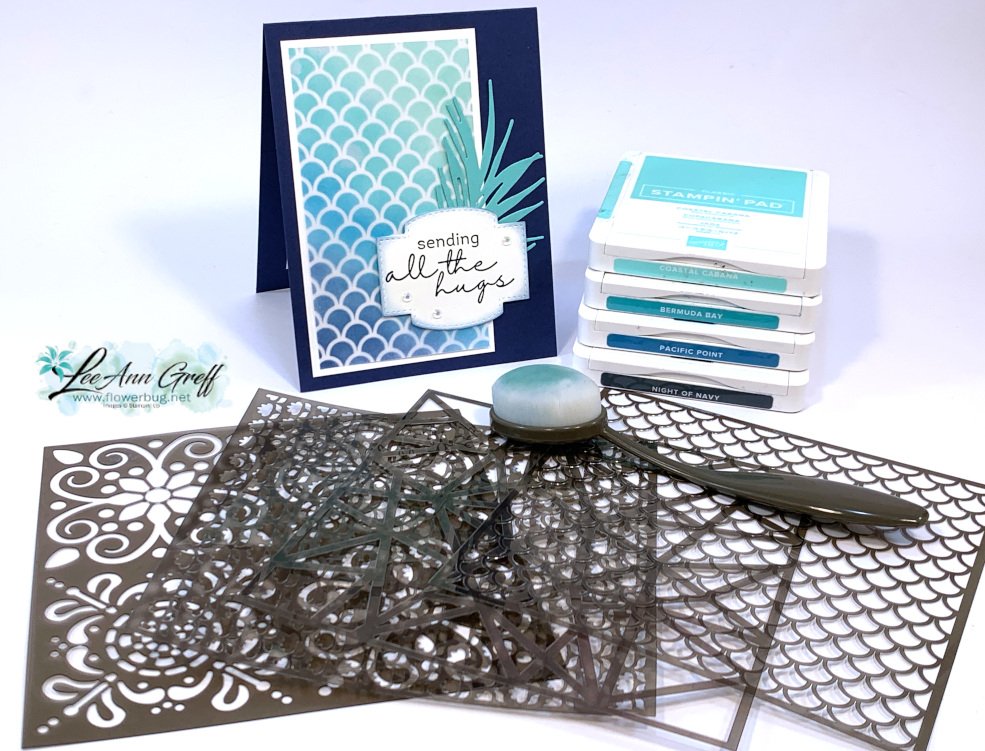
    For the ombre' effect I used Night of Navy, Pacific Point, Bermuda Bay and Coastal Cabana inks along with Blending Brushes. You can see how it's done on the video here.  


    I kept is super simple otherwise.  I layered the sponged vellum on a piece of White CS and added a greeting and leaf die-cut. 


    You can see the Plenty of Pattern masks I used here.  They are so fun to play with; especially if you like sponging or techniques. 

    The neat leaf die-cut is in the Artfully Layered bundle in the upcoming 2022 Jan-June catalog as well as the greeting. 

    Below is the video with these projects & lots more! 

    ~~~

    December Specials:

    Host code:  T9YW6QCC

     *click here to order 

    Use the host code above & get a free card stock sampler ring with a $50 order in December! 

    See the last chance list here

    See the July-December catalog carry over list here

    Leave a Reply

    Your email address will not be published. Required fields are marked *


Notice: LeeAnn Greff, Independent Stampin’ Up! Demonstrator, Manager. The content of this website is my sole responsibility as an independent Stampin’ Up! demonstrator and the use of, and content of, the classes, services, or products offered on this website is not endorsed by Stampin’ Up! Copyright 2025