/


Latest Post

Check out this ‘Tackle box’ with the Gone Fishing bundle! Amazing!!


Today I'm sharing the last projects Candace made with the Gone Fishing and Let's Go Fishing designer paper.  She was our Artist of the Month for June and created some incredible projects!  

I was blown away by this 'tackle box' full of candy.  She told me she made it up herself!  AMAZING!! 
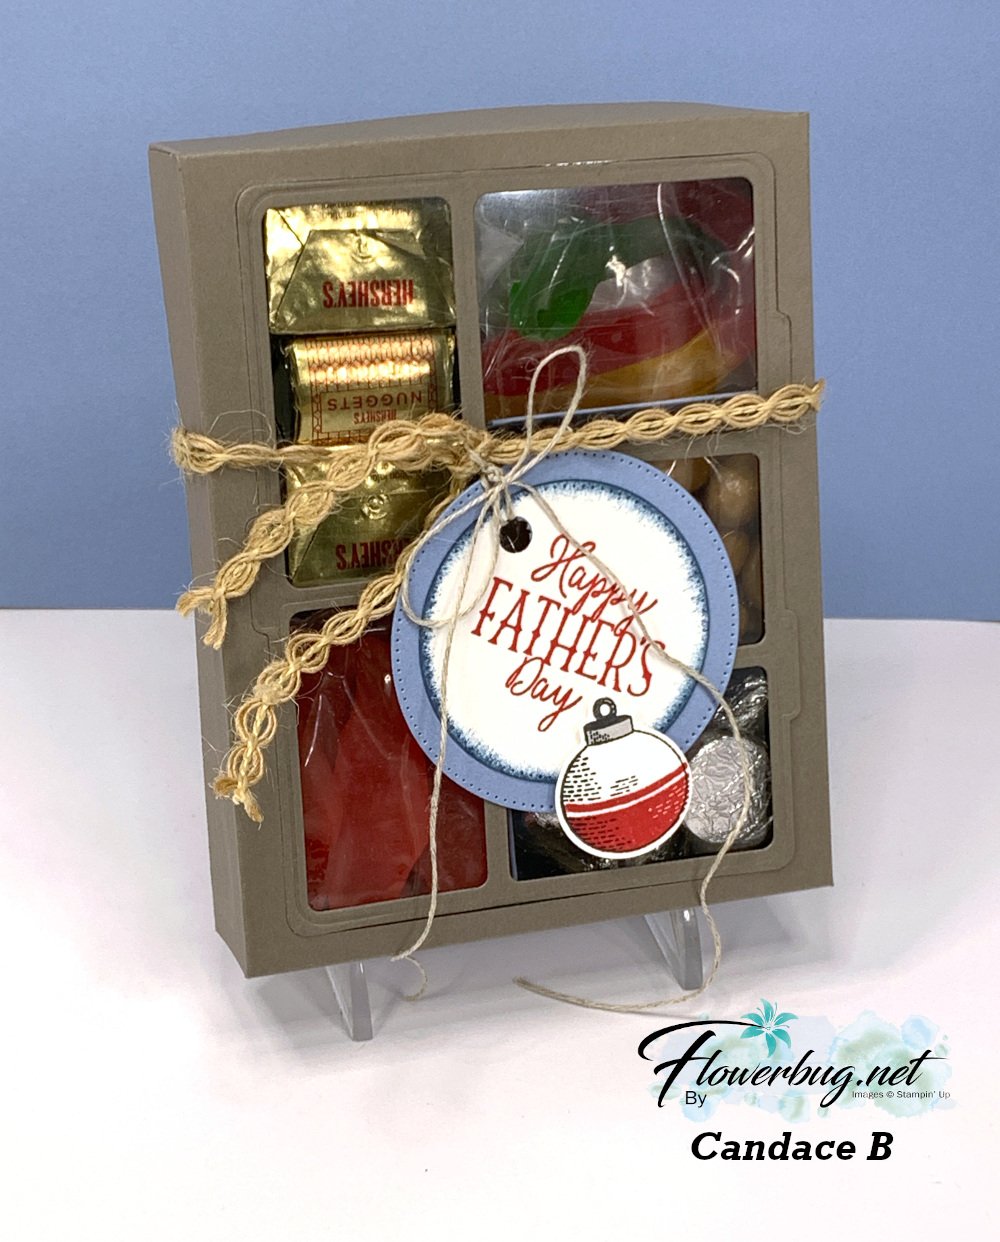
She added gummy fish & worms, kisses, candy 'rocks' and nuggets inside.  I believe she first scored her box front then used the Gone Fishing large die to cut the windows for the front panel. Scoring first would help you center the die. Then she added the window sheet to the underside.  The window sheet holds the die-cut frame and the box front in place. 

Measurements for the box: *corrected

  • top of box 6 1/4 X 7 1/2" score 1" on all sides
  • bottom of box 6 1/8" X 7 3/8" score at 1" on all sides
  • window sheet 4 1/8" X 5 1/4" 
  • left inside divider (two compartments) is 1 7/8" X 6 3/4" score at 2 3/4", 3 1/2" & 4 1/4" 
  • right inside divider (three compartments) is 2 1/8" X  8 1/4" scored at 2", 2 3/4", 3 1/2", 5 1/8", 5 7/8" & 6 5/8" 
  • inside bottom (under the two divided sections) 5 1/4" X 5 5/8" score at 1 7/8", 2 5/8" & 3 3/8"

To assemble this you'd add the long vertical divided piece first and then the two scored strips after that.  

I made a birthday version of this box. You can watch the video here.  

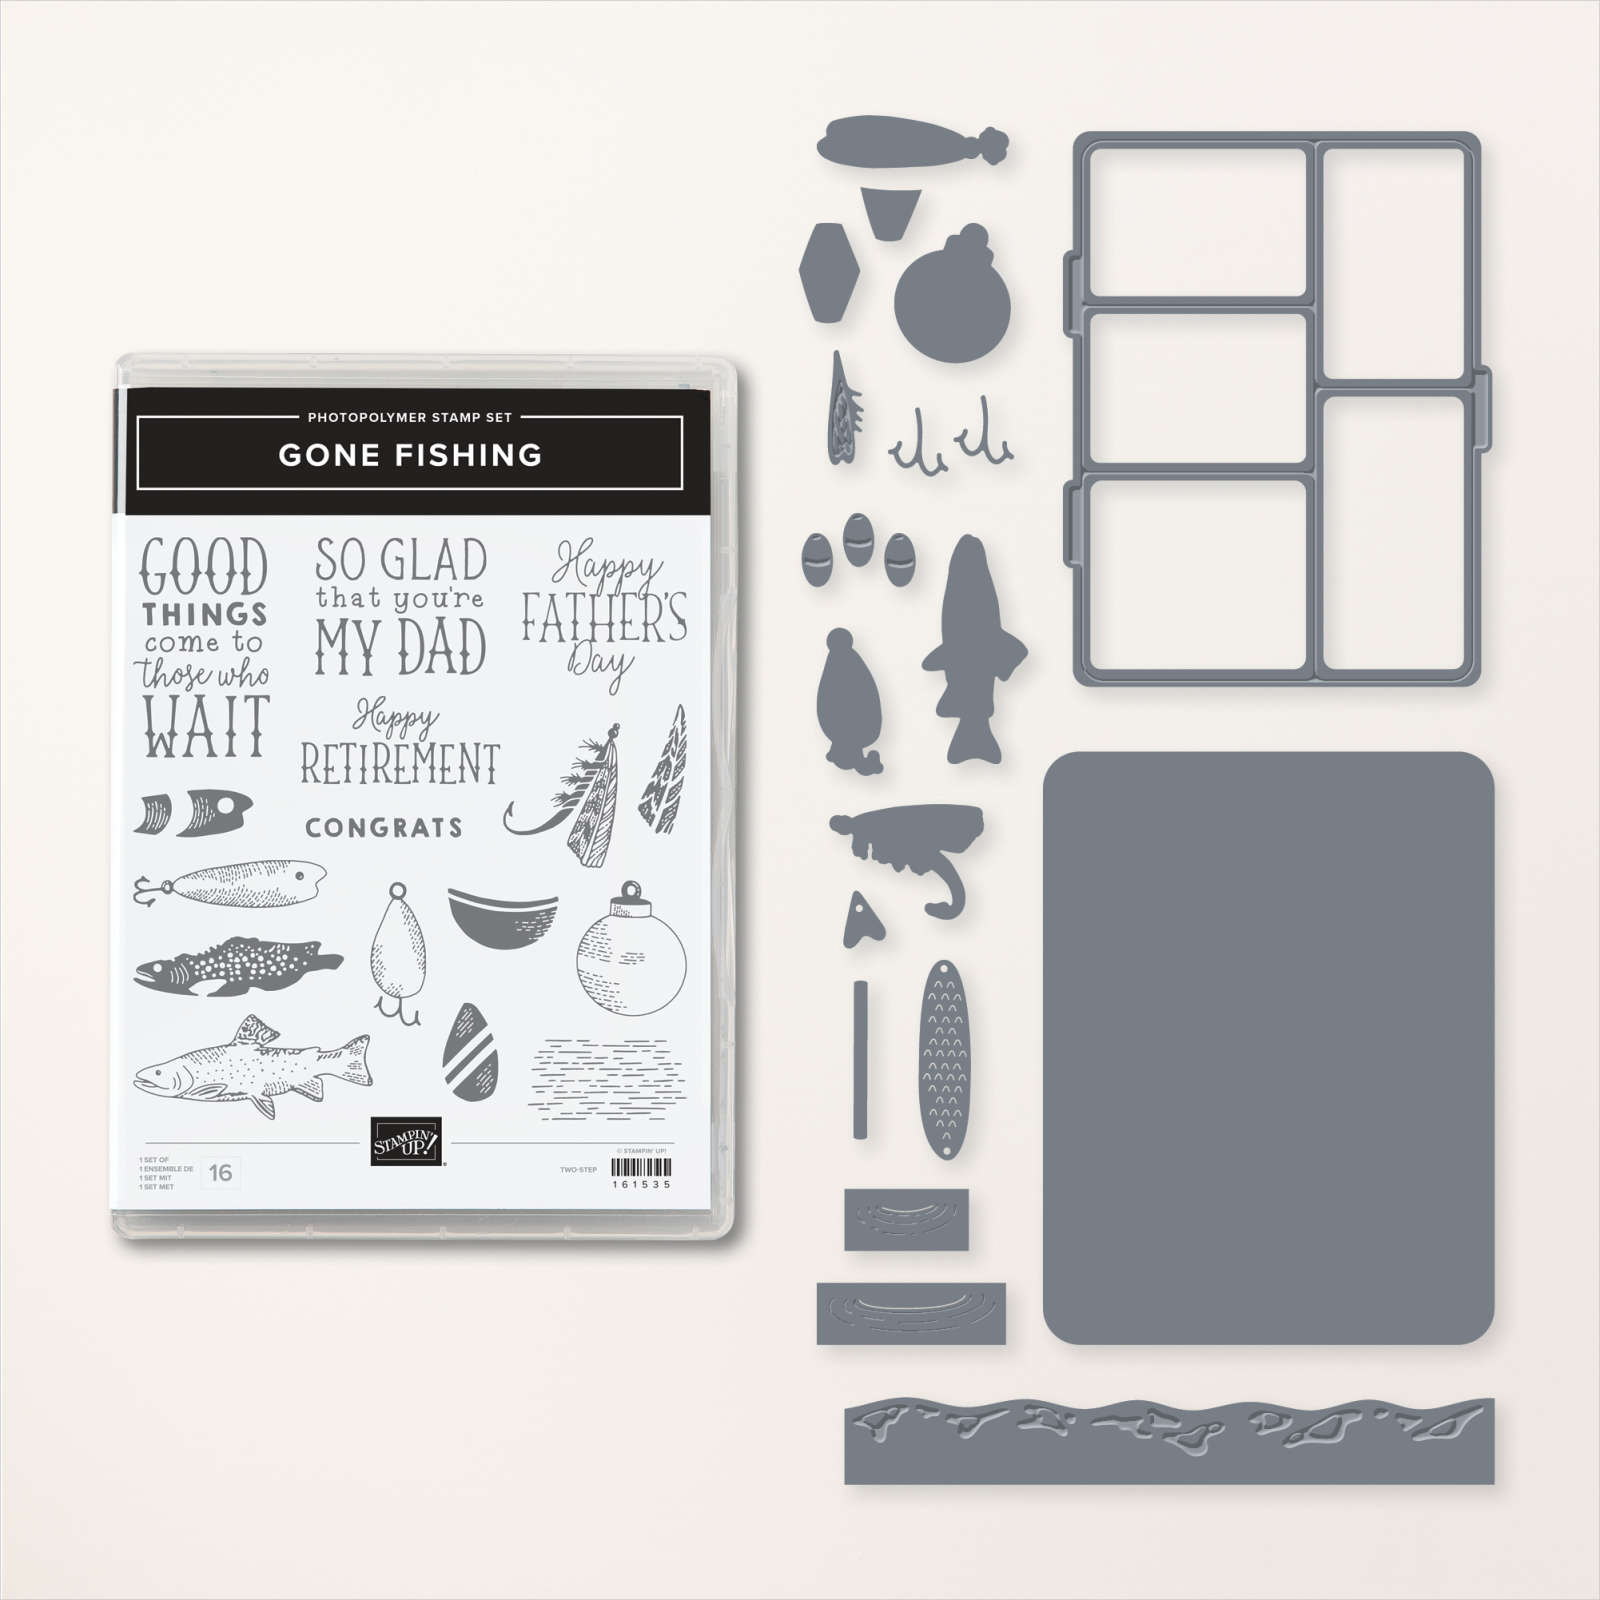
You can see the Gone Fishing bundle here. 
This last card is another fun fold; she made lots of them in her array of cards.  

It's a pocket card that could also include a gift card inside it. Be sure to note the rhinestone 'fish bubbles' on the sentiment.  


I love the wavy detail she added to the inside piece; it's from the Gone Fishing dies.

Measurements:

  • Misty Moonlight card base 5 1/2" X 8 1/2" scored at 2 3/4" & 6 3/4"
  • DSP 5 1/4" X 2 1/2" for front, bottom layer is 5 1/4" X 1"
  • Vanilla inside pull-out is 4 1/2" X 3 1/2"

And last but certainly not least is this fabulous shaker card:
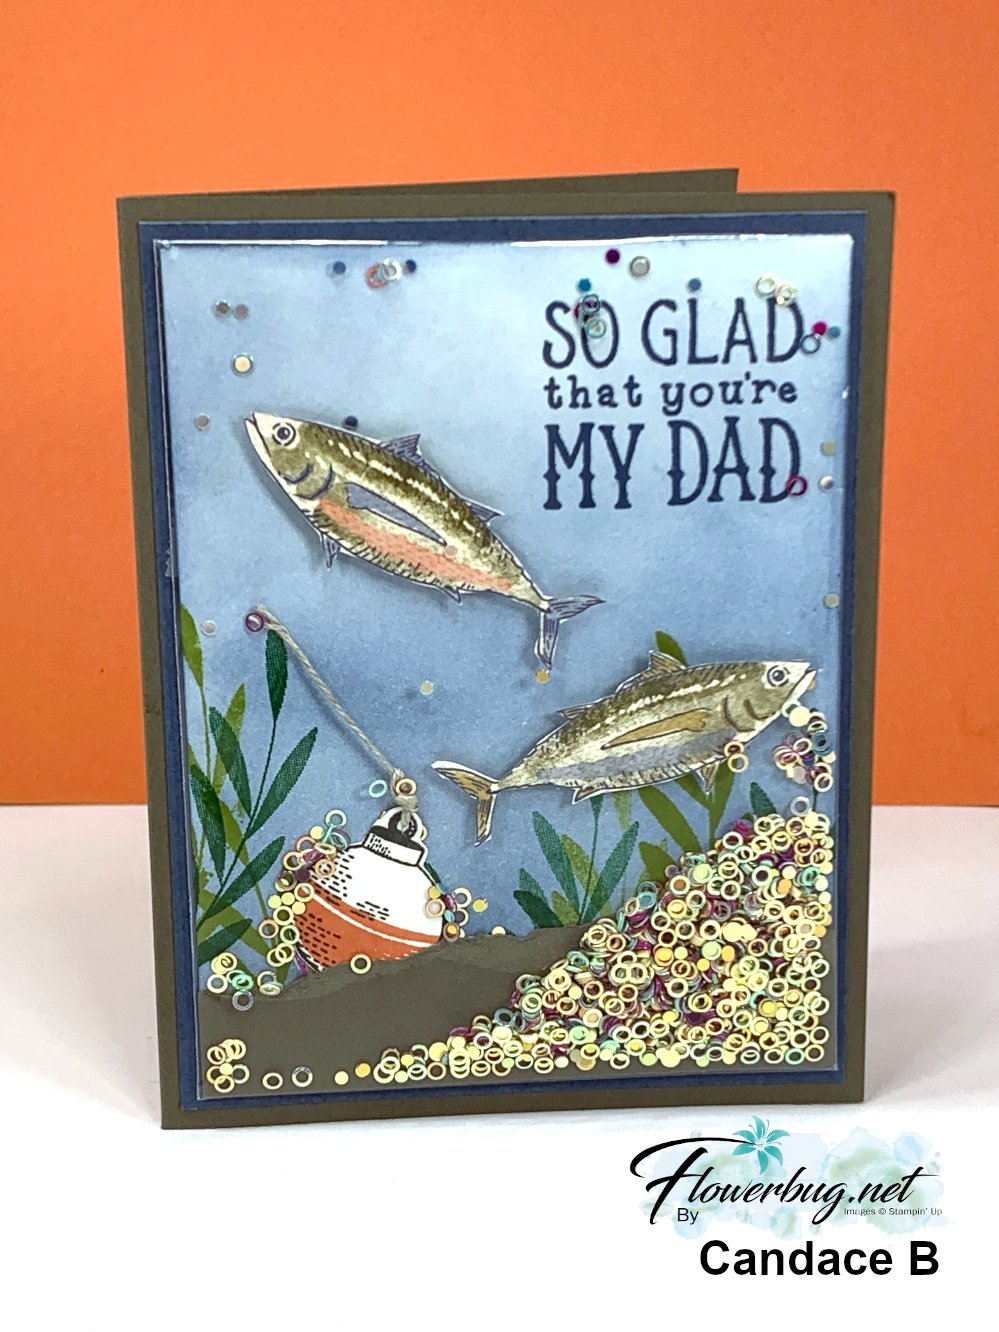

It's hard to tell but the colored and stamped panel is placed in one of our clear envelopes so she could add the new Iridescent shaker circles seen here. She added Boho Blue ink to the neutral card front using a Blending Brush, then stamped the greeting and leaves. She also fussy cut the fish from the Let's Go Fishing designer series paper and added them with Dimensionals. Then came the torn card stock layer and the bobbin and linen thread. 

Now she placed the entire piece inside a clear envelope, folded over the excess and secured it with adhesive. Now she added the shaker circles from the top open edge before closing it off to seal.  Add it to your card base layers and you're done! 

You can see these clear envelopes here.  I use them for card swaps, storing & protecting my finished cards and of course for easy shaker cards. They're $7 for 50 envelopes! 

This is such a fun card to make AND receive! It's hard to stop shaking it! 

~~~

July Specials: 

Bonus Days!

Get a $5 coupon for each $50 order you place in July.  Use the coupon in August!

2. PAPER PUMPKIN 48-HOUR SALE!

3. Next is a Clearance Rack update!

See all items available here

4. NEW Online Exclusives will be available

See them all here

~~~

Plus my monthly special for online orders:

Get a free card kit & a new Beautifully Happy stamp set 

with online orders over $65; must use a host code.

*current host codes: BKEARDMW or GGDRKFQR

All Posts

  • Easy Treat Bag with video & free project sheet!


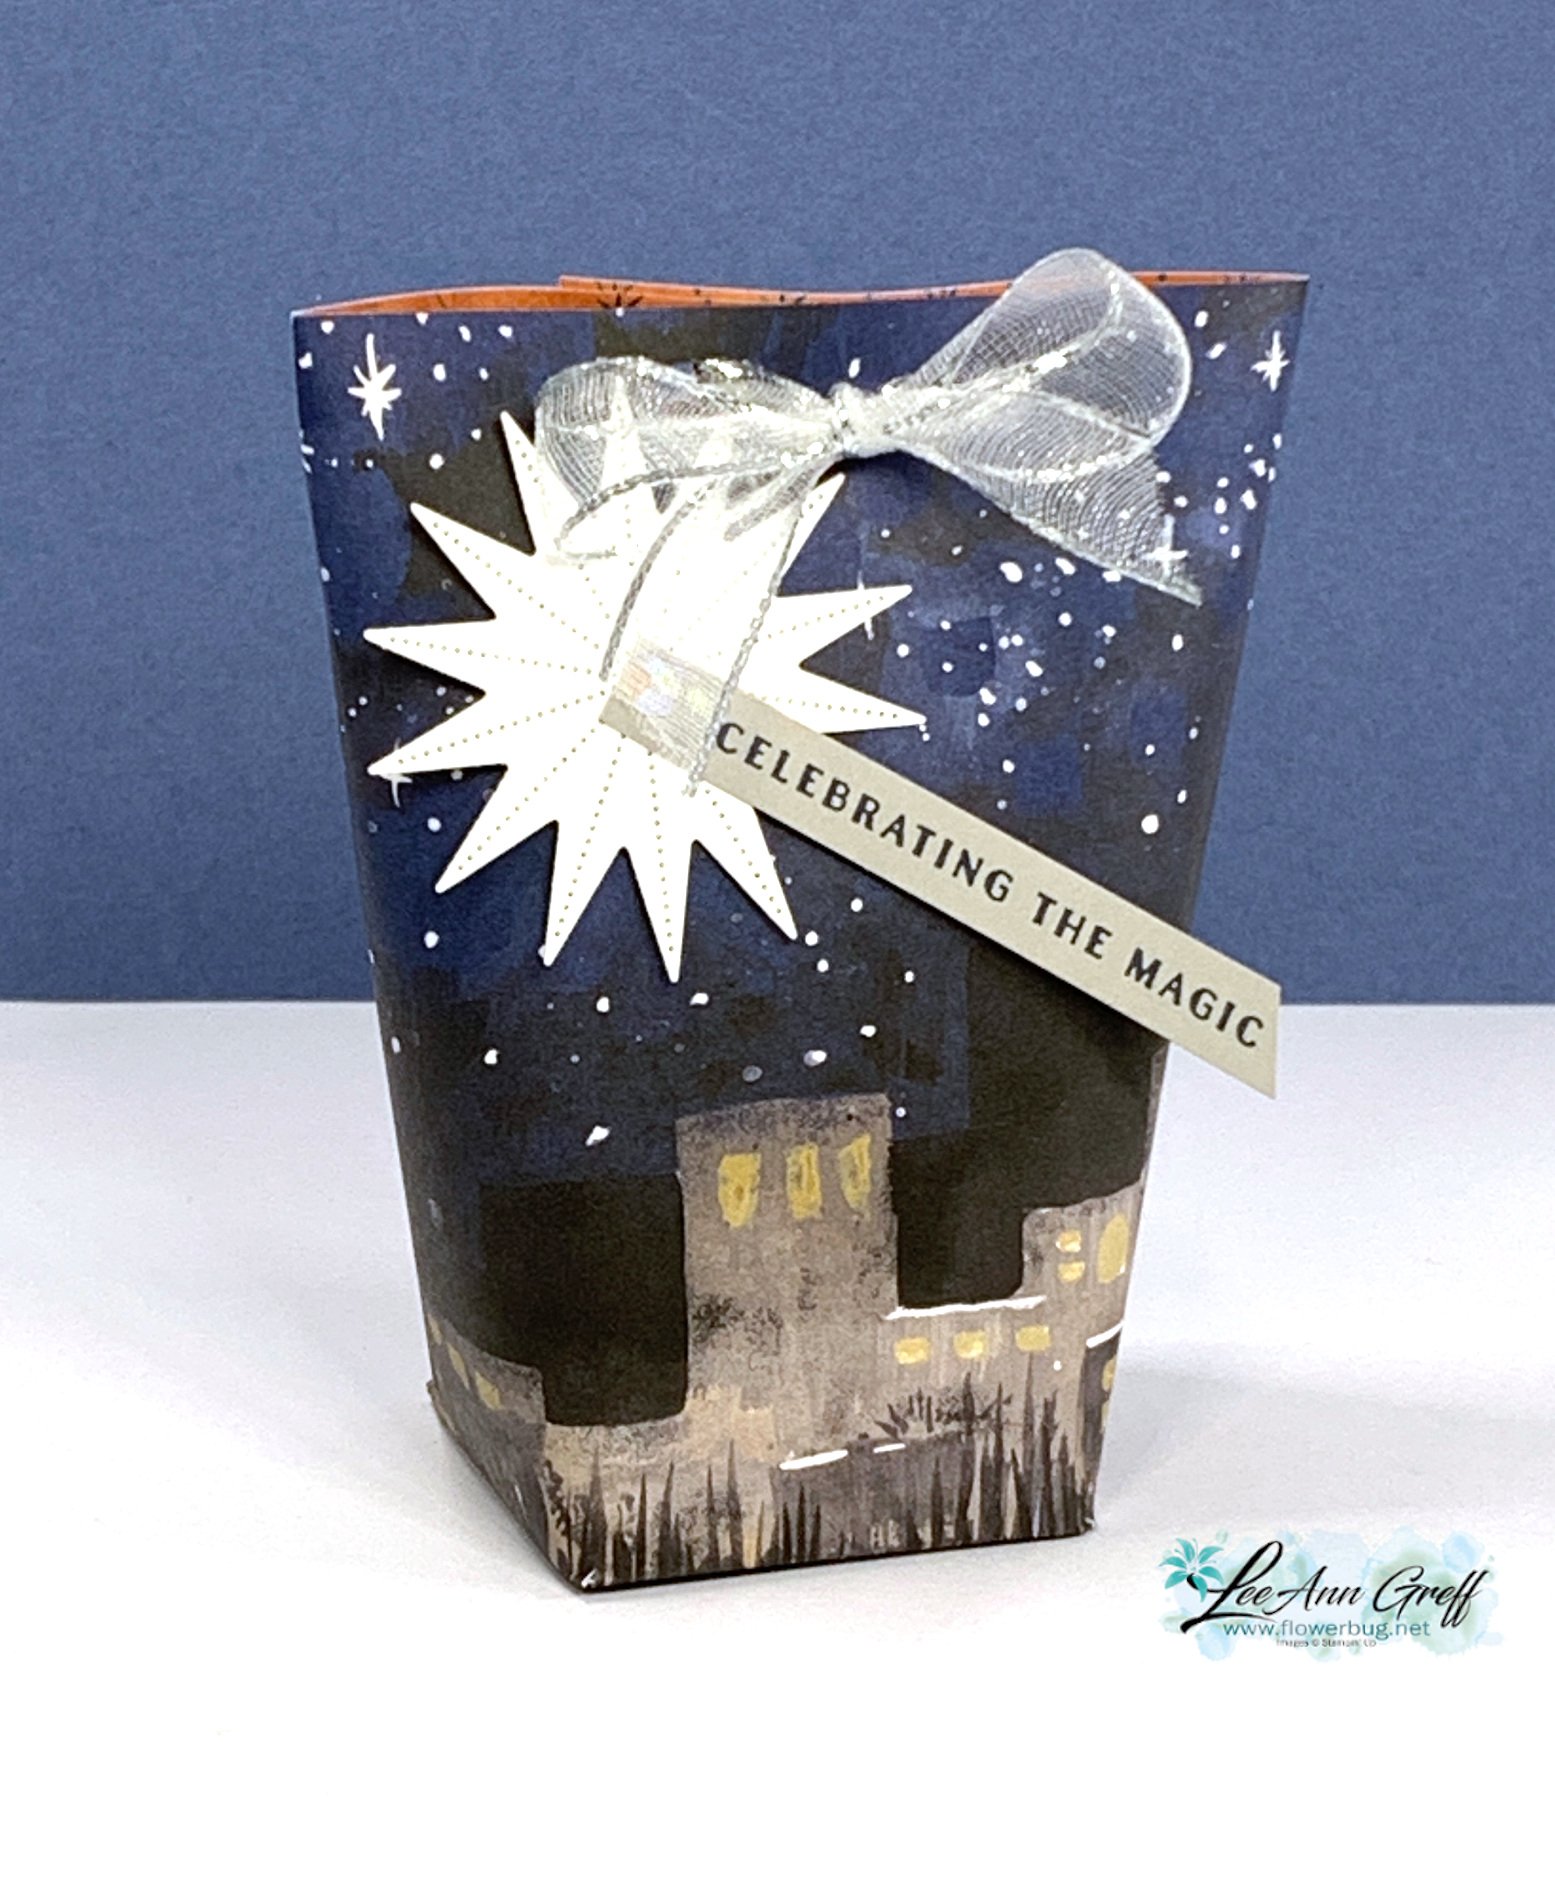
    If you ever need a fast & easy way to gift treats or a small gift I recommend this quick treat bag. I shared how to make it in a recent video and you can scroll down to get the free project sheet. 

    It's made from a piece of designer paper that's 8 1/2" wide X 6" tall.  The bag is 4 3/4" tall and about 4" wide at the top.  A nice size!

    The 'Boo' bag is made from the Them Bones designer paper and the tag is also from the paper.  It's part of a full sheet of individual panels you can use for cards etc.  

    I made the Boo bag before the video and the Christmas bag during the video. See this video here.  

    Below is a photo of it open.  I added about 6 small candy bars inside and there was room for more yet! The layered greeting tag holds the bag closed with a mini clip. 

    *Download the free project sheet with template here: Download Easy Treat bag with template

    Below is the template but it will help quite a bit to watch the video tutorial here. 

    The treat bag below is made from the O Holy Night designer paper and the Stars at Night bundle.  This pretty paper has the beautiful nighttime scene printed on it!

    I punched two holes in the top of the bag to thread the Silver & White ribbon through for a tied bow. This ribbon is a new favorite; it's sparkly and thin so it's easy to work with. Unfortunately it's out of stock until mid November. 

    Click here to watch the video you can watch to see this and two fun fold cards as well. 

    ~~~

    October Specials: 

    The Amazing Starter Kit deal ends Tuesday! 

    Choose one and enjoy the 20% discount on all future orders! Click here

    *current host code: HTHK4TQU or 4GHXYSDQ

    *Get free glitter gems with online orders over $55 (Please use a host code)

    Leave a Reply

    Your email address will not be published. Required fields are marked *

  • 2 days left to get in on the Starter Kit deal!


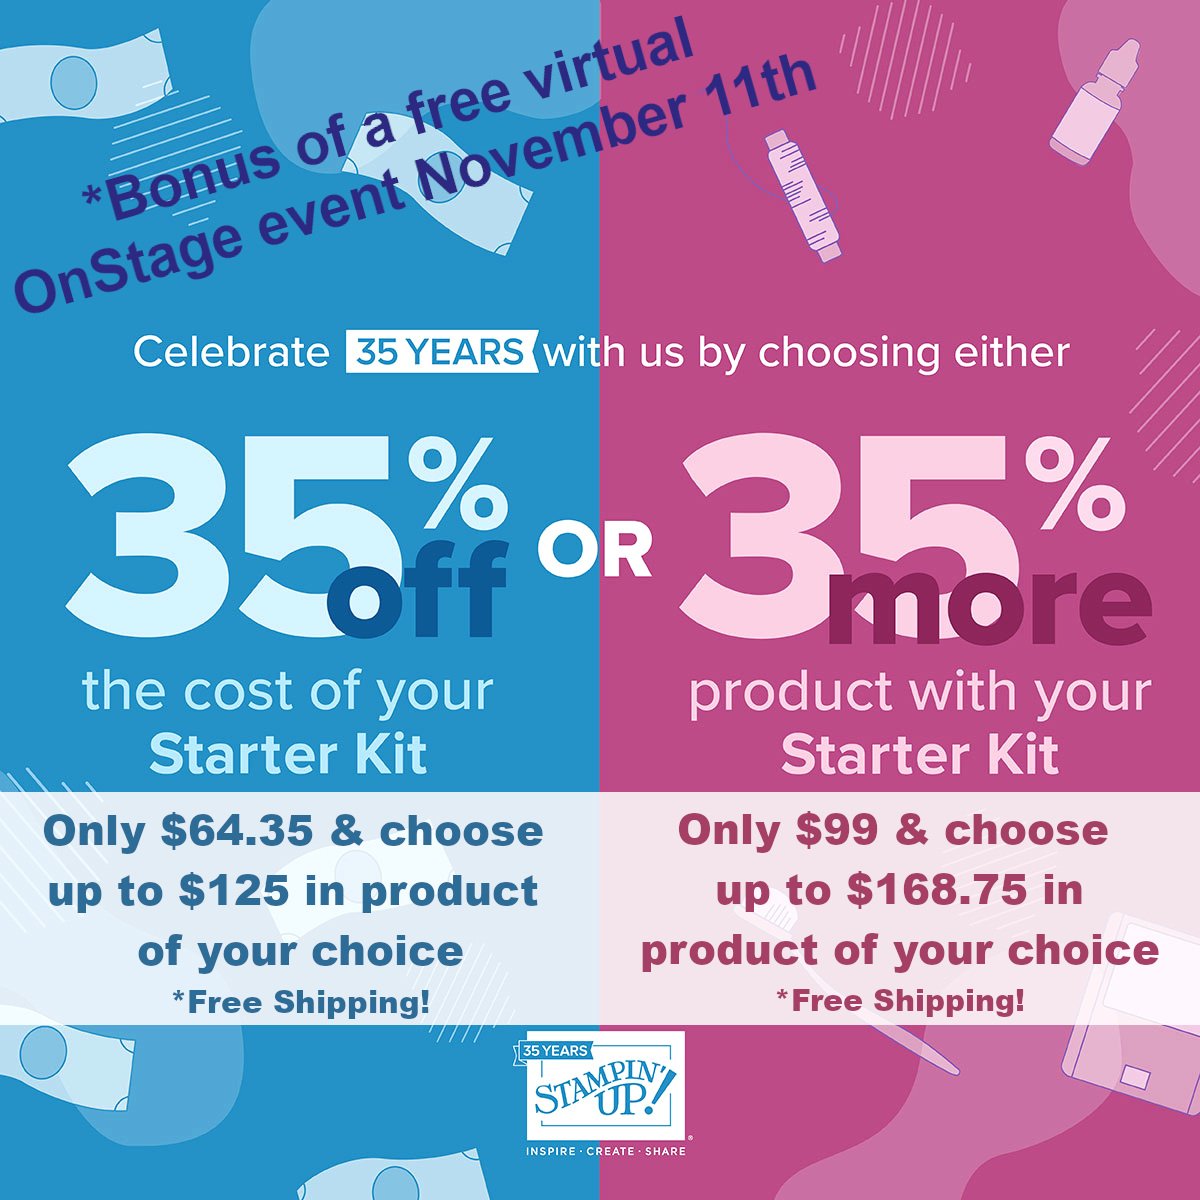
    Tuesday is the last day to take advantage of the October Starter Kit deal.  

    You can choose the deal you'd prefer – 35% off or 24 % more! *see prices in the graphic above
     
    A few things to note:
    – 20-25% off all future orders
    – create your own personalized kit with products YOU want.
    – Purchasing the starter kit is basically just an order at a fantastic price; what you do afterwards is up to you! 
    – you don't need to sell products or hold events; just enjoy the discount while you can. There's no pressure to do more than YOU want to!
    – you'll get a FREE online event in November valued at $77
    your first $300 quarterly minimum isn't due until the end of March, 2024!
    – all orders until March count towards that minimum!
    – All of my tutorials are free each month to my team – it's usually 3-4 each month
    – enjoy being a part of our friendly, active Flowerbug's Team with optional challenges, swaps, local and online gatherings and sooo much sharing!
     

    ~~~

    October Specials: 

    Amazing Starter Kit choices! 

    Choose one and enjoy the 20% discount on all future orders! Click here

    *current host code: HTHK4TQU or 4GHXYSDQ

    *Get free glitter gems with online orders over $55 (Please use a host code)

    Leave a Reply

    Your email address will not be published. Required fields are marked *

  • Trucking Along window fun fold card with video & free project sheet!


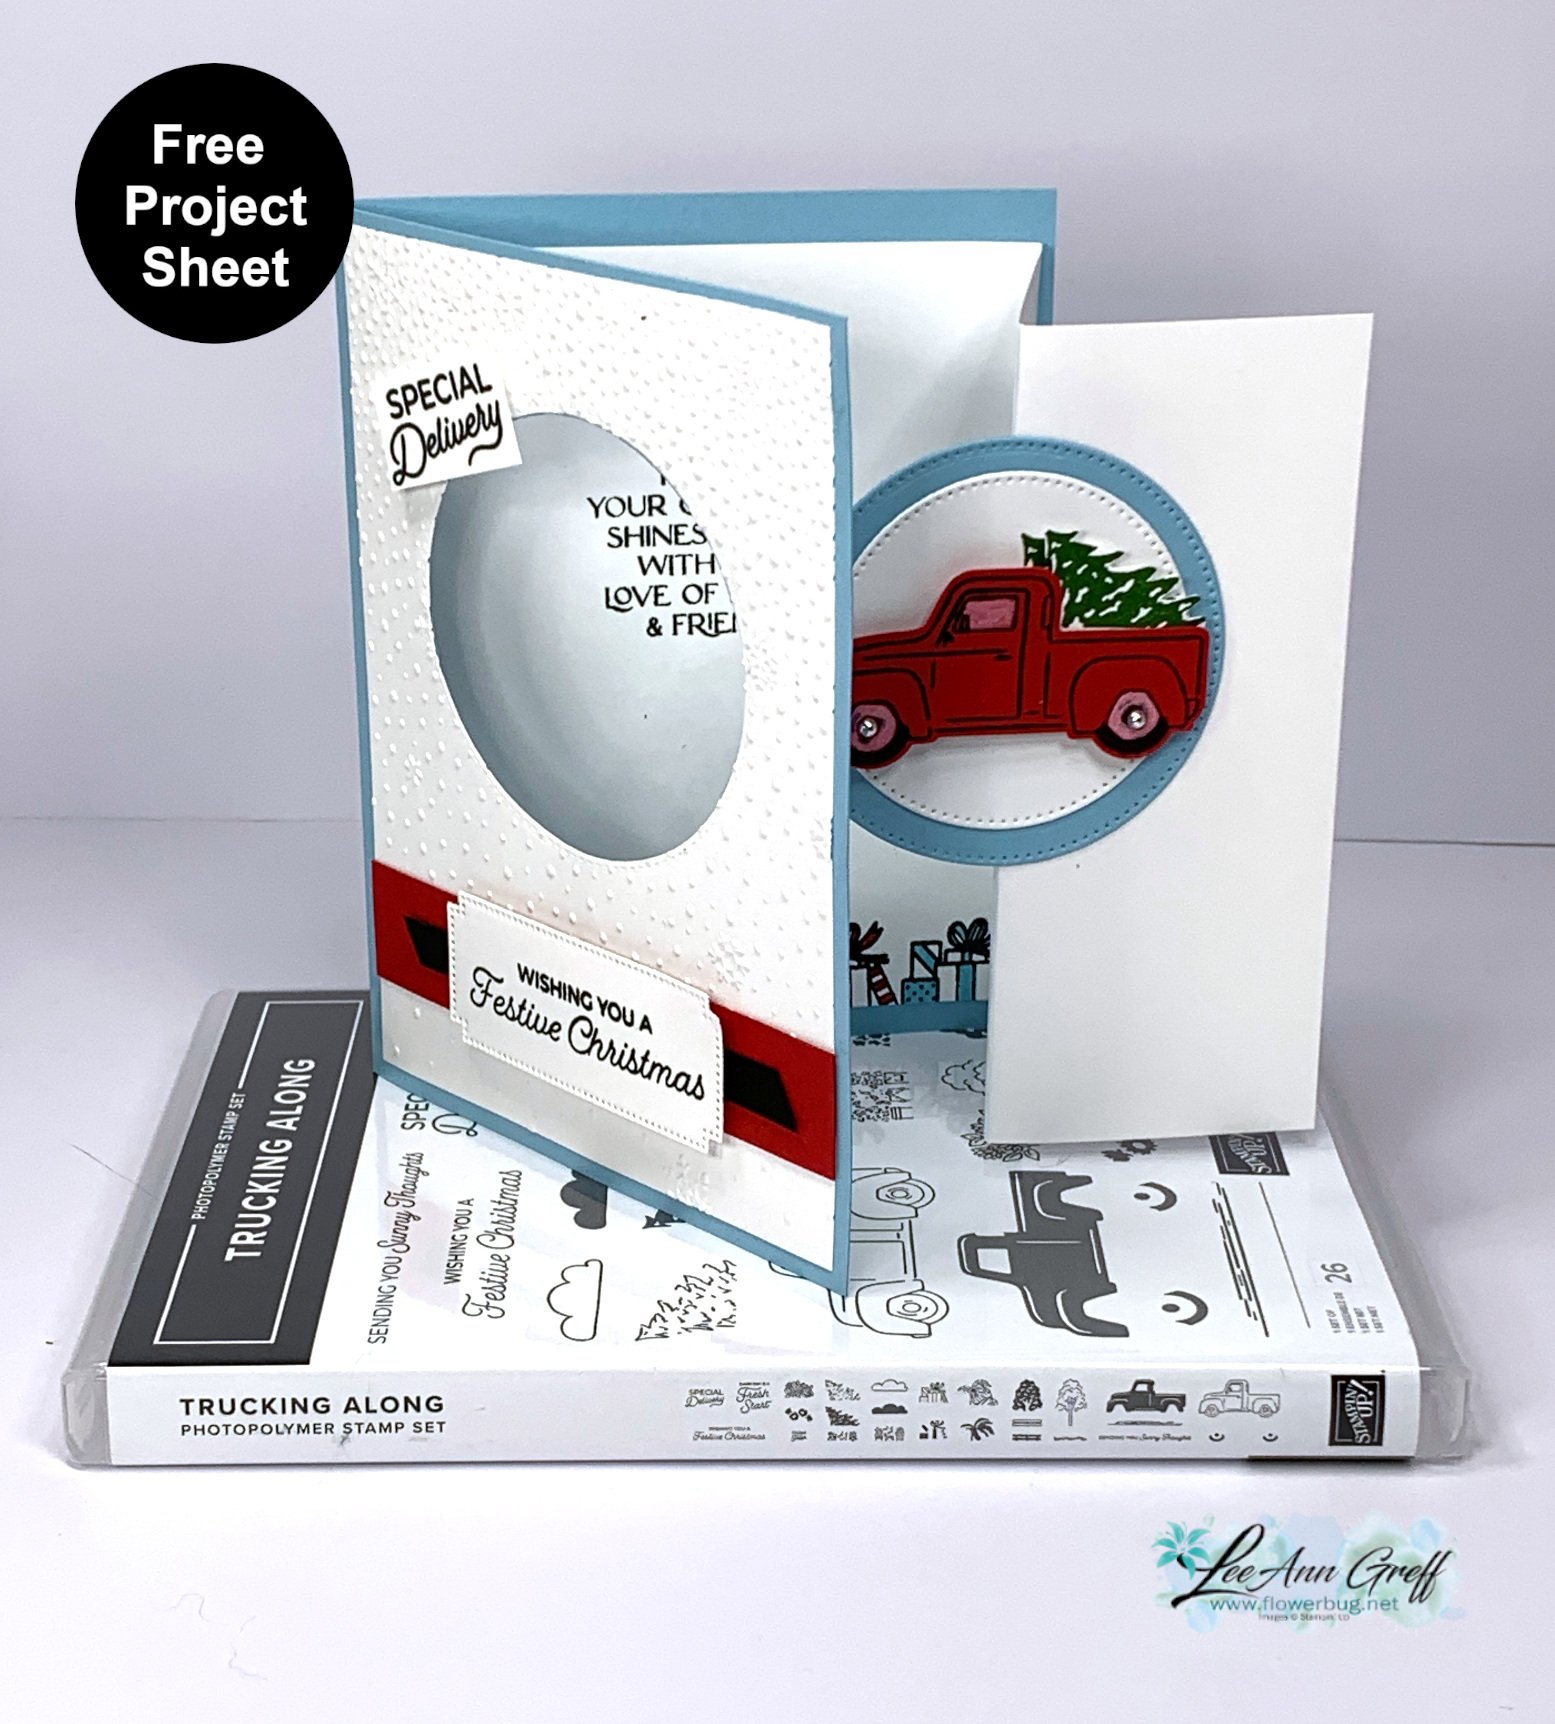
    Today I'm sharing one of my October card club projects; it features the Trucking Along punch bundle.  See it here; it's now back in stock!! 

    I used an easy technique on the window and tire rims. See how they're a soft white?  Using our White Craft ink pad, I grabbed a bit of White ink with a blender pen and colored these areas. You can add more color if you'd like it whiter, but I like the almost opaque look.  

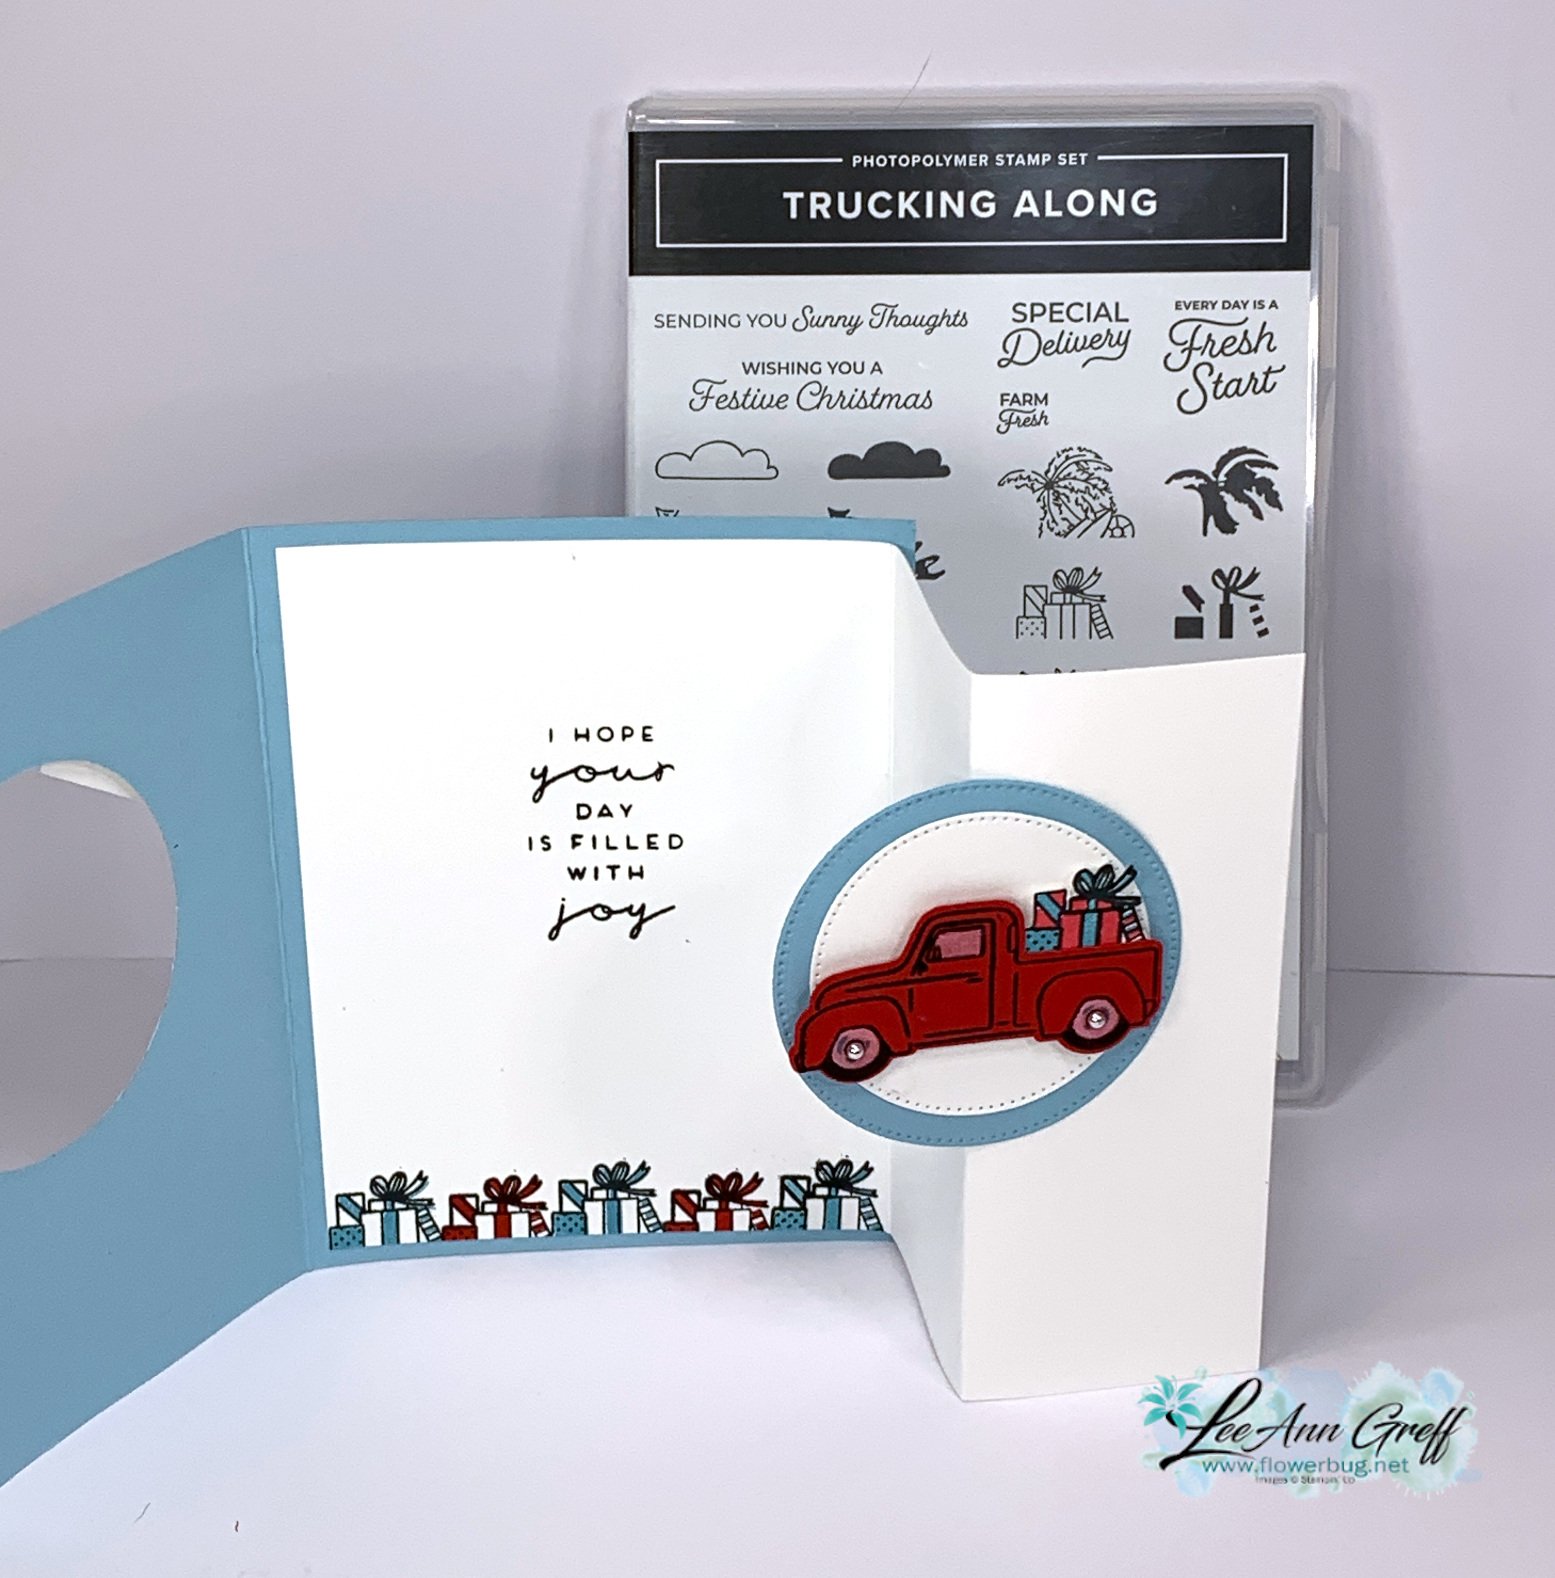
    Note one card has presents and the other a tree in the truck bed.  These are stamped on a separate piece of White paper and fussy cut before adding to the truck. 


    I created two options for my Club members; a birthday or a Christmas card. This Truck bundle has a wide variety of stamps & greetings.  I did use the Happy Birthday image from the Enjoy the Rhythm set and the inside Christmas greeting from the Brightest Glow stamp set.  

    Click on this link to download or print the free project sheet.  It includes photos, supplies, measurements and step by step directions.  Download Oct 23 Trucking Along window card

    As you can see in the card above and the one below; it's easy to switch themes with this fun card. 

    Below is the video tutorial for this card, another fun fold and an easy treat bag too!  Don't forget to subscribe to my YouTube channel too!  

    ~~~

    October Specials: 

    Amazing Starter Kit choices! 

    Choose one and enjoy the 20% discount on all future orders! Click here

    *current host code: HTHK4TQU or 4GHXYSDQ

    *Get free glitter gems with online orders over $55 (Please use a host code)

    Leave a Reply

    Your email address will not be published. Required fields are marked *


Notice: LeeAnn Greff, Independent Stampin’ Up! Demonstrator, Manager. The content of this website is my sole responsibility as an independent Stampin’ Up! demonstrator and the use of, and content of, the classes, services, or products offered on this website is not endorsed by Stampin’ Up! Copyright 2025