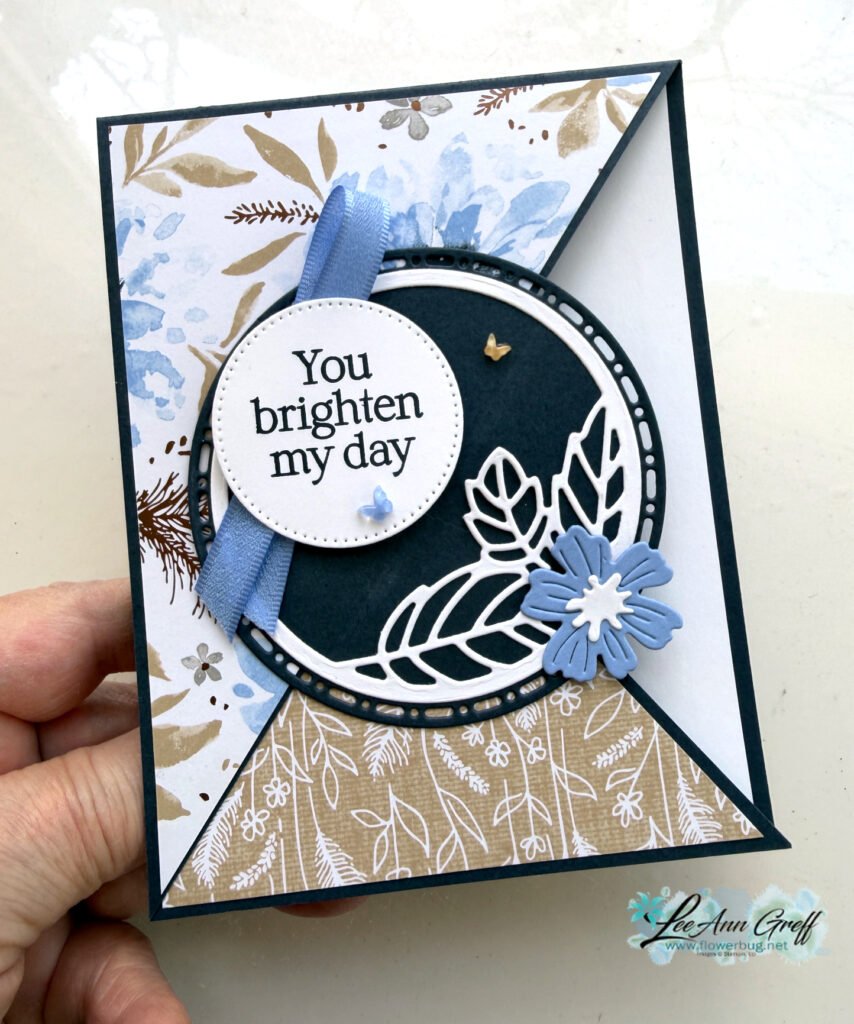
This card might look like it’s difficult but it’s as simple as trimming off one half of the card front at a diagonal and flipping it over. Yup; that’s it! Watch my video below to see how it’s done.
My colors include Secret Sea, Hydrangea Hue (new in color), White and Crumb Cake. The largest circle is from the Spotlight on Nature dies seen here. The small White circle is from Stylish Shapes dies.
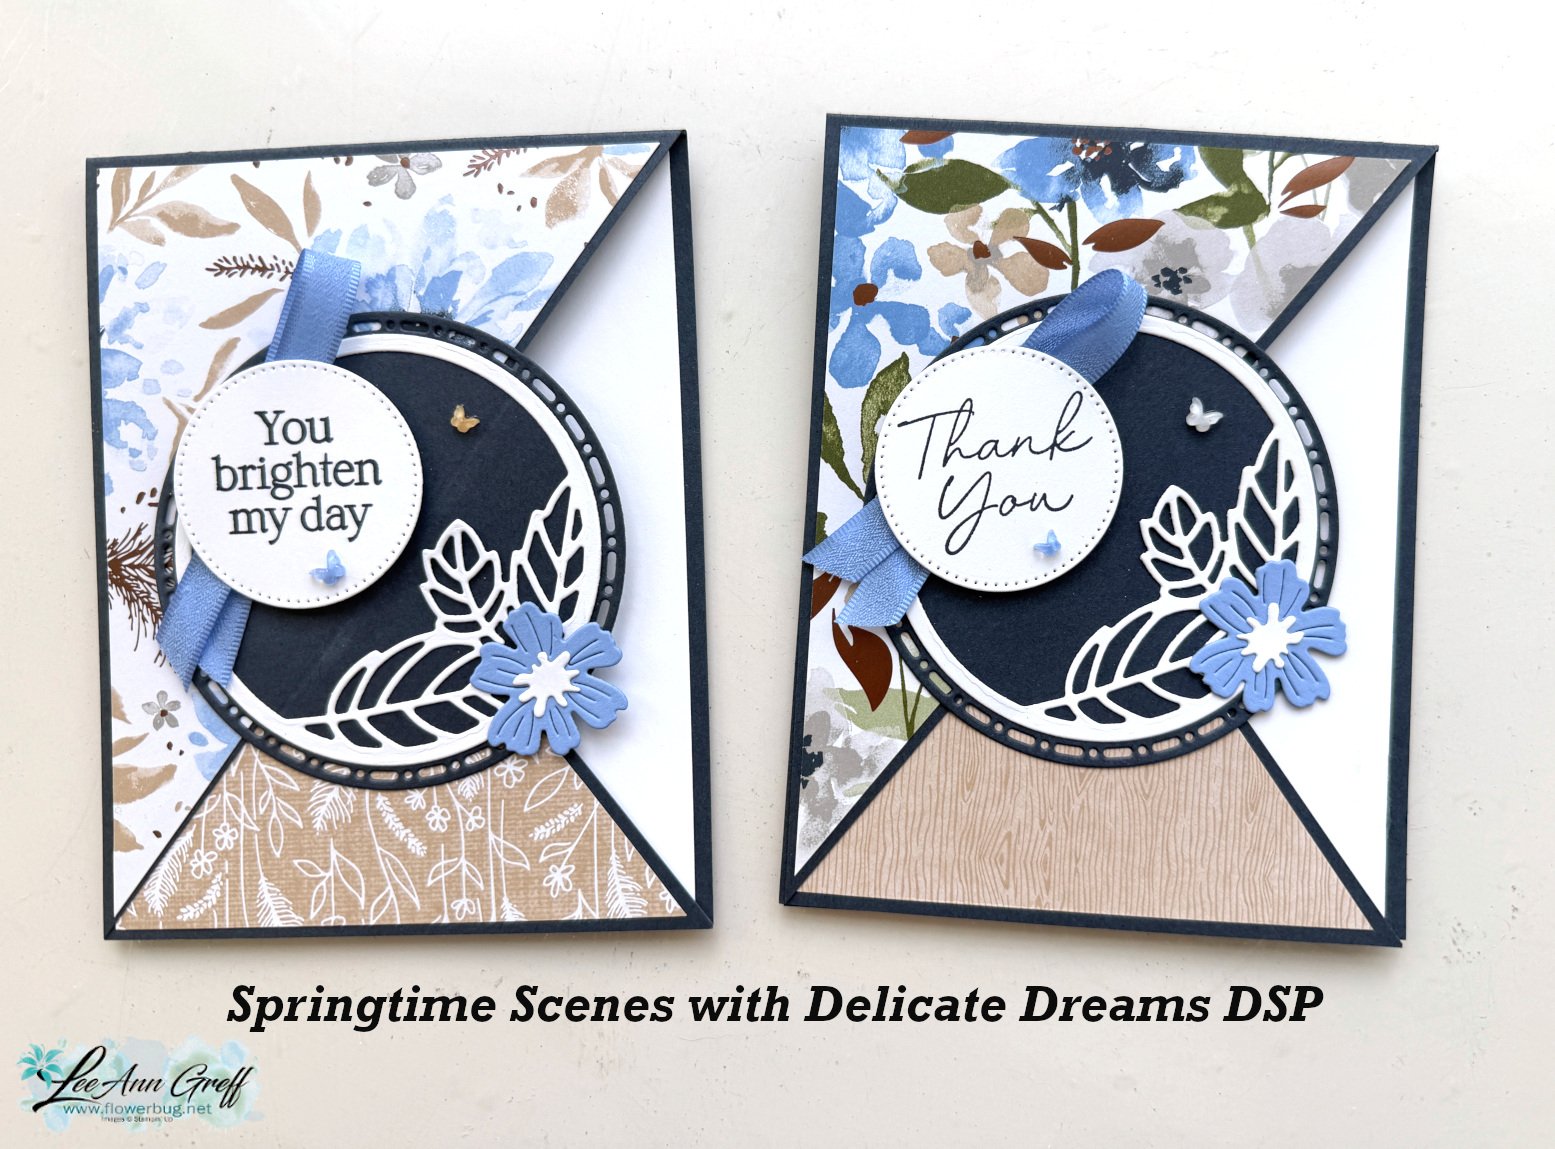
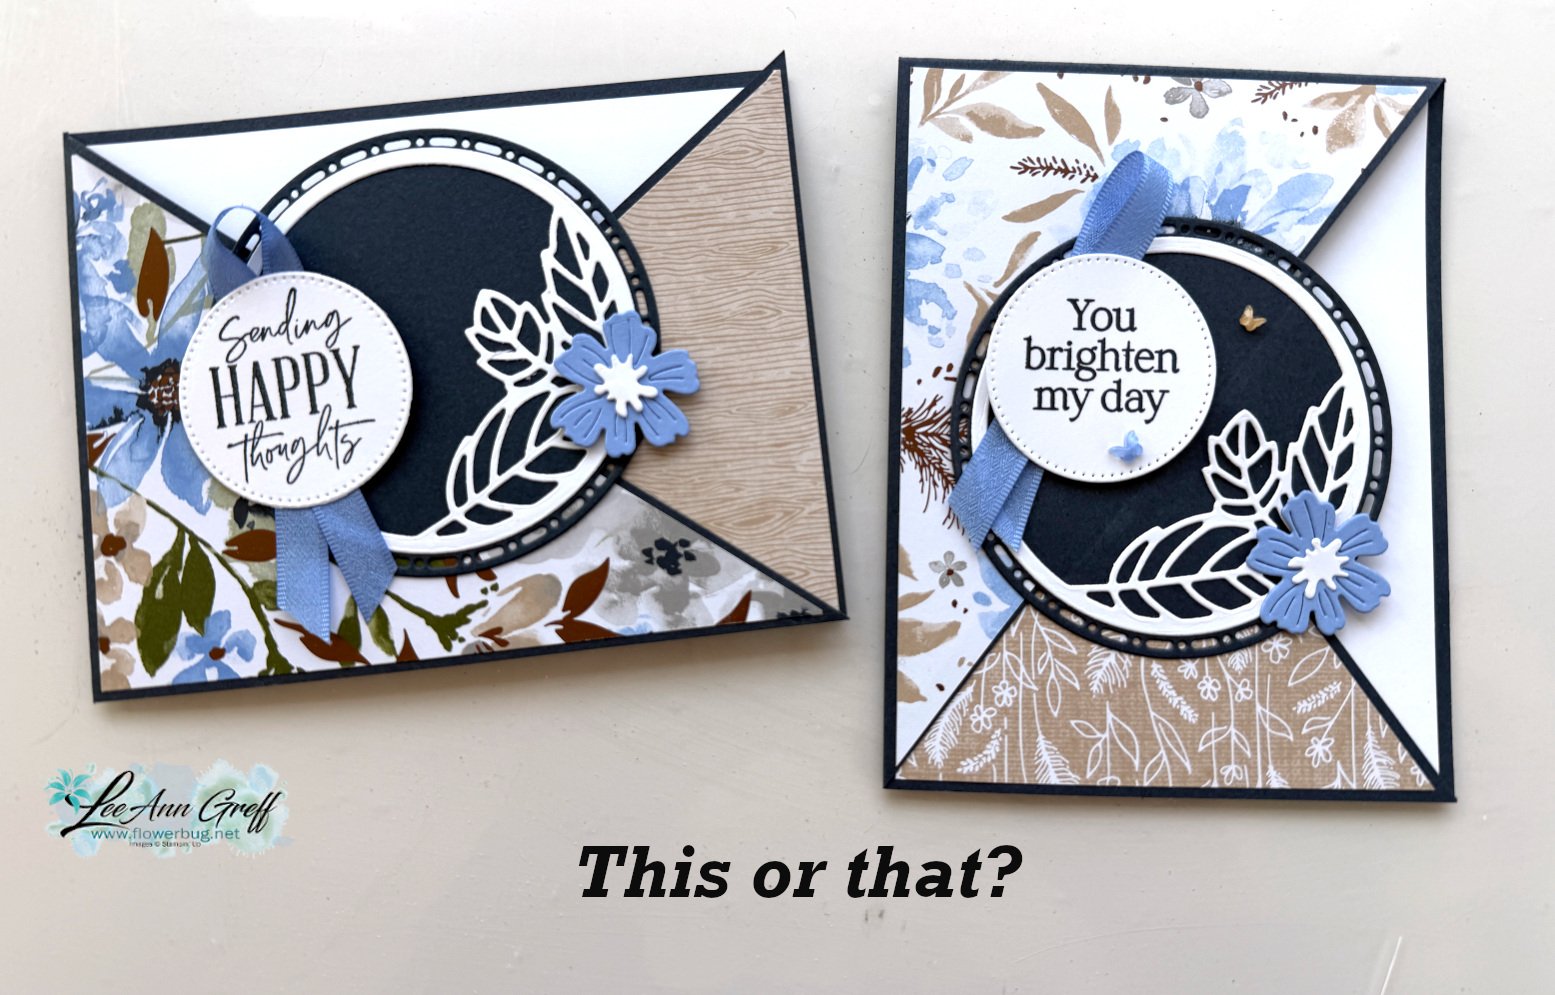
We tried this layout in both landscape & vertical position. Which do you prefer?
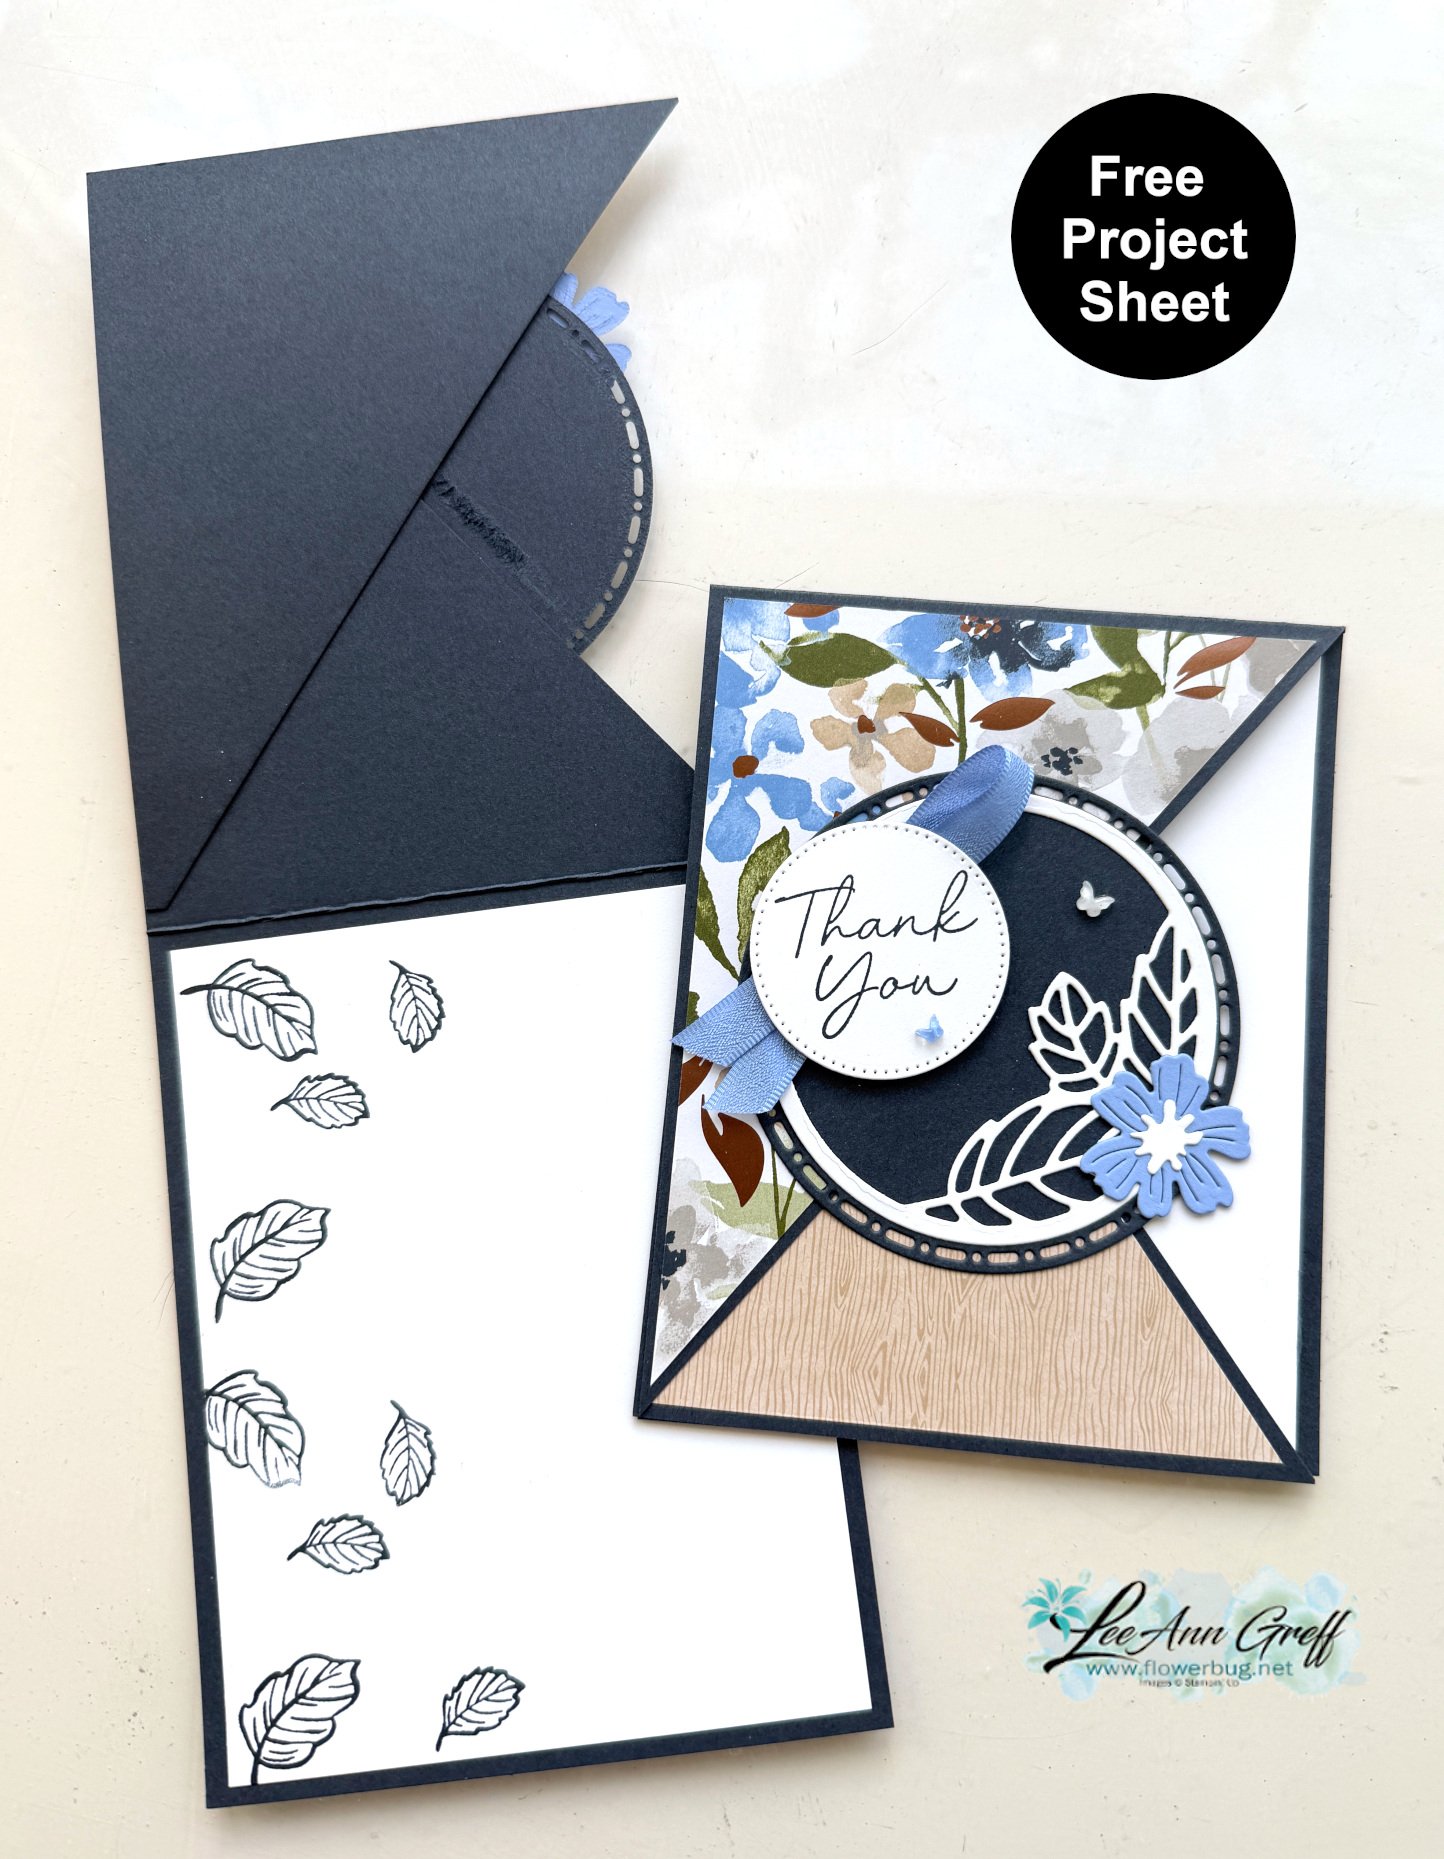
I created a free project sheet for this card with measurements, directions, photos and supplies listed. Click hereto download or print it.
Below is the video tutorial with tips on assembly.
Today's project was inspired by my Team member Candace who made this cool fun fold card for a recent swap.
Isn't it neat! She featured the Beary Cute bundle on her card in Lost Lagoon, Smoky Slate & Pretty Peacock.
My favorite part of her card is that it's quite easy to make! I knew my followers would like to know how to make it so I shared it on a recent video (seen below).
I used similar colors but chose the Magical Meadow stamp set & the Abundant Beauty Decorative Masks seen here.
I used a blending brush, Lost Lagoon ink and the snowflake mask to create my card front. After adding the pretty snowflakes I textured it with the Snowflake Sky 3D embossing folder.
It's a mini slim line card; the finished size is 3" X 5 1/2". I just love the fun of the popped up panels inside!
Get 2 cards at a time with this special card layout & a 6 X 6″ piece of designer paper!
I shared this card on last week's Live video. It features the So Very Merry stamp set and the Snowflake Magic designer paper.
I made a bunch of these cards for our Flowerbug's October Christmas card swap. You might wonder how I achieved the starburst effect with the Snowflake Magic designer paper. Keep reading plus watch the video seen here or below!
Other products used:
Vellum card stock, Gold Foil paper, Deckled circle dies, Stylish Shapes dies, Blends markers for coloring & Gold heat embossing.
Here's what the inside looks like. Make note of the little designer paper triangles inside; remember this when you see the cutting templates below.
My friend Lyssa Zwolenek inspired these cards and created the template too. She is super creative and so great about sharing ideas!
Below are a few cutting templates for you.
Watch the video hereor below to see how this is done.
Directions:
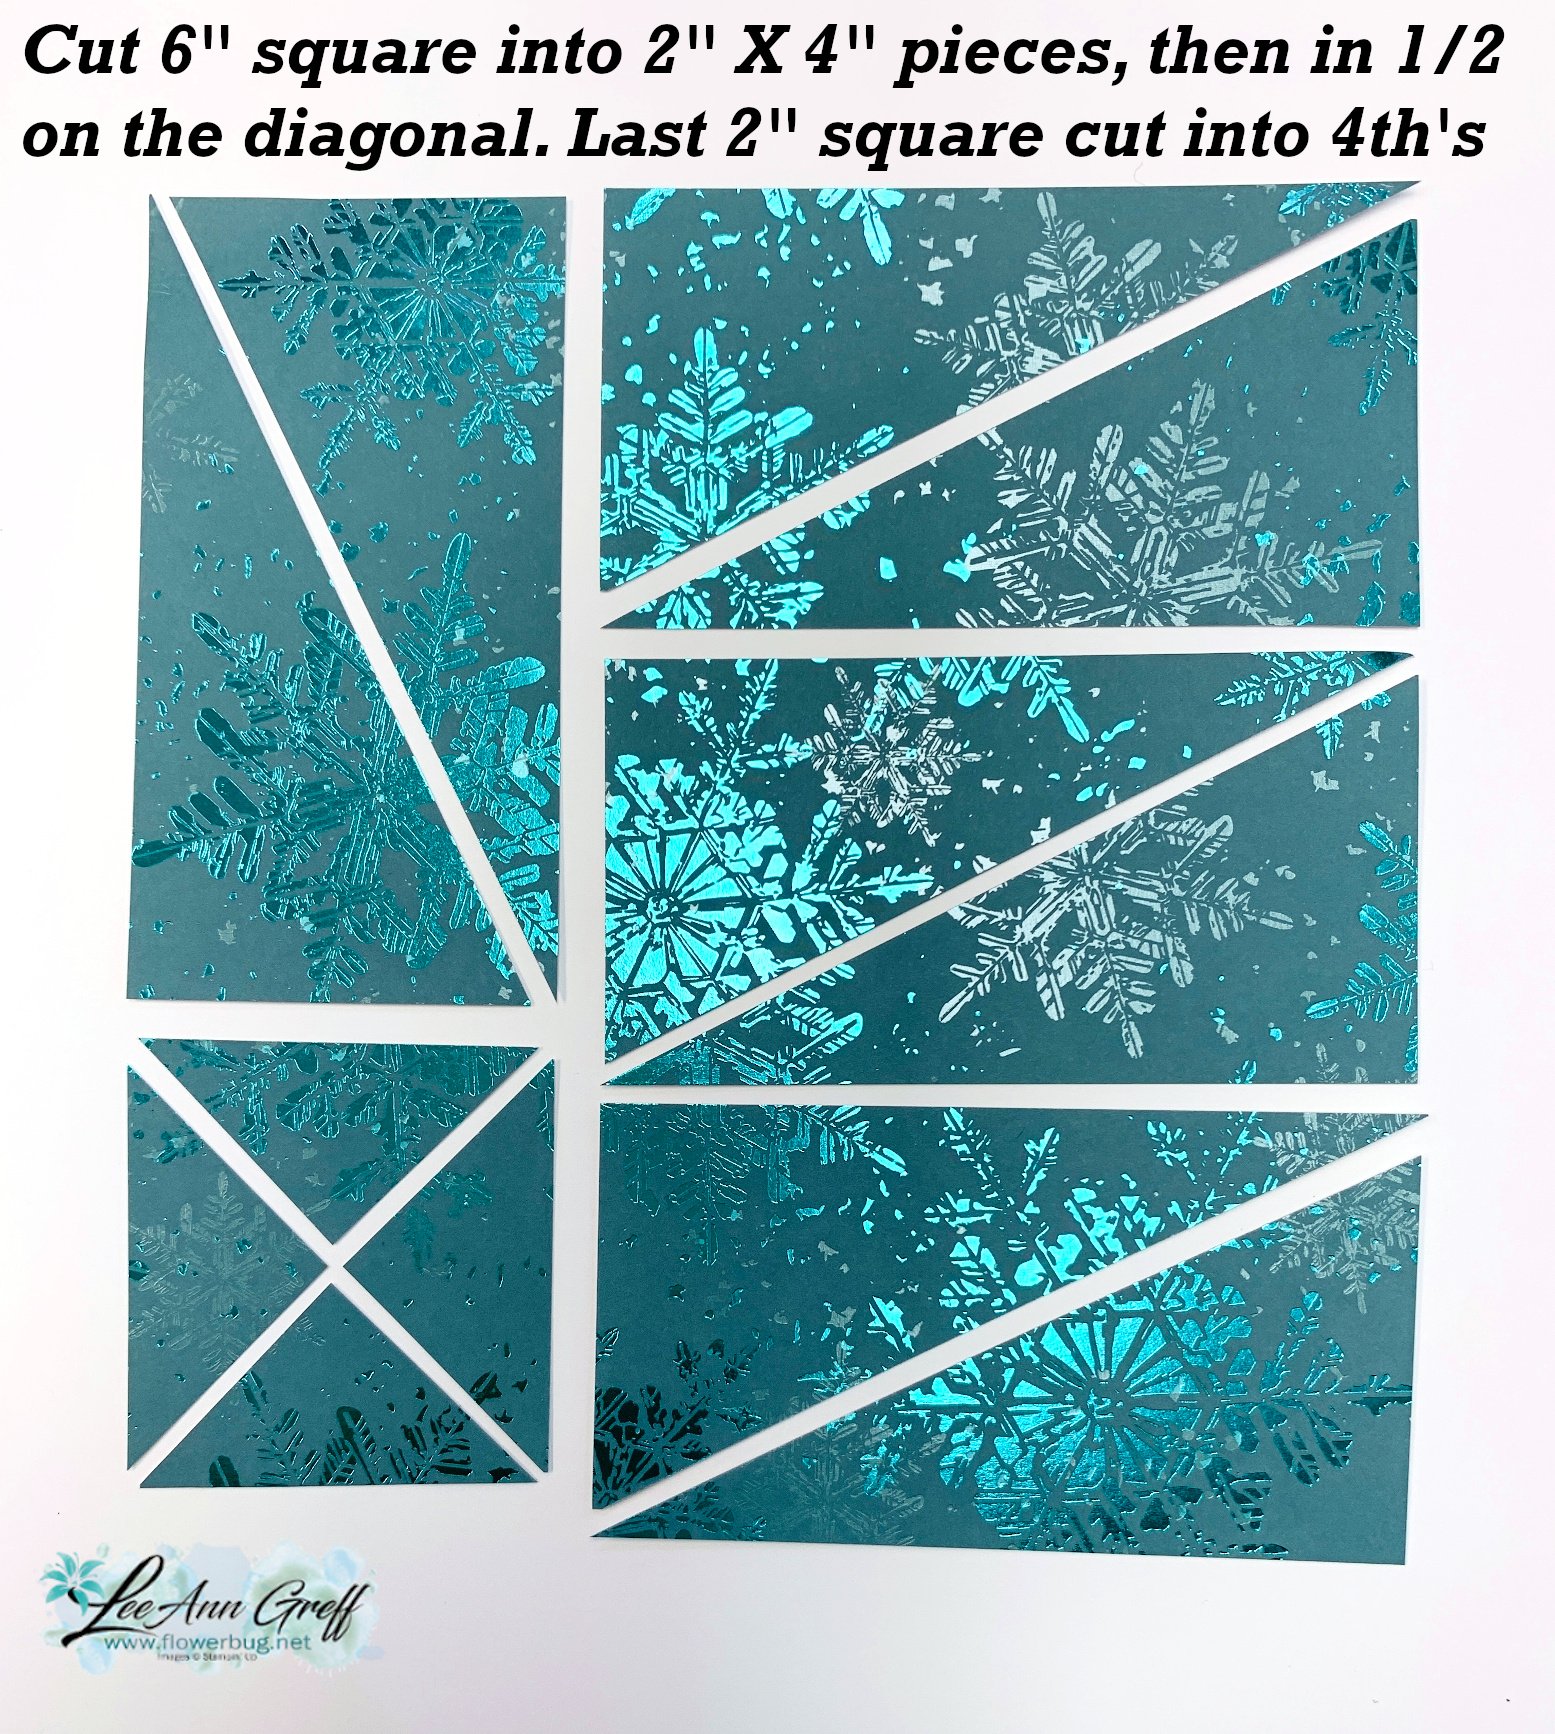
You'll start out with a 6" square of designer paper.
First cut is at 2". You're left with a 4" X 6" piece on the right.
Cut the 2" strip into a 2" X 4" piece, leaving you with a 2" square.
Next cut the 4" X 6" piece on the right into three 2" X 4" pieces.
See this gorgeous Snowflake Magic specialty paper here.
Now you'll cut each 2" X 4" strip into two pieces by cutting it in half on the diagonal.
Be sure you cut each one in the same direction.
Cut the 2" square in half on the diagonal and then cut each triangle in half. These pieces are used on the inside of the card.
You'll use 4 of the large pieces and two small triangles on each card.
Our Online Exclusive products can be ordered by anyone. The name means that they are only seen online and not in any printed catalog.
These products may run out at any time. Some will be reordered and others will not. We never know!
Many will remain in the Online store for up to 1 year before they'll be discontinued.
Online Exclusives allow Stampin' Up! to offer timely products for seasons and holidays. Most of their other products are in catalogs that are printed over a year in advance!
Watch the video tutorial below:
~~~
October Specials:
Amazing Starter Kit choices!
Choose one and enjoy the 20% discount on all future orders!Click here
Beautiful cards made with the Rustic Christmas Countdown kit!
I created these pretty cards with the Rustic Christmas Countdown kit. It's meant to be used as an advent calendar but I thought they'd make great Christmas cards.
I will not be surprised if this kit sells out soon. It's gorgeous! The envelopes for the advent calendar are approximately 3" X 4"; a good size to add a treat inside.
I added Mossy Meadow & Cherry Cobbler card bases, some textured strips of the same colors and a few greetings.
The greetings mostly cover up the numbers printed on the wood & gold paper elements in the kit.
For greetings I used the Brightest Glow (annual catalog) and Beary Cute (Holiday catalog) along with circle punches and Tailored Tags dies.
We made these projects at my October Flowerbug's Team meeting. So pretty but super easy!
You could make up to 25 cards using this kit just by adding card bases, a few layers and greetings. The red adhesive-backed sequins, Dimensionals, Cherry Cobbler and craft twine all comes in the kit.
See this kit here online. Our Christmas kits can sell out quick; so don't wait too long. You never know if it will be back in time for Christmas.
The kits is gorgeous as an advent project as well! It also includes the cutest clothespins to close the envelopes.
While you're shopping our kits be sure to check out the huge selection of kits in our Kit Collection. These kits are all inclusive and can be the answer to quick, seamless crafting or a fabulous gift for any creative person. See them all here.
~~~
October Specials:
Amazing Starter Kit choices!
Choose one and enjoy the 20% discount on all future orders!Click here
Notice: LeeAnn Greff, Independent Stampin’ Up! Demonstrator, Manager. The content of this website is my sole responsibility as an independent Stampin’ Up! demonstrator and the use of, and content of, the classes, services, or products offered on this website is not endorsed by Stampin’ Up! Copyright 2025


Leave a Reply