/


Latest Post

Bonus Days are here! Plus lots of exciting new products seen online!!


First, I want to wish you a wonderful & happy 4th of July!  I hope you get to spend it with family or friends.

~~~

Bonus Days start today!  That means that for each $50 you spend (before tax and shipping) you earn a free $5 coupon to redeem in August. 

Tips on earning & using these coupons:

  • Spend in July & redeem in August – if you tend to order monthly or every other month it makes sense to assure your order is over $50 in July so you can redeem it in August
  • Need some of the new colors – In Colors or the new Basic Beige? Grab them in July!
  • Wanting to try Paper Pumpkin kits? Or if you already love Paper Pumpkin grab a 3 or 6 month pre-paid subscription here and earn free coupons!

Below is a sneak peak of the upcoming 3 months of Paper Pumpkin kits. There is an optional add on that coordinates with each of these kits! See that here. 

Remember that Paper Pumpkin subscribers get perks!  They are eligible to purchase any of the available past kits, refills or add ons.  I love the refill options; they're a fabulous deal!  See those here. 

Subscribe here to receive a kit sent to you each month. *Remember you are in charge of the kits you receive.  You can opt out or skip a month.  If you want to receive the Painted Petals kit be sure to opt in or subscribe by July 10th!

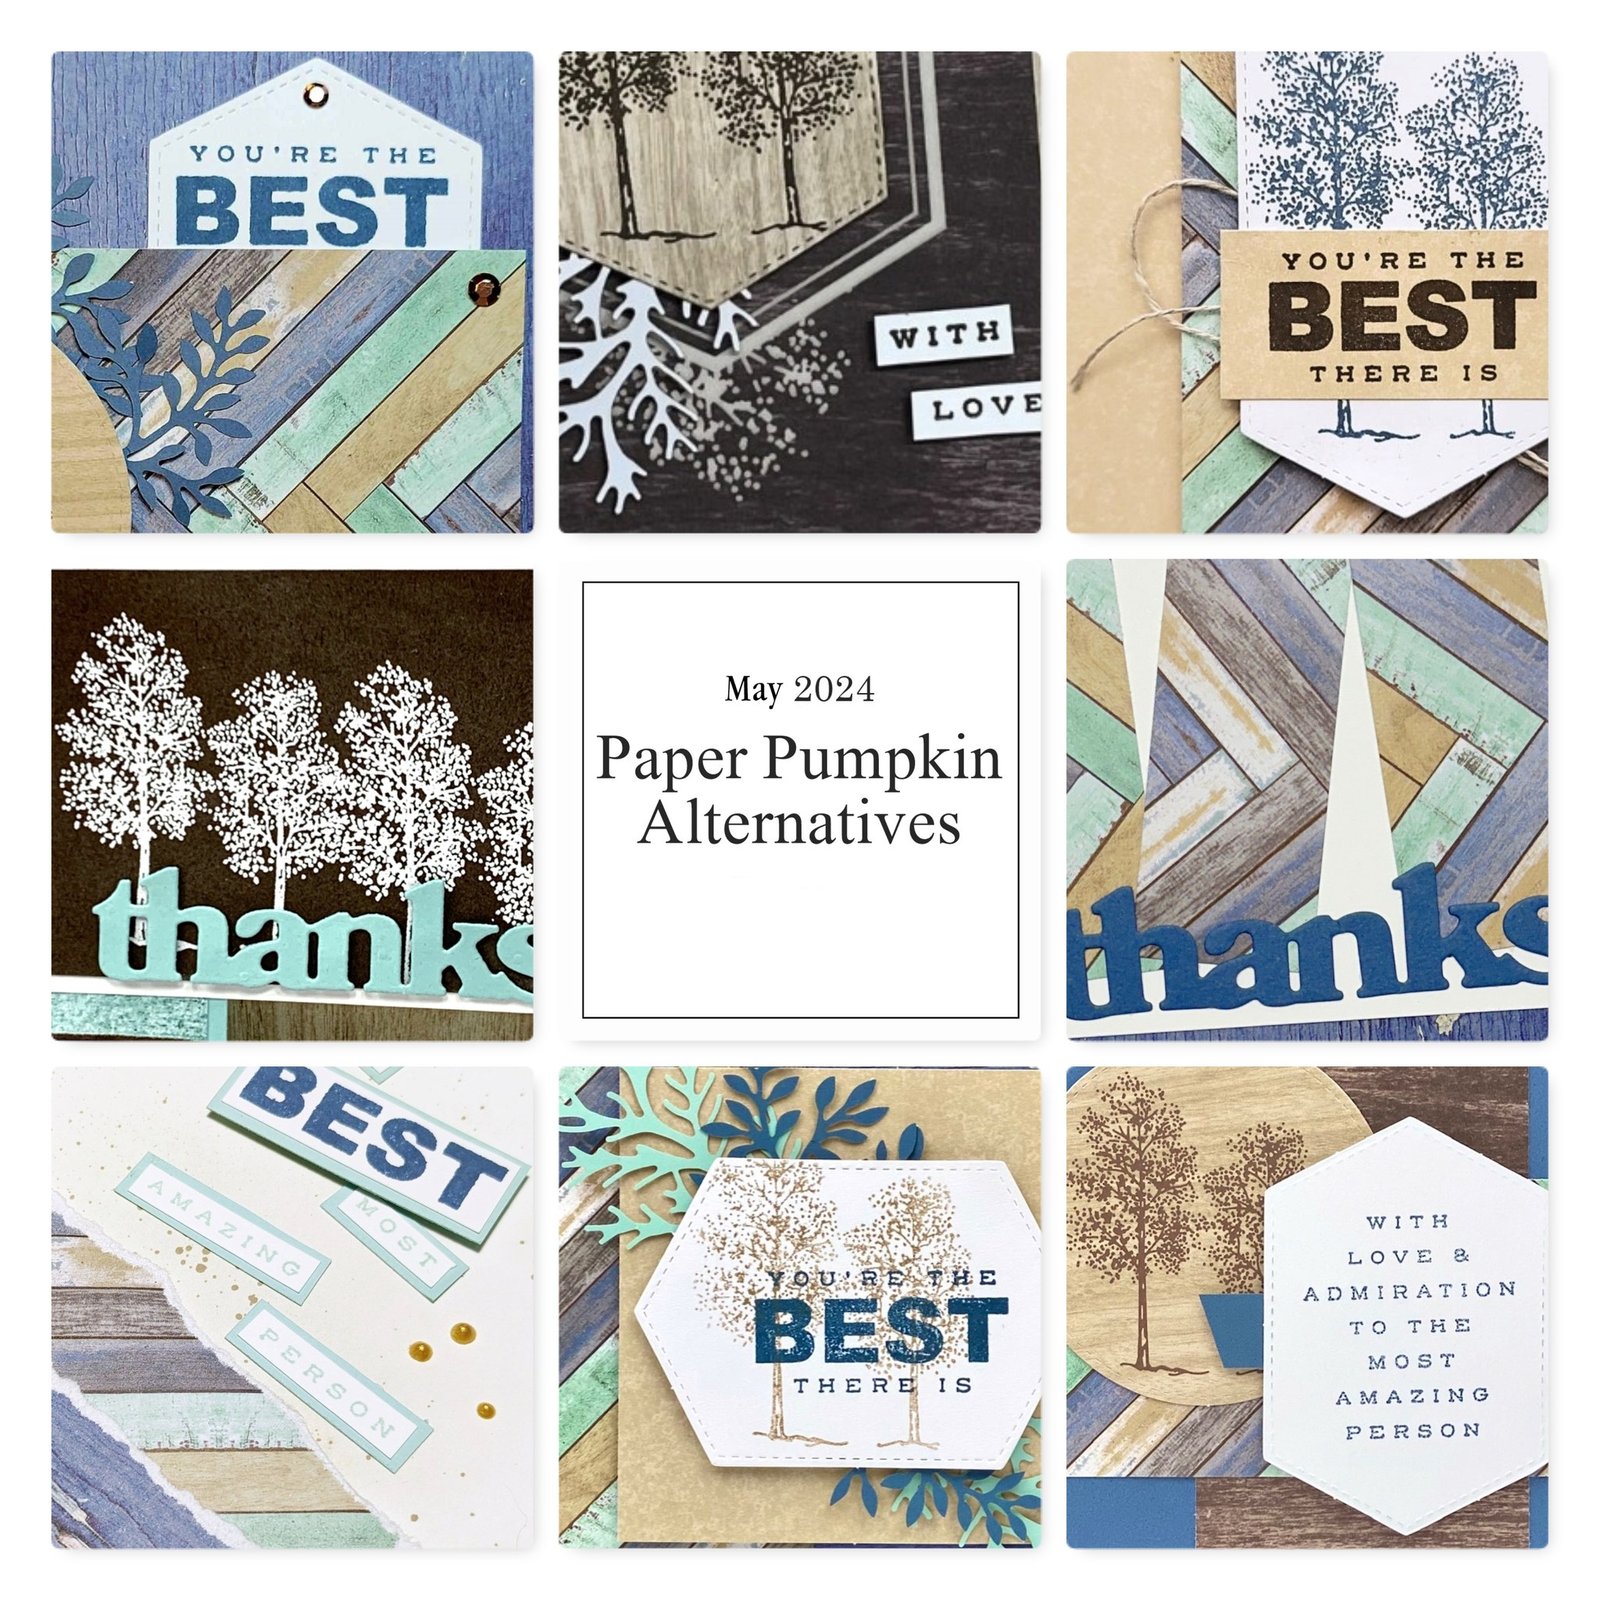
My subscribers get a free project tutorial that includes multiple bonus projects each and every month!  Here is a peak at May's tutorial projects: 
~~~

Click here to see the many new Online Exclusive products released yesterday; you can print it out too.  Fall, Halloween and Christmas as well as everyday greetings.  Here's a flyer made by Terri Gaines that you can print so see them all. Download July 24-OnlineExclusivesRelease

~~~

*current host code links: GF24T6XG or 3A73HXYB

Starting July 3rd, earn $5 coupon for every $50 you spend in July; redeem in August. 

~~~

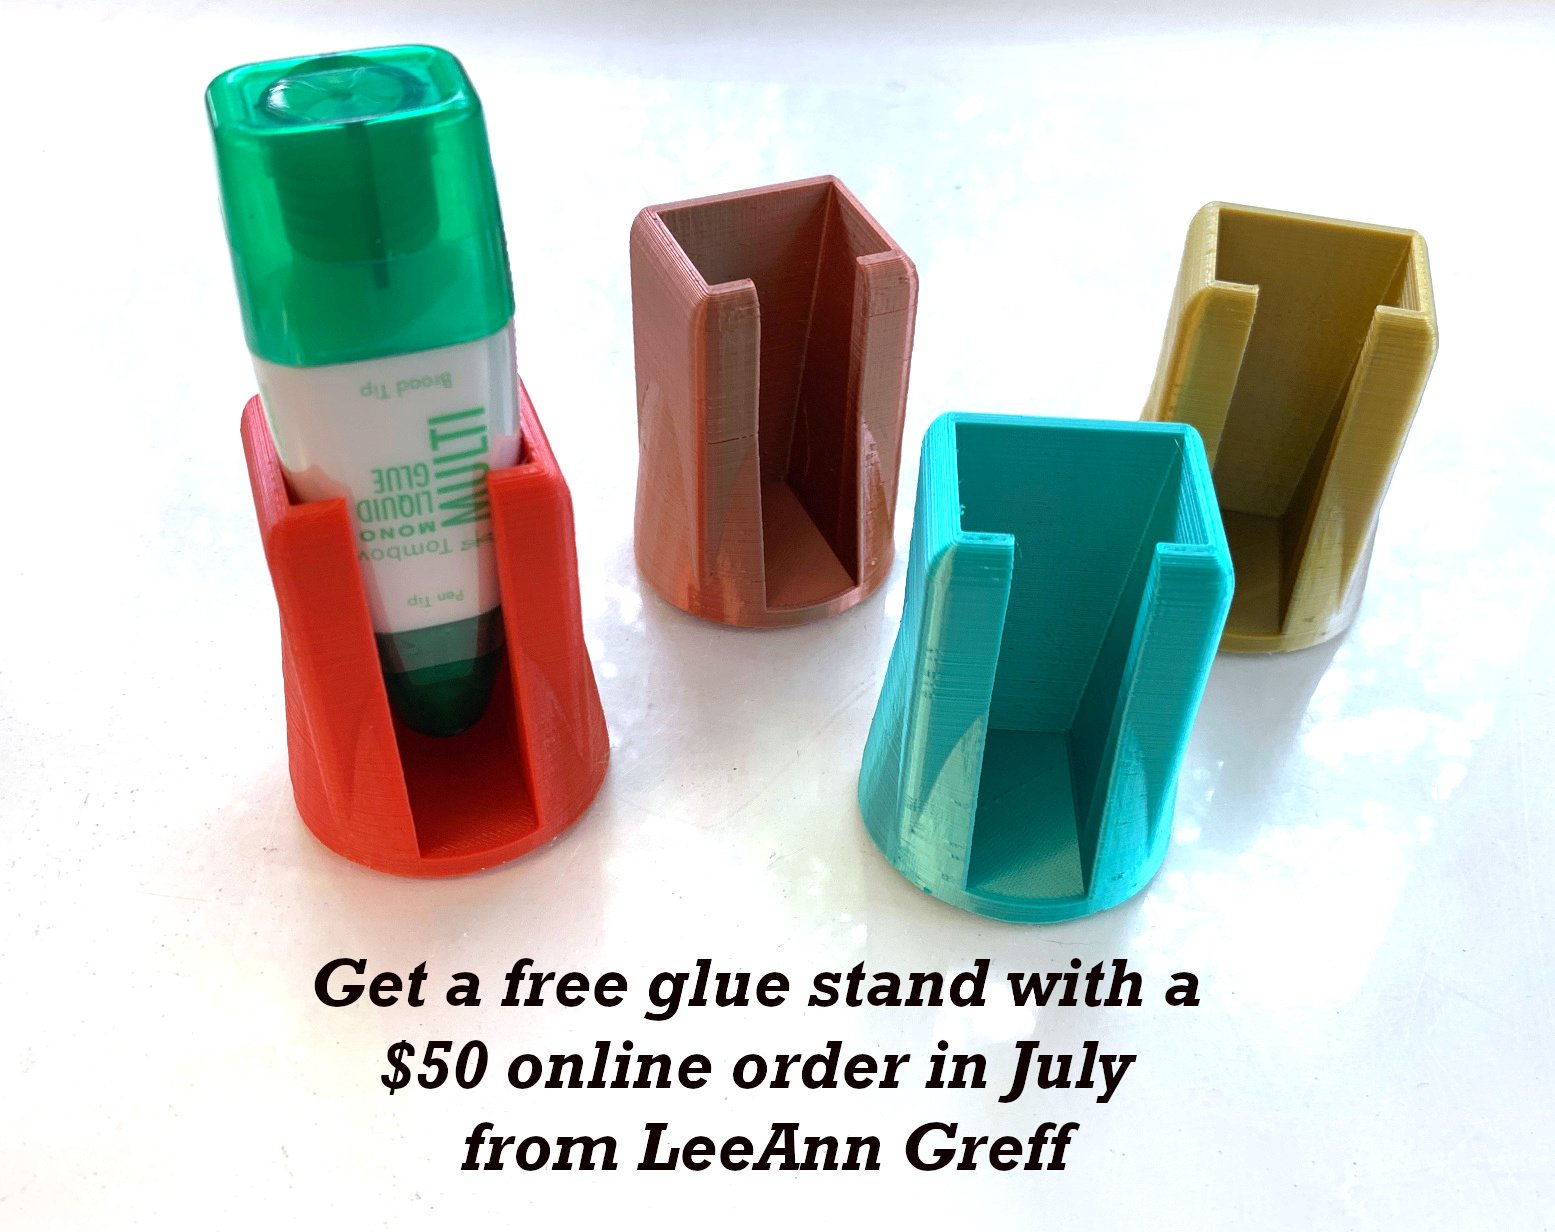
Get a free glue stand from me in July with your online order!
All online orders will receive my PDF tutorial featuring the Full of Life suite

All Posts

  • AMAZING Fun Fold card swaps by my Flowerbug’s Team!!


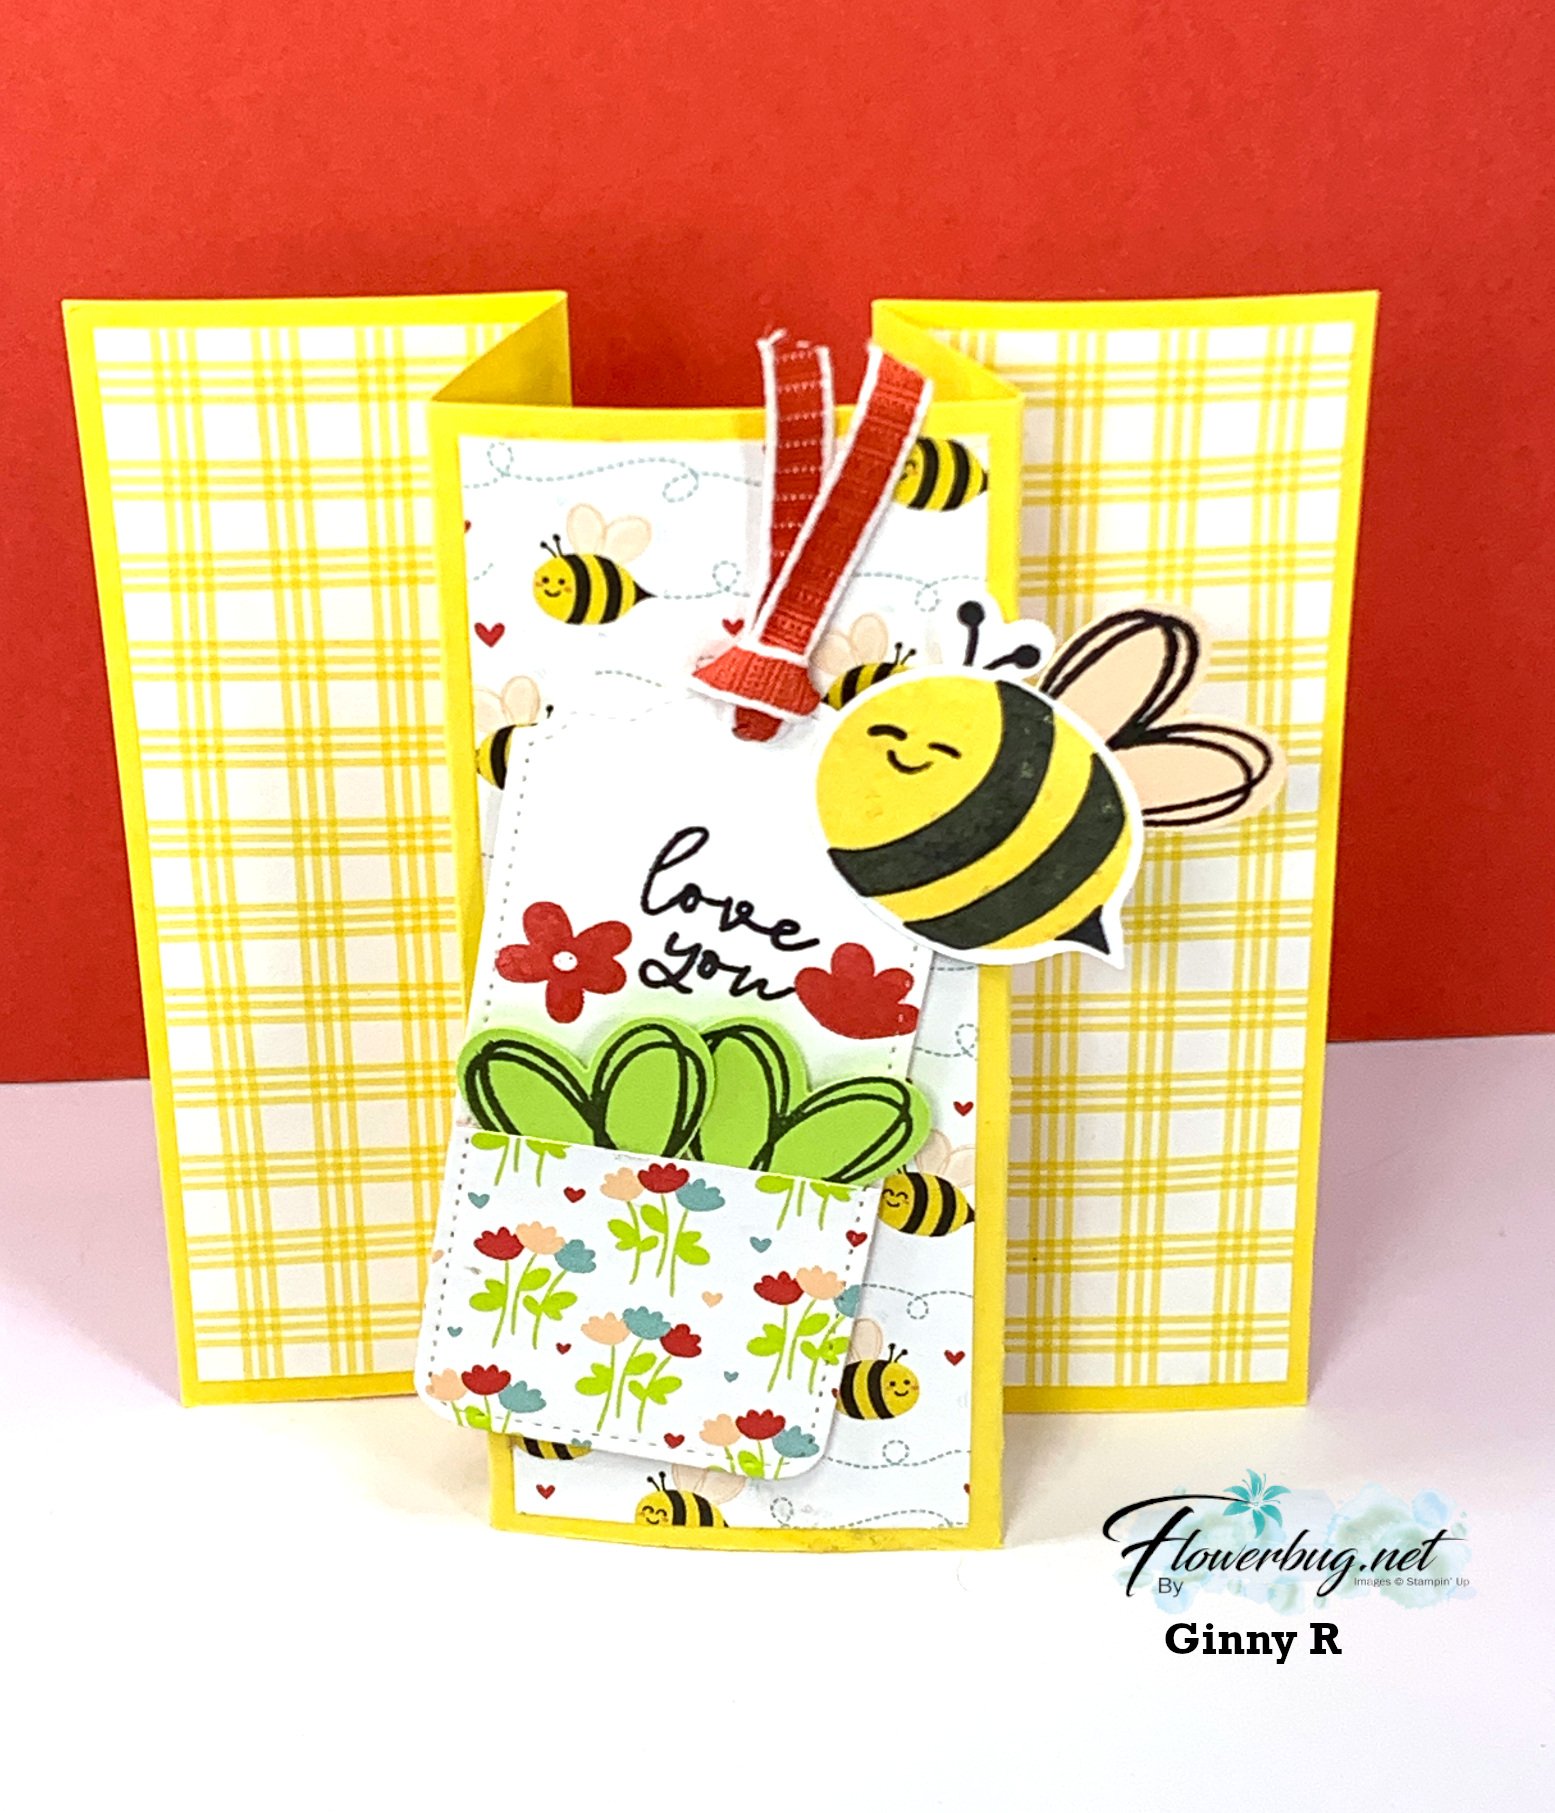
    We held our monthly Team swap last weekend and the them was fun fold cards.  Wow; did they ever deliver fabulous cards!!!  

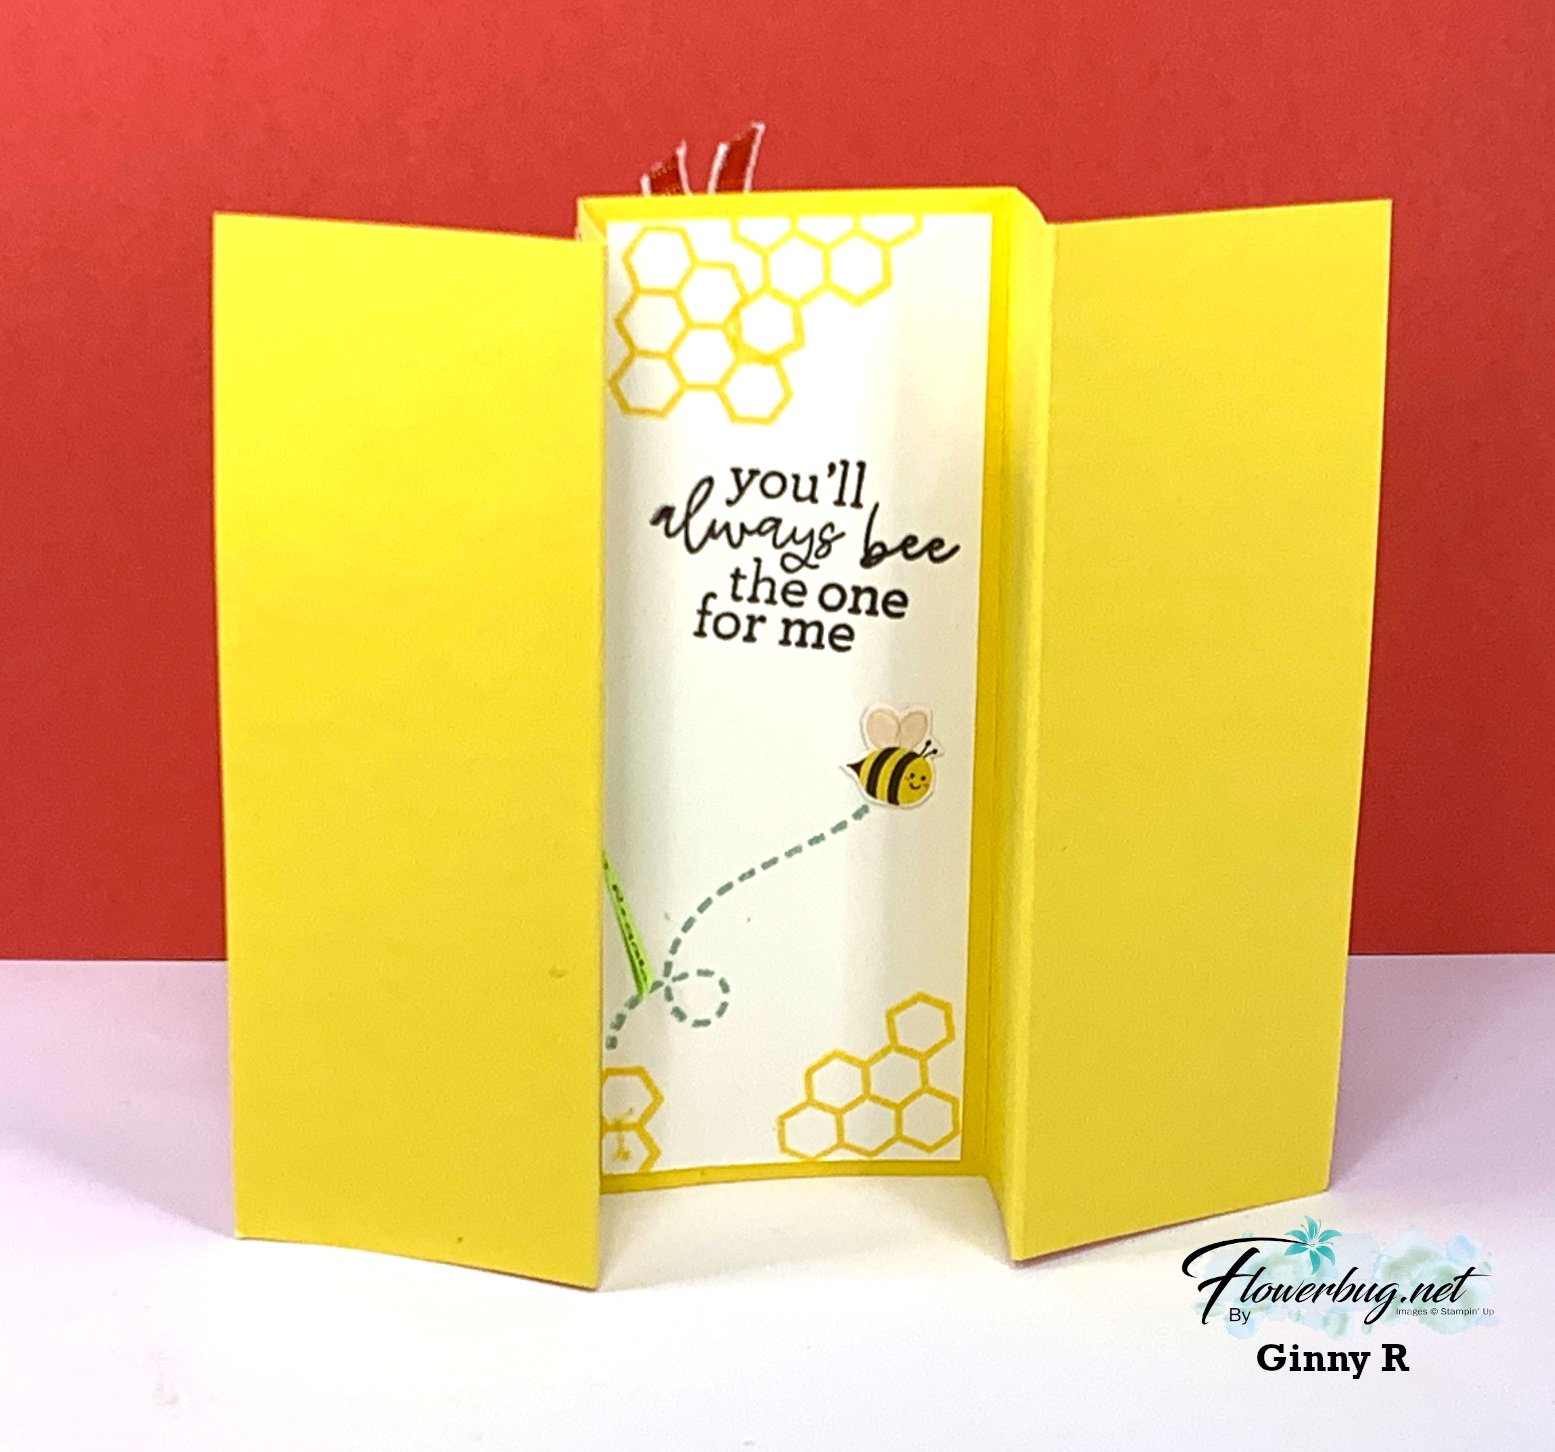
    First is a sweet card made by Ginny who chose the cute Bee Mine Suite. 

    Her colors include Daffodil Delight, Lemon Lime Twist, Sweet Sorbet, & Black.  She cased the card from quite a few people seen online including Karen Titus & Robyn's Roost. 

     I absolutely love the tag with the added pocket; it's made with the Tailored Tags dies!  

    Measurements: 

    • Daffodil Delight card base is 8 1/2" X 5 1/2" card but scored at 2", 3 1/8", 5 3/8" & 6 1/2".  
    • Designer paper on the front are 1 3/4" X 5 1/4" for outer areas. middle is 2" X 5 1/4" & the last two beside the middle layer is 7/8" X 5 1/4" 

    Here's a view of the back: 

    ~~~

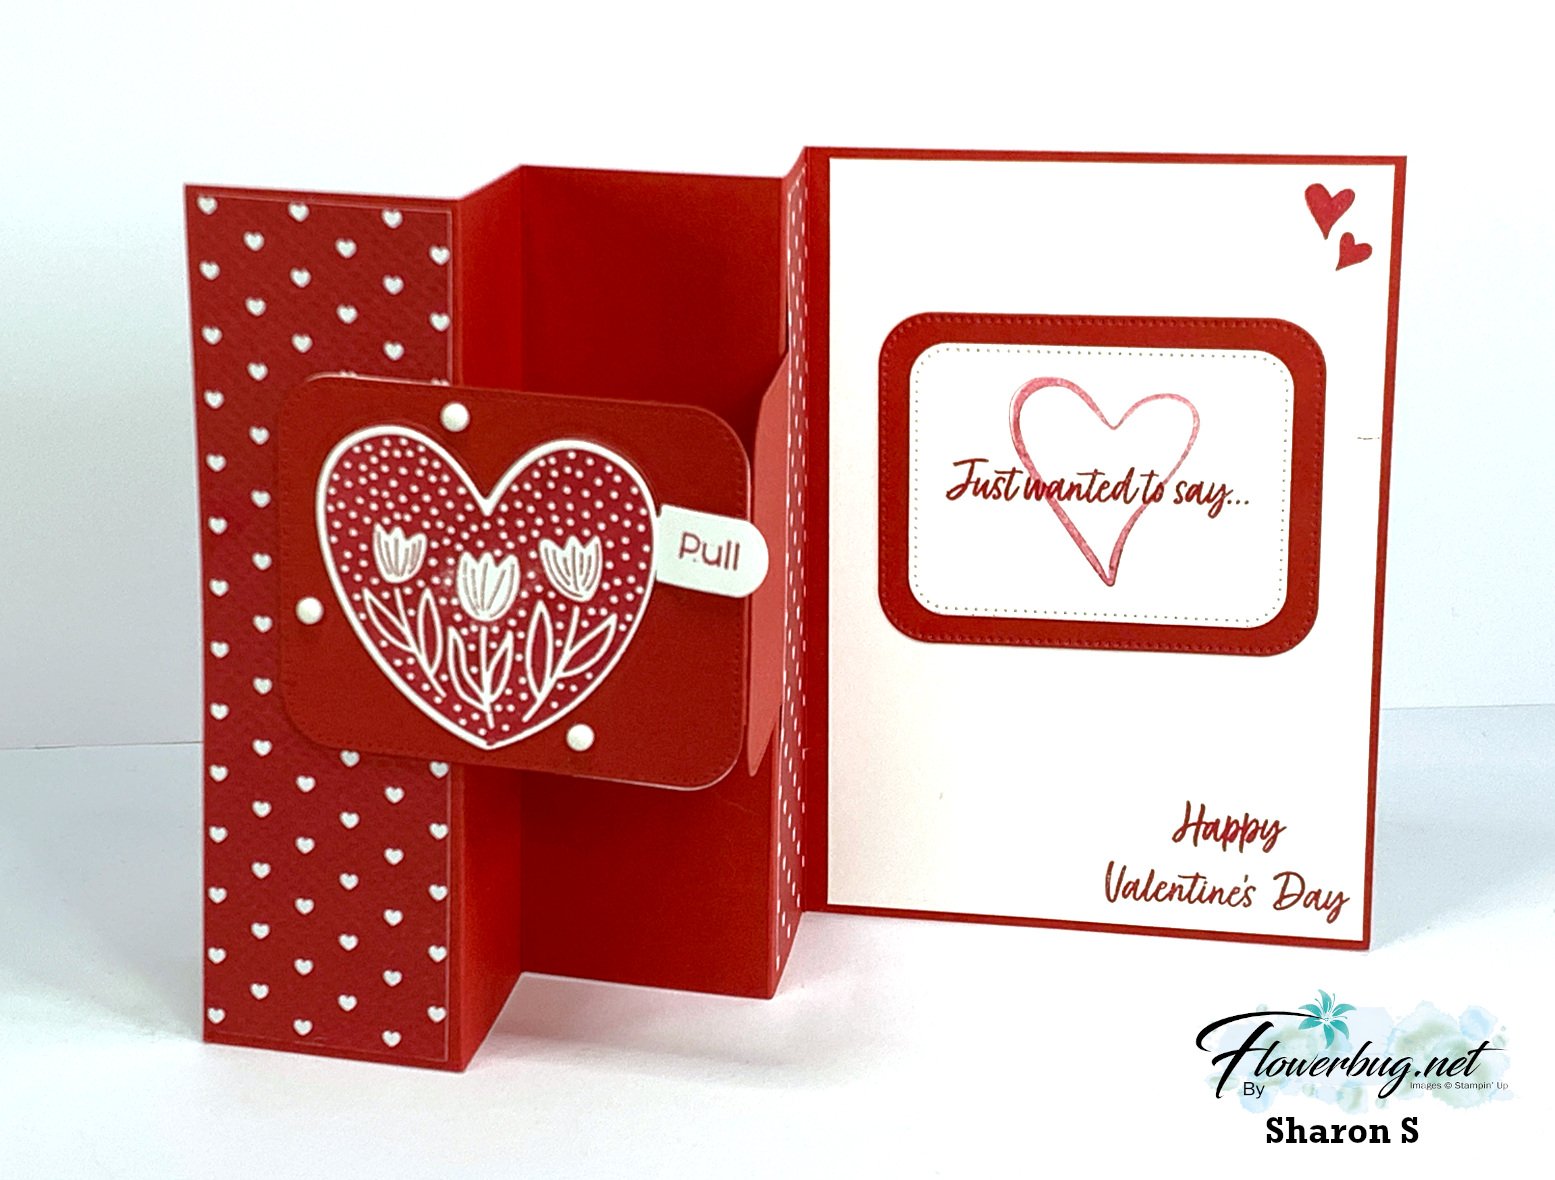
    Next is an 'over the top' card made by Sharon who chose the Hooray for Surprises bundle.  

    She used the Most Adored designer paper from Sale-a-Bration (seen here) and Real Red & White. This specialty designer paper is still available and free with any $50 purchase through February – while supplies last. 

    Other products used are the Country Bouquet stamp set in the Annual catalog and Classic Matte dots

    Measurements:

    • Card base 11" X 5 1/2", 1 3/4", 3 1/2", 5 1/4" & 7".  
    • 2nd layer under heart & curved rectangle die-cuts is 4 1/2" X 1 1/2" scored at 2 1/4". 
    • She adhered two curvy rectangle die-cuts (from the Nested Essential dies) over this. 
    • DSP – 2 pieces at 1 1/2" X 5 1/4"
    • White 3 3/4" X 5 1/4"

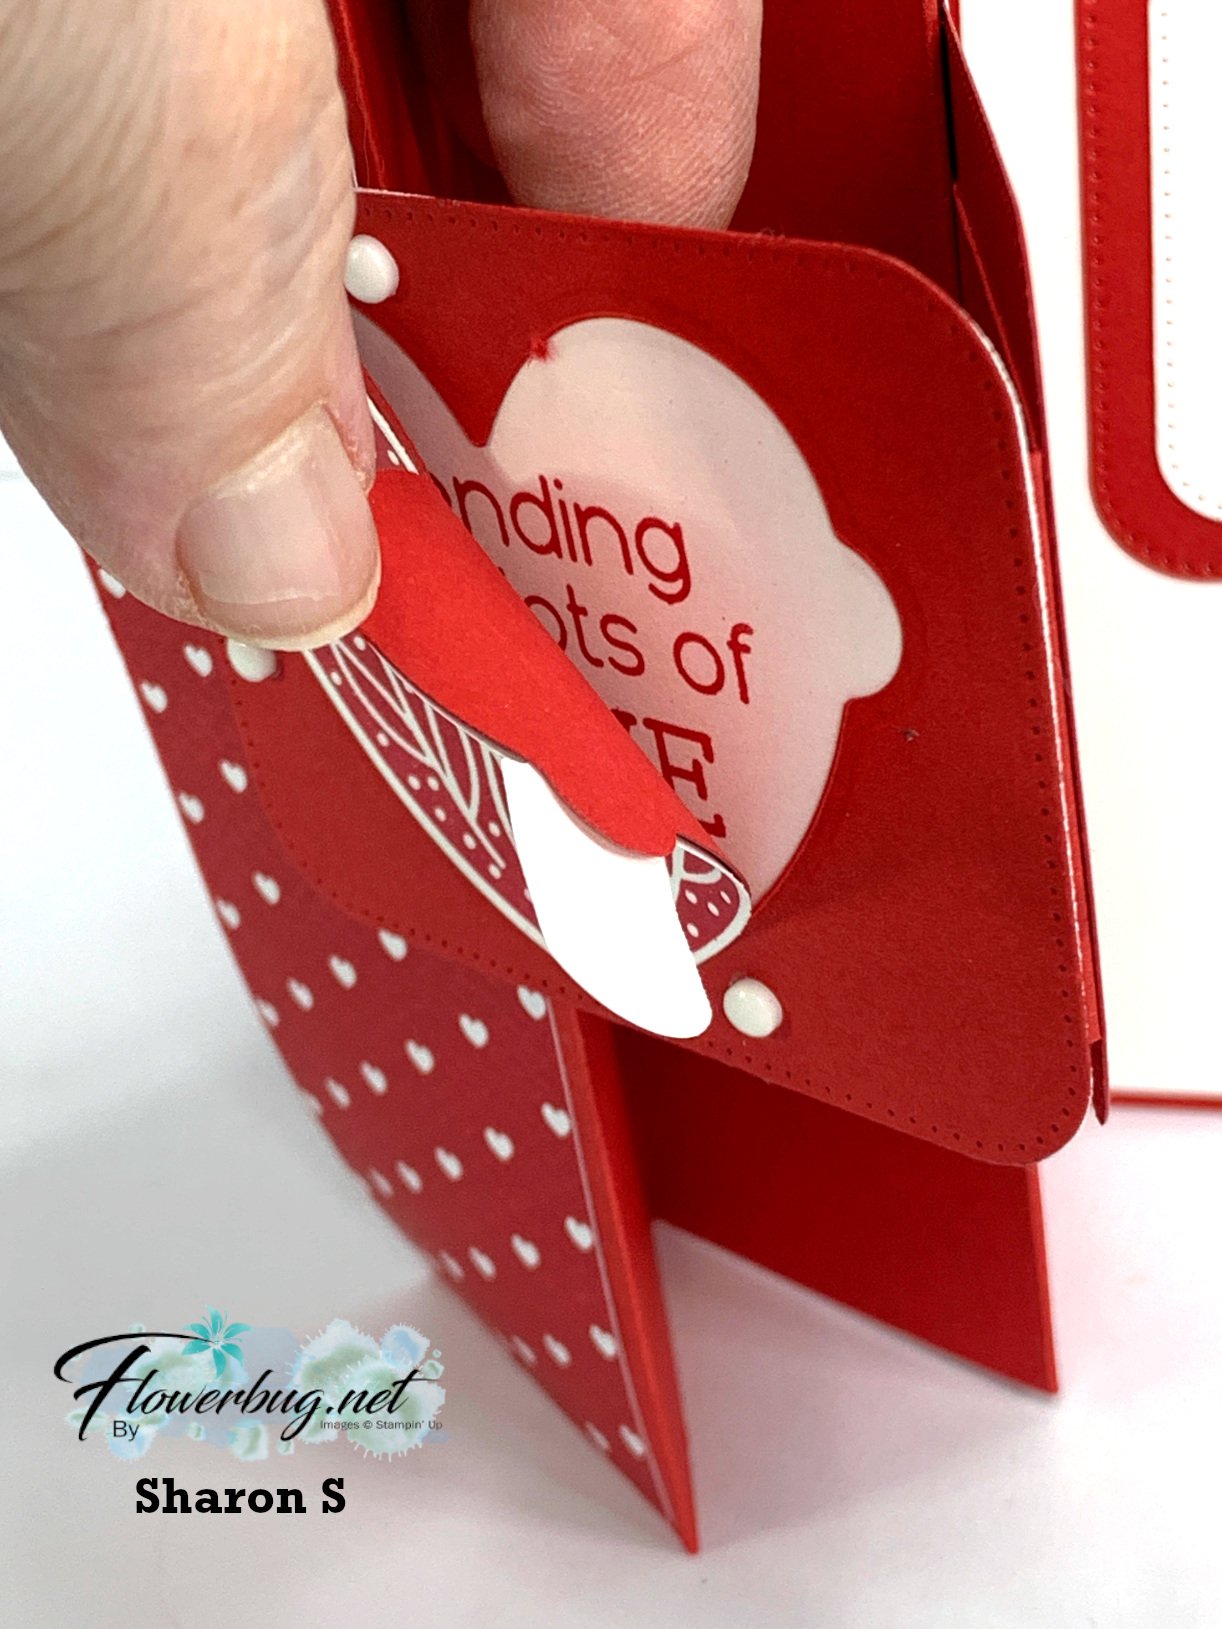
    The Hooray for Surprises bundle has multiple dies that allow for  peek-a-boo surprises. You can see in the photo below that the heart die-cut can be 'pulled' away to reveal a hidden message. There are multiple dies in this set that provide a tear-away element. It's so cool!  

    Here's a photo of the Hooray for Surprises bundle; even with out the peek-a-boo elements I love the stamped images and dies! *see the perforations on the large dies? That provides the tear away aspect.  

    ~~~

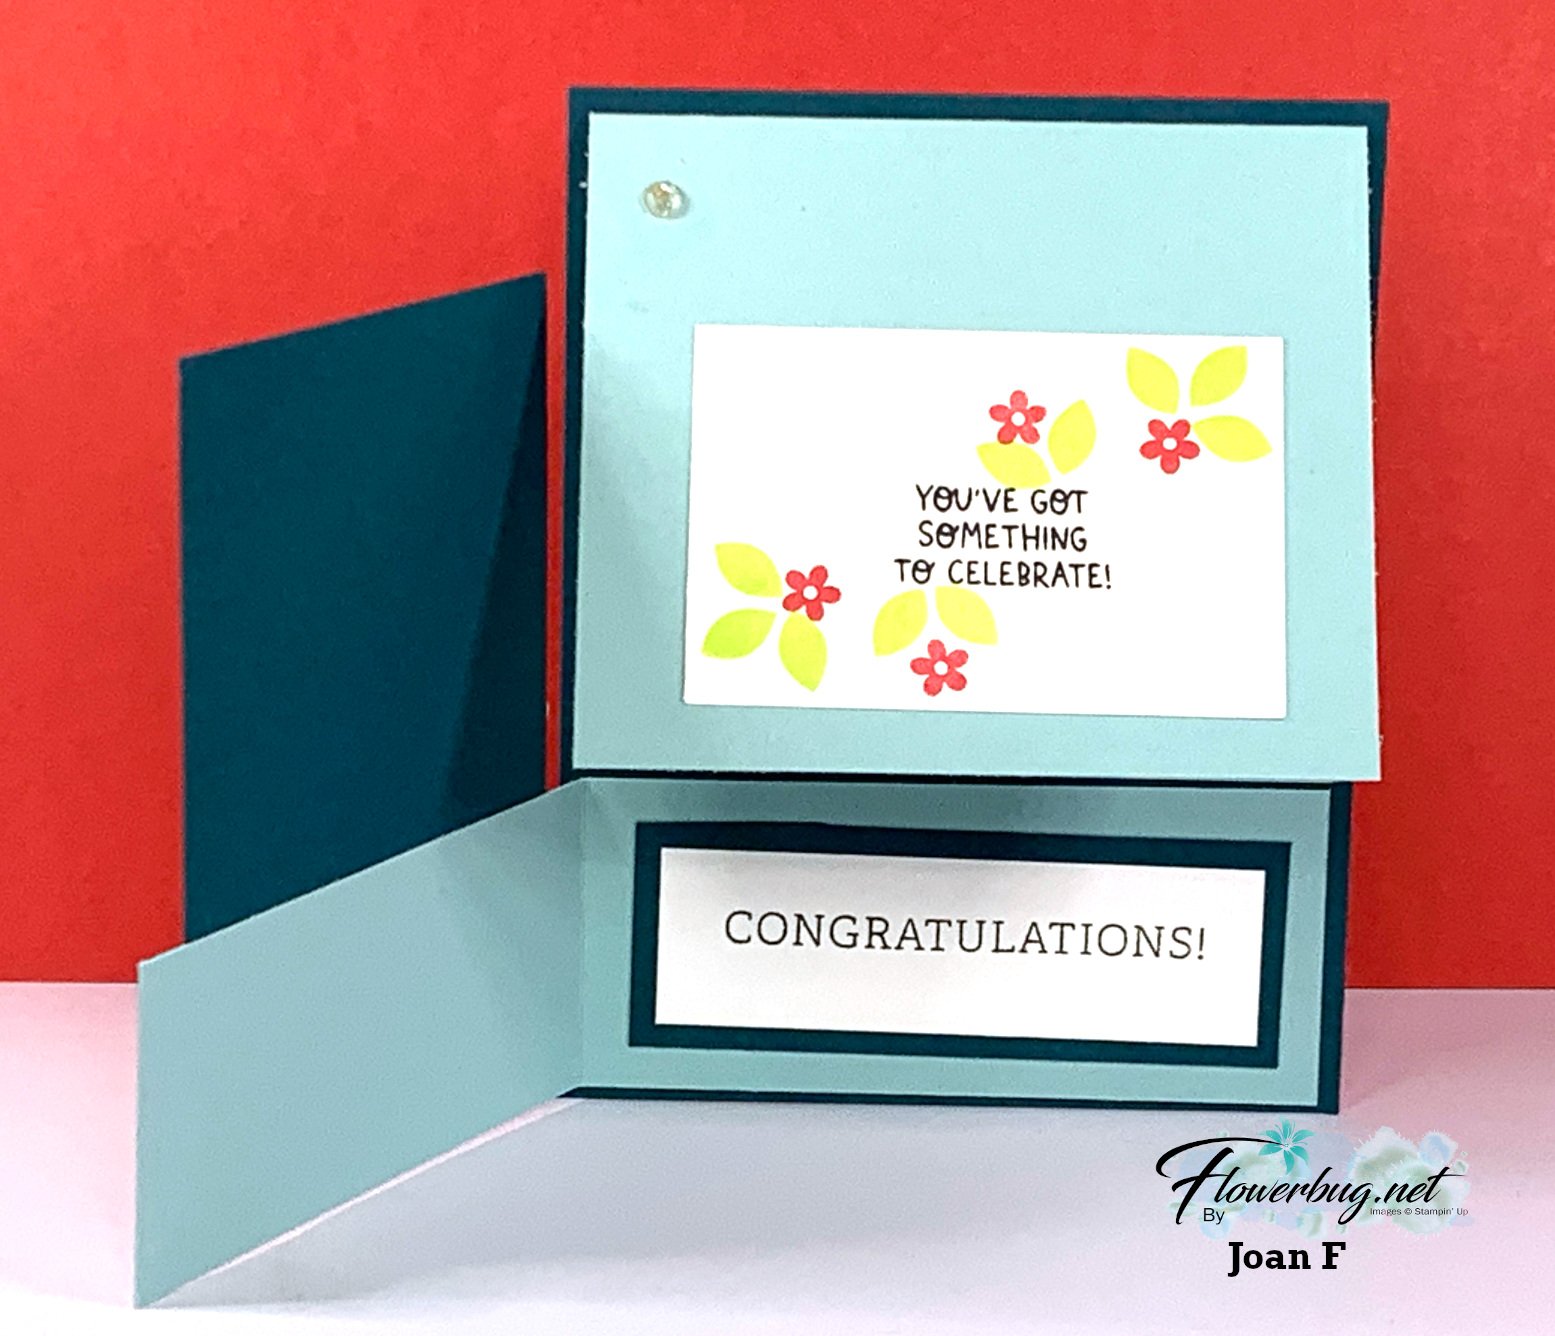
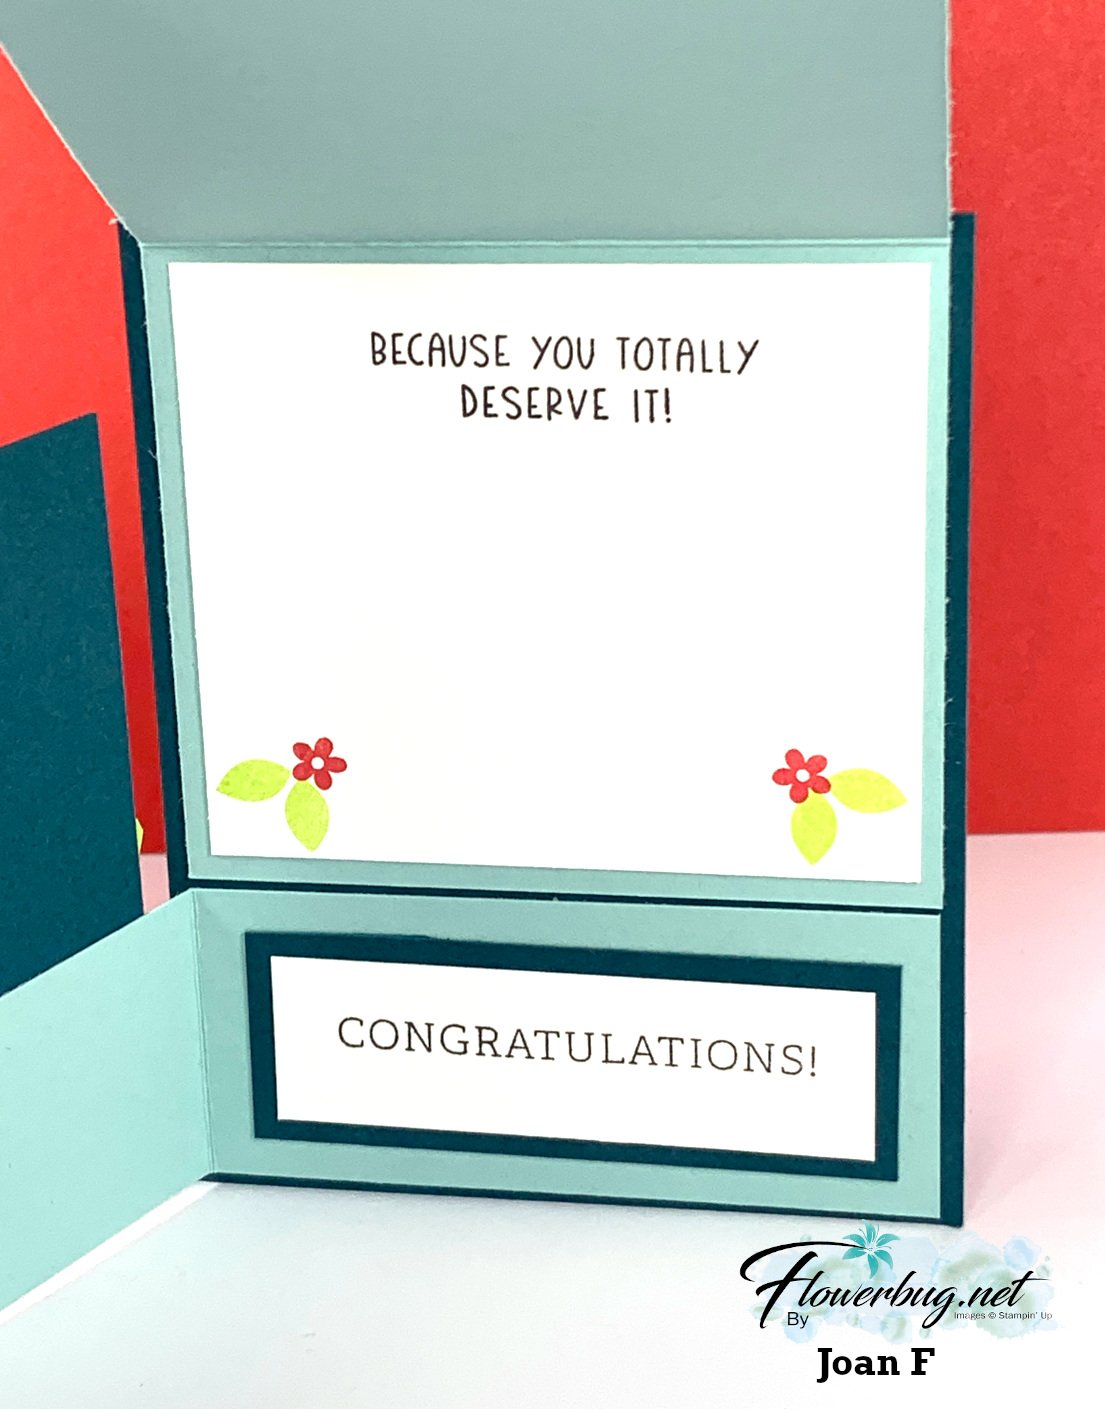
    Next is a sweet card made by Joan; it was her first card swap with us as she joined my Flowerbug's Team in January!  She did an incredible job too!

    She chose to feature the Sweet Songbirds stamp set & coordinating Songbird Builder punch. See the stamp set here and the punch here; they used to be a bundle but are now sold separately. 

    She designed a fun fold I haven't seen before!  It's a Dutch door fold with an added top flap. So amazing for her first swap!  

    Measurements:

    • Pretty Peacock – 4 1/4" X 5 1/2" for back, front layer 3 1/4" X 4", greeting layer 3 1/2" X 1 1/4"
    • Pool Party – lower fold is 8" X 1 3/4" scored at 4", upper fold is 4" X 7" scored at 3 1/2"
    • White front 3 X 3 3/4", front of inside flap is 3" X 2", inside 3 3/4" X 3 1/4", greeting 3 1/4" X 1"
    • scraps of White, Lemon Lime Twist & Pecan Pie for leaves, nest & bird

    Here's the card fully opened: 

    Aren't they all amazing?!!  And I have LOTS more to share with you too!  Stay tuned!  

    ~~~

    February Specials: 

    Earn FREE products with your Stampin' Up! purchase during

    Sale-a-Bration! *click here

    *current host code link: 4BXU7SGH 

    It's the best time to get a pre-paid Sale-a-Bration subscription

    & earn free Sale-a-Bration products!  


    ~~~

    Get a free Gold Foiled cards & envelopes kit

    with online orders over $55 in February

    All online orders in February will receive this free tutorial with 8 projects!

    Leave a Reply

    Your email address will not be published. Required fields are marked *

  • Trusty Tools single gatefold card with the Sale-a-Bration Trusty Toolbox designer paper


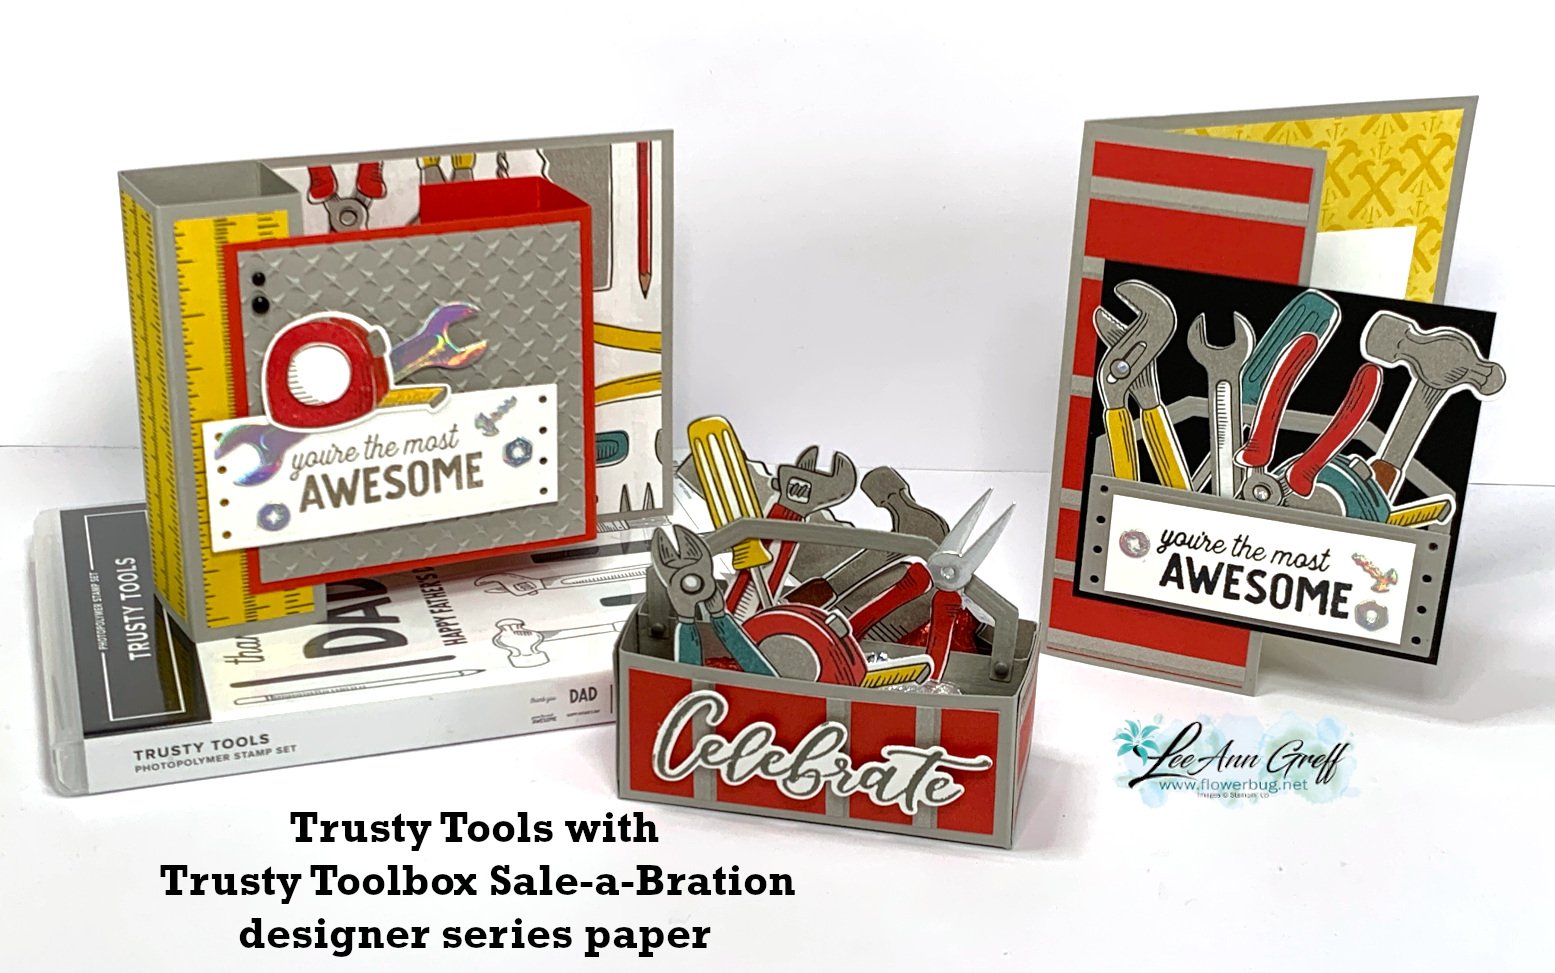
    Last week I shared the projects featuring the Trusty Tools bundle and the Trusty Toolbox designer paper in my weekly video. I've shared the free project sheets for two of those in the last two blog posts. 


    Today I'll focus on the third project on the right – a single gate-fold card with a 'faux' toolbox on the front.  

    I love this greeting!  It's from the Trusty Tools bundle seen here.  The tools in front are all fussy cut from the Trusty Toolbox designer paper (and Holographic specialty paper in the Annual Catalog) although a few of the dies in the bundle coordinate with the paper. 

    I did not create a project sheet for this project but I will provide the measurements:

    Measurements:

    • Gray Granite card base 6 1/2" X 5 1/2" score at 4 1/4" plus die-cut tool box pieces 
    • DSP – front is 2" X 5 1/4", inside is 4" X 5 1/4" plus fussy cut tools
    • Black 3 1/2" square
    • White greeting layer 2 3/4" X 1"; inside is 3 1/4" square

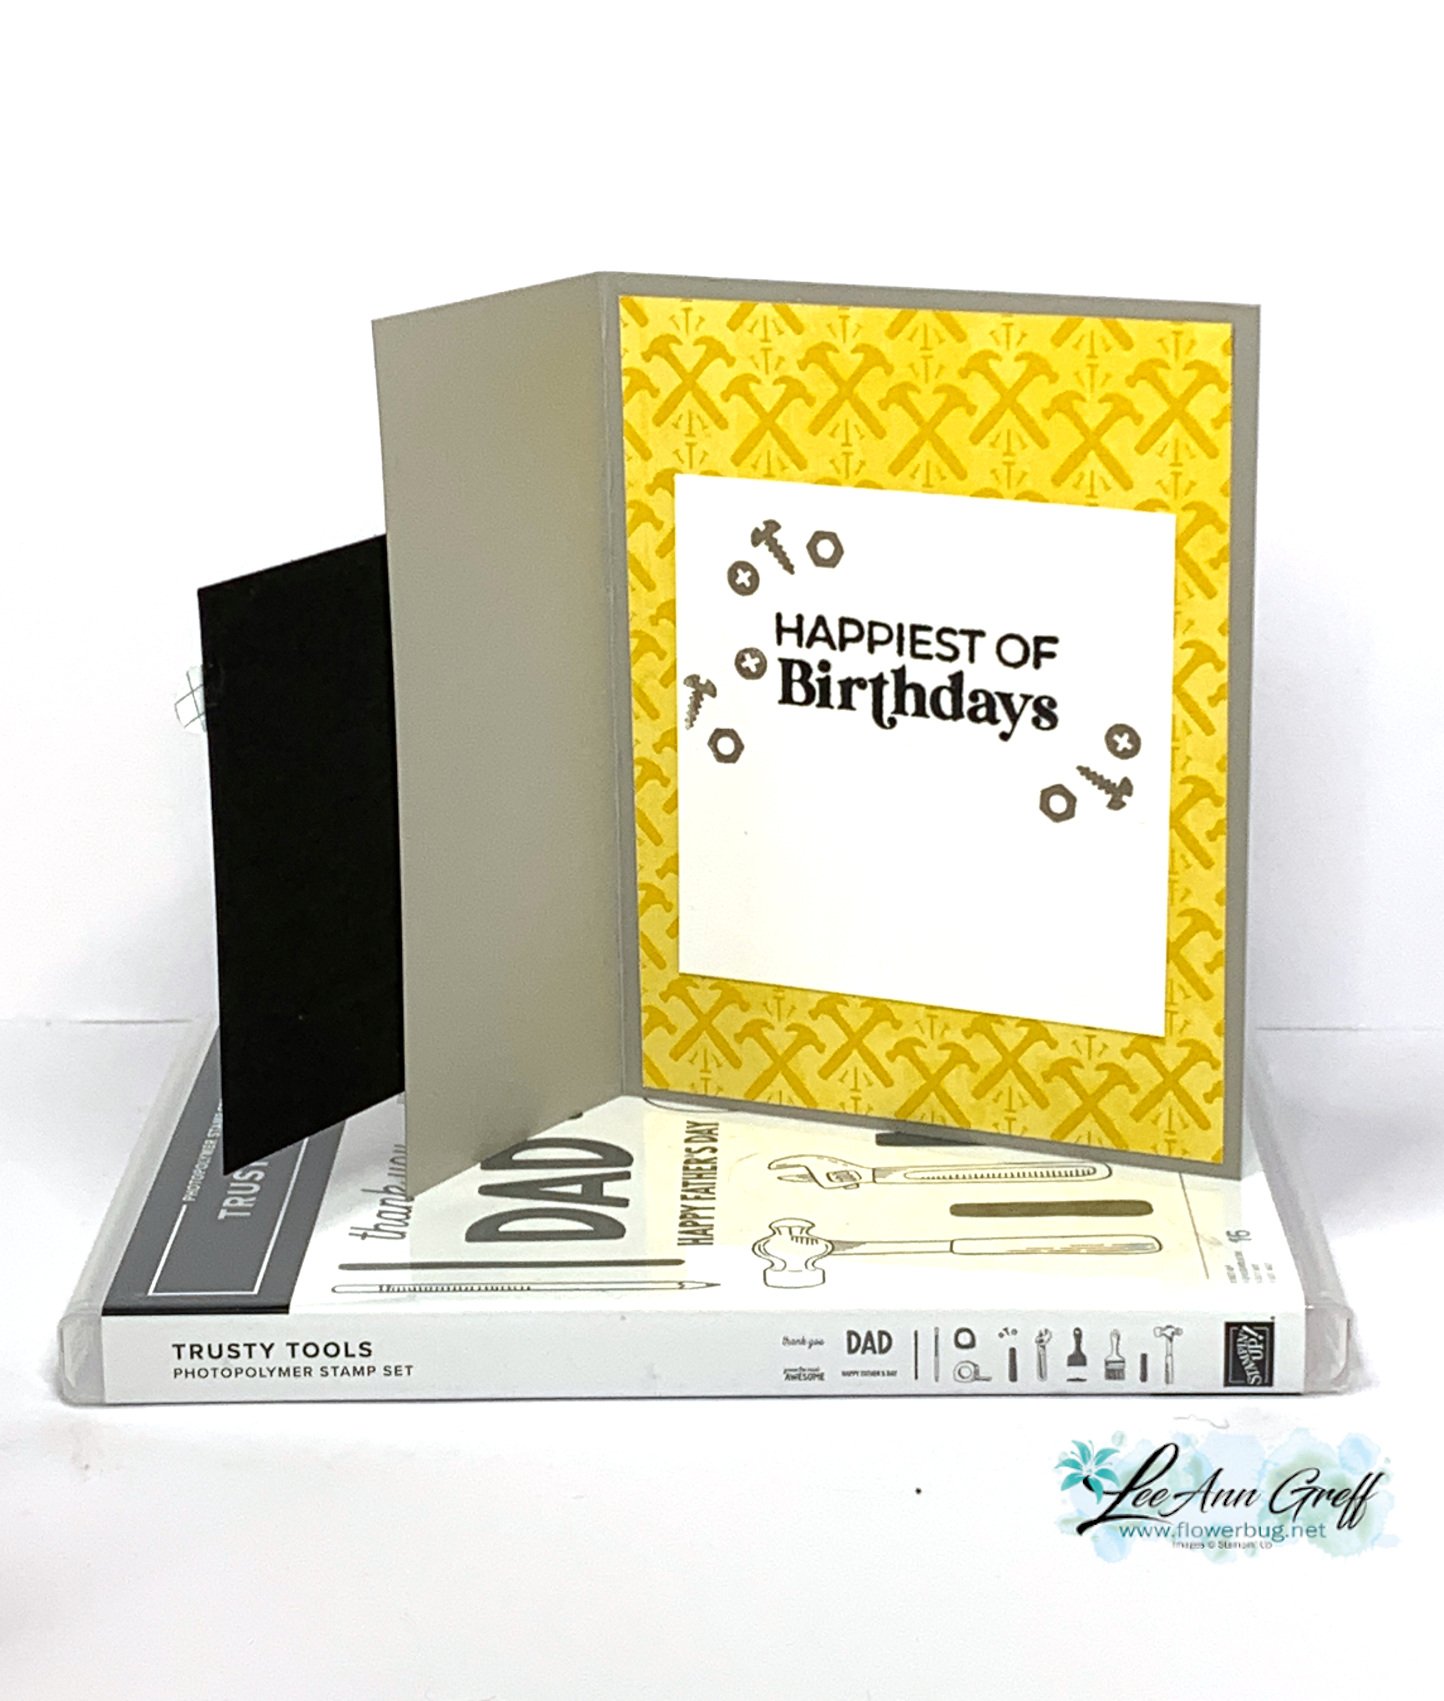
    Here's the inside view: 

    I also shared this adorable treat box on the video as well as another cool fun-fold card; I hope you watch it! 

    Below is the video where I demo how to make it.  Click here or on the photo below to watch this and two more projects featuring this bundle and designer paper. 

    ~~~

    February Specials: 

    Earn FREE products with your Stampin' Up! purchase during

    Sale-a-Bration! *click here

    *current host code link: 4BXU7SGH 

    It's the best time to get a pre-paid Sale-a-Bration subscription

    & earn free Sale-a-Bration products!  


    ~~~

    Get a free Gold Foiled cards & envelopes kit

    with online orders over $55 in February

    All online orders in February will receive this free tutorial with 8 projects!

    Leave a Reply

    Your email address will not be published. Required fields are marked *

  • Trusty Tools ‘Toolbox’ Treat box with video & free project sheet!


    Happy Valentine's Day! 

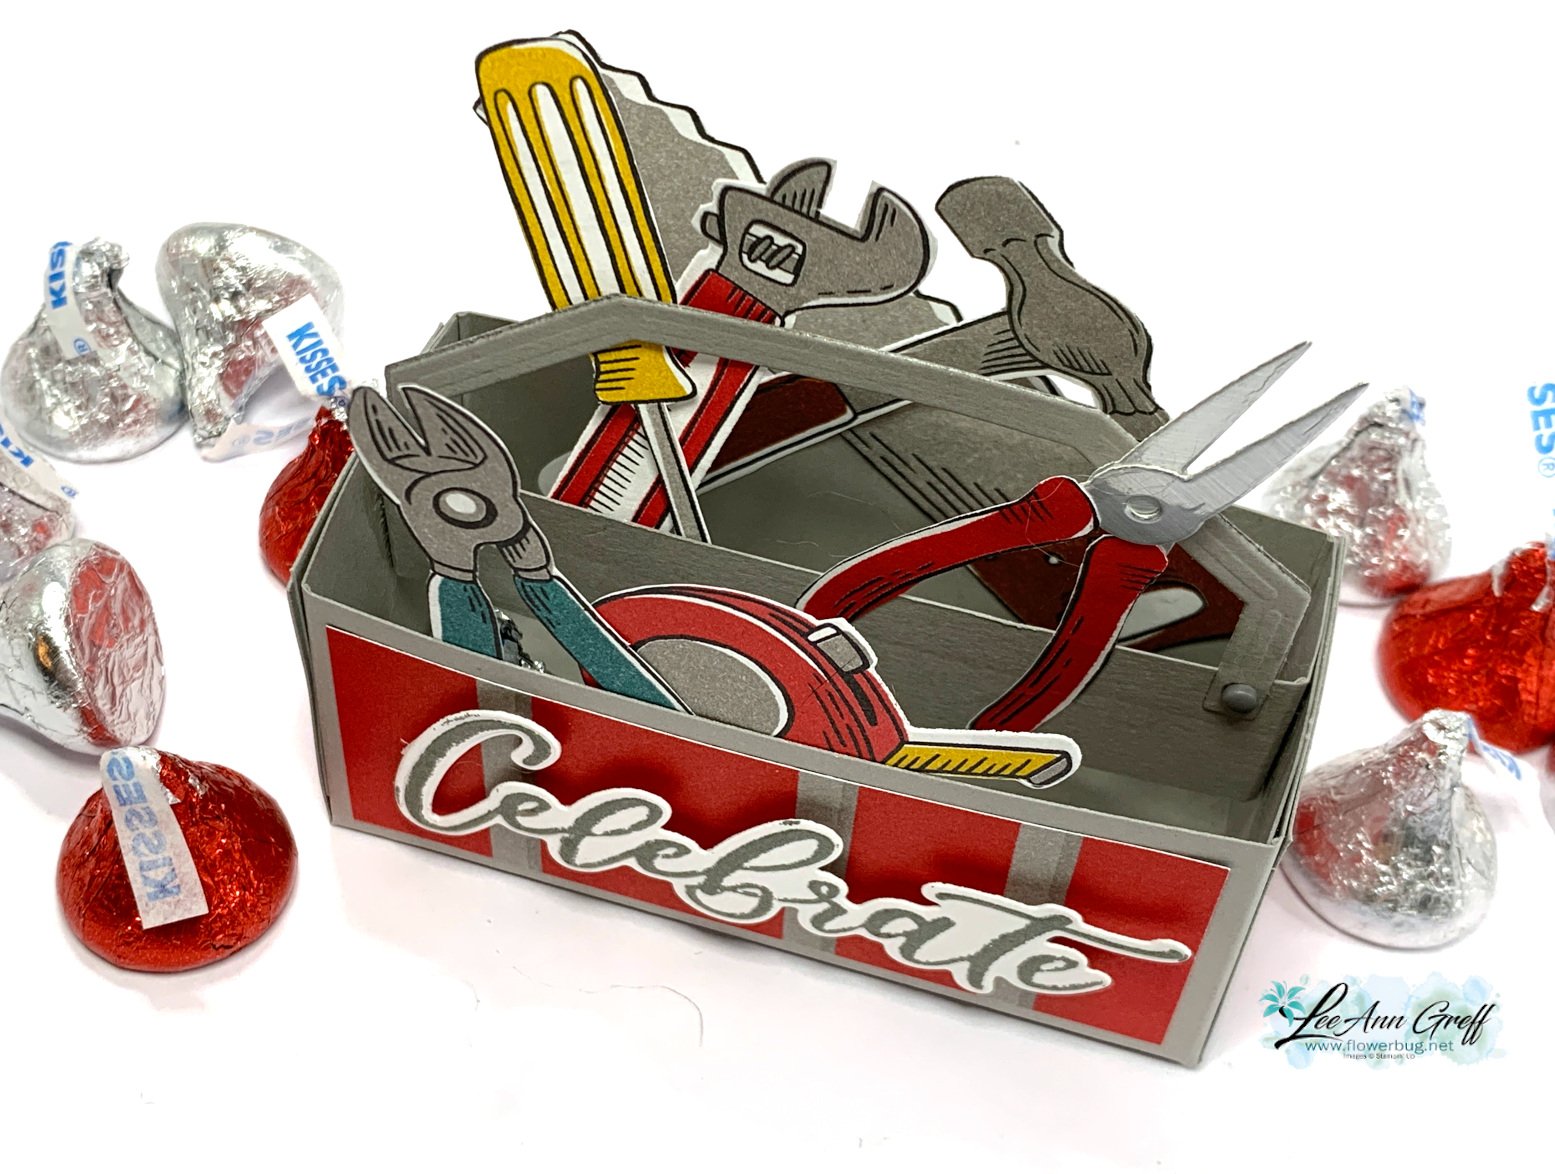
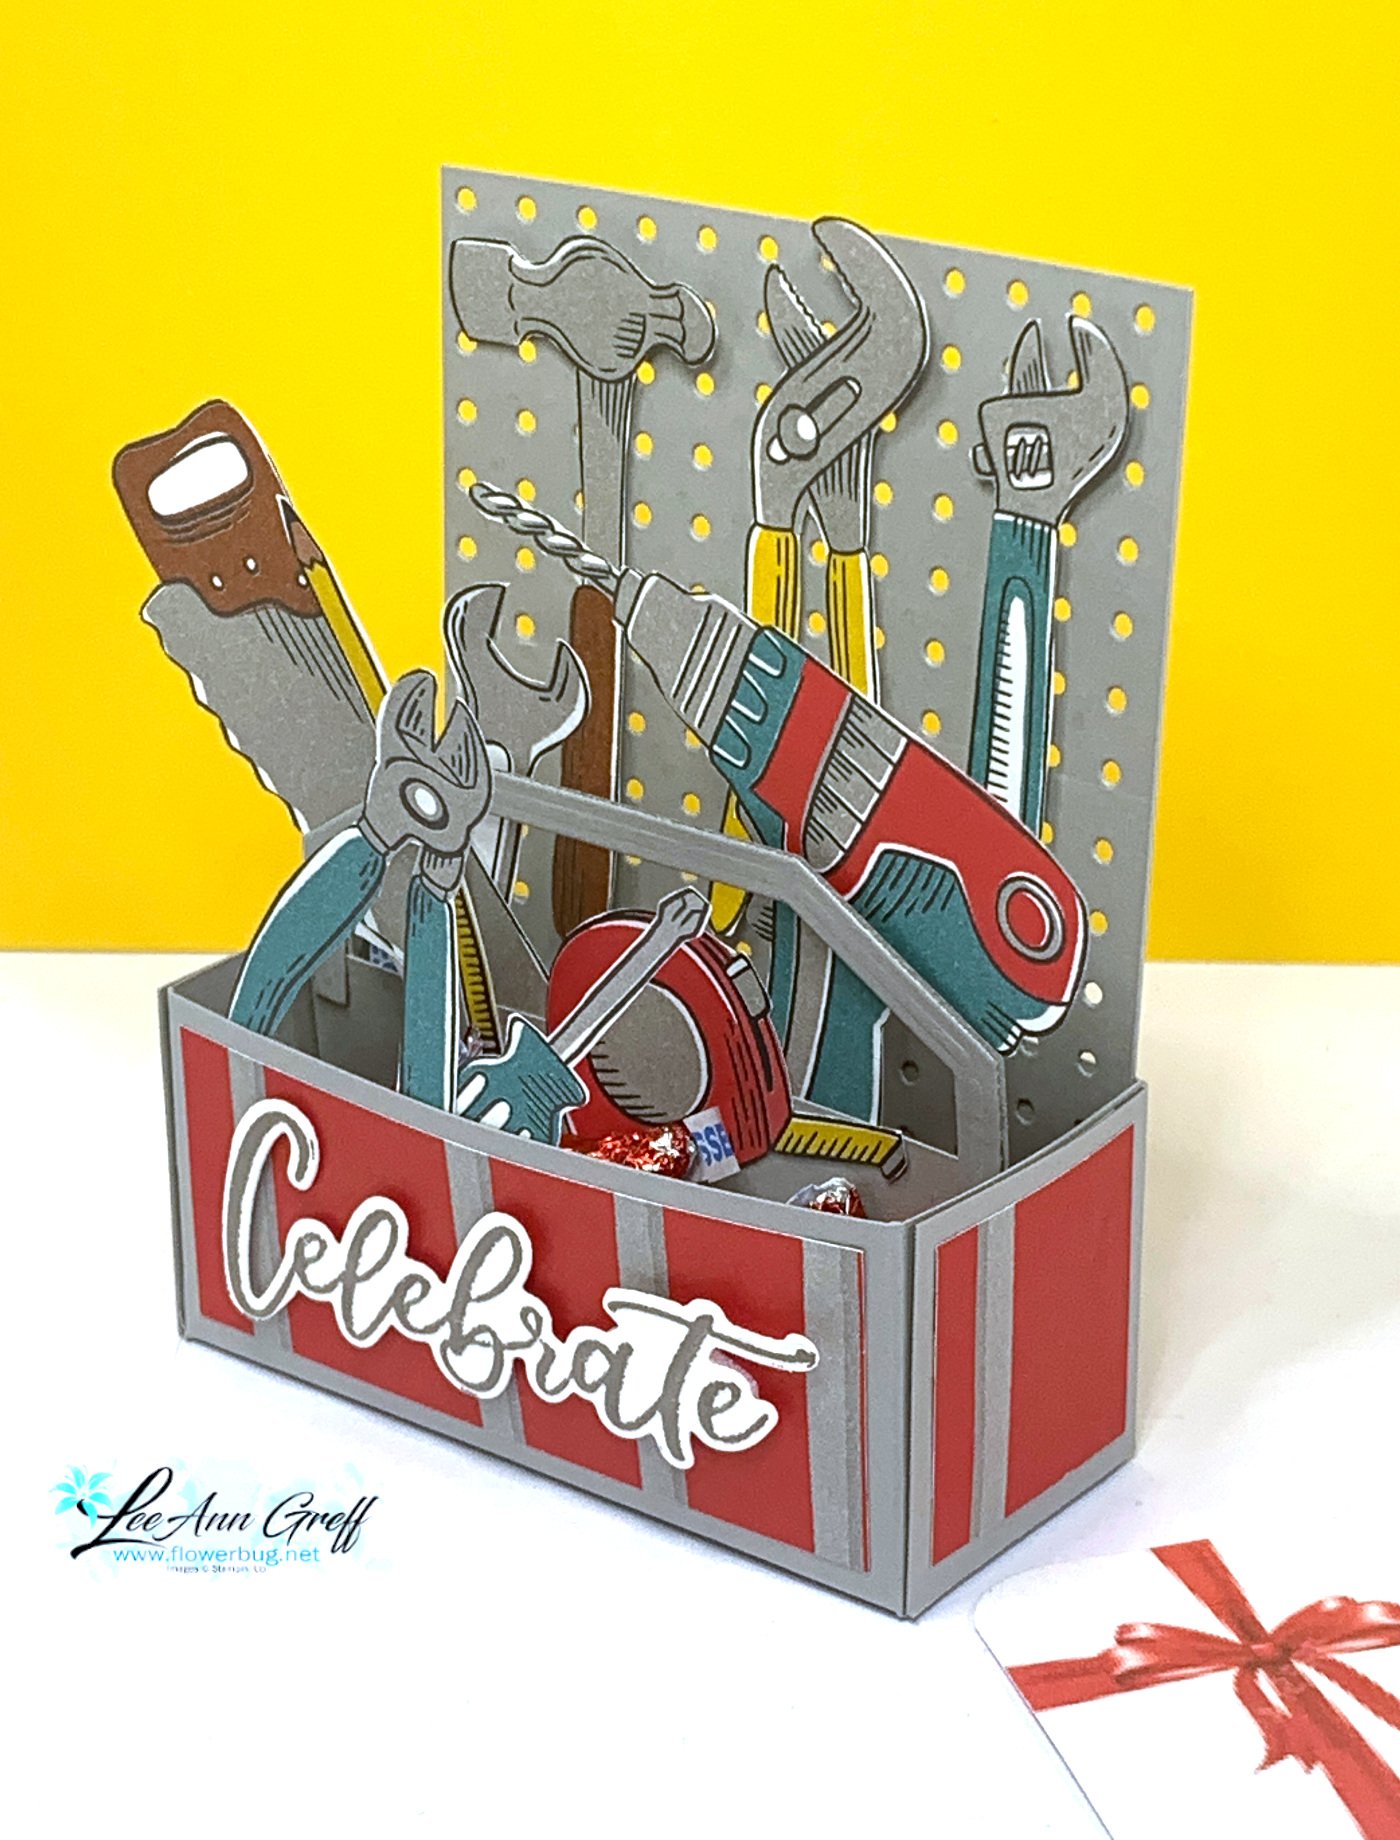
    I had to try my hand at making a treat box using the Trusty Toolbox designer paper. So I came up with this & shared it on last week's video here.

    Isn't it adorable?  It holds quite a few candy treats plus there's room for a gift card too. I plan to give this to my husband today.

    I decided to change it up a bit and added a pegboard (made with the Trusty Tools' dies seen here) to the back of my second box.

    The tools in the box are cut from the Trusty Toolbox designer paper seen here. You can use the Trusty Tools dies for some of them as they coordinate wonderfully.  But honestly I fussy cut most of them. 

    Details:

    • The box is 3 1/2" wide and the 1 1/2" deep & high. The pegboard is 4 1/2" tall. 
    • The 'Celebrate' greeting is from the Thoughtful Moments dies & emboss folder seen here.  My new favorite! I added ink after I cut the word out using my brayer very, very gently. *watch the video to see how
    • There are two handles glued back to back in the center. 
    • The tools are adhered to the front, center layer and the back to give depth & interest to the box. 
    • The tool designer paper on the front & sides are also from the Trusty Toolbox designer paper from our Sale-a-Bration catalog. 

    Aren't they just adorable?!  What a great little treat to give to the guys?  And why not the gals too?  

    Click here to download or print the free project sheet for this cute box: Download Trusty Toolbox treat box

    I shared a double box card and a second card all using the same colors & products in the video below. I hope you're inspired by it! 

    Below is the video where I demo how to make it.  Click here or on the photo below to watch this and two more projects featuring this bundle and designer paper. 

    ~~~

    February Specials: 

    Earn FREE products with your Stampin' Up! purchase during

    Sale-a-Bration! *click here

    *current host code link: 4BXU7SGH 

    It's the best time to get a pre-paid Sale-a-Bration subscription

    & earn free Sale-a-Bration products!  


    ~~~

    Get a free Gold Foiled cards & envelopes kit

    with online orders over $55 in February

    All online orders in February will receive this free tutorial with 8 projects!

    Leave a Reply

    Your email address will not be published. Required fields are marked *


Notice: LeeAnn Greff, Independent Stampin’ Up! Demonstrator, Manager. The content of this website is my sole responsibility as an independent Stampin’ Up! demonstrator and the use of, and content of, the classes, services, or products offered on this website is not endorsed by Stampin’ Up! Copyright 2025