/


Latest Post

Beautiful Peaceful View card the easy way with video & free project sheet


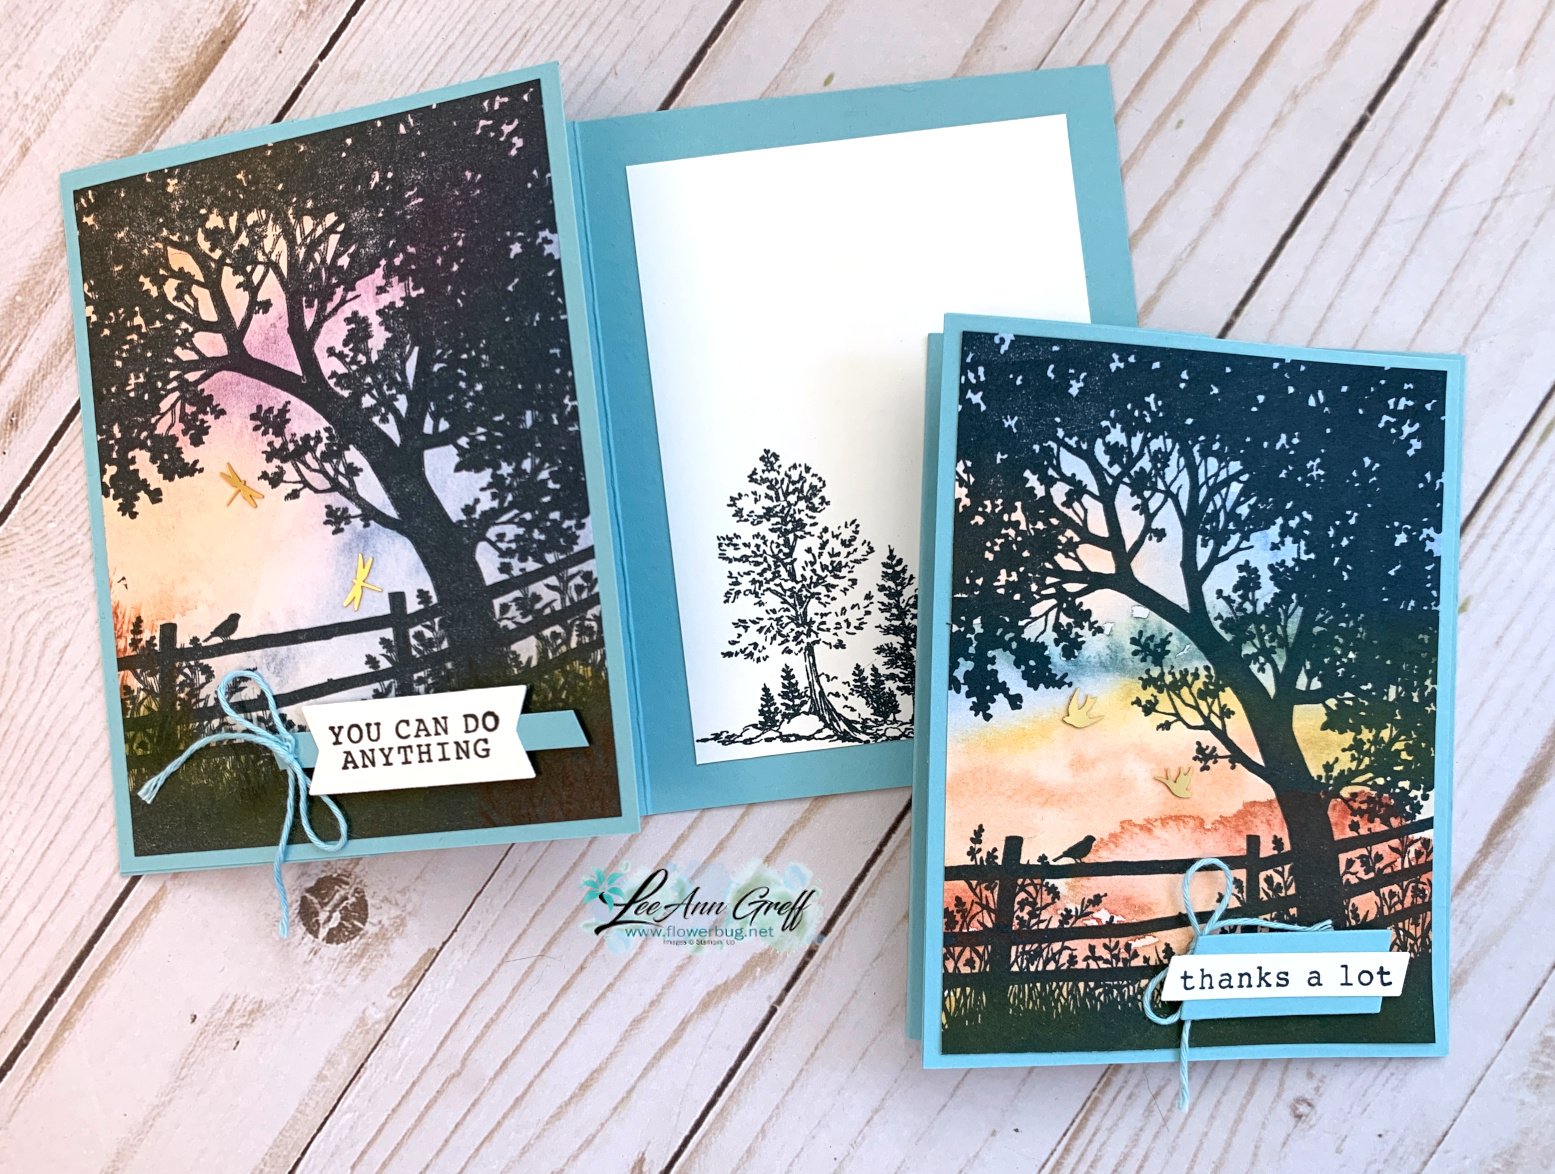
For my June card clubs I knew I wanted to feature the Peaceful View stamp set.  This gorgeous stamp makes it easy to create a stunning card with.  I've asked for this type of stamp for years and finally got one! 


Could you ask for a more perfect background for this image?  Where did it come from?  It's a piece of designer series paper – from the Thoughtful Journey 6" X 6" DSP seen here.   It's absolutely the perfect choice and much easier than creating a coloreful background with ink. 

The majority of the papers work well for this stamp so my club members could pick their favorite. 

We inked the tree scene with Secret Sea ink and stamped on the designer paper.  It's then adhered to a full 4 1/4" X 5 1/2" piece of Balmy Blue CS before it's added to the front flap of the card base (front is folded back once).  

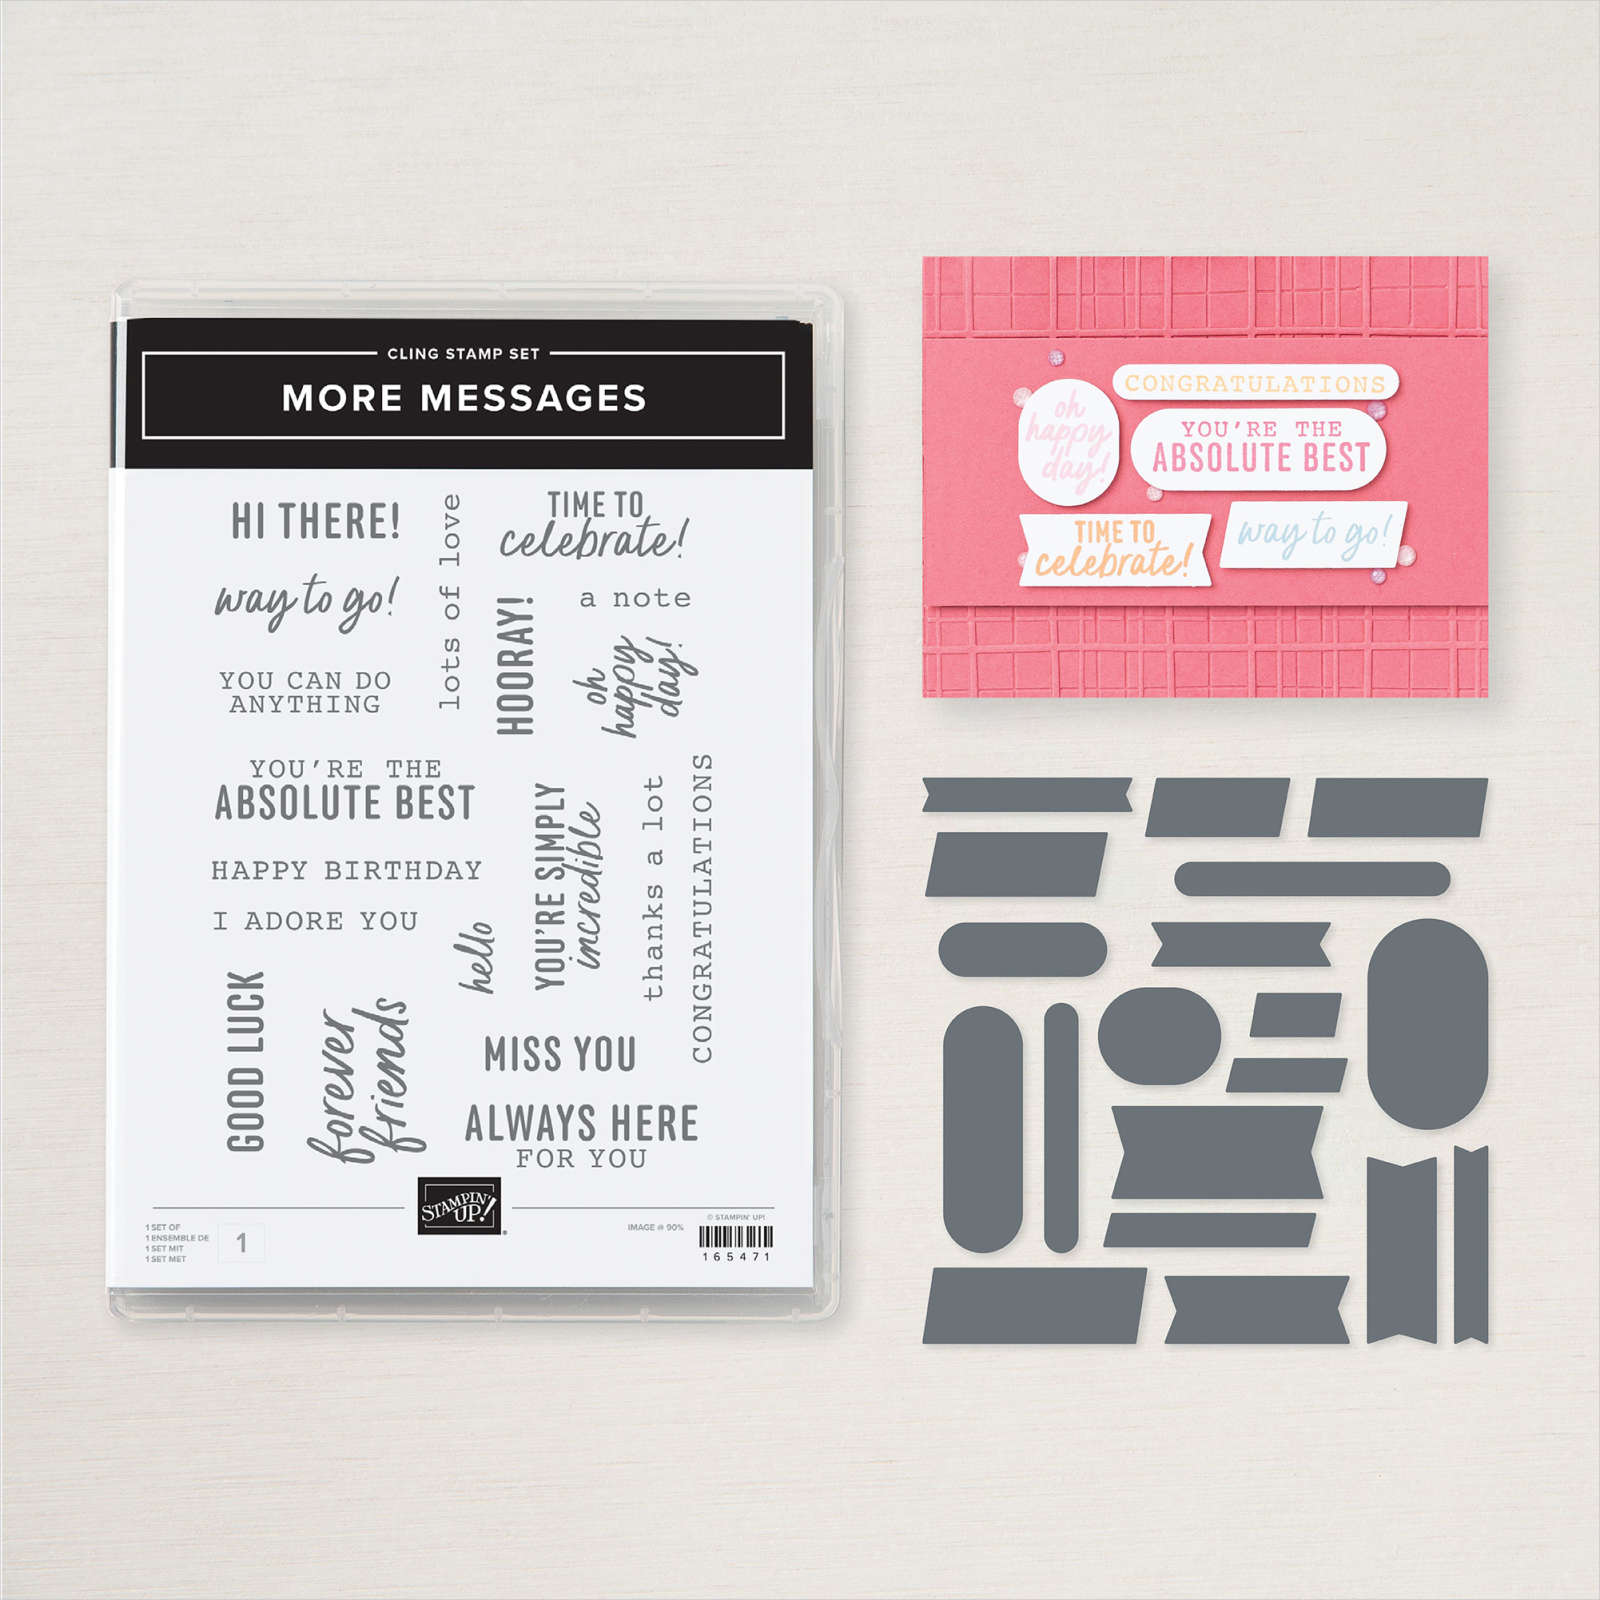
For the greetings I stamped the More Messages stamp a few times and used the coordinating die to cut them all out.  I had tons of greetings for them to choose from.  They then layered them onto another Balmy Blue strip or die-cut. 

What I love about this latest messages bundle is that the greetings and die-cuts are larger than ever before. See the bundle here. 
Here's the free project sheet with measurements and supplies for you: Download Peaceful View June Club

Below is the video for this card and another where I show you how to add color to the stamp. I'll share details on that project tomorrow.  

~~~

July Specials:

New Online Exclusives are here!  

~~~

Last Chance List has been updated!  see it all here. Don't miss out on the deals!

~~~

Get my Turtle-y Cute PDF tutorial free with any online order in July!

All Posts

  • Quick cards with the Stack & Cut template! Video & measurements too!


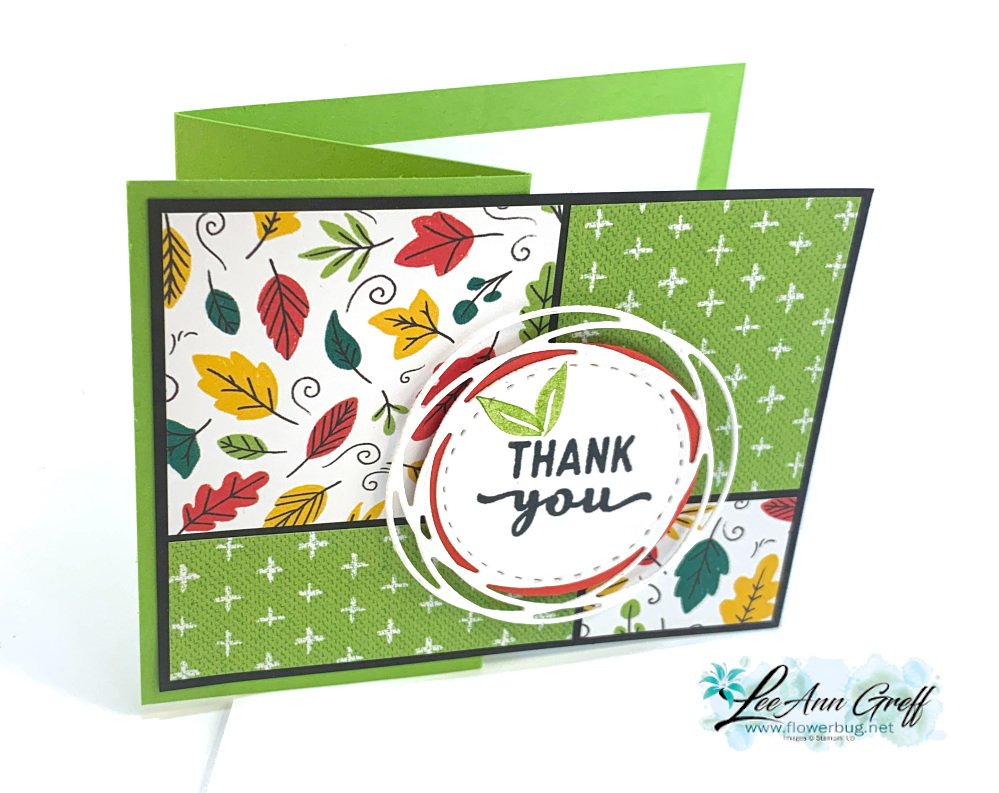
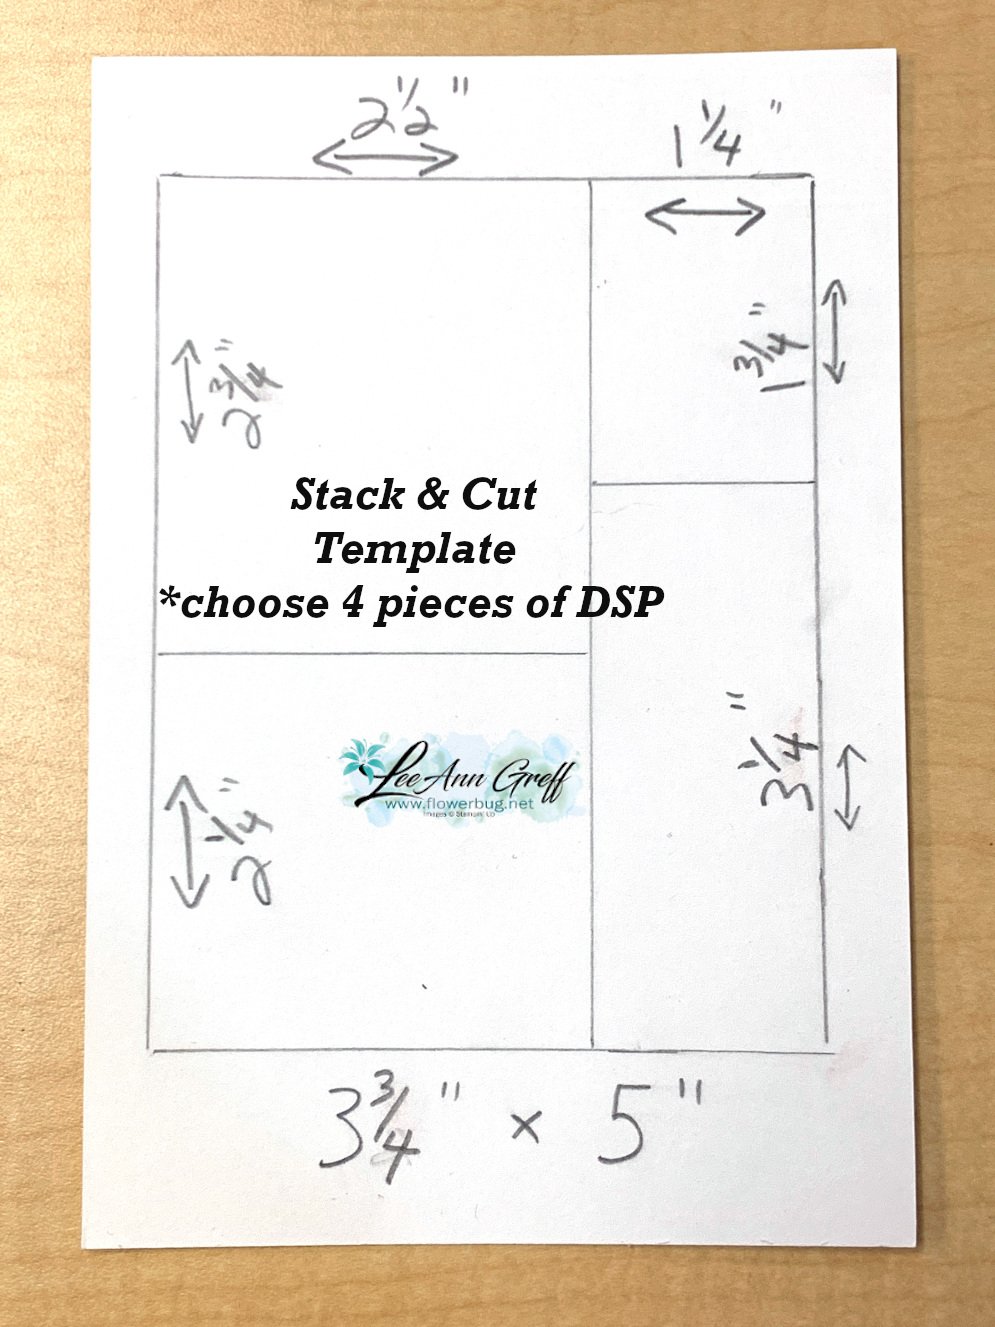
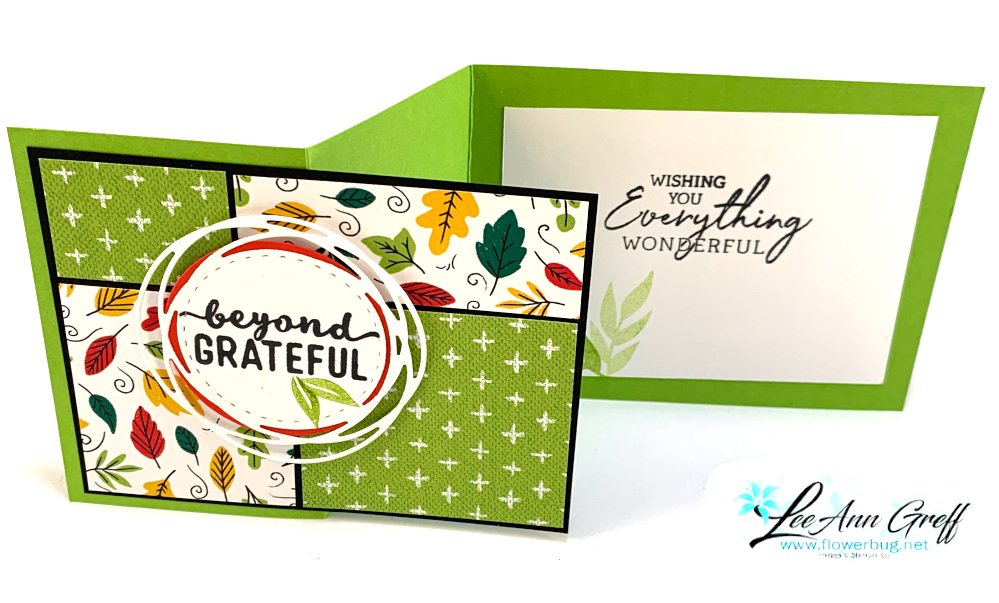
    I featured the Stack & Cut template for this project from last week's Stamp Camp class.  Scroll down to see the template; it's one of my favorite ways to use designer paper and for quick cards too!  

    I chose to feature the Celebrate Everything designer paper for a colorful thank you card.  Here are the products I used: 

    • Greetings are from the Charming Sentiments stamp set
    • Leaves are from the Simply Fabulous stamp set
    • The white die-cut is from the Painted Label dies. The Poppy Parade circle is 2 1/4"

    And here is the template.  Remember that you can use just one piece of DSP for one card; or stack two pieces and get 2 cards.  This works best with double sided designer paper.  

    I hope you try making some Stack & Cut cards soon.  Like I said it's a wonderful way to use your designer paper. 

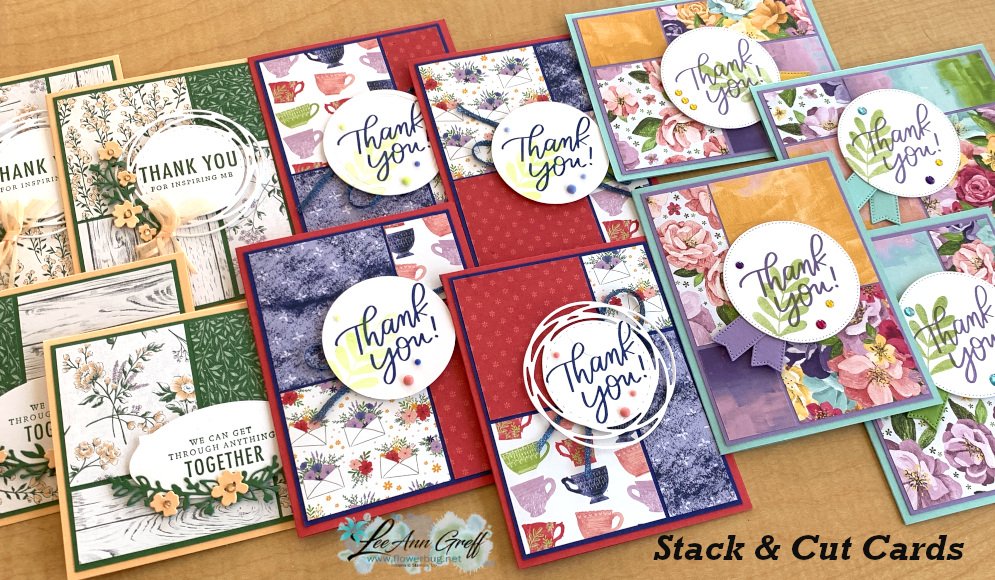
    Here's a group of cards I shared in this video. 

    I share this card & 2 more fun folds in the video below: 

    ~~~

    October Specials

    Starter Kit special! Get $155 in product for just $99

    click here

    ~~~

    Order online here

    Host code links: GDCBRHF7 or JPJ4FKYJ

    Get a free embellishment from me with online orders over $50!


    Earn free products with my loyalty rewards! 

    Click here to download yours and earn a $50 shopping spree!

    Leave a Reply

    Your email address will not be published. Required fields are marked *

  • Christmas Card Class – Attend class or get the pre-cut kit & tutorial!


    Each year I offer my local gals at least 3 Christmas card classes so they can create beautiful cards to send to their family & friends. I also offer my long distance customers a chance to get these same cards in a pre-cut kit & tutorial as well.  

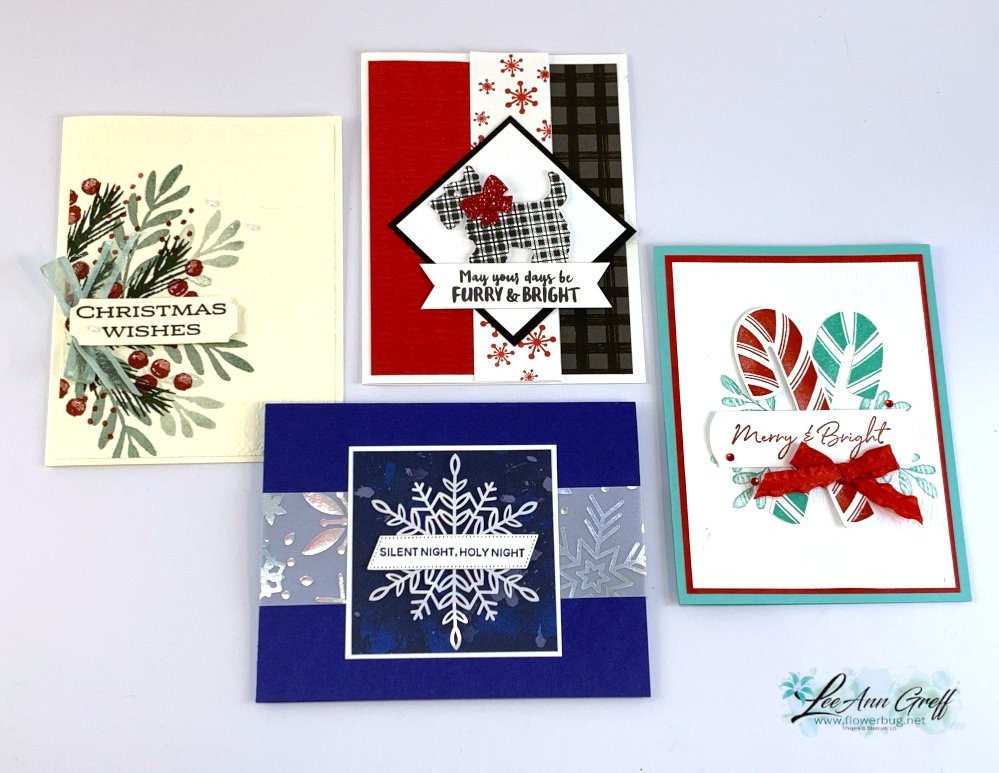
    Here are the beautiful cards for October's class:  

    I love the variety – from cute to beautiful; they satisfy all of your holiday card needs.  

    For these cards I used the Christmas Season (2022 Annual Catalog), the Christmas Scottie, Sweet Candy Canes and Peace to You stamp sets from the 2022 Holiday catalog.  You can substitute other sets for these if you'd like to.  

    The local class is on Saturday, October 29th at 10 am.  Cost is $25 and you'll make 3 of each card with stamped, coordinating envelopes too.  RSVP to attend  by Thursday, October 20th please.  

    The pre-cut kit to go includes 12 cards, all cut, die-cut & punched pieces.  It includes ribbons but not gems, texturing or stamped images. The cost is $25 plus shipping. 

    Go here to get the kit to go; while supplies last.  

    You can combine kits and save on shipping.  You can see them all here.  

    I am not offering the PDF tutorial separately at this time. 

    I just love these cards!! 


    ~~~

    October Specials

    Starter Kit special! Get $155 in product for just $99

    click here

    ~~~

    Order online here

    Host code links: KSAEED9Y or JPJ4FKYJ

    Get a free embellishment from me with online orders over $50!


    Earn free products with my loyalty rewards! 

    Click here to download yours and earn a $50 shopping spree!

    Leave a Reply

    Your email address will not be published. Required fields are marked *

  • Last of the Team swaps; gorgeous cards from the Holiday & Annual catalogs


    Today is the last of the swaps from our Flowerbug's September swap event.  I've sure enjoyed sharing their talent with you and hope you've been inspired by them.  If you haven't seen them all, click here and scroll down.  

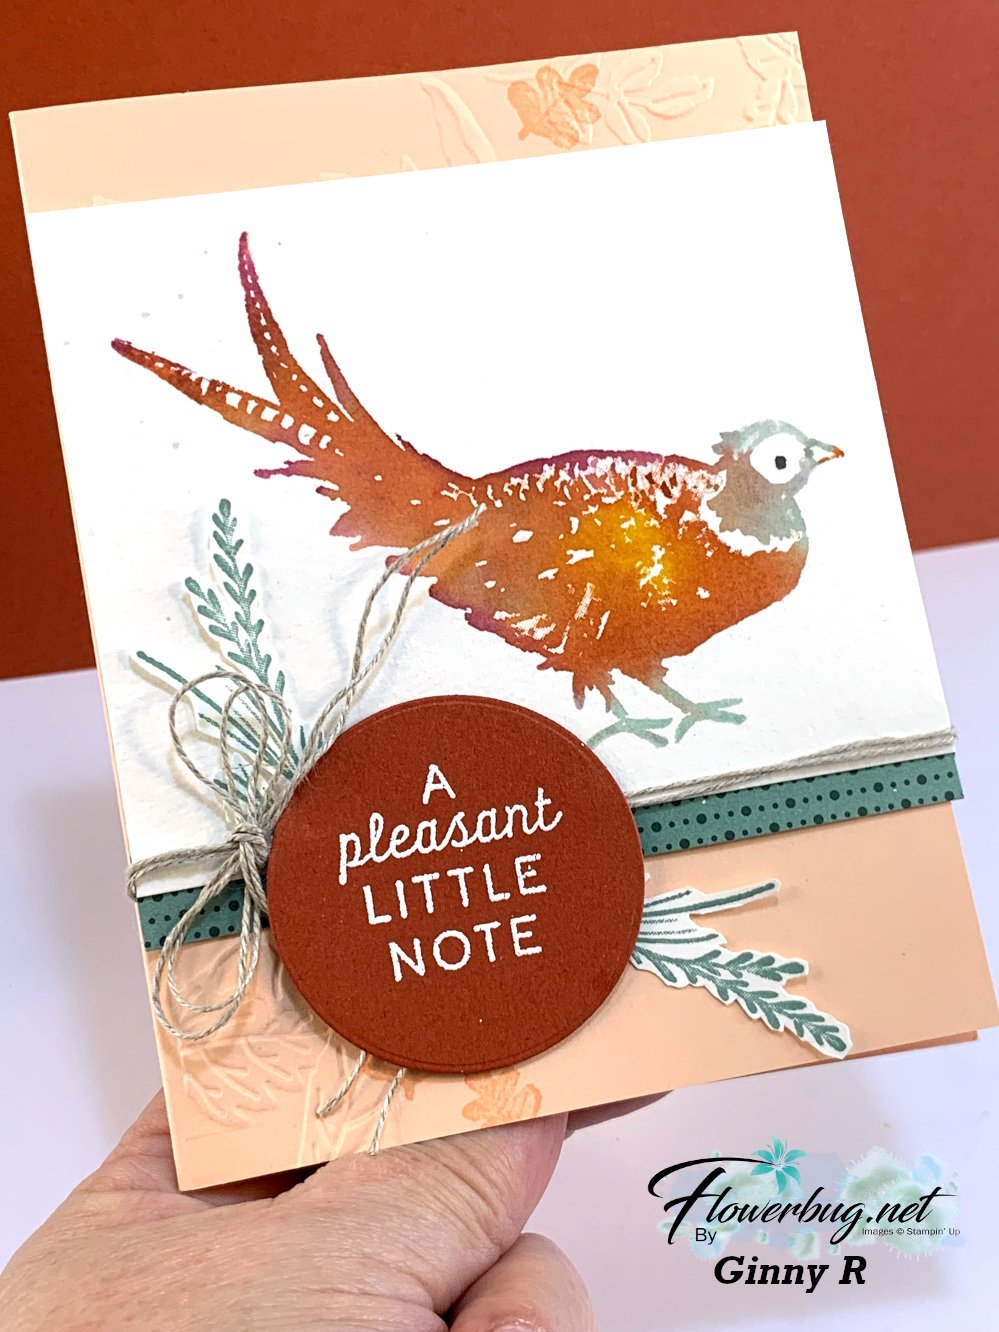
    First up is a a card by Ginny who featured the Painted Pheasant stamp set seen here.  I just love the colors she achieved on the bird!!

    She inked the stamp with markers; spritzed with water and stamped.  A clever way to get multiple colors on this image.  

    Her card base is Petal Pink with a bit of Soft Succulent and Cajun Craze added too. 

    ~~~

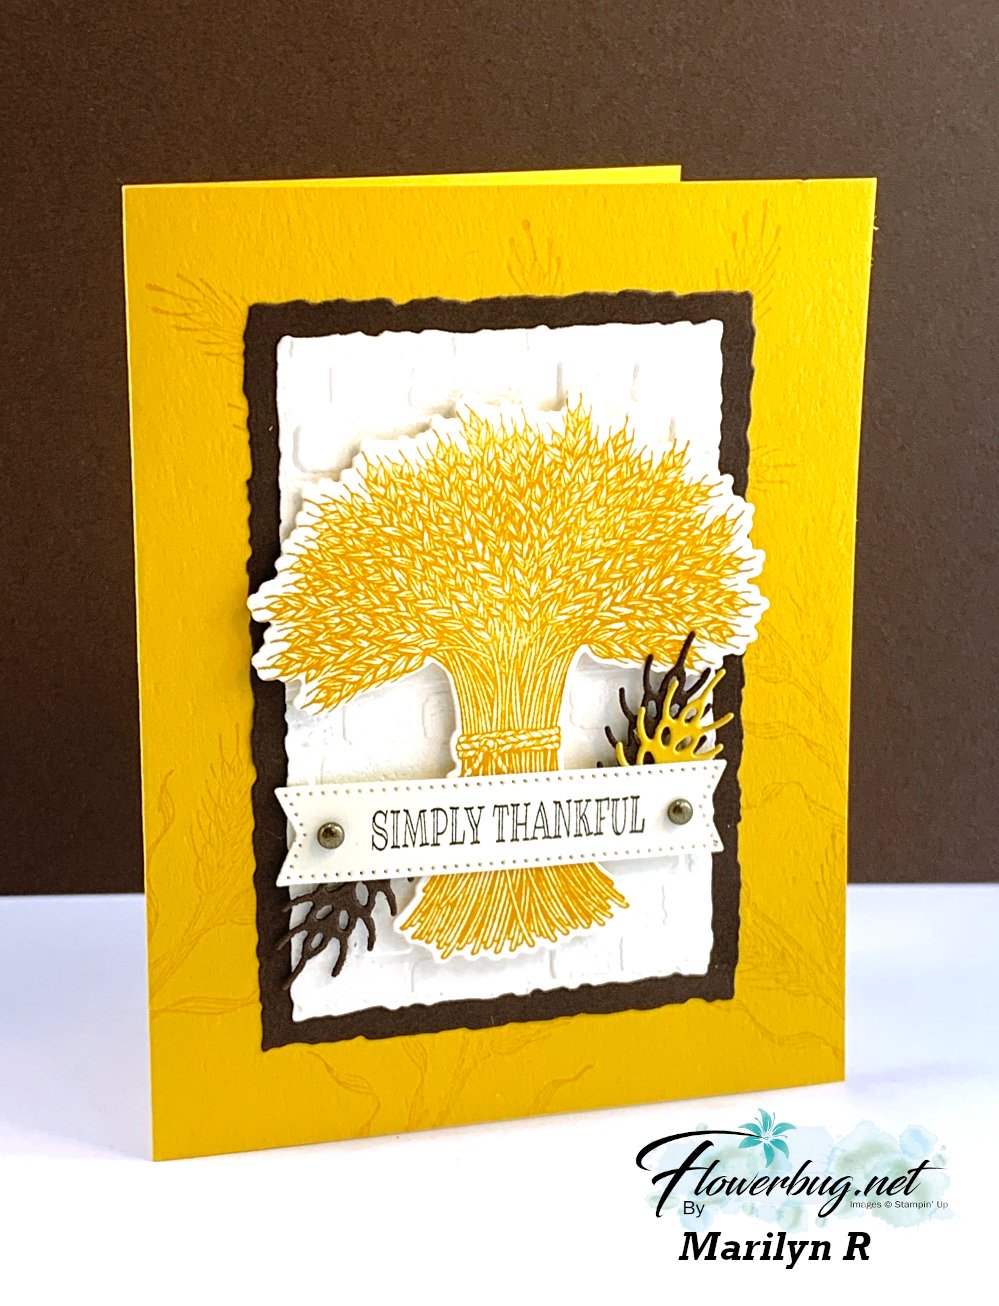
    Next is a pretty card made by Marilyn with the Gathered White bundle seen here.  

    She used the Deckled rectangles & Stylish Shapes dies in addition to the dies in the Gathered White bundle.  Her colors are Crushed Curry with Early Espresso & White.  

    ~~~

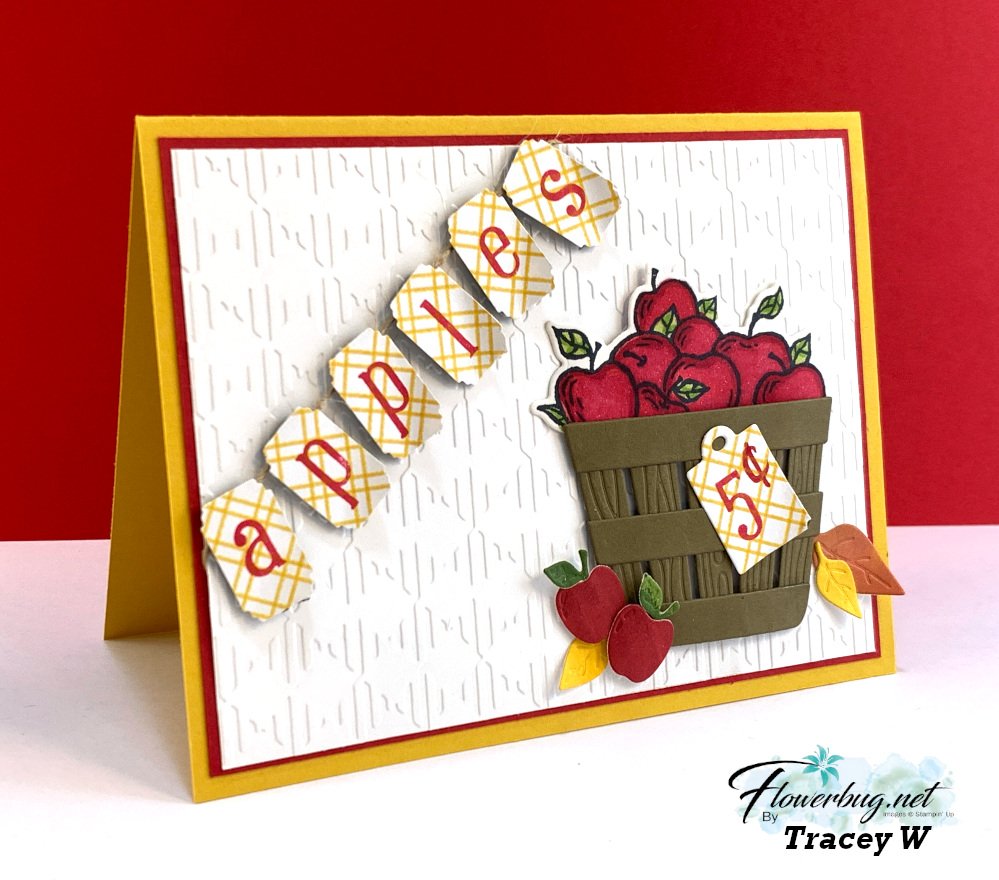
    Lastly is Tracey's cute card made with the Cheerful Basket bundle.  There's so much life & texture to this card! 

    Her colors are Crushed Curry, Cherry Cobbler, White & Soft Suede. The embossing folder is called Gingham, the letters are stamped on the Celebrate Everything host DSP and the apples are colored with Blends markers. 

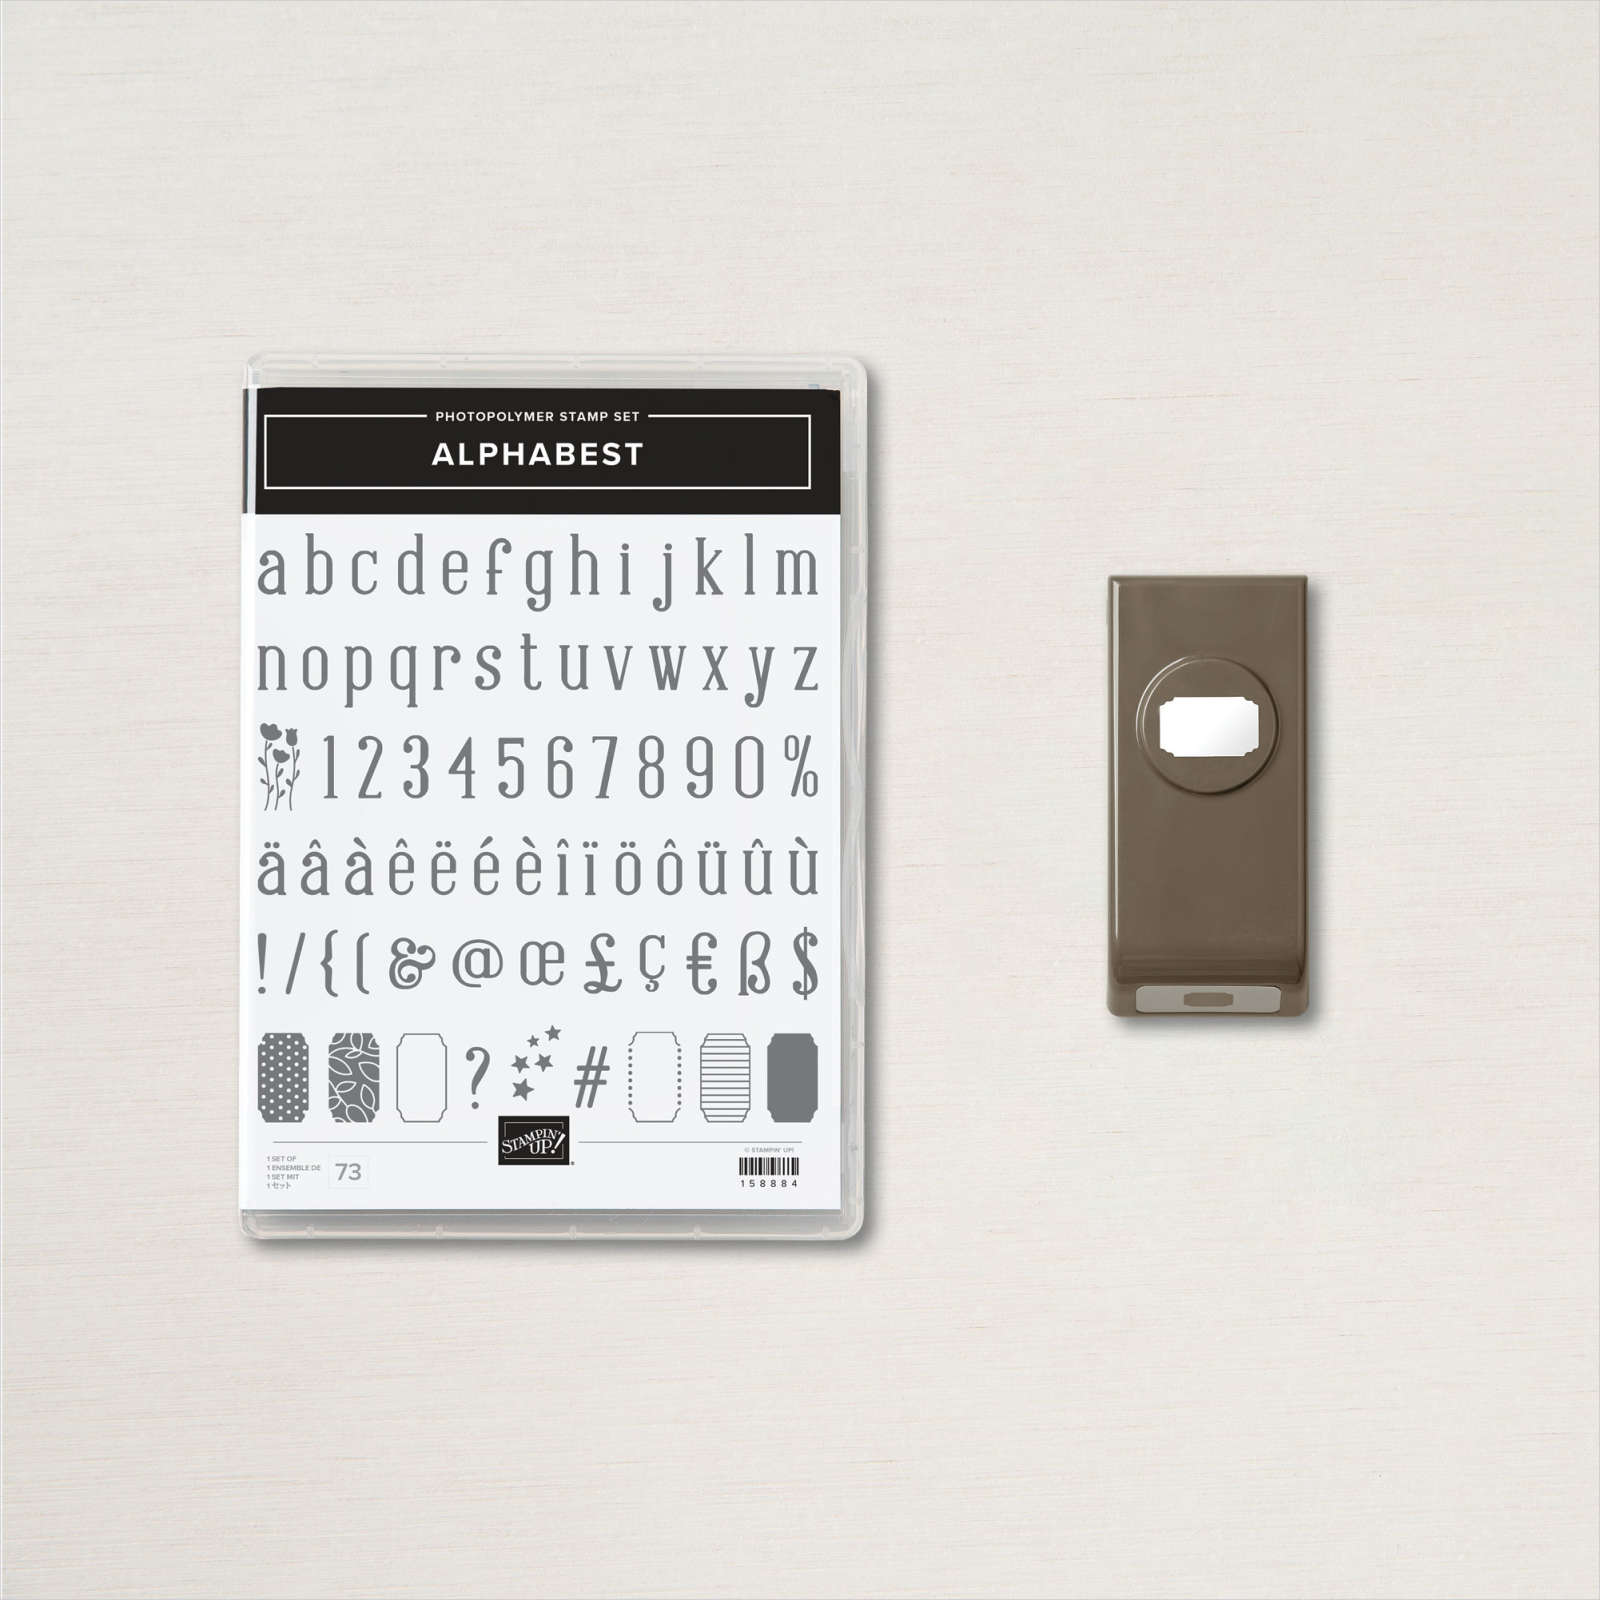
    The 'apples' is made with the adorable Alphabest bundle seen here.  This punch & stamp bundle is so easy to use!  It's photopolymer and allows you to easily and quickly customize your projects.  See it here. 

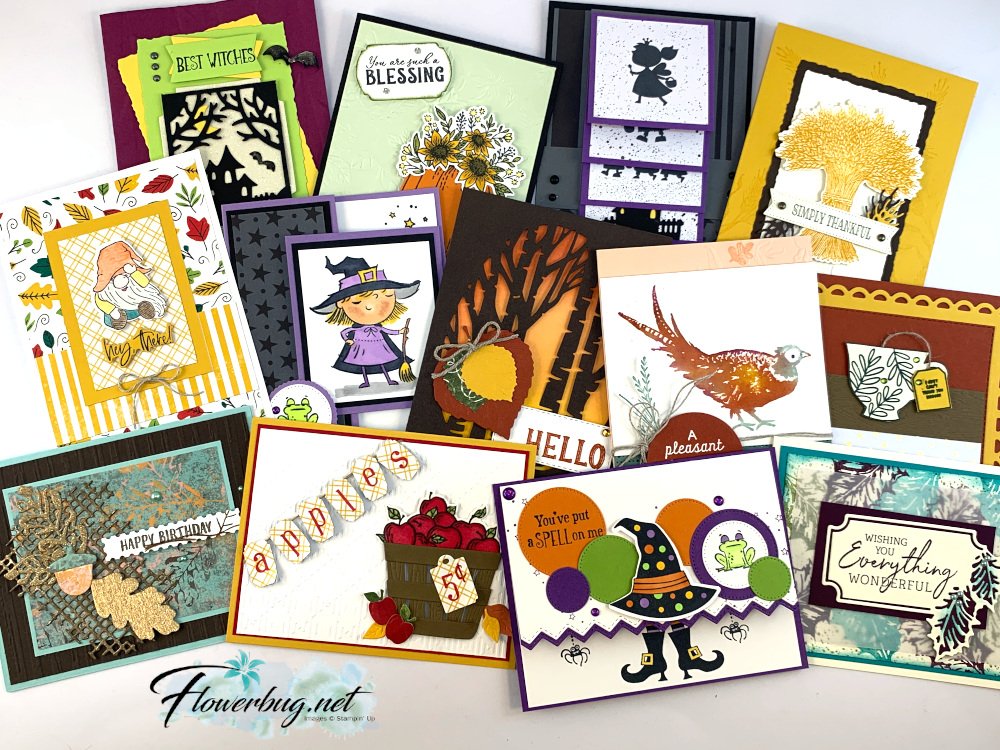
    I hope you've enjoyed seeing the many incredible swap cards my Flowerbug's created for our September swap.  Here's a photo of them all:

    ~~~

    October Specials

    Starter Kit special! Get $155 in product for just $99

    click here

    ~~~

    Order online here

    Host code links: KSAEED9Y or JPJ4FKYJ

    Get a free embellishment from me with online orders over $50!


    ~~~

    Earn free products with my loyalty rewards! 

    Click here to download yours and earn a $50 shopping spree!

    Leave a Reply

    Your email address will not be published. Required fields are marked *


Notice: LeeAnn Greff, Independent Stampin’ Up! Demonstrator, Manager. The content of this website is my sole responsibility as an independent Stampin’ Up! demonstrator and the use of, and content of, the classes, services, or products offered on this website is not endorsed by Stampin’ Up! Copyright 2025