/


Latest Post

Beautiful cards made with the Rustic Christmas Countdown kit!


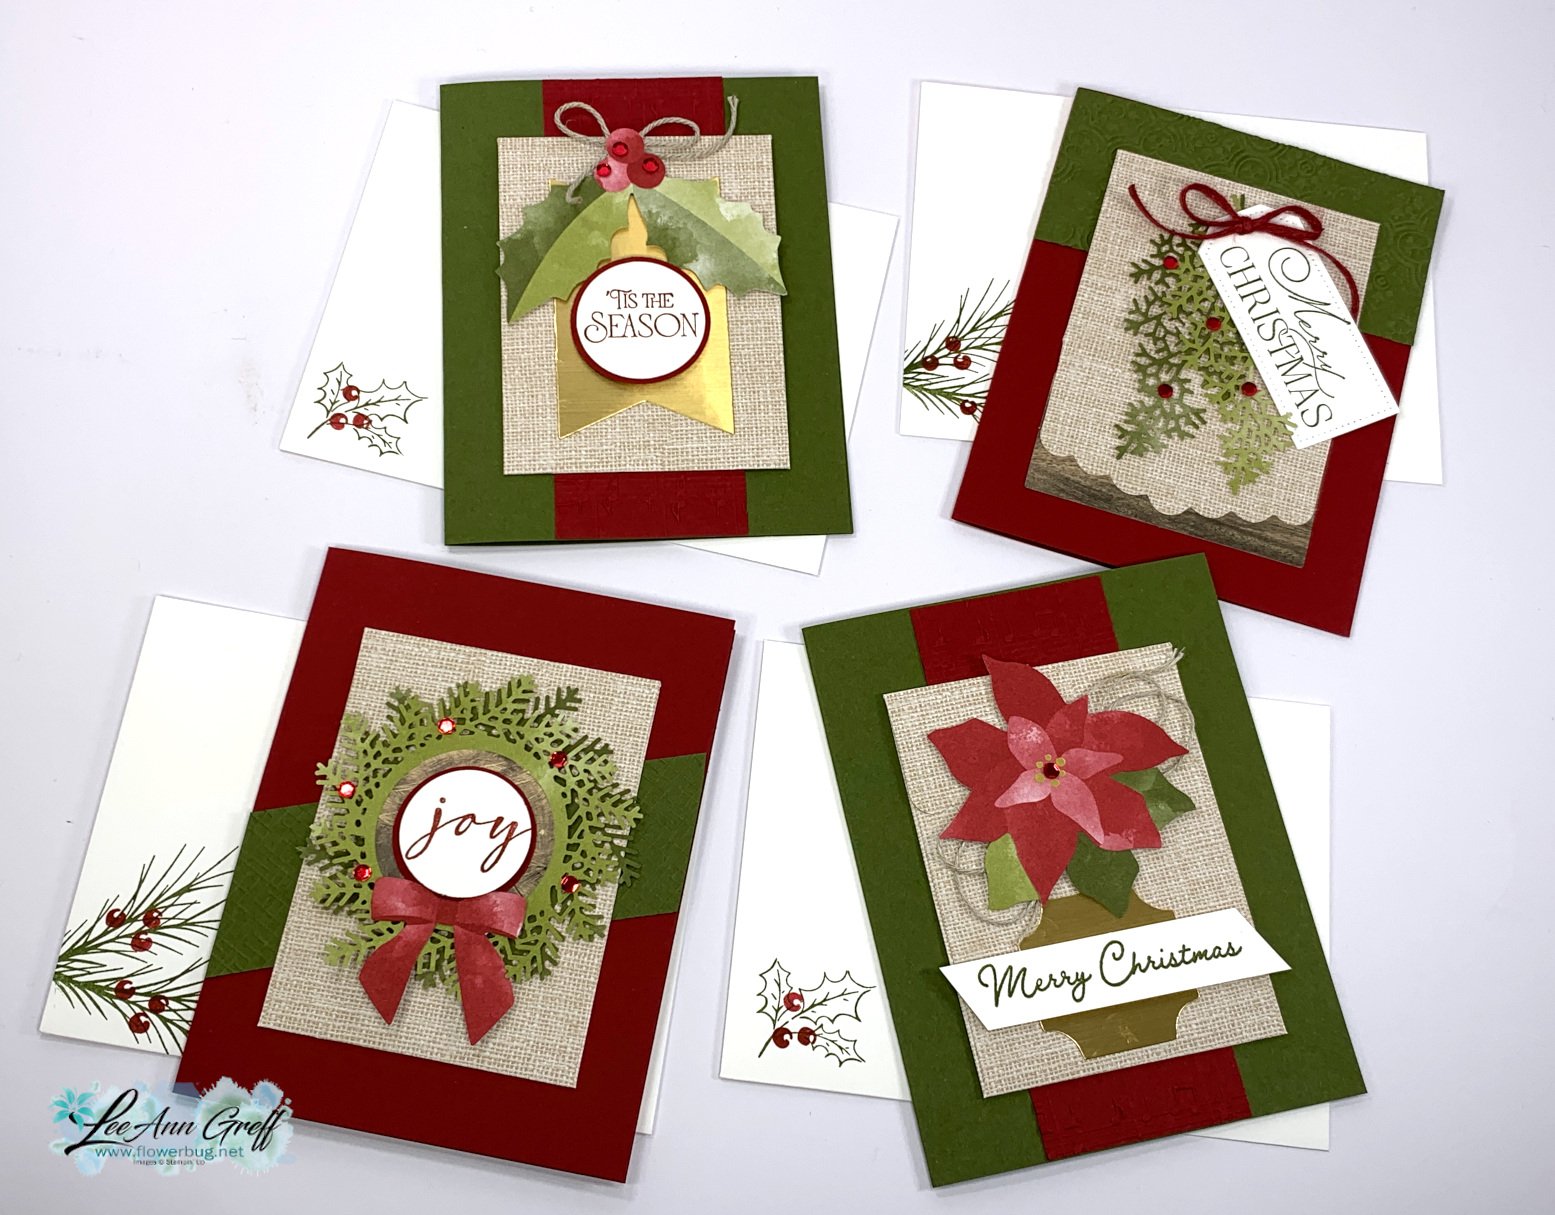
I created these pretty cards with the Rustic Christmas Countdown kit.  It's meant to be used as an advent calendar but I thought they'd make great Christmas cards. 

I will not be surprised if this kit sells out soon.  It's gorgeous!  The envelopes for the advent calendar are approximately 3" X 4"; a good size to add a treat inside. 
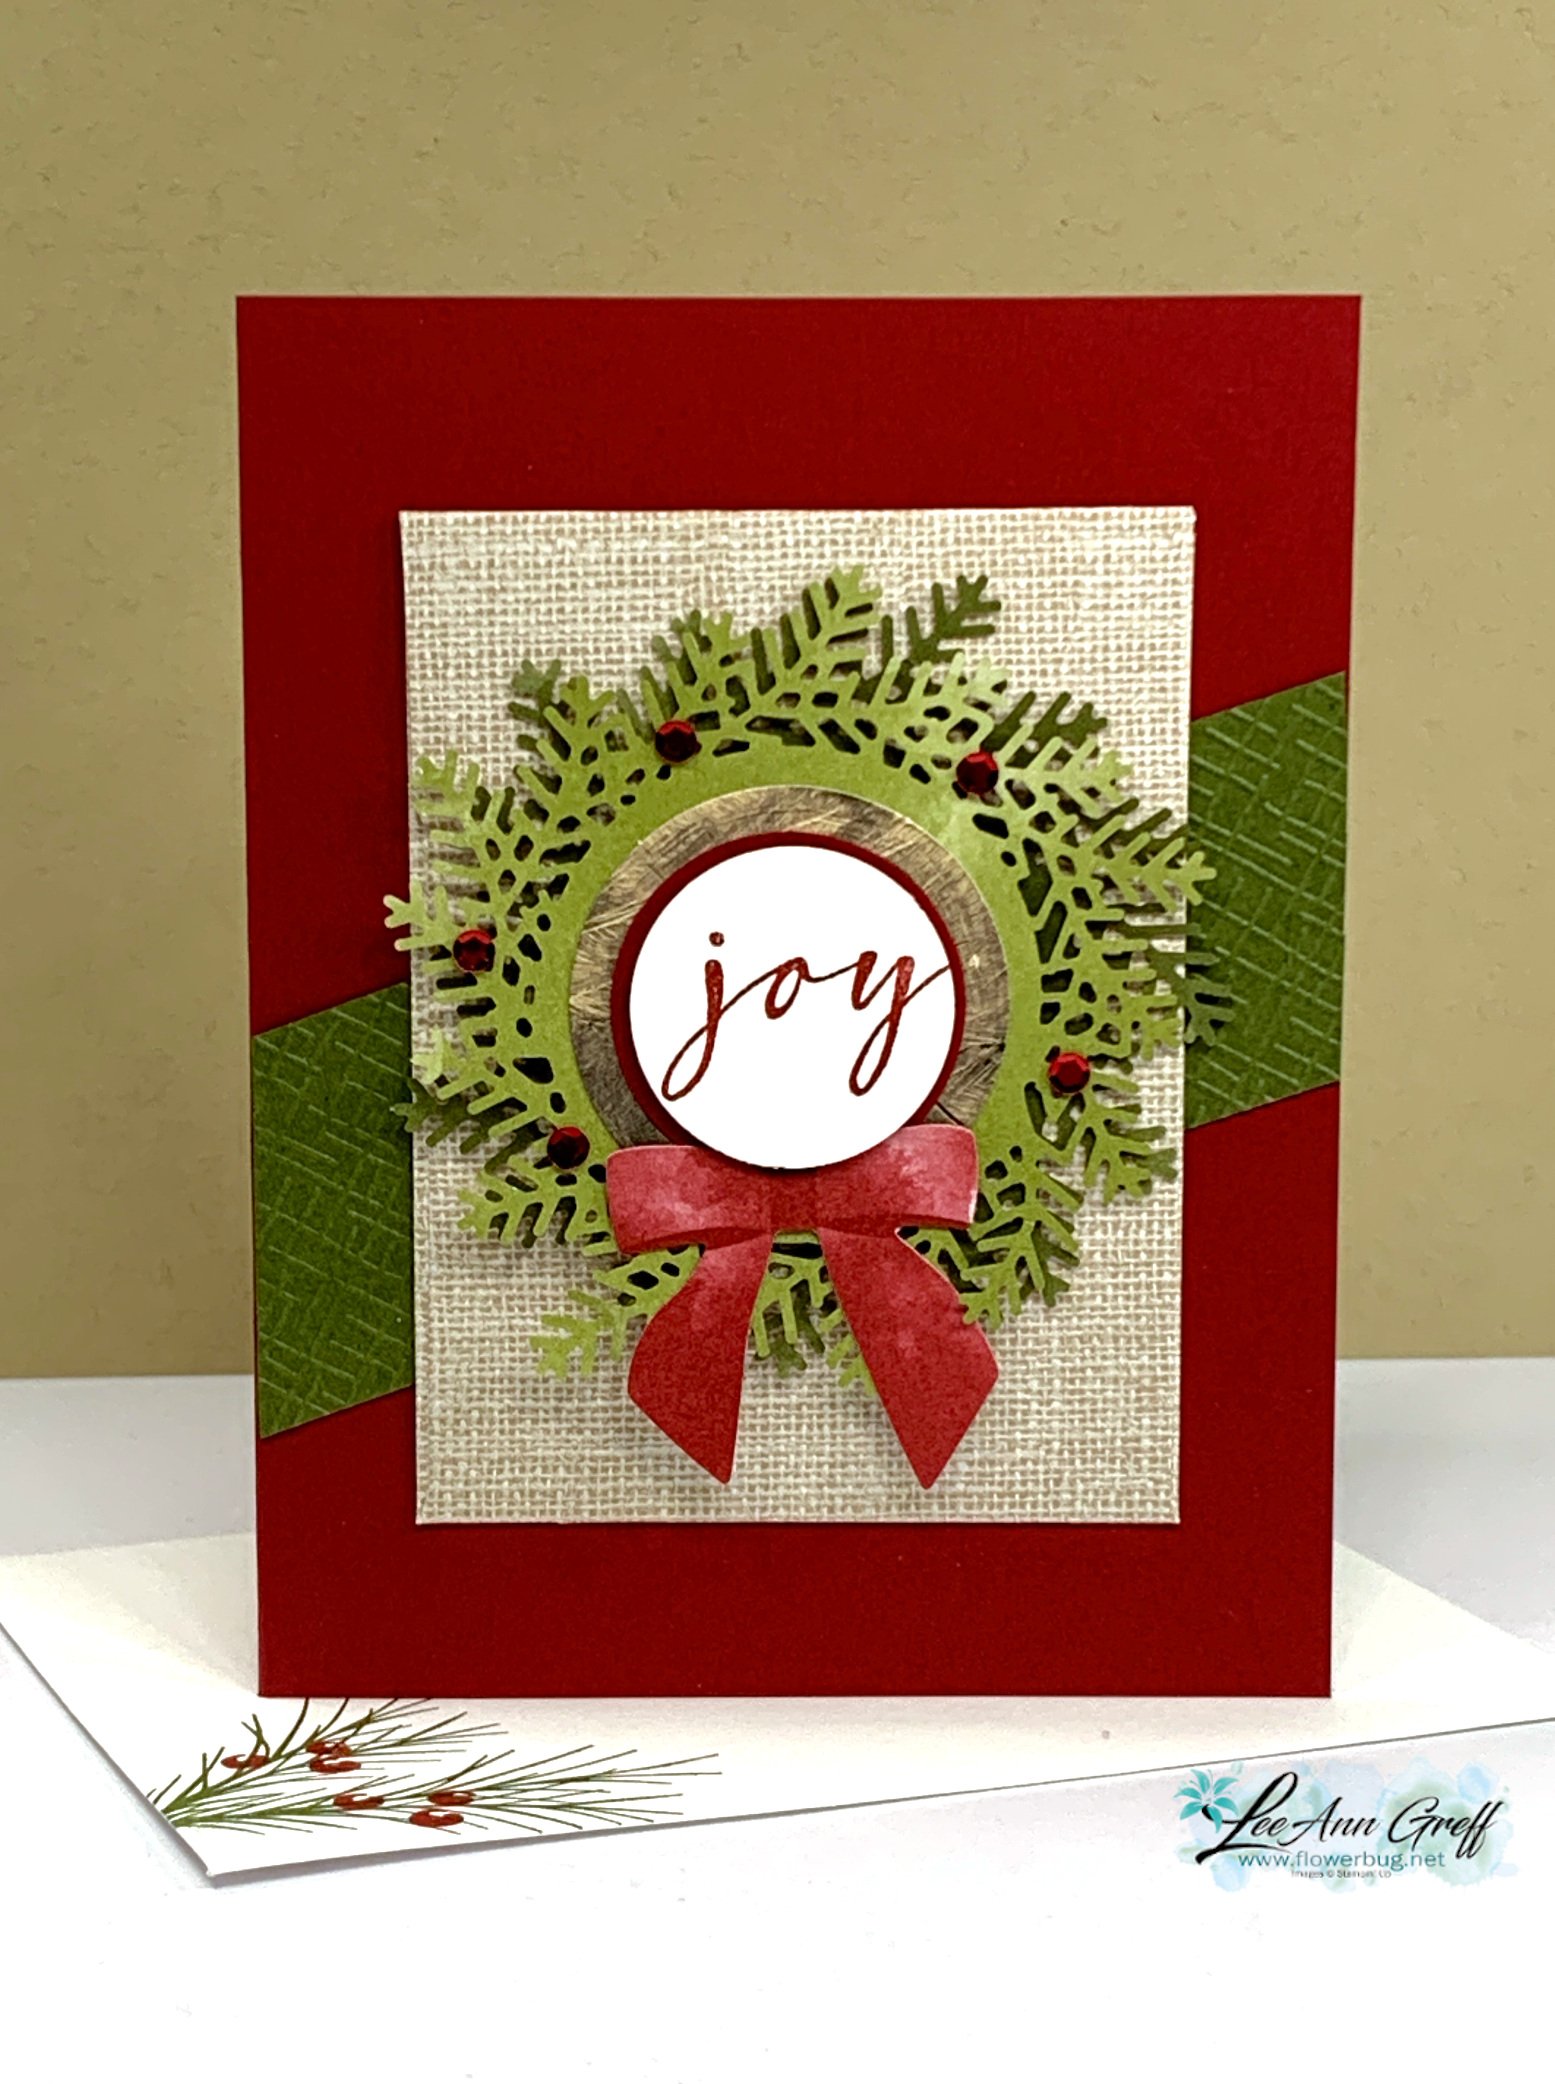
I added Mossy Meadow & Cherry Cobbler card bases, some textured strips of the same colors and a few greetings. 

The greetings mostly cover up the numbers printed on the wood & gold paper elements in the kit. 

For greetings I used the Brightest Glow (annual catalog) and Beary Cute (Holiday catalog) along with circle punches and Tailored Tags dies. 

We made these projects at my October Flowerbug's Team meeting. So pretty but super easy!


You could make up to 25 cards using this kit just by adding card bases, a few layers and greetings.  The red adhesive-backed sequins, Dimensionals, Cherry Cobbler and craft twine all comes in the kit. 
 

See this kit here online.  Our Christmas kits can sell out quick; so don't wait too long.  You never know if it will be back in time for Christmas. 

The kits is gorgeous as an advent project as well!  It also includes the cutest clothespins to close the envelopes. 

While you're shopping our kits be sure to check out the huge selection of kits in our Kit Collection. These kits are all inclusive and can be the answer to quick, seamless crafting or a fabulous gift for any creative person.  See them all here. 


~~~

October Specials: 

Amazing Starter Kit choices! 

Choose one and enjoy the 20% discount on all future orders! Click here

*current host code: HTHK4TQU or Y7VMN2TC

*Get free glitter gems with online orders over $55 (Please use a host code)

All Posts

  • Fancy fold swap cards by my Flowerbug’s Team – with measurements!


    We swapped Fun Fold cards with my team in February and they knocked it out of the park! I've already shared quite a few of their cards with you and today I have more yet! 

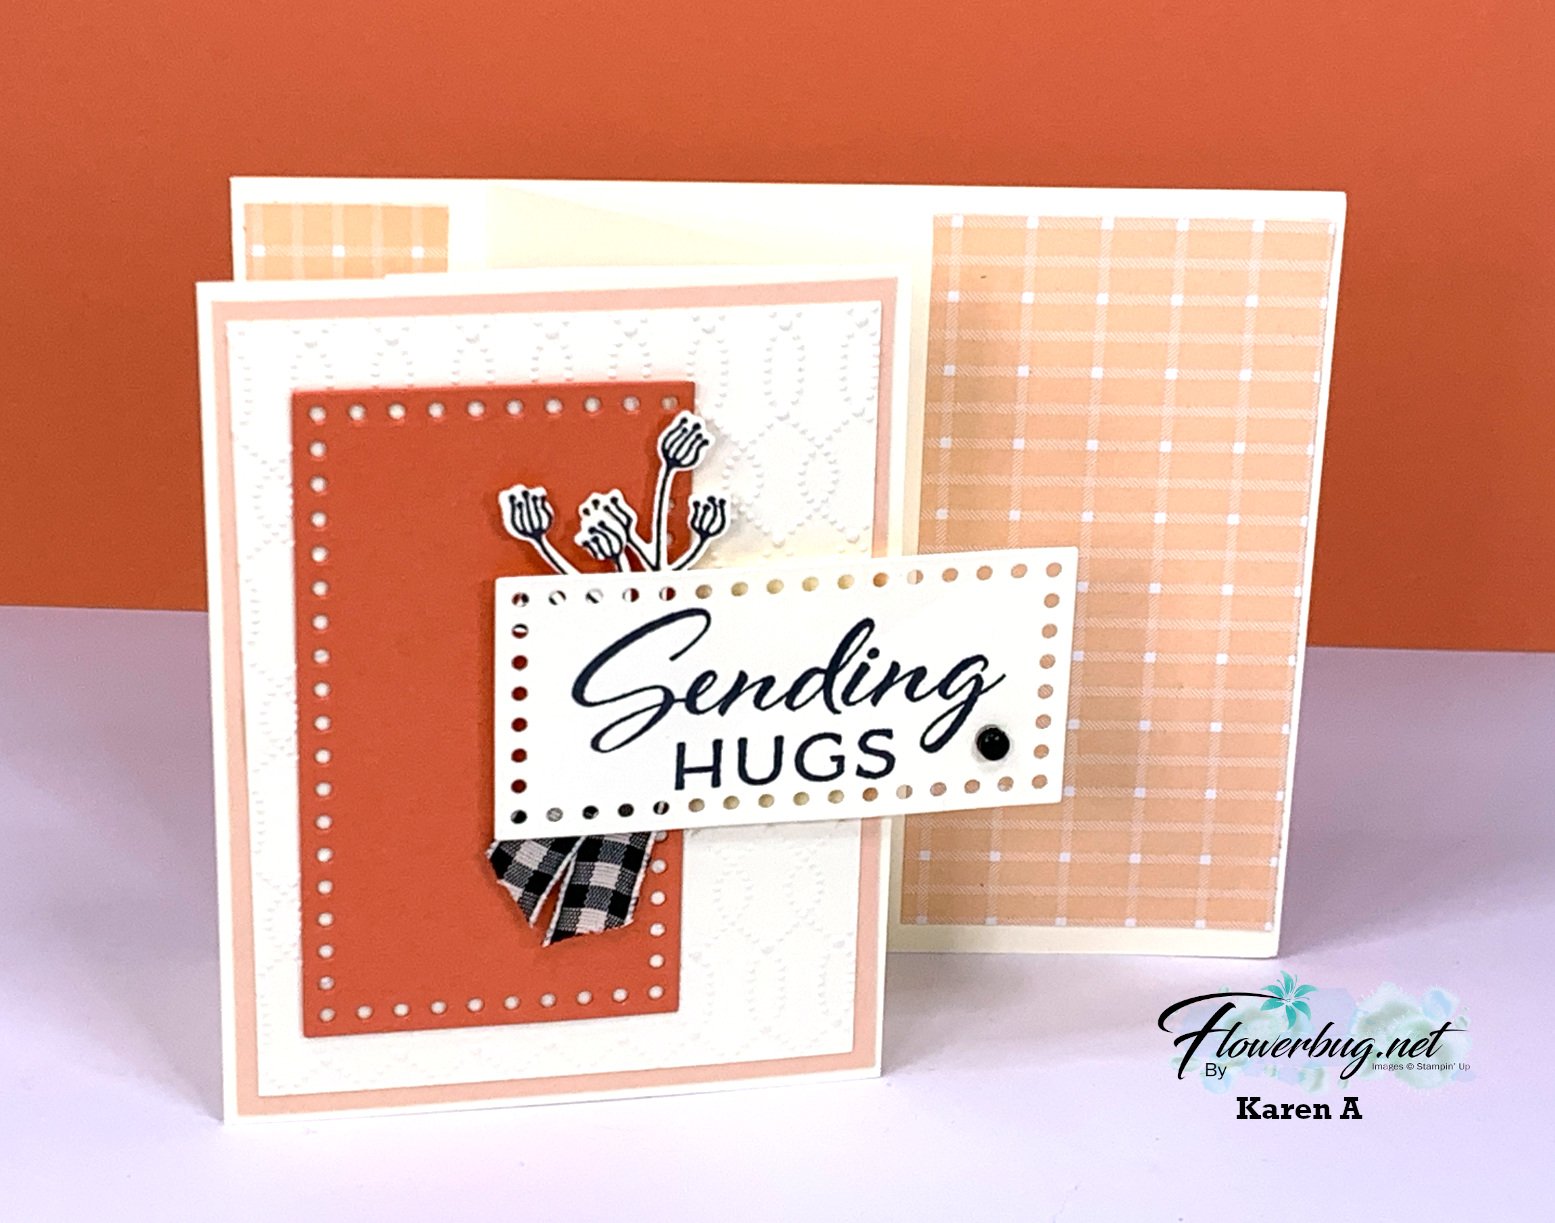
    First up today is a pretty card made by Karen.  She found a new fun fold that's a take on a 'book-binding' fold but now completely new with just one additional piece. 

    She used the Softly Stippled designer paper – a free choice during Sale-a-Bration with any $50 purchase. Her colors include Calypso Coral, Black, Petal Pink and Vanilla. 

    Measurements:

    • Vanilla card base 4 1/4" X 11" scored at 2 1/8", 4 1/4" & 5 1/2", 2nd Vanilla layer is 3 1/4" X 4 1/4", textured layer is 2 7/8" X 3 7/8", die-cut greeting (Everyday Detail dies) is 2 3/4" X 1 3/8"
    • Petal Pink is 3 1/8" X 4 1/8"
    • Calypso Coral die-cut (Everyday Detail dies) is 1 3/4" X 3 1/4"
    • Designer paper – 2 pieces – 1" X 4" for book binding fold, 2" X 4" on right side.  

    ~~~

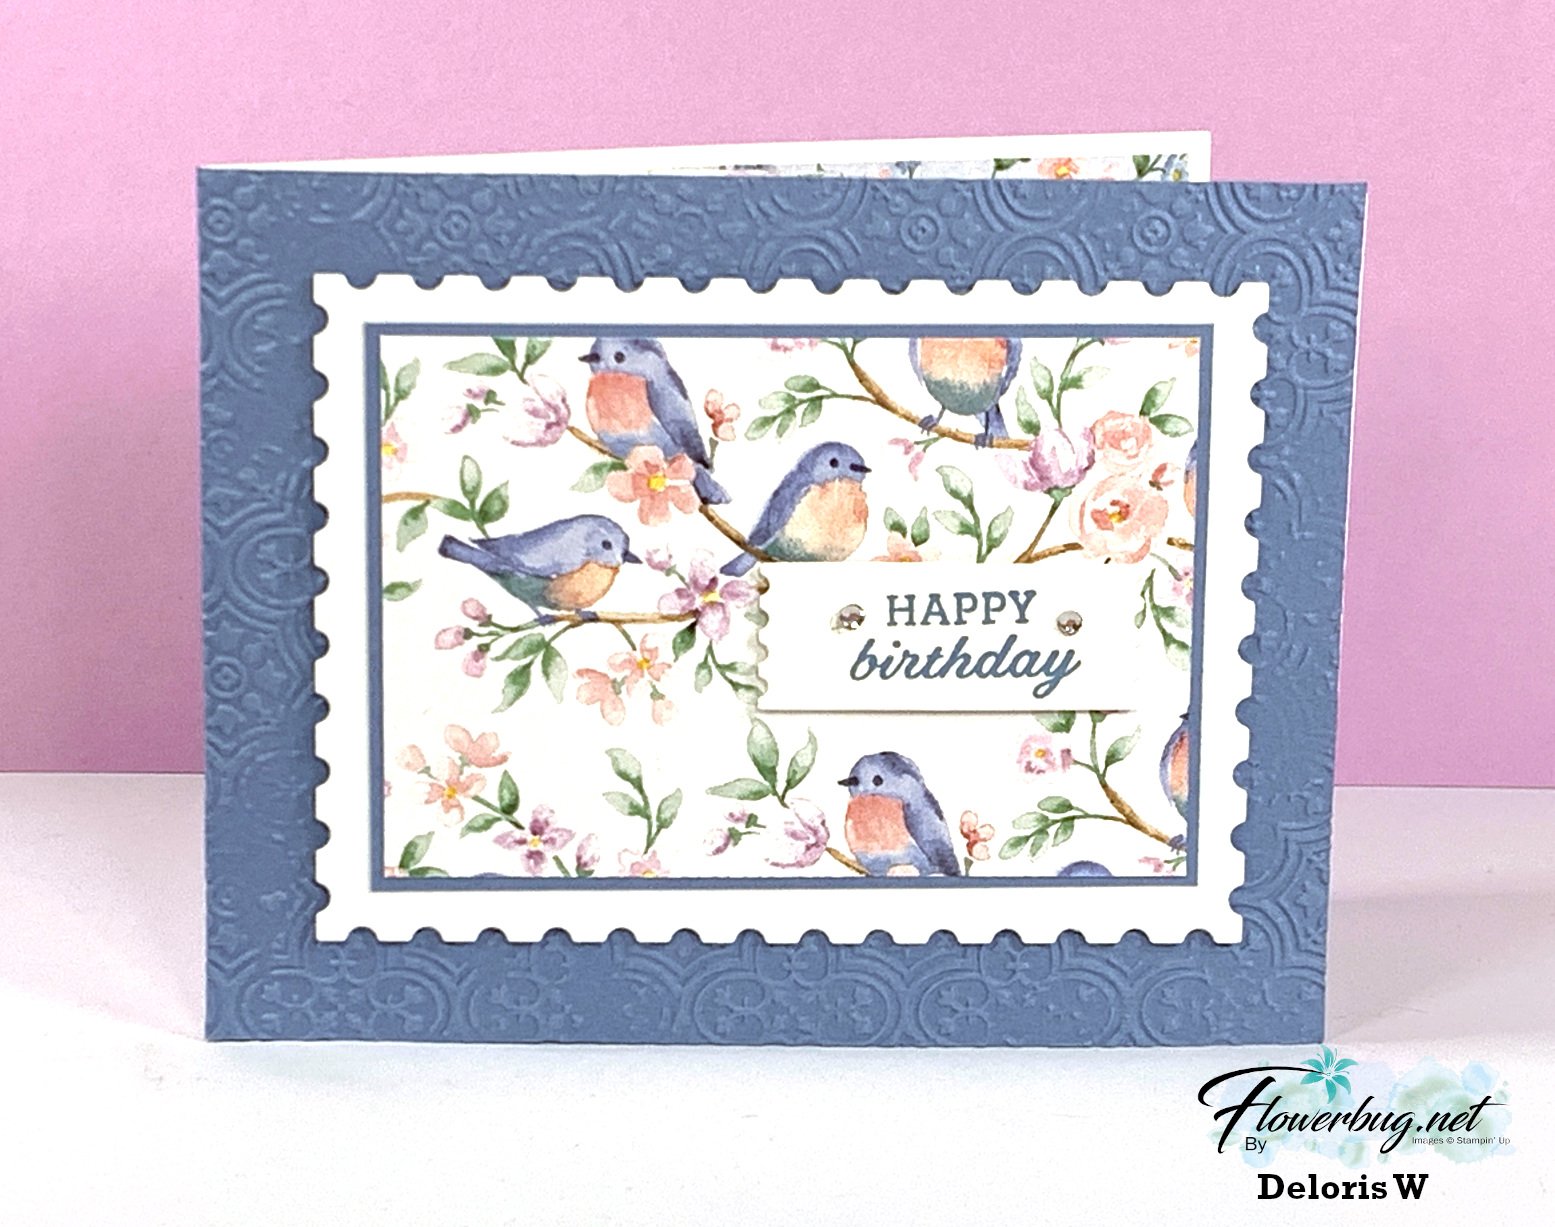
    This next card was made by Deloris who chose the Flight & Airy designer paper, also in our Sale-a-Bration offering in February. It's also free with any $50 purchase from Stampin' Up!. 

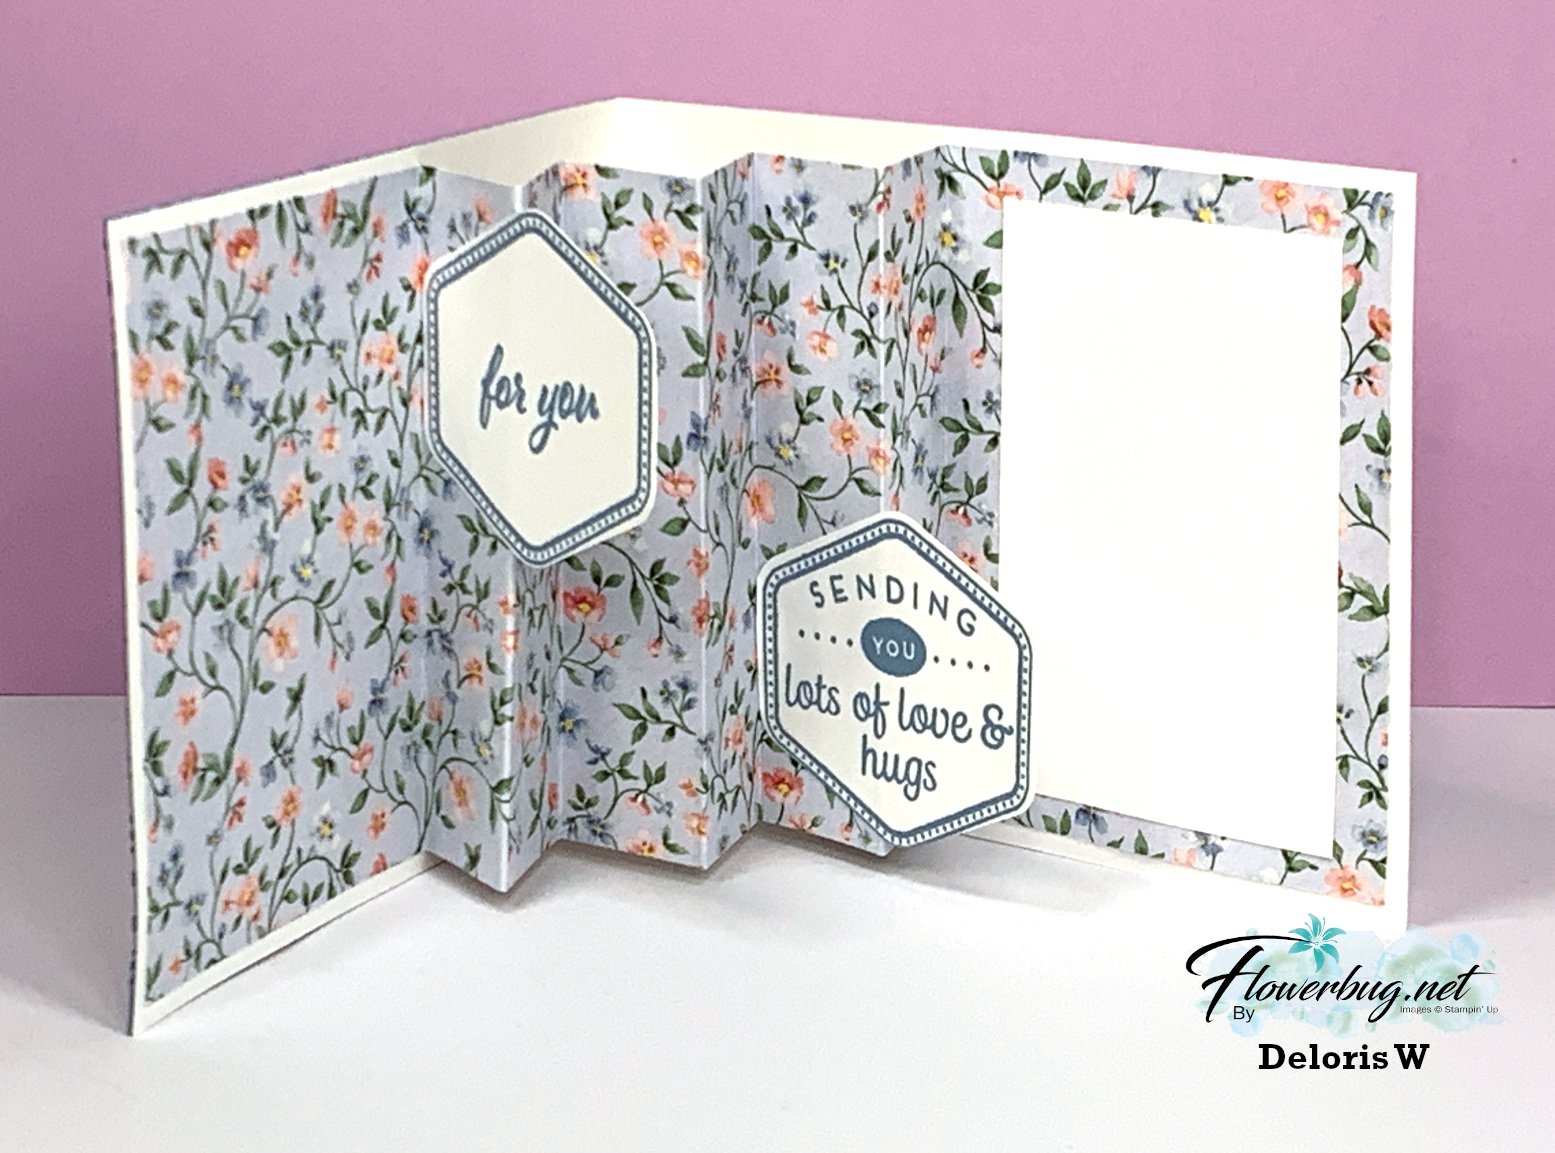
    She used the Perennial Postage dies on the front along with the Distressed Tile embossing folder.  Look at the inside fold!

    The inside greetings are from the Heartfelt Hexagon bundle.

    I shared how to make this neat accordion card on a recent video – see it here. 

    Measurements:

    • Card base 11" X 4 1/4" score at 5 1/2", White layer for Perennial Postage die is 4 1/2" X 3 1/4" finished size, inside white is 2 1/4" X 3 1/2"
    • Boho Blue on front is 5 1/2" X 4 1/4" &  4" X 2 3/4"
    • Flight & Airy designer paper – front is 3 7/8" X 2 5/8", inside accordion is 12" X 4" scored at 3", 4", 5", 6", 7", 8" & 9"

    ~~~

    Lastly today is a beautiful card made by Rita who chose the Softly Stippled designer paper like Karen above. 

    Her colors include Pebbled Path, Calypso Coral and Vanilla.  The inside greeting is from Charming Sentiments; the front is from Wild Ferns.

    Measurements:

    • card base 11" X 5 1/2" score at 1 3/4", 3 1/2", 5 1/4" & 7". second accordion piece is 4" X 3" score in half at 2"
    • Pebbled Path layers – 4 pieces at 1 1/2" X 5 1/4"
    • Designer paper 1 3/4" X 2 3/4" and 1/2" X 5 1/4" on the inside right edge
    • Calypso Coral greeting strip is 2 3/4" X 5/8" 

    I'll share more with you tomorrow!  Stay tuned!  

    ~~~

    February Specials: 

    Earn FREE products with your Stampin' Up! purchase during

    Sale-a-Bration! *click here

    *current host code links: 4BXU7SGH or 6SUH2MUQ

    It's the best time to get a pre-paid Sale-a-Bration subscription

    & earn free Sale-a-Bration products!  


    ~~~

    Get a free Gold Foiled cards & envelopes kit

    with online orders over $55 in February

    All online orders in February will receive a free Nature's Sweetness tutorial with 8 projects!

    Leave a Reply

    Your email address will not be published. Required fields are marked *

  • Simple Direct to Paper Technique for quick gorgeous cards! Plus 6 ways to add ribbon! Video & free project sheet too!


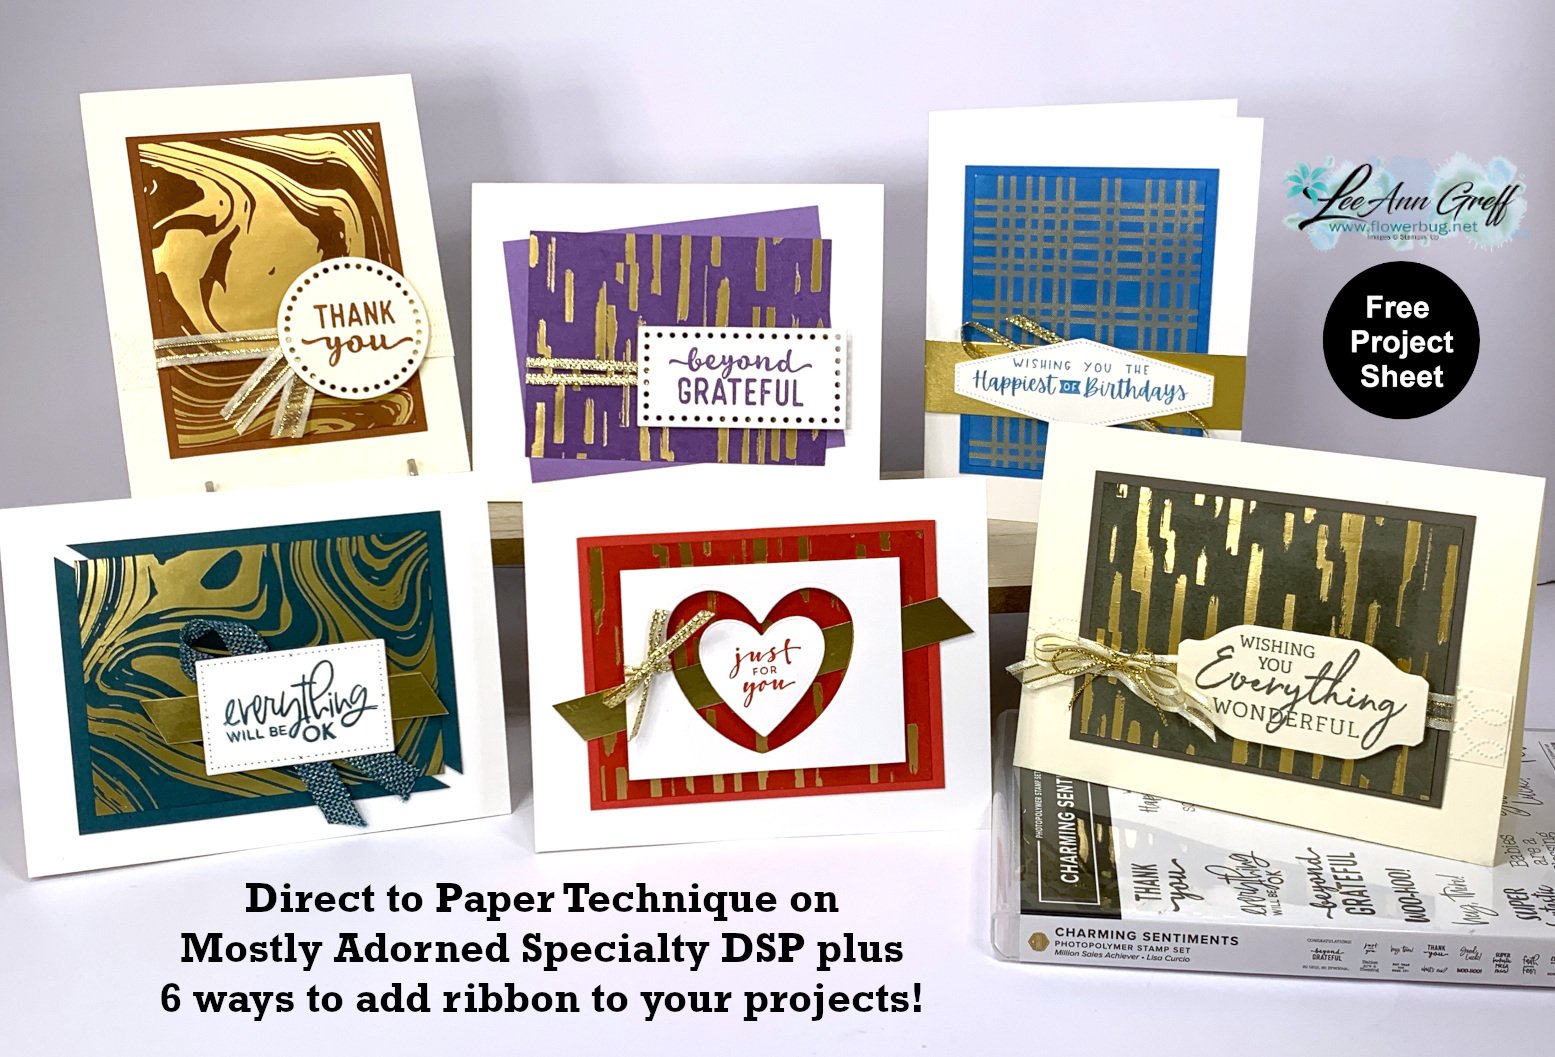
    On last week's Live video I focused on the Most Adored specialty designer paper and shared the Direct to Paper technique and these gorgeous cards: 

    Anytime we have designer papers with foil designs I think of this fun technique! It's basically rubbing or tapping your water based ink pad onto the designer paper. The ink soaks into the background but resists the foil designs. Simply wipe the excess ink off the foil with a tissue – done!

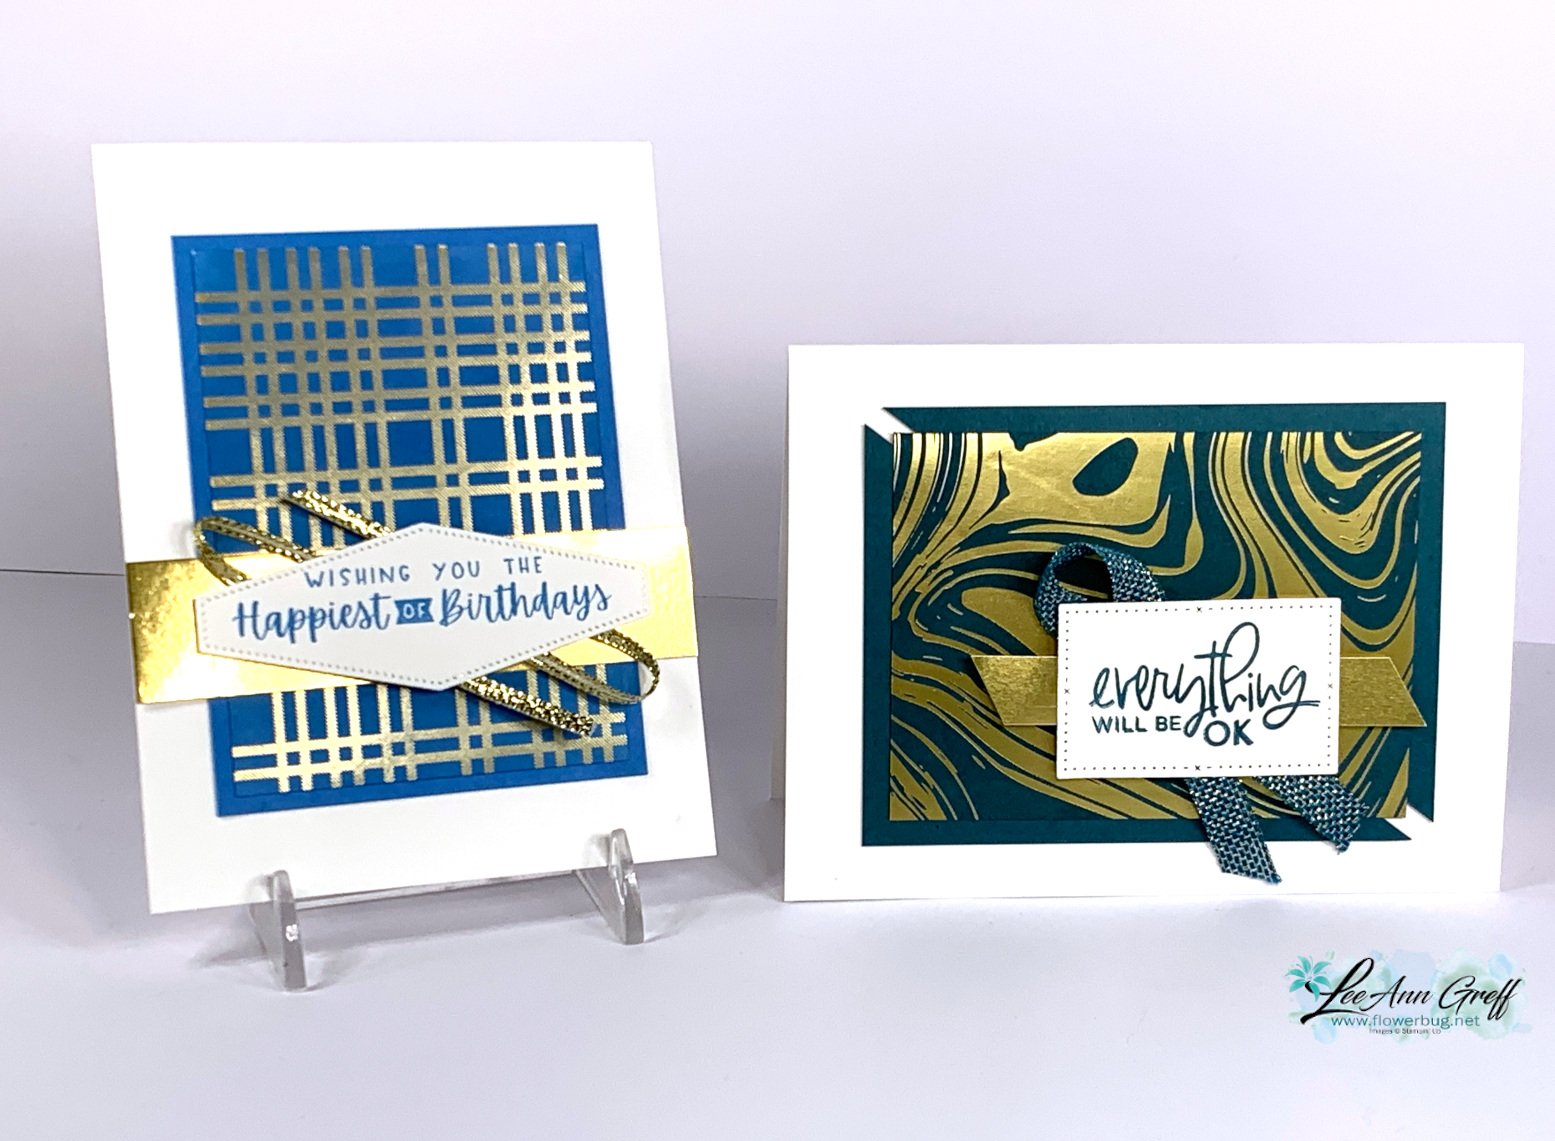
    The colors above are Azure Afternoon and Pretty Peacock. Notice the different ribbon techniques and layouts. The left card has loops of ribbon added to the greeting label; the right has a simple fold of ribbon. 

    Each card has two main pieces – the designer paper is 3" X 4" and the layered, coordinating card stock is 3 1/4" X 4 1/4". Check out the different layouts with these basic pieces.  

    The left card above is Highland Heather and the right is Sweet Sorbet.  A few more examples of ways to add ribbon and change up this simple layout.  I added two thin strips of ribbon across the left card and tied a bow around the window frame on the right. 

    Remember this pretty specialty paper is available through February during Sale-a-Bration. It's free with any $50 Stampin' Up! purchase. See it here. 

    Keeping to a basic layout like this is a wonderful way to get a bunch of cards done quickly and use up your designer paper at the same time! I chose the Charming Sentiments stamp set for all of my greetings.  

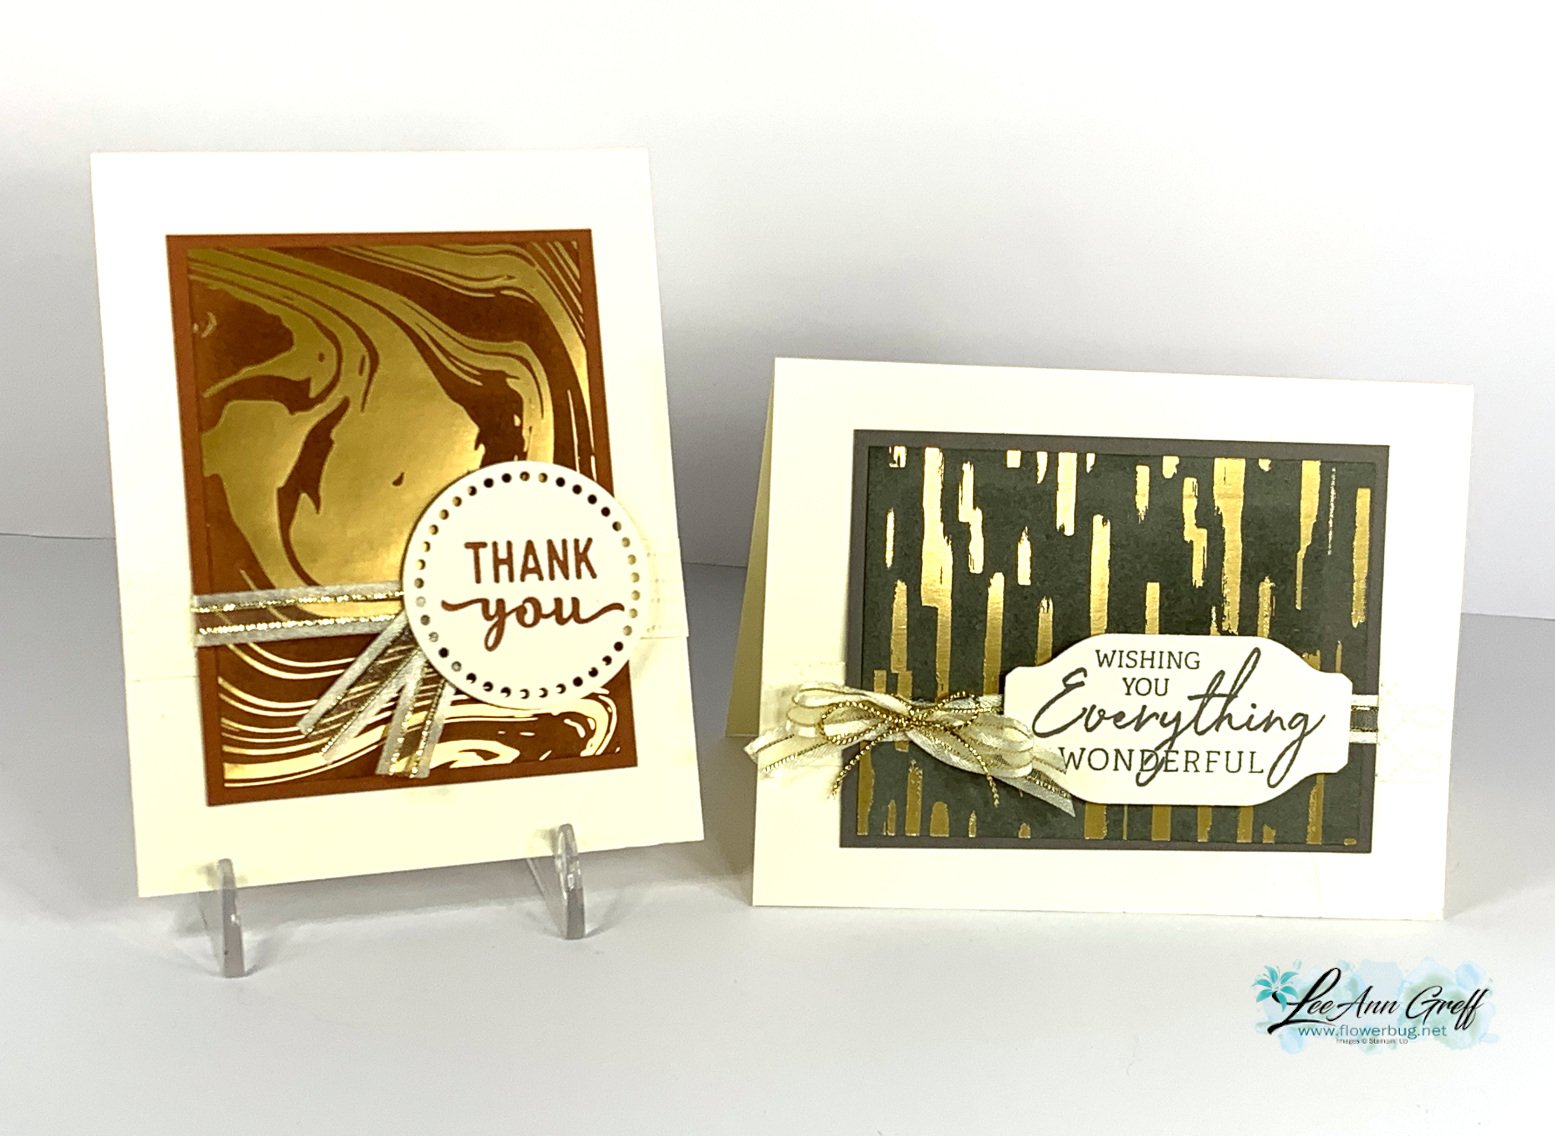
    The colors above are Copper Clay and Pebbled Path – 2 of our newest in colors.  Ribbon uses include a flag and a double bow.

    The free project sheet can be downloaded here: It's also a great reference for ways to add ribbon! Download Direct to Paper technique with 6 ways to add ribbon

    I hope you're inspired by the simply card idea, the technique and the 6 ways to add ribbon!  Watch the video below to see this technique in action!

    I'm Live on Facebook here every Tuesday at 11 am. Follow me to catch it live. 

    Or see and follow me on YouTube here! 

    ~~~

    February Specials: 

    Earn FREE products with your Stampin' Up! purchase during

    Sale-a-Bration! *click here

    *current host code link: 4BXU7SGH 

    It's the best time to get a pre-paid Sale-a-Bration subscription

    & earn free Sale-a-Bration products!  

    ~~~

    Get a free Gold Foiled cards & envelopes kit

    with online orders over $55 in February

    All online orders in February will receive this free tutorial with 8 projects!

    Leave a Reply

    Your email address will not be published. Required fields are marked *

  • AMAZING Most Adored Cascading Pleats fancy fold card – with video & free project sheet!


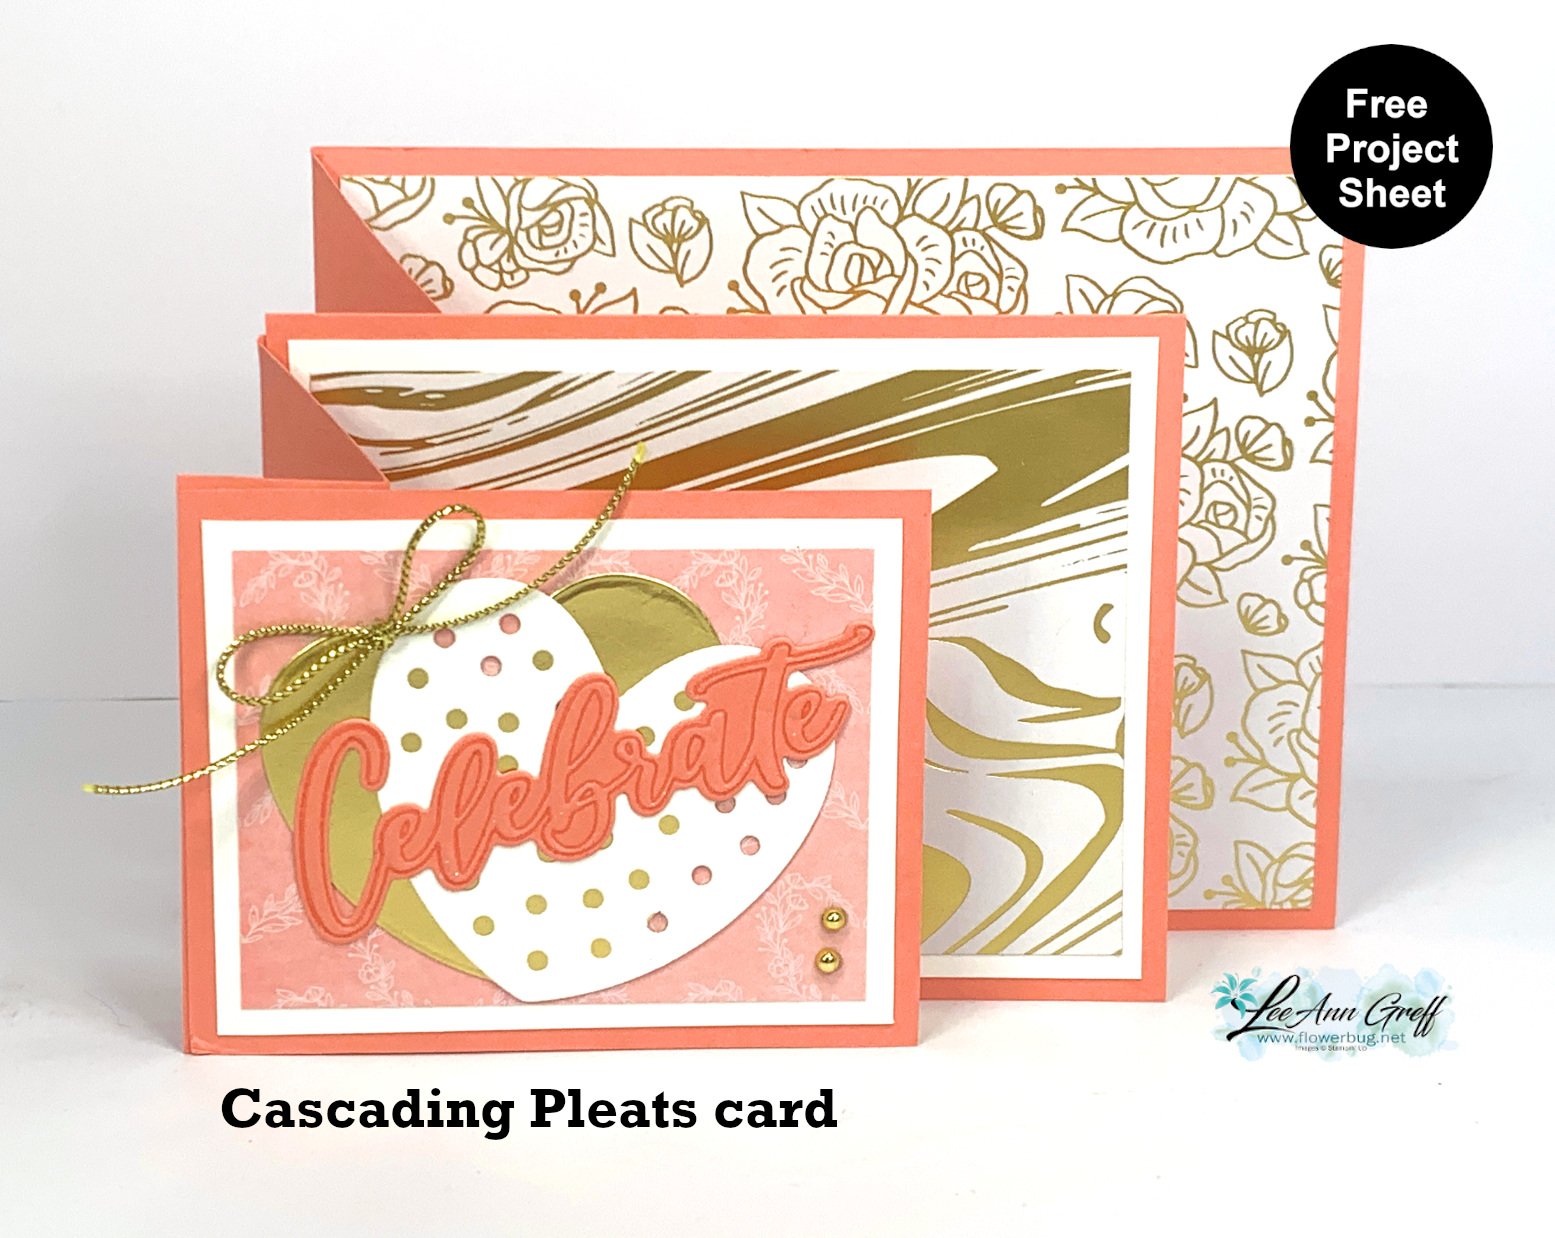
    Have you seen or made a 'Cascading Pleats' fun fold card before?  They're so cool and actually quite easy to make.  

    I shared how in last week's video. *if you want to watch them Live, follow me on my FB page here.  

    I chose to feature the Most Adored Specialty designer paper for my video projects. On this card I used both the Flirty Flamingo side and the Gold Foiled sides of this pretty paper.  See it here.  It's free with any $50 order through February during our Sale-a-Bration promotion – or while supplies last.  

    I have full measurements in my free project tutorial below but it will help you a lot to watch the video.  

    There are three layers and they 'cascade' in sizes from smallest in the front to largest in the back.  Each has 2-3 layers.  

    Other products used include: Thoughtful Moments Hybrid 3D embossing folder, Hooray for Surprises bundle, Give it a Whirl dies, Something Fancy stamp set, Gold foil paper & Elegant Trim.  


    It looks quite complicated but it really isn't.  I hope you 'll watch my video below or here to see how it's made. 

    Click here to download or print the free project sheet: Download Most Adored Cascading Pleats card


    Below is the photo where I share how to make this neat fancy fold card.  The photo doesn't show it but it is the correct video! 

    *I'll share more cards featuring this stunning specialty designer paper tomorrow. 

    ~~~

    February Specials: 

    Earn FREE products with your Stampin' Up! purchase during

    Sale-a-Bration! *click here

    *current host code link: 4BXU7SGH 

    It's the best time to get a pre-paid Sale-a-Bration subscription

    & earn free Sale-a-Bration products!  


    ~~~

    Get a free Gold Foiled cards & envelopes kit

    with online orders over $55 in February

    All online orders in February will receive this free tutorial with 8 projects!

    Leave a Reply

    Your email address will not be published. Required fields are marked *


Notice: LeeAnn Greff, Independent Stampin’ Up! Demonstrator, Manager. The content of this website is my sole responsibility as an independent Stampin’ Up! demonstrator and the use of, and content of, the classes, services, or products offered on this website is not endorsed by Stampin’ Up! Copyright 2025