/


Latest Post

Beautiful By the Bay card kit; stunning designer paper!


This gorgeous By the Bay specialty designer paper is amazingly beautiful!  It has gold and glossy accents on one side of each page.  

It was my top choice for a January card kit; it's incredibly pretty and not just for beachy themes.  Below you'll see the 10 cards featured in my By the Bay card kit to go.  
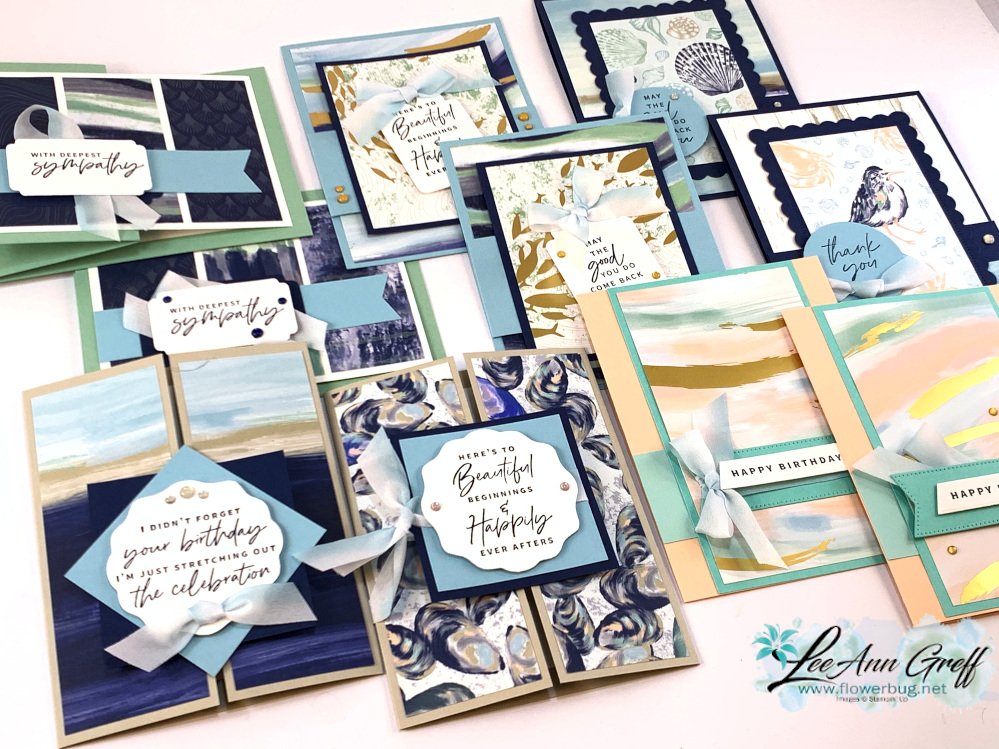
There are 10 cards here with most being fancy folds.  The kit includes a half a package of By the Bay 6" DSP, a share of new Milky Dots and new Balmy Blue shaded ribbon AND the PDF tutorial.  Plus you'll receive the 10 pre-cut cards – everything is cut for you including the die-cut or punched pieces.  You'll just need to cut the designer paper that's in your product kit.  You'll have lots of product left to make even more cards! 

Opt in for this kit by January 19th; it will be mailed out at the end of January.  You can choose the PDF tutorial here.  

Get this fun fold card kit here.  

*The PDF tutorial is emailed to you immediately after purchase.  Please check your spam or junk folder for it. 

It does not include stamped images. I used the Something Fancy stamp set but you can substitute other greetings.

More details:

  • Add on the Something Fancy stamp set or bundle at an extra 10% off (and earn a free SAB choice). Email me 
  • I also have a second card kit available this month featuring the Regency Park designer paper.  See that one here.  
  • You can combine your kit orders and save on shipping; they'll both fit in one package. 
  • Each kit includes $20 in product so if you'd like to earn a free $50 Sale-a-Bration item, add on $30 or more in product and choose a free item (or add $10 if you get both kits).  Email me here for that option please.  
  • You will need greeting images, Navy ink, adhesives and a paper trimmer to cut your new designer paper. 

~~~

Sale-a-Bration & the Spring Catalog!


Order online using the links below:
January Host code links: FYRQ94HR or 69GXSA3B

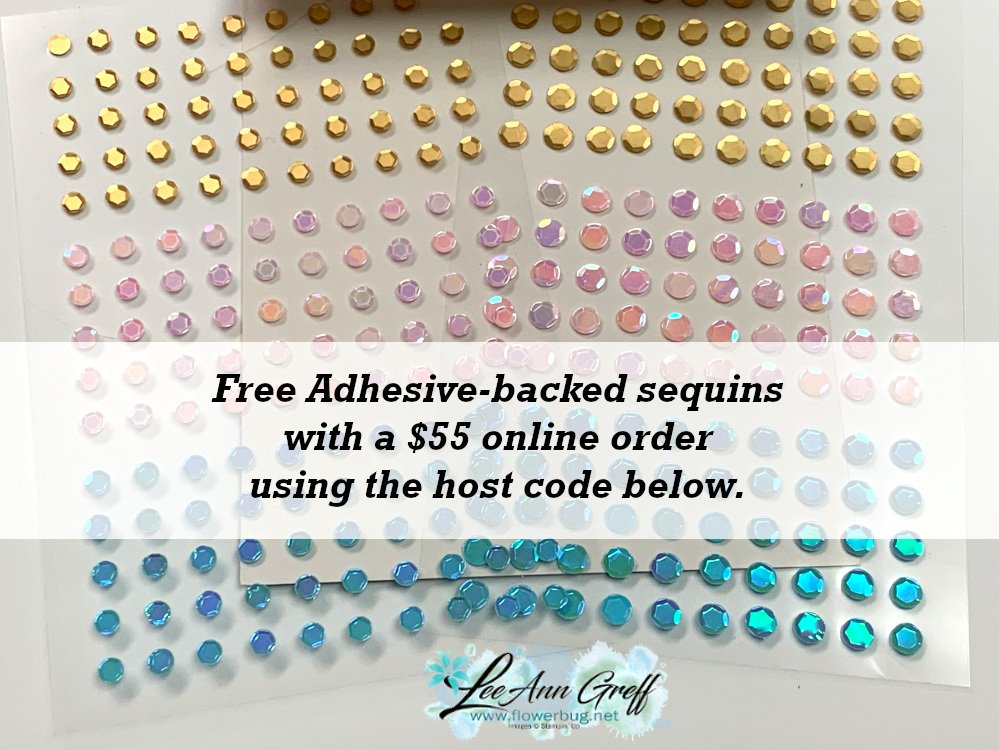
Get free Pastel Sequins with online orders over $55 when using the host code above! 

January Host code links: FYRQ94HR or 69GXSA3B
 Earn free products with my loyalty rewards! 

Click here to download yours and earn a $50 shopping spree!

~~~

Best Deal Ever on the Starter kit here!

Choose $175 in products for just $129 plus the new mini machine!

Or choose $175 for $99 without a new Mini.  AMAZING!

All Posts

  • An amazing flower from the Ladybug Builder punch? Yes!


    I have been sharing many cards made with the Hello Ladybug stamp & punch bundle in the last few days.  I've gone a bit crazy with it lately!  If you missed them scroll to the next few posts before this one or watch the video here to see most of them.  

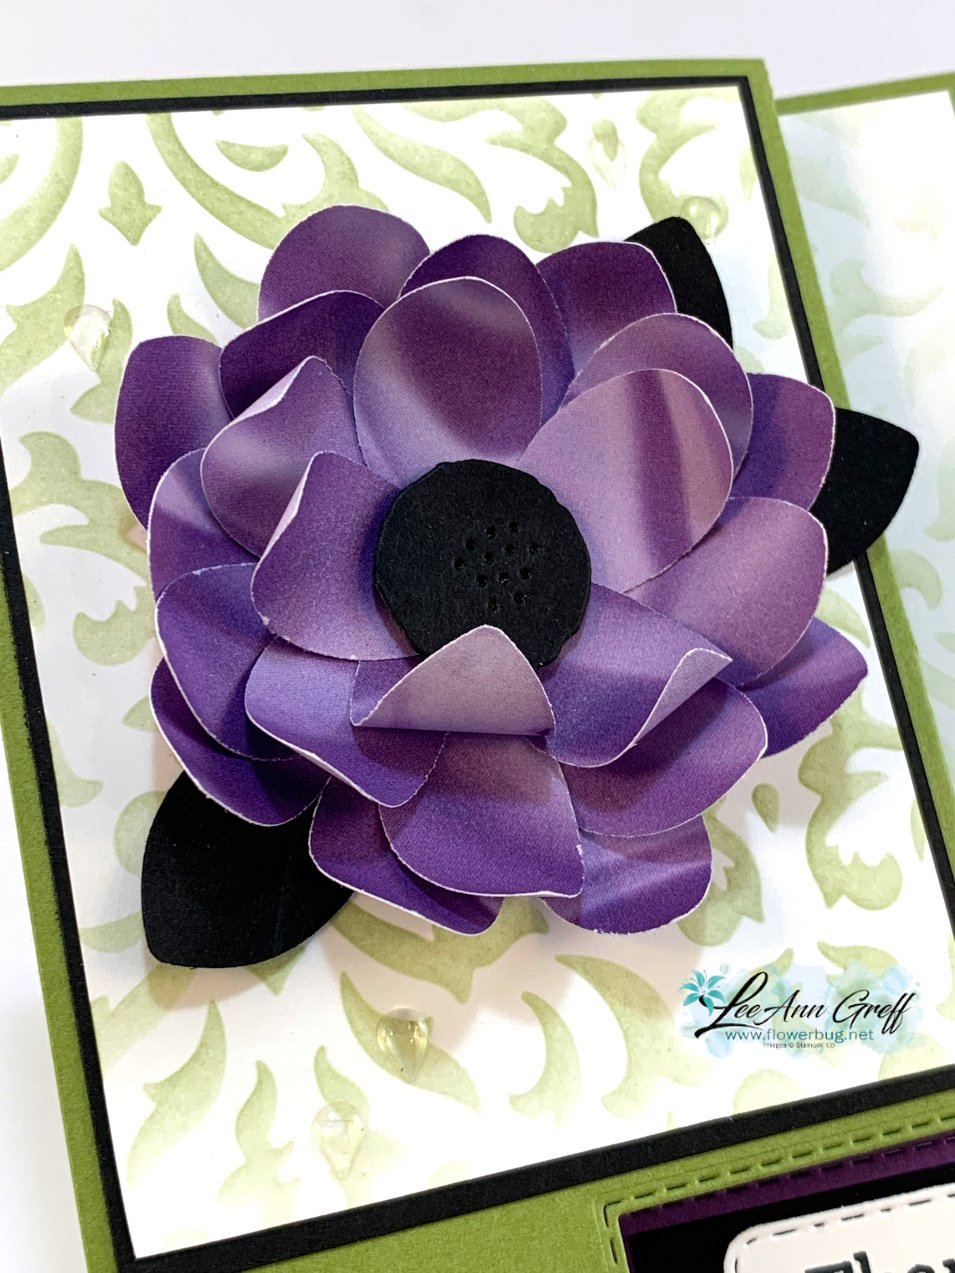
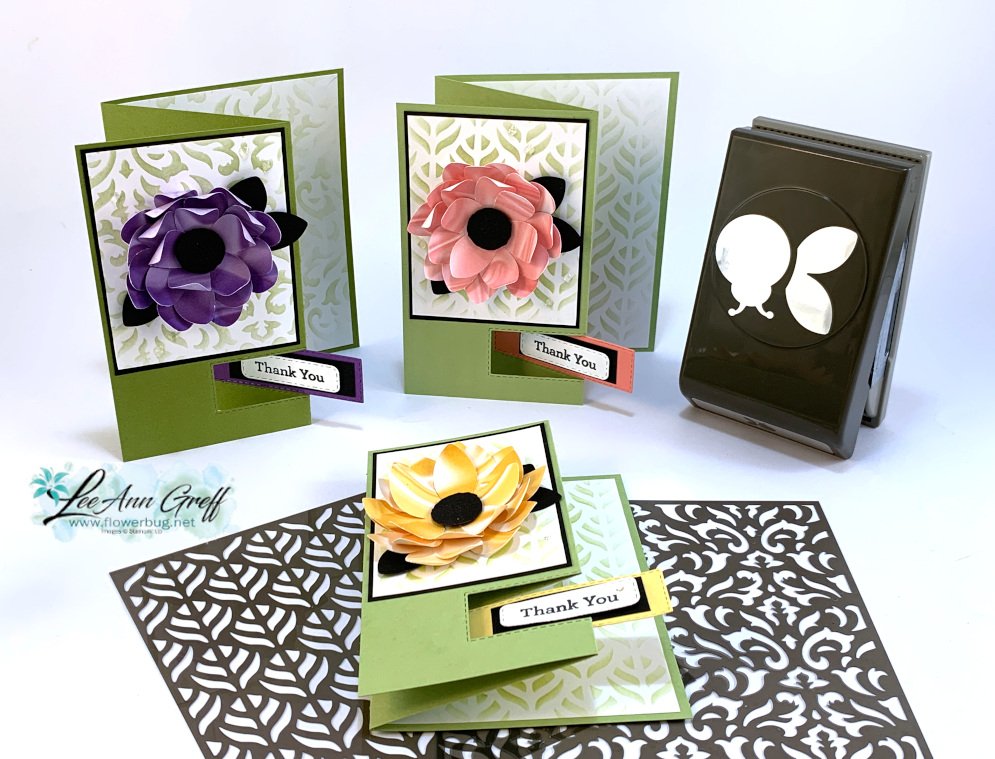
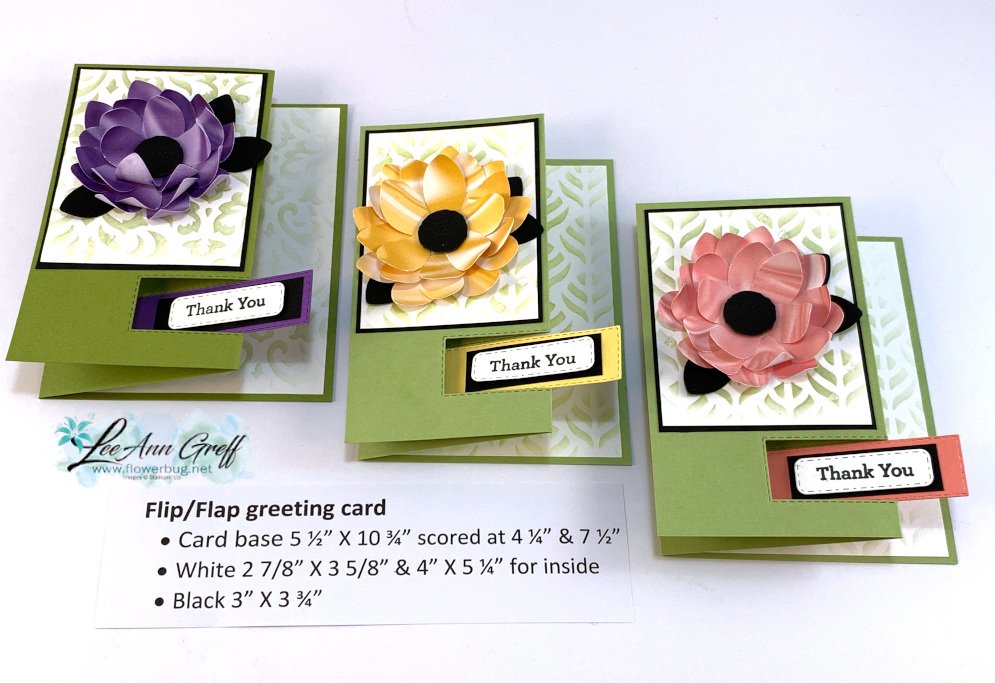
    I've seen a few samples of flowers made with the Ladybug Builder punch and had to try one myself.  I love the dimension you get when you curl the 'wings' a bit! 

    It's definitely a 3D type flower; maybe suited best for a box or gift bag.  Wouldn't that be pretty!

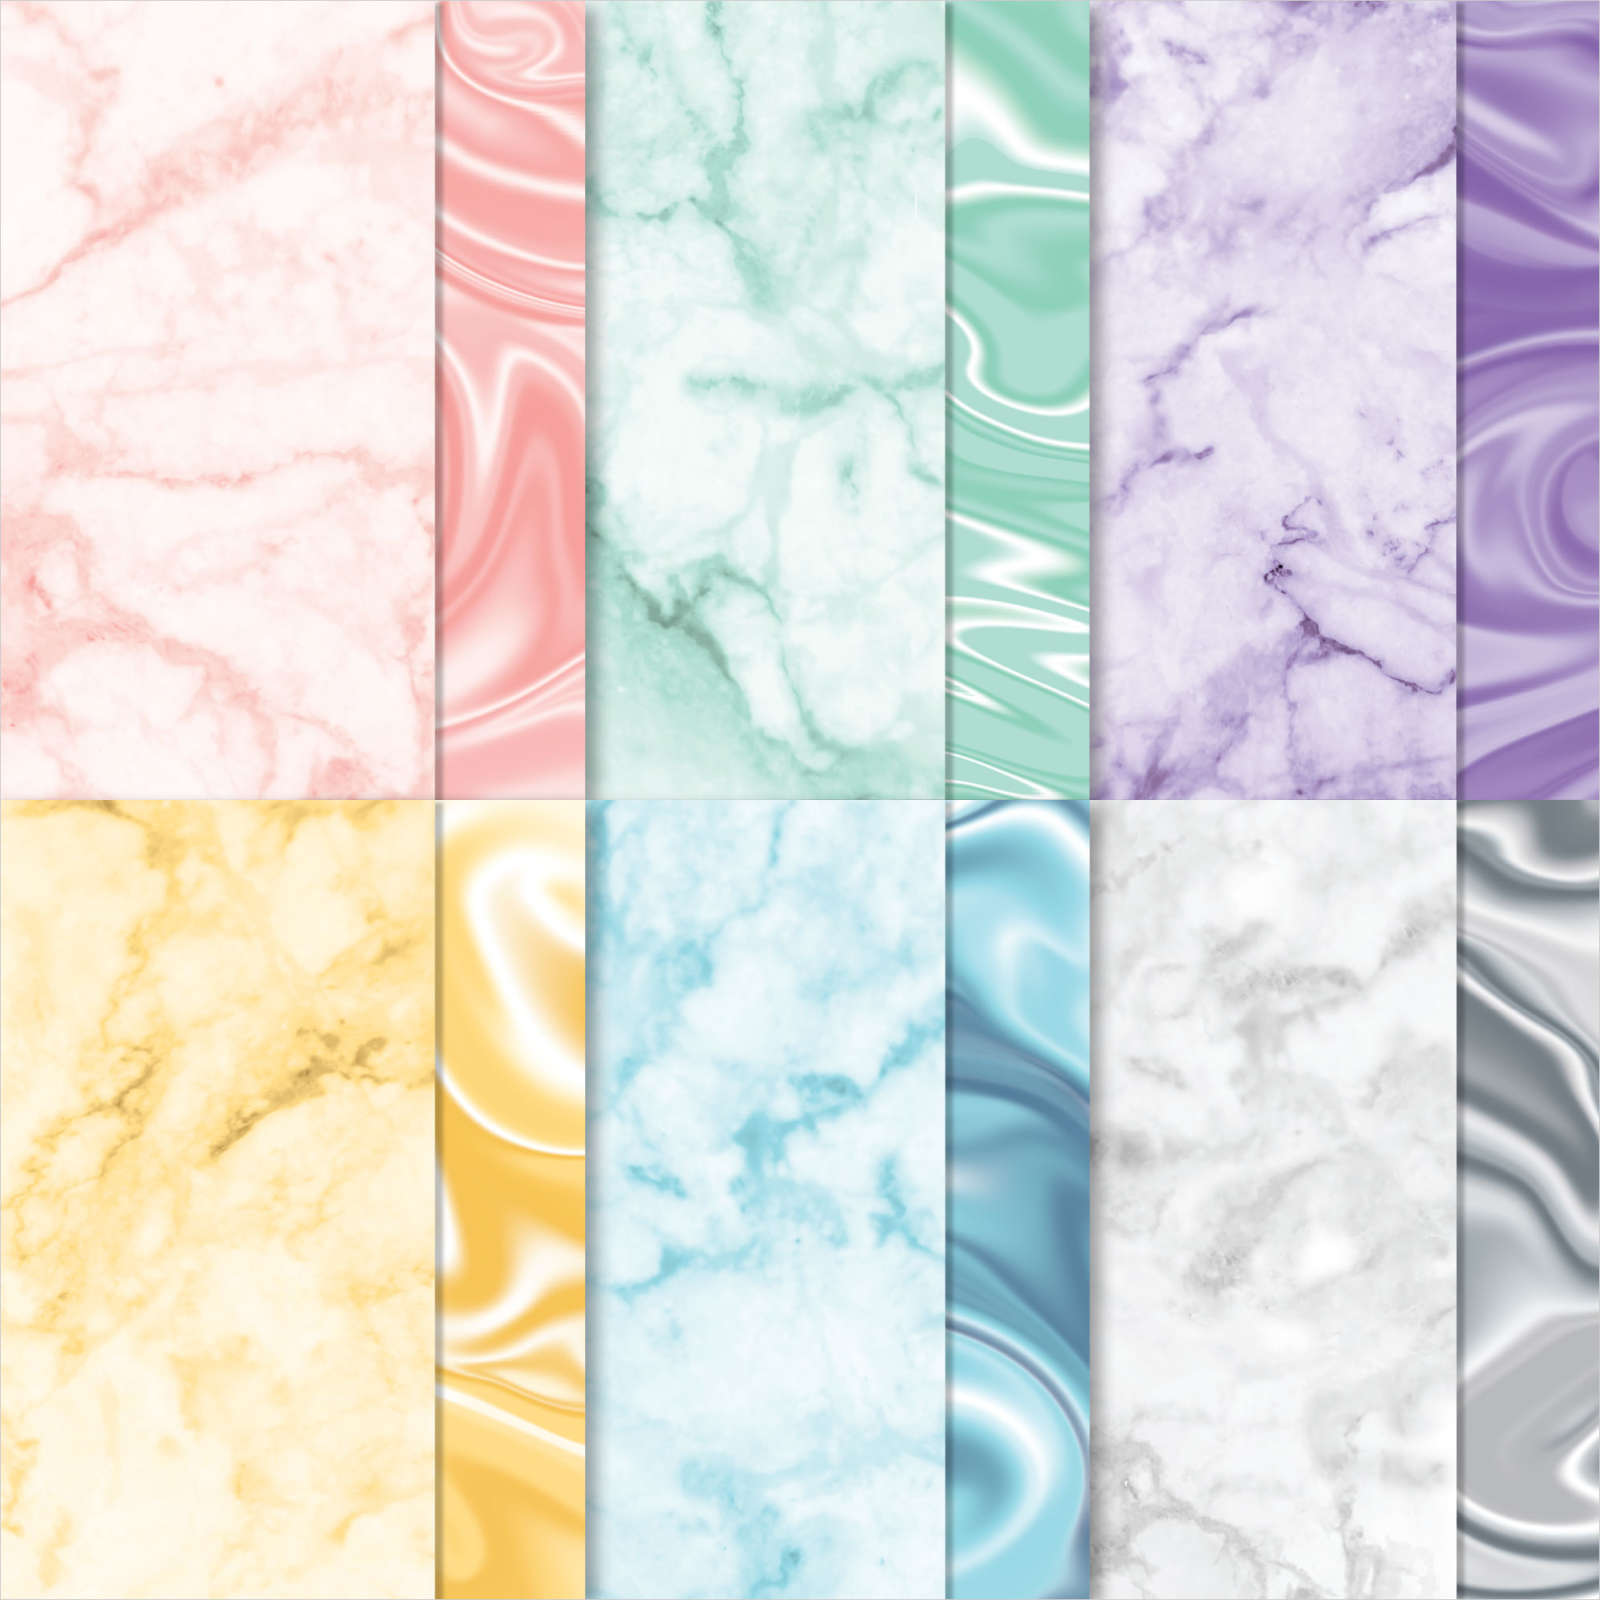
    I punched 'wings' from the Ladybug Builder punch from our Simply Marbelous designer paper.  This paper is free during our Sale-a-Bration promotion through February 28th.  See it here!  

    It's my top favorite item in our Sale-a-Bration catalog!  I love that each sheet is monochromatic on both sides; many shades of the same colors. Don't miss out on this amazing paper. 

    I used quite a few punched wings to make these flowers.  Start with a 1 1/2" – 1 3/4" circle punch as a base to add them to, working your way from outside towards the center.  Be sure to curl them first with a bone folder.   

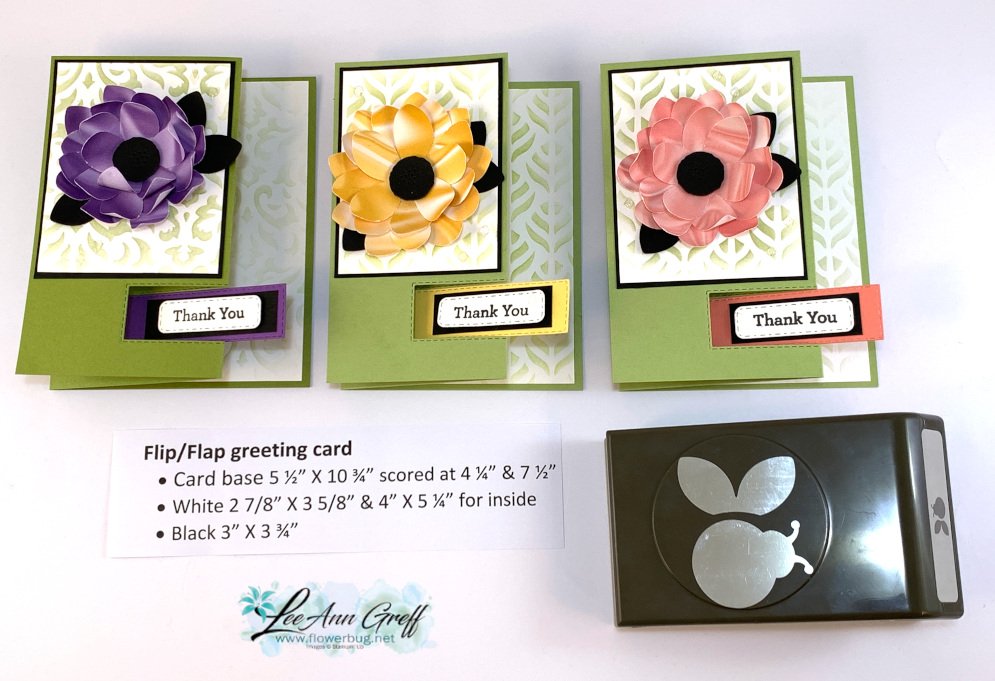
    This card is also a unique fun fold I'd never seen before.  I used our Stitched Rectangle dies to cut a partial window in the front fold.  You can get my tips on achieving this fold in the video seen here or below.

    I used the Basic Patterns Decorative Masks seen here for my background.  Our blending brushes make this a breeze.

    You can see the measurements in the photo below. 

    Which is your favorite color? 


    Below is the video; click on the photo to watch.  Don't forget to subscribe to my You Tube Channel here. 

    ~~~

     Hot Deals in February:

    Choose $125 in product PLUS any 2 stamp sets free in February!

    It's just $99. Get FREE shipping too!

    Click here to get the deal.


    Host codes: PA93N9CF

     *click here to order 


    Use the host code above & get a free Easel Calendar kit

    & the Gingham embossing folder with a $55 order in February, 2022! 

    Leave a Reply

    Your email address will not be published. Required fields are marked *

  • How to make a bumblebee with the Ladybug Builder punch


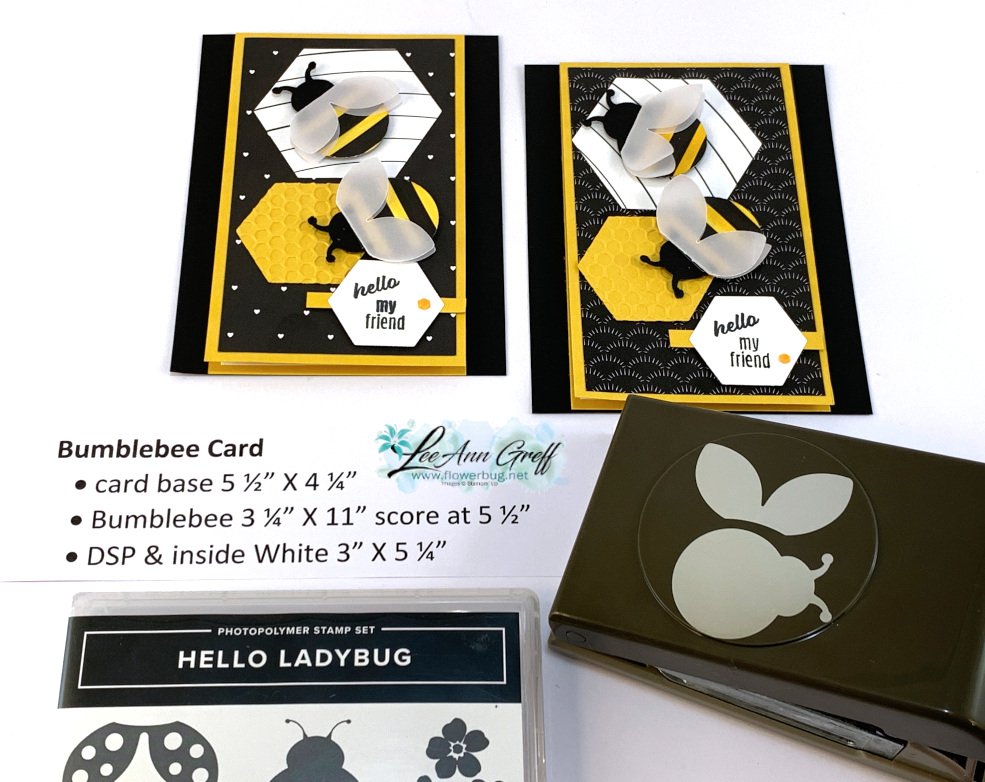
    This month my Flowerbug's Team's swap theme was cards featuring an animal, bug or bird with a unique fold.  I decided to use the Hello Ladybug bundle for mine. Click here to see the bundle.  I changed the ladybug into a bumblebee!  

    I shared how to make this card on last week's Facebook Live.  It's now on YouTube as well.  Click here to see it and two other cards featuring this cute Ladybug Builder punch.  


    You may have seen this done before; it's so simple if you have some Black & White designer paper.  I colored the white stripes with a Dark Daffodil Delight Blends marker.  I used the Ladybug Builder punch to punch out the body circle and added it to the main Black Ladybug body.  

    Then I punched out wings from Vellum.  I made them double wings by folding a piece of vellum in half and punching so the fold was intact.  The wings are adhered with a few mini glue dots. 

    Details:

    • I used the Beautiful Shapes dies seen here for the hexagon shapes.  
    • Designer paper is the All Together 6 X 6" black & white paper seen here. 
    • The Bumblebee hexagon is textured with the Hive 3D embossing folder.
    • That hexagon embellishment on the greeting was pink. It's one of three colored in the Adhesive-backed Hexagon gems in the 2022 Jan-June catalog. I colored it with the Dark Daffodil Delight blends marker. 


    This is an easy fun fold card to make.  And it makes great use of your Designer Paper – you can get 2 fronts from each 6 X 6" piece or 8 fronts from a 12 X 12" piece of paper. 

    Below is the video; click on the photo to watch.  Don't forget to subscribe to my You Tube Channel here. 

    ~~~

     Hot Deals in February:

    Choose $125 in product PLUS any 2 stamp sets free in February!

    It's just $99. Get FREE shipping too!

    Click here to get the deal.


    Host codes: PA93N9CF

     *click here to order 


    Use the host code above & get a free Easel Calendar kit

    & the Gingham embossing folder with a $55 order in February, 2022! 

    Leave a Reply

    Your email address will not be published. Required fields are marked *

  • Lots to see in this month’s Control Freak’s Blog hop!


    The theme for February's Blog Hop is projects for our friends! 

    There's a lot of talent in the Control Freaks group; be sure to click on each icon at the end of each post to see it all.   

    If you just stopped in from Bree's blog I'm sure you enjoyed her projects. She is uber creative!

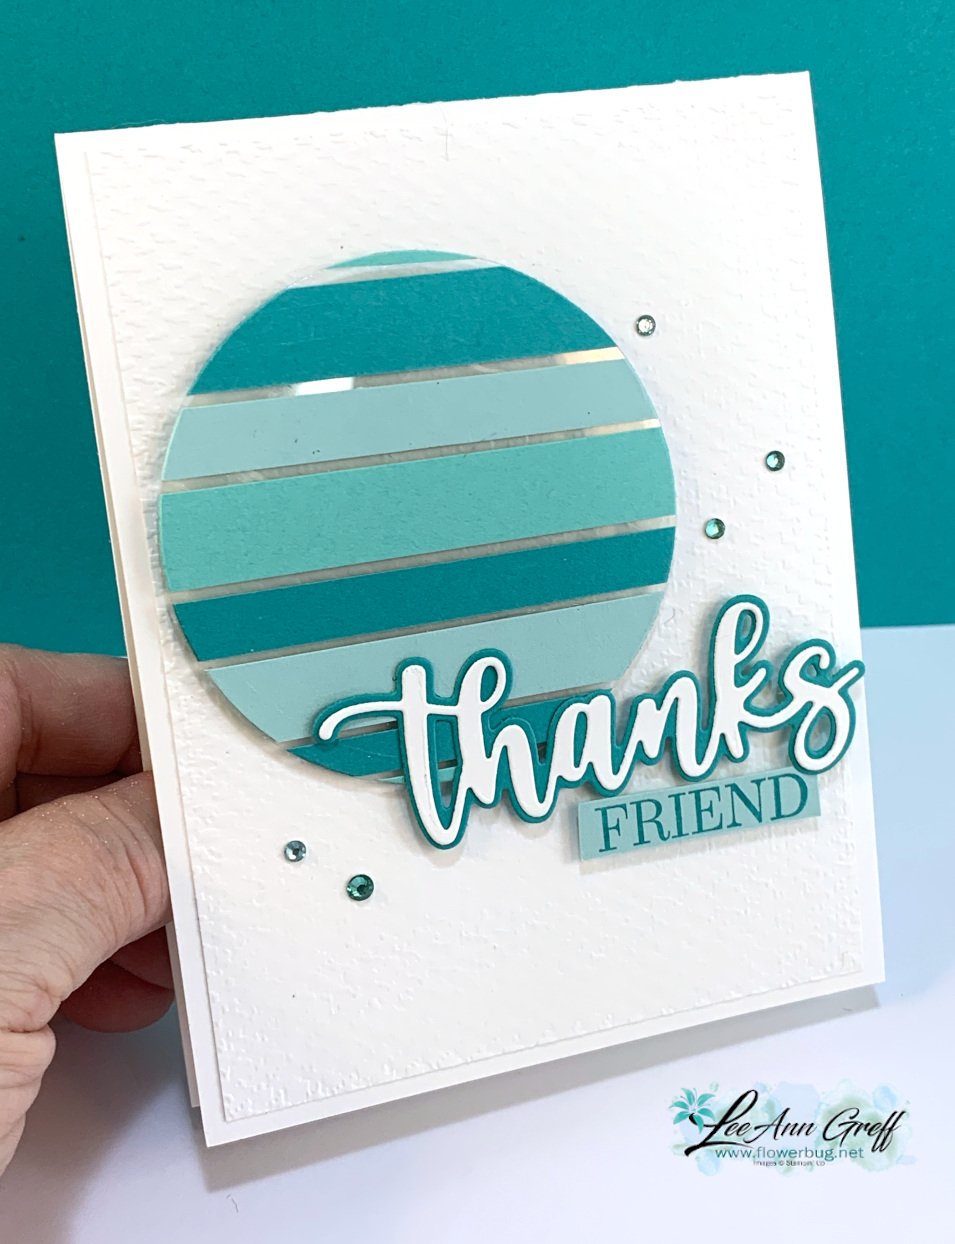
    My first card features the Floating Technique. It gives the illusion that your paper is floating on the card.  

    I adhered random sizes of card stock strips onto a piece of Window Sheet and used our largest circle in the Layering Circles dies  to die-cut it out.  I've been making monochromatic cards lately and chose my favorite blue/green hues of Bermuda Bay, Pool Party & Coastal Cabana.  

    Details:

    • This circle is added with Stampin' Dimensionals onto White CS that's been embossed with the Tasteful Textile embossing folder. 
    • The 'Thanks' is made with our Amazing Thanks dies from the January-June catalog. 
    • The 'Friend' greeting was fussy cut from the Special Moments stamp set.
    • Those pretty rhinestones are from a new release coming out in March called the Wave Collection.  Rhinestones in blues & greens!! 

    ~~~

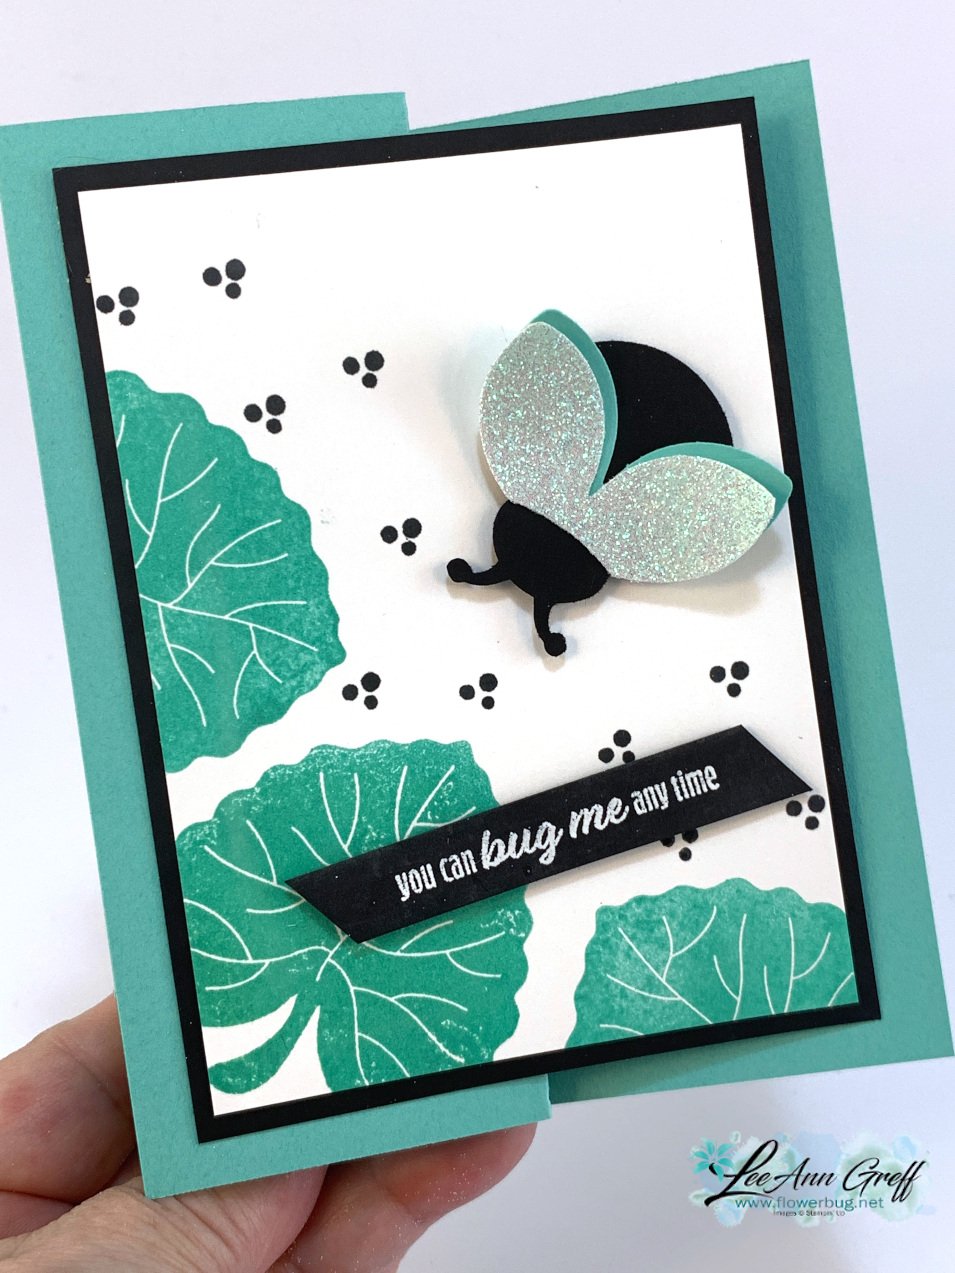
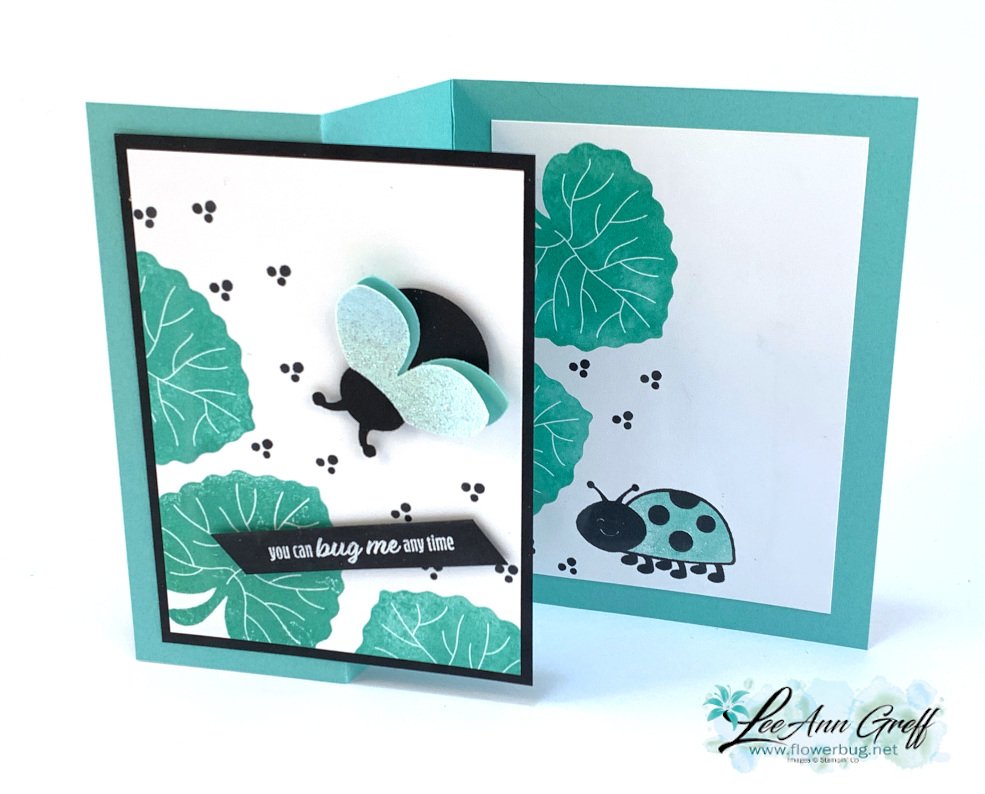
    I recently made a card with the Hello Ladybug using Magenta Madness with Black and wanted to try it out with Coastal Cabana too. I found out that our new Supple Shimmer specialty paper works great for wings! It's pretty & iridescent.


    It's also what I like to call Black & White with a 'pop' of color.  A bit of black on a card makes other colors 'show up' and be noticed. 

    This card is an easy fun fold.  Turn any basic card into a fun fold with these measurements: 

    • Card base 5 ½” X 8 ½”, score at 2 1/8” & 4 ¼”
    • White (X 2) 3 ½” X 4 ¾”
    • 3 ¾” X 5” Black


    The stamped images are all from the Hello Ladybug stamp set.  It's in a bundle with the punch at 10% off when purchased together.  


    Thanks so much for stopping in today. Click on the icon below to see what Cindy has created for you. You won't want to miss it! 

    Leave a Reply

    Your email address will not be published. Required fields are marked *


Notice: LeeAnn Greff, Independent Stampin’ Up! Demonstrator, Manager. The content of this website is my sole responsibility as an independent Stampin’ Up! demonstrator and the use of, and content of, the classes, services, or products offered on this website is not endorsed by Stampin’ Up! Copyright 2025