/


Latest Post

Blessings of Home & Flowers of Home dies projects


Look at this pretty card I made on last week's Facebook Live. 
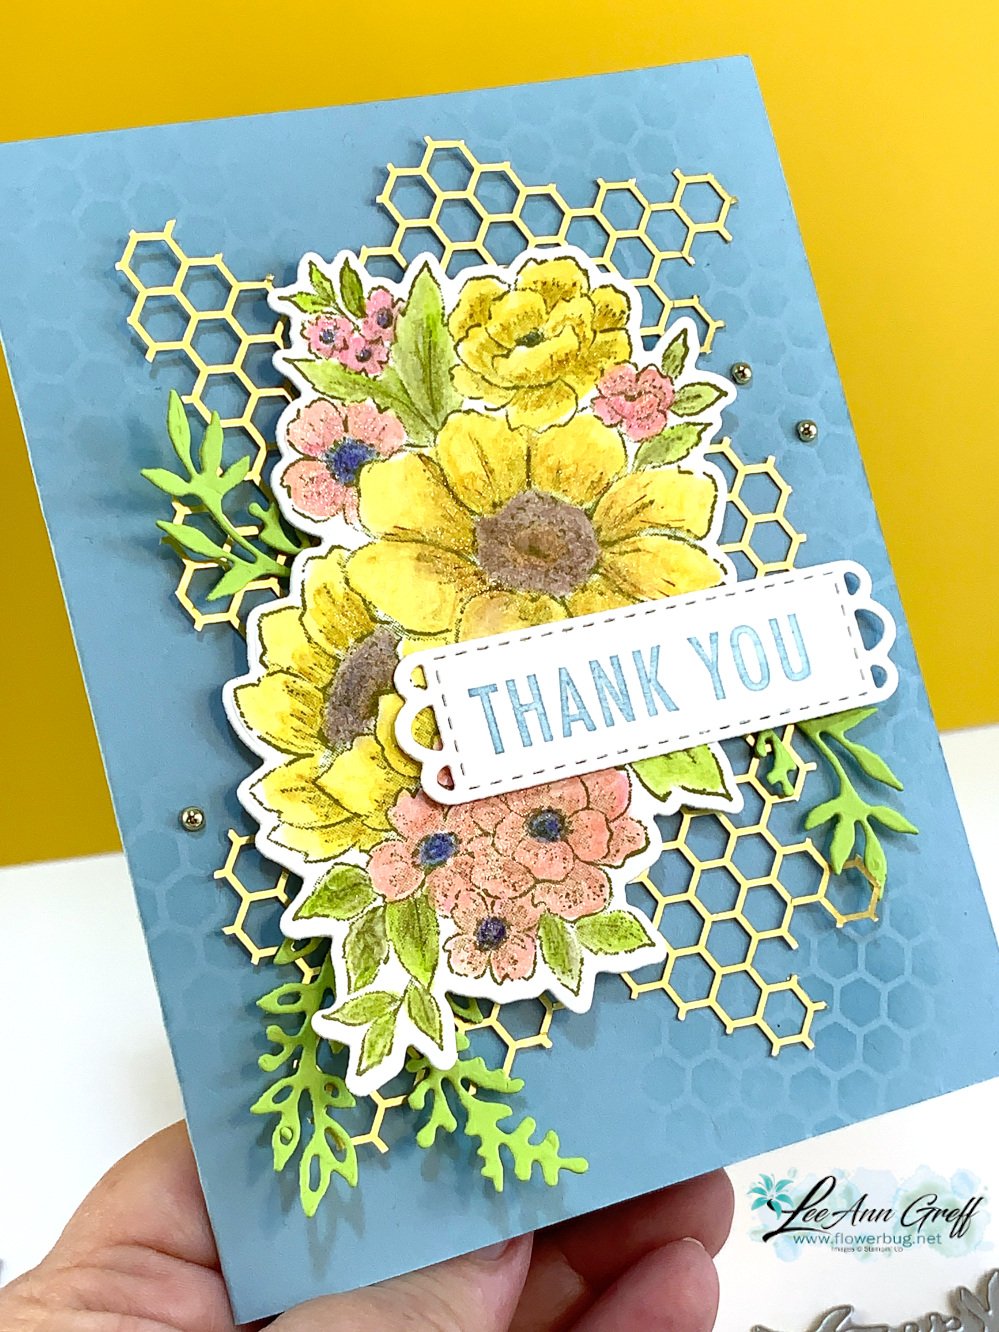
Lots of pretty details on this card:

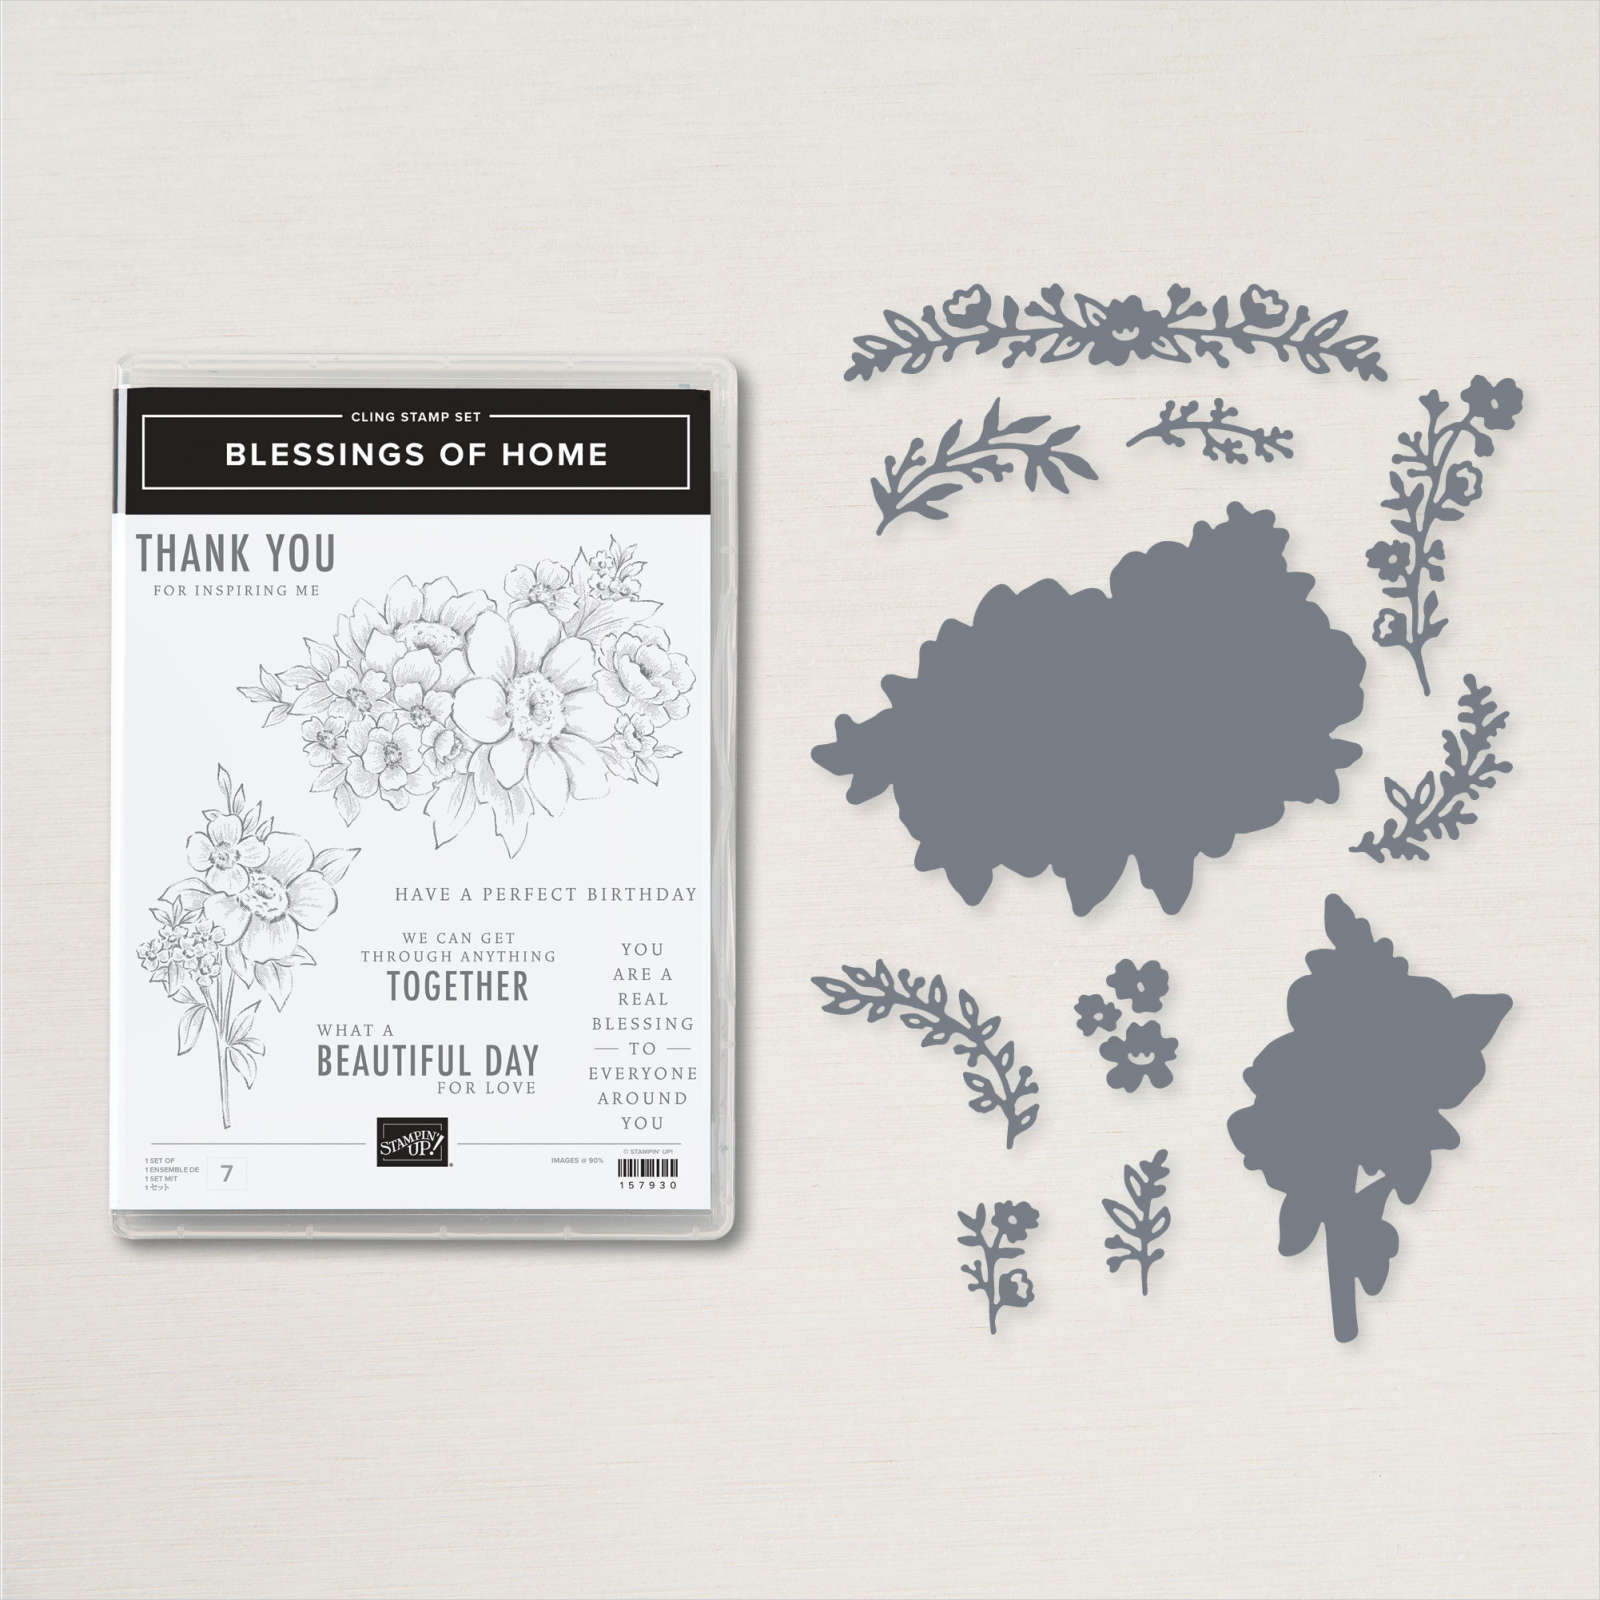
  • Blessings of Home stamp set & Flowers of Home dies for the leaves
  • I used watercolor pencils & blender pen to color the floral image
  • the gold honeycomb sheet is from the Sweet Sunflower Paper Pumpkin kit; it was a free gift add on
  • I used the gold honeycomb sheet to add a pretty, blended background using Balmy Blue ink & a Blending Brush

The Flowers of Home dies are in the 2022-23 Annual Catalog but also available free with a $100 Stampin' Up! order during Sale-a-Bration.  See them here. This option ends on Wednesday, August 30th.  See all of the Sale-a-Bration options here. 

The stamp set & dies are available in a bundle too.
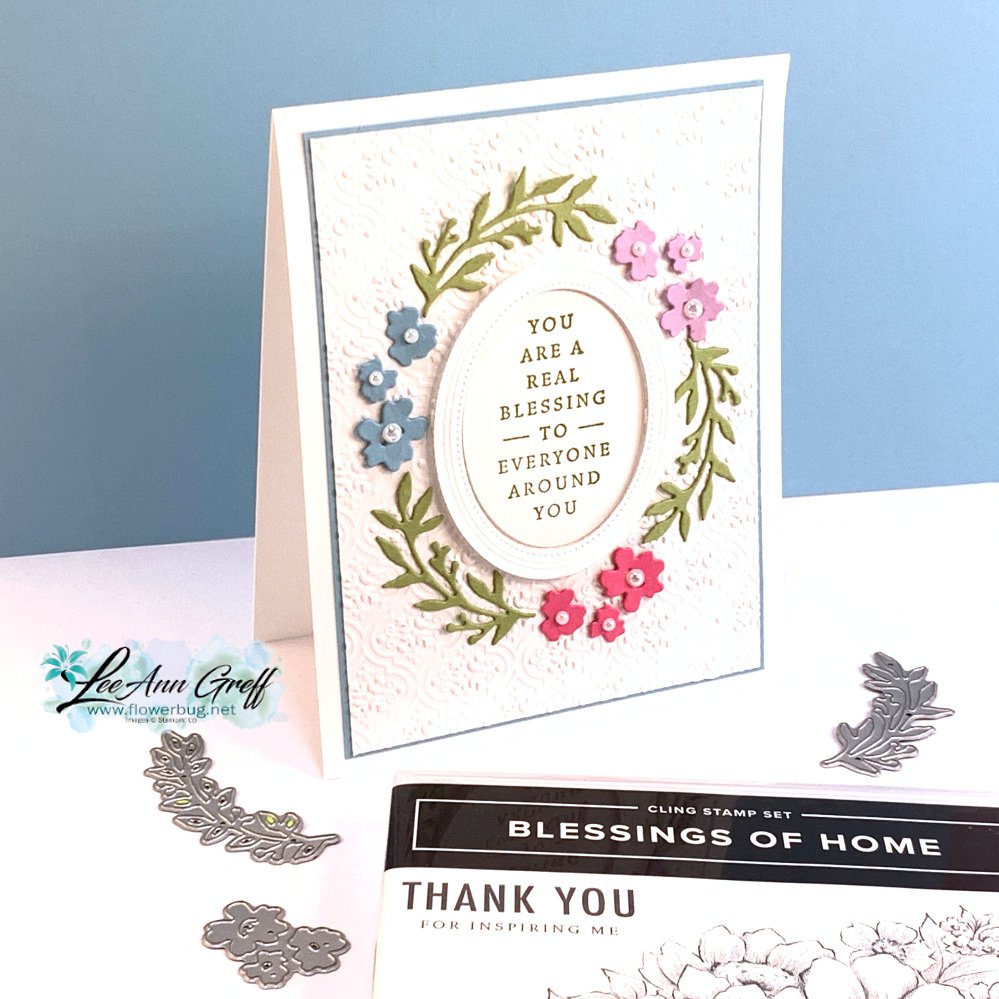
I made a second card using mostly the Flowers of Home dies.

I cased the card from Sue Mohr; I thought it was simply elegant way to create a 'wreath' around the oval sentiment.  

The oval dies are from the Fabulous Frames dies seen here.  When you cut out the oval it creates both the frame and the inside; two pieces with one die! 

I textured the White layer with the Quatrefoil embossing folder seen here.  It's so pretty and works perfectly with these flower & leaves die-cuts.  

The colors I used are Balmy Blue, Pear Pizzazz, Polished Pink and Fresh Freesia.  

Tip; when adding these delicate die-cuts use just a tiny but of Multipurpose Liquid glue.  
Remember that these Flowers of Home dies are free with any $100 order through Wednesday, August 31st.  Sale-a-Bration ends that day. 

Click on the photo below to watch the video to see how I made both of these cards & one more too! 

~~~

August Specials

Get free items here in August during Sale-a-Bration! 

Host code: E22FXSSB


Get these pretty gems free! *click here to order 

Earn free products with my loyalty rewards! 

Click here to download yours and earn a $50 shopping spree!
All Posts

  • Free-form waves using the Floating Technique


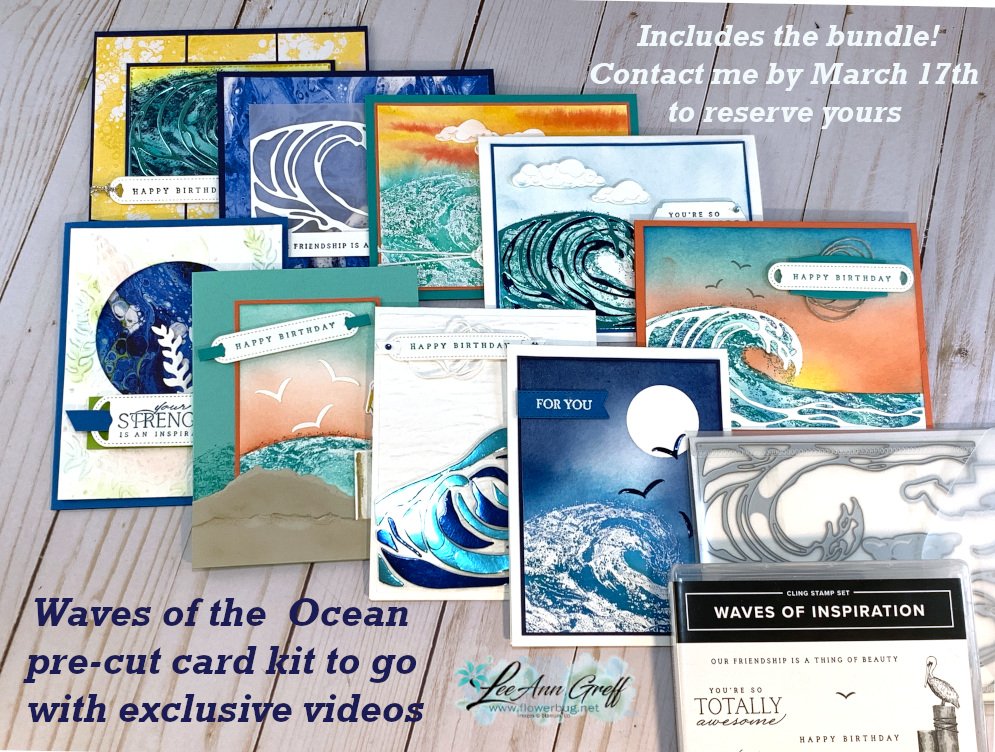
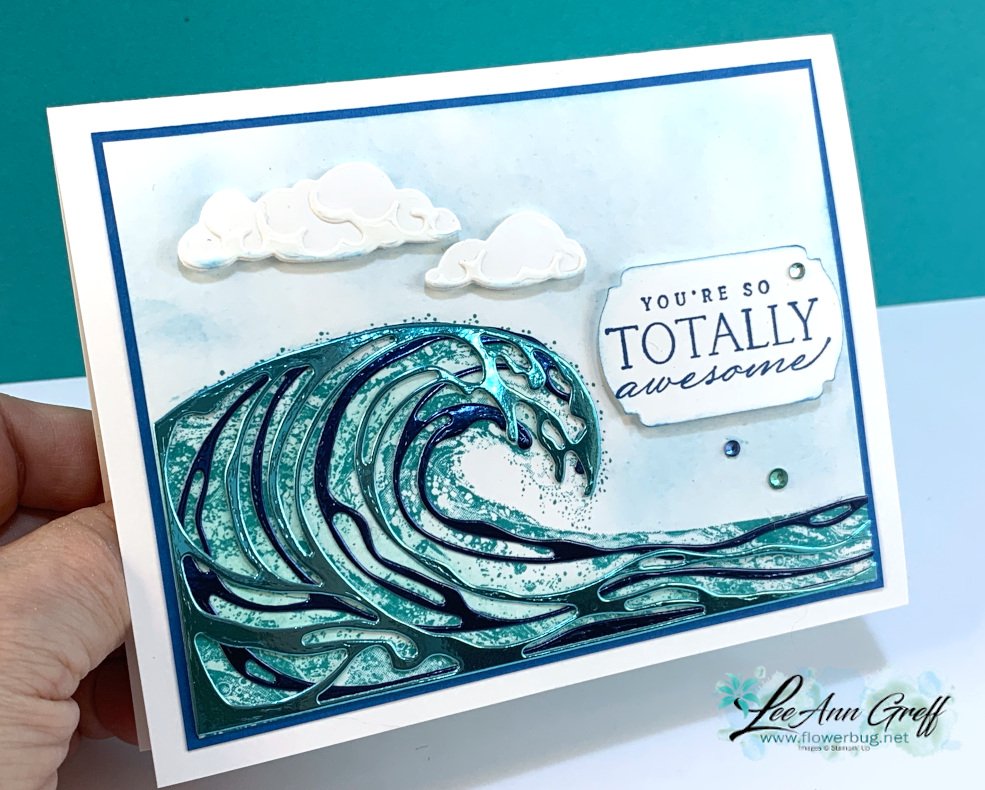
    We made this gorgeous 'wave' card at a Team meeting last month.  I used the Waves of Inspiration bundle and a Blending Brush for the sky. 

    The colors are Bermuda Bay, Pacific Point and White.  See those gorgeous gems?  They're called Rhinestone Waves Basic Jewels and there are 168 in a package for just $6.50!  See them here. 

    I had a bunch of curvy foil pieces left over after die-cutting a bunch of these waves from the two blue colors in the Blue Foil paper seen here.  I challenged myself to use them and came up with a free-form wave using the Floating Technique.  

    I adhered various die-cut foil pieces to a Window Sheet using Multipurpose liquid glue and added them to the card with Stampin' Dimensionals.  This take a bit of patience as you can imagine!    

    Here are some tips to achieve this:

    • It's best if you start at the bottom and add just a few pieces. Let it set to dry. 
    • Adding a weight over them while they dry helps keep them flat. The foil likes to curl up.
    • Next form the top of the wave.  I used one of the long curved pieces for this.  
    • Add just a few pieces at a time and let them dry.  They slide easily!
    • Fill in the center of the wave a few at a time. Again, add weight over it all to set & dry.  
    • Trim off the sides of the Window sheet at 4" to fit the White layer. I fussy cut the top to match the foil wave.  
    • I adhered it to the textured 'Bark 3D' White 4" X 5 1/4" piece of CS with mini dimensionals.  

    This card is part of my Waves of Inspiration tutorial and video with 11 projects!  This is available to anyone who purchases the Waves of the Ocean Collection from me or purchases my Waves of Inspiration kit to go. 

    Click here for the details.  Be sure to opt in for the kit by March 17th. 

    ~~~

    March Specials: 

    Host codes: EU76H4H7

     *click here to order 

    If your order is over $50 you'll receive a free embellishment

    from the Jan-June catalog in your thank you card.

    Email me to opt in for my Waves card kit to go here; it includes the Waves bundle!

    Or the Flowering Fields kit seen here. 


    Don't forget about my loyalty rewards! 

    Click here to download yours and earn a $50 shopping spree!  

    Leave a Reply

    Your email address will not be published. Required fields are marked *

  • Fun 4-Way Split Angled card idea; Live video tonight!


    We're making these fun but easy cards on tonight's Facebook Live.  It's at 7:30 pm CT here.  I hope you can join me!  If not it will be added to my YouTube channel here as well.  *Be sure to follow me on FB so you won't miss these lives! 

    Every 2nd & 4th Monday night's I host a 'Stamp with Me' live on Facebook where we create striking cards using Designer Paper or a fun technique.  If you're new to stamping you'll become more comfortable and efficient at it.  If you're a seasoned stamper you'll still enjoy it and get new ideas to create. 

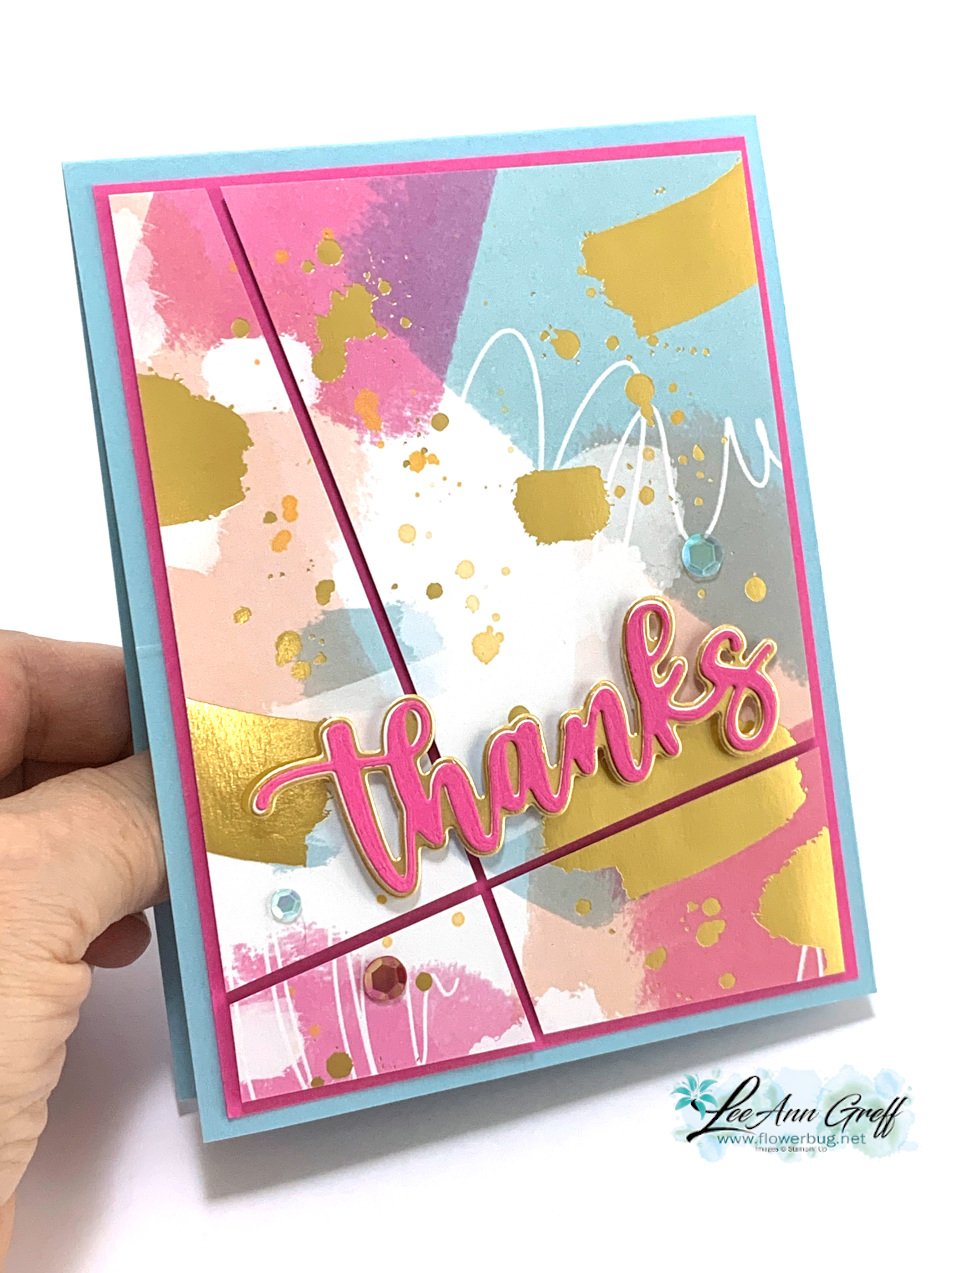
    Tonight I'll share a version of this card; I'm calling it a 4-way Split Angled card. 

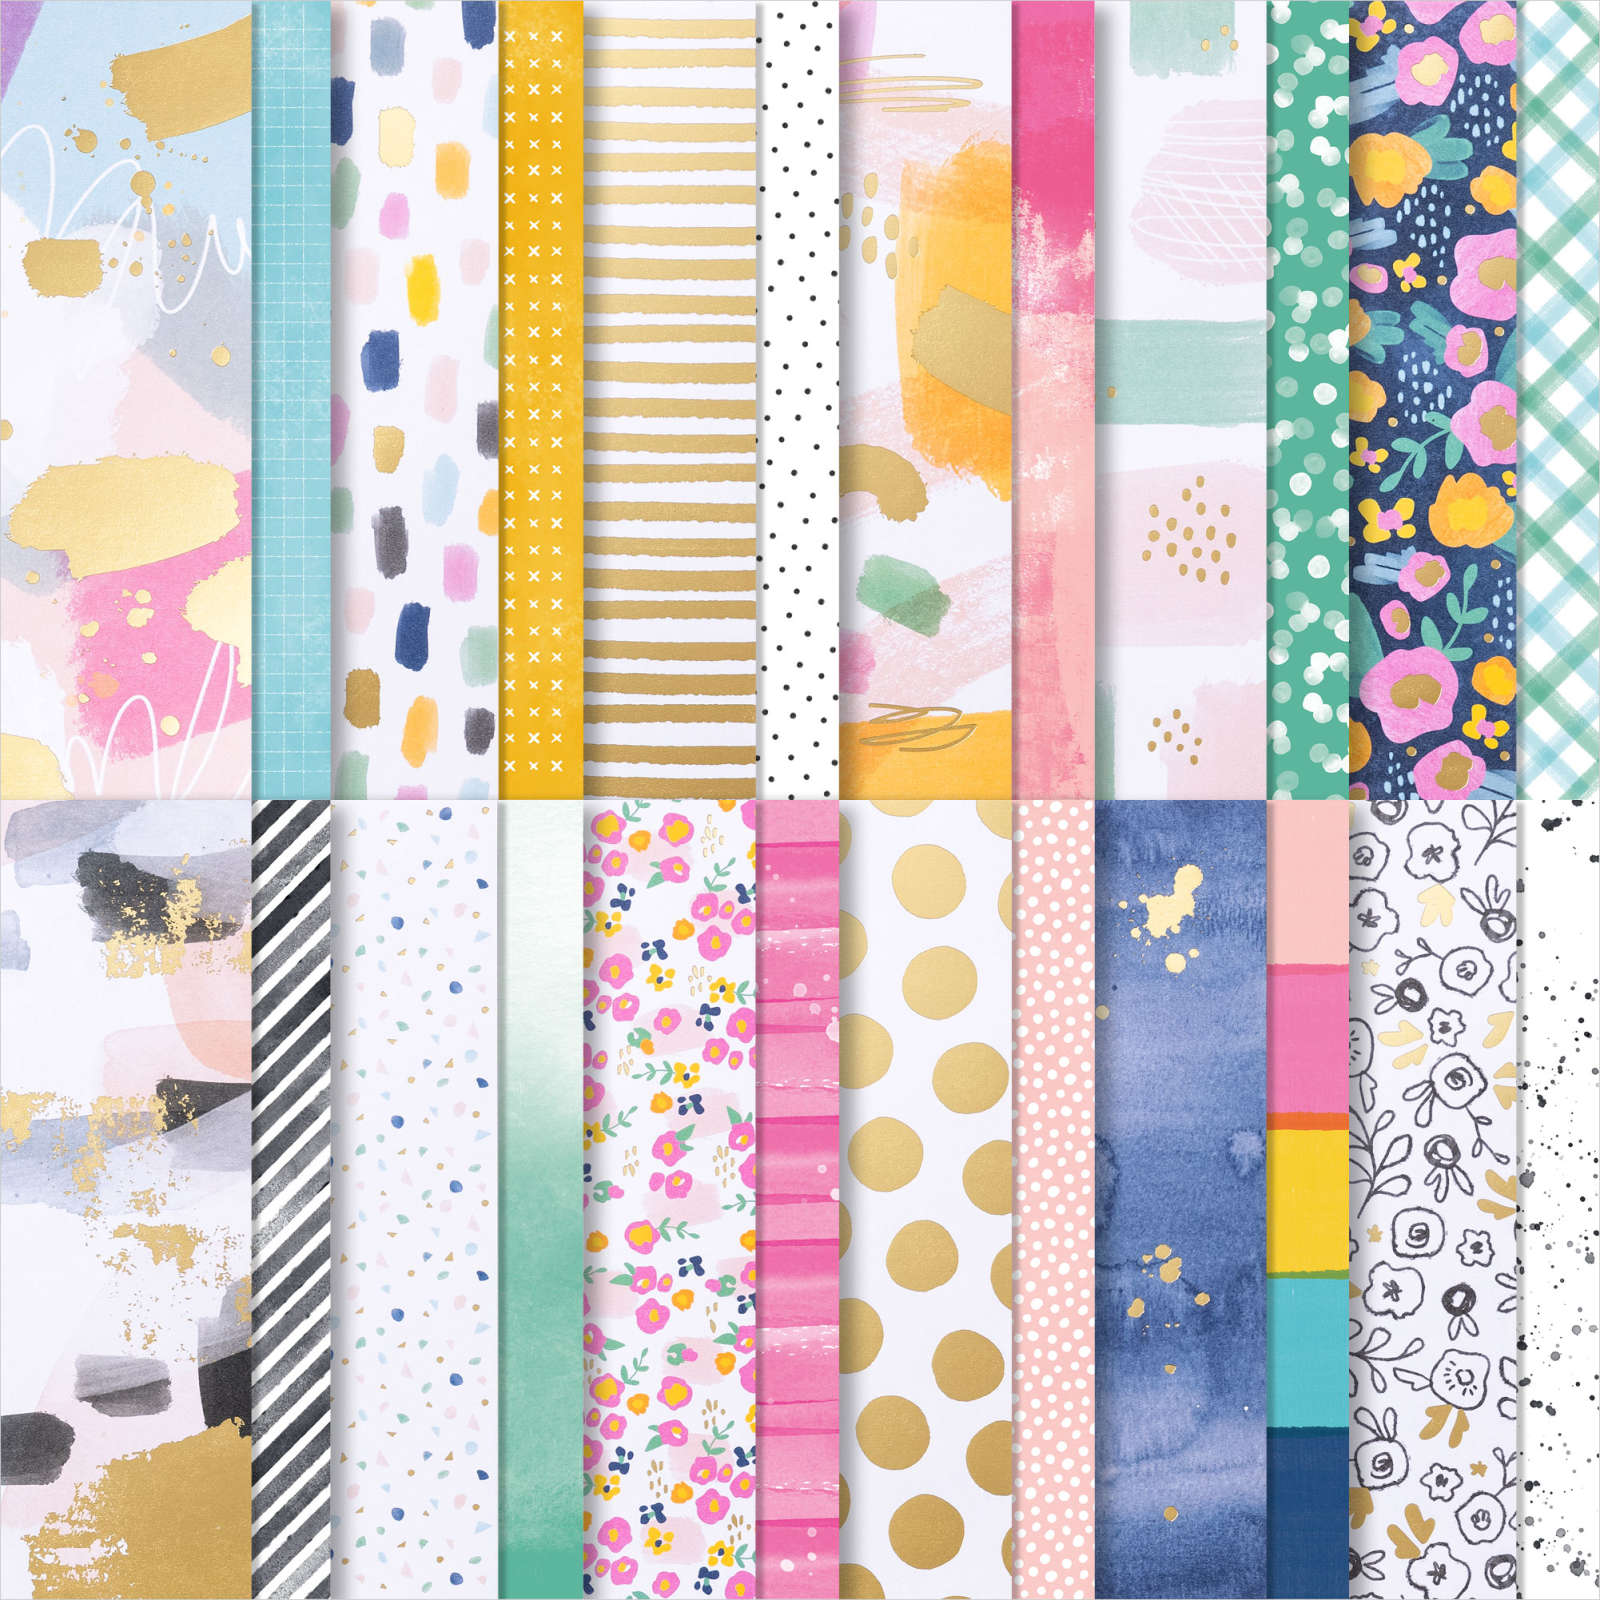
    The card above features the Abstract Beauty specialty designer paper in the 2022 January-June catalog by Stampin' Up!  It has splashes of color along with gold highlights.  See it here.  

    If you want to make one of these you'll need card bases, DSP or stamps & ink and a greeting or die-cut like I used here. 

    • card base 4 1/4" X 11" scored in half at 5 1/2"
    • Colored layer 4" X 5 1/4"
    • DSP or stamped layer 3 3/4" X 5" (for a wider split use 3 1/2" X 4 3/4") 

    The Amazing Thanks dies have quickly become a favorite of mine.  See those here. 

    The next example uses the Flowing Flowers stamp set in Calypso Coral, Pear Pizzazz and Daffodil Delight.  I stamped the images before I cut them in 4 pieces. 

    You might wonder – 'how do you cut these into 4 angled pieces?'  Honestly I cut from the top to the bottom first, just estimating my angled cut. Then I held the two pieces back together and cut from the bottom left to the right side. 

    It does not have to be perfect!  Honestly; just wing it; I dare you to do this without measuring.  

    ~~~

    March Specials: 

    Host codes: EU76H4H7

     *click here to order 

    If your order is over $50 you'll receive a free embellishment

    from the Jan-June catalog in your thank you card.

    Email me to opt in for my Waves card kit to go here; it includes the Waves bundle!

    Or the Flowering Fields kit seen here. 


    Don't forget about my loyalty rewards! 

    Click here to download yours and earn a $50 shopping spree!  

    Leave a Reply

    Your email address will not be published. Required fields are marked *

  • Quick & beautiful cards for any occasion with the New Horizon suite.


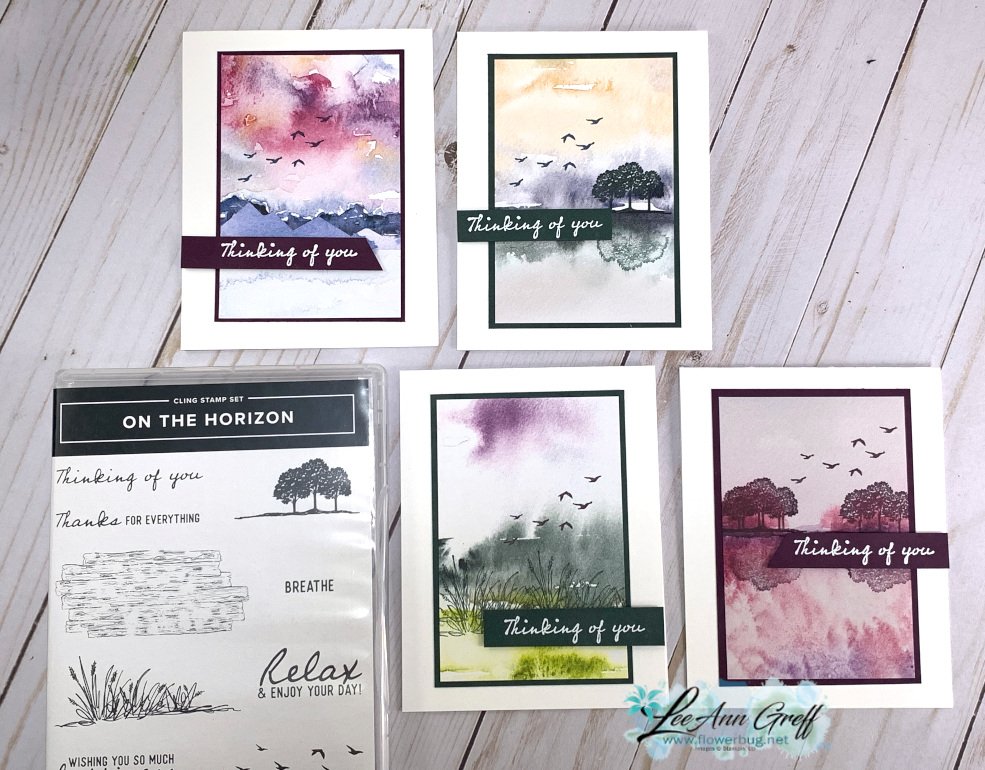
    If your style is clean and simple I have the perfect card layout for you! Look at these gorgeous cards!

    I stamped a few of the images from the On the Horizon stamp set here.  I used the birds a lot!  They add a peaceful 'movement' to the card.

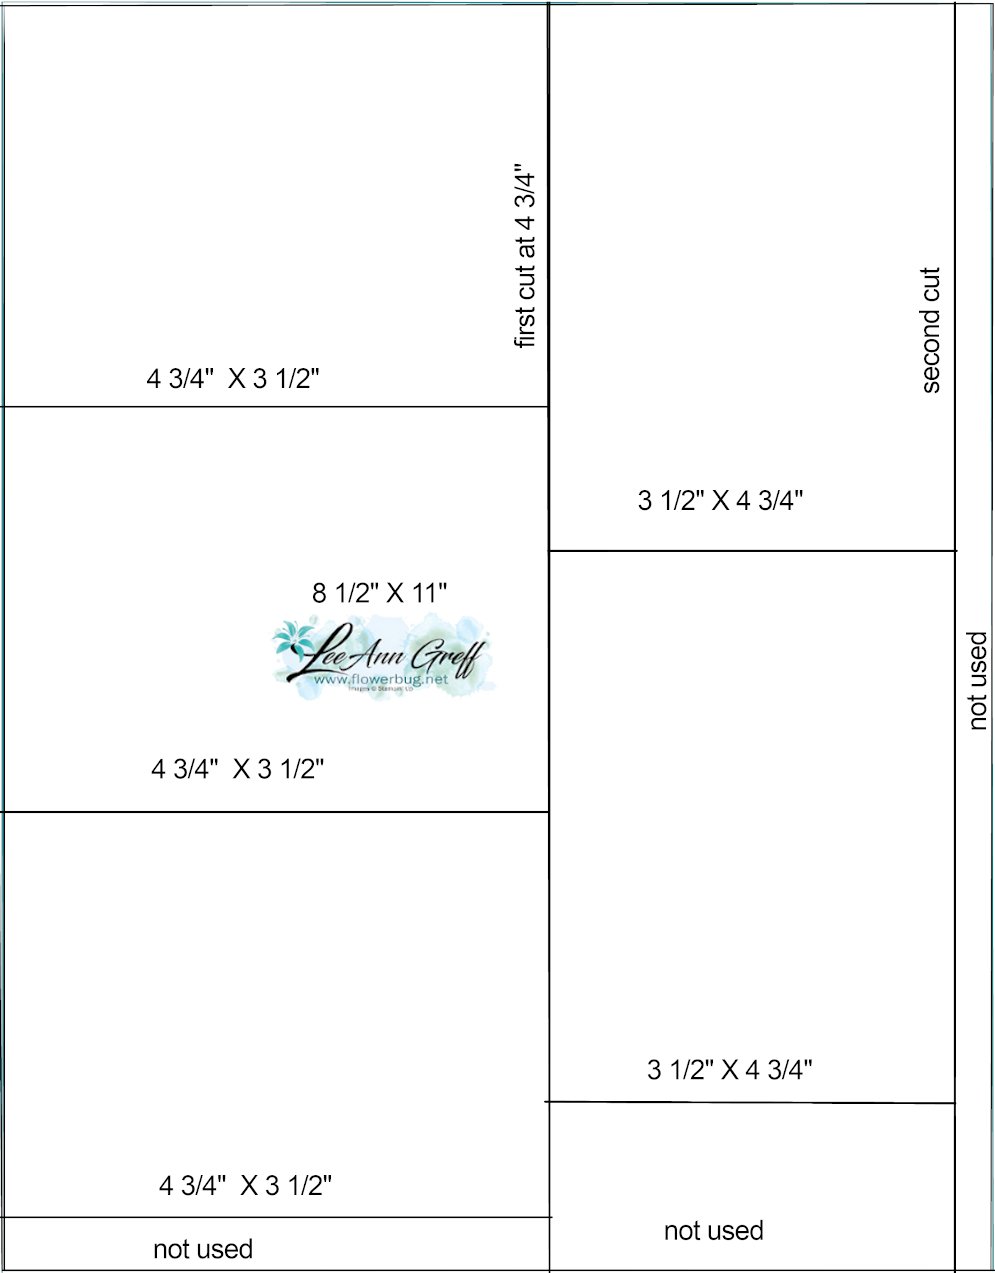
    I used a version of my 5 at a time template for the card stock layers for these cards.  I use this often for the inside of my cards; especially if I need a white piece.  When making multiple cards it sure is nice to get 5 pieces from an 8 1/2" X 11" sheet instead of just 4.  I get a lot of people who ask me about this template.  If you like it I suggest you save it and either print it out or save on your computer for easy reference.  

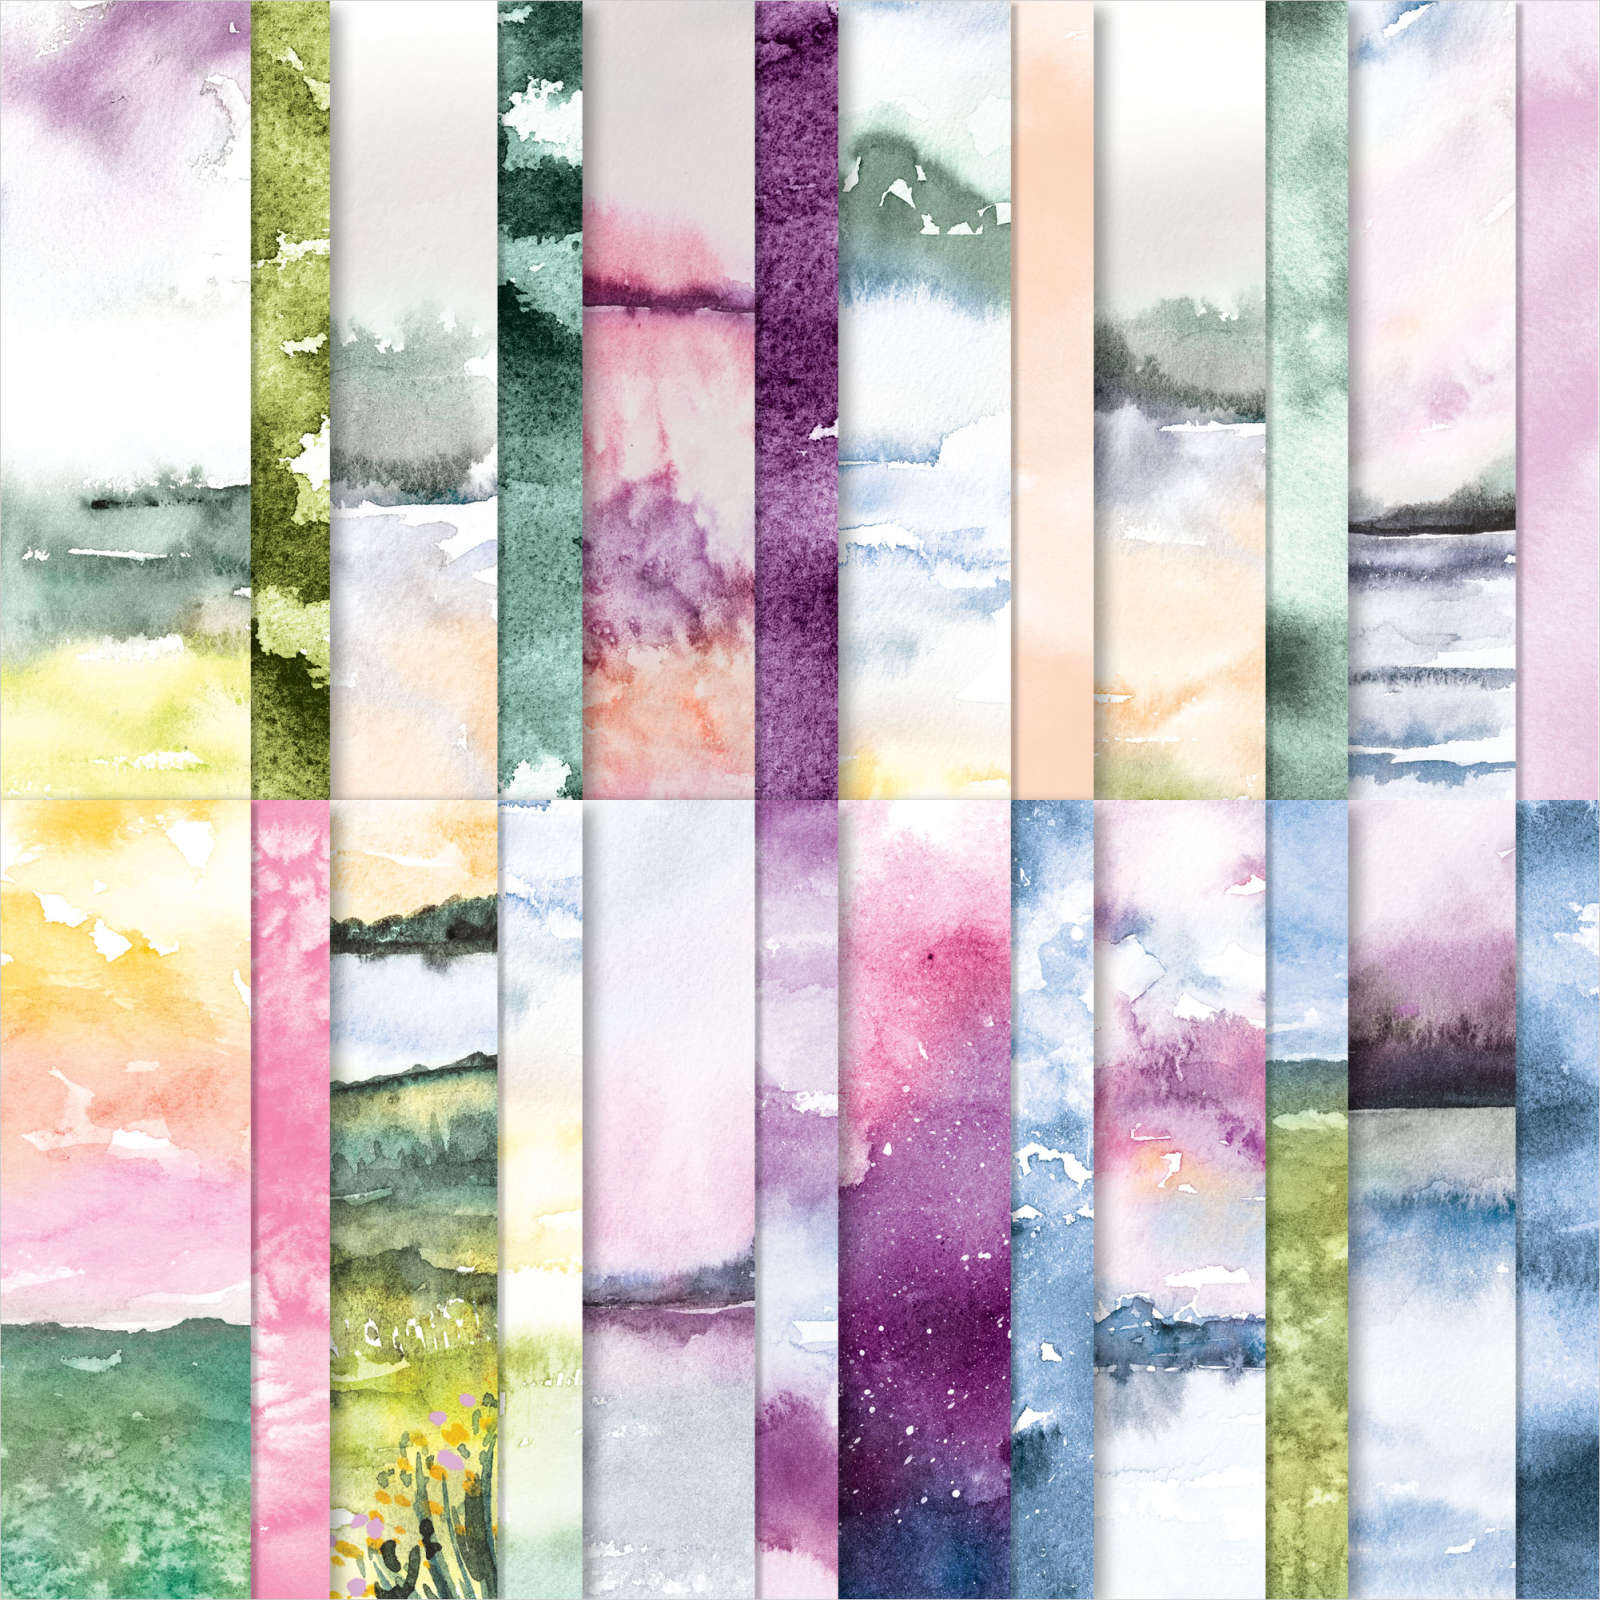
    If you look closely at the cards with the trio of trees on them you'll see a 'watery' reflection. It's so easy with this New Horizon Designer Series Paper.  I shared how in the video here. 

    The New Horizons paper is on low inventory at this time. If they run out the item will be shut off until they restock.  

    Here's how this simple reflection is done. 

    1. Stamp the tree on the horizon line using full ink.
    2. Do not ink again. 
    3. Turn the stamp upside down and simply stamp under the first image.  Easy, instant reflection.  

    Measurements:

    • White card base 4 1/4" X 11" scored in half at 5 1/2"
    • Designer paper 3" X 4 1/2"
    • Card stock layer 3 1/8" X 4 5/8"
    • greeting strips 5/8" X 3" 

    Click on the photo below to watch this video tutorial.  

    ~~~

    March Specials: 

    Host codes: EU76H4H7

     *click here to order 

    If your order is over $50 you'll receive a free embellishment

    from the Jan-June catalog in your thank you card.

    Email me to opt in for my Waves card kit to go here; it includes the Waves bundle!

    Or the Flowering Fields kit seen here. 


    Don't forget about my loyalty rewards! 

    Click here to download yours and earn a $50 shopping spree!  

    Leave a Reply

    Your email address will not be published. Required fields are marked *


Notice: LeeAnn Greff, Independent Stampin’ Up! Demonstrator, Manager. The content of this website is my sole responsibility as an independent Stampin’ Up! demonstrator and the use of, and content of, the classes, services, or products offered on this website is not endorsed by Stampin’ Up! Copyright 2025