/


Latest Post

Angled Gate-Fold card with a latch closure; template & video tutorial


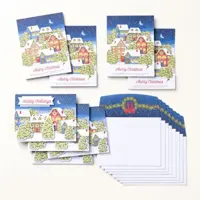
I shared these cards last night on my Monday night Stamp with Me Live.  They're called Angled Gate-Fold cards.

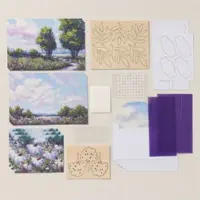
These first two cards feature the Painted Christmas designer paper, the Thinking, Thanks & Peace stamp set & Seasonal Label dies. The large greeting die-cut was cut smaller by cutting once and reinserting it to trim off a bit. (shared in the video) 


On this card I added dimensionals to only the very left side of the greeting so it could work as a 'latch'.  The right side flap slips between the left side and the die-cut greeting to keep the card closed flat.  *Watch the video below to see how it's done.

I created an easy template for both the card base and the additional designer paper layer.  

One important thing to note about the template below for the DSP layer is to be sure to check the direction & side you prefer before trimming off the angles.  You can use this template for both sides; just trim off the opposite edge. 

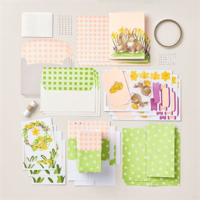
I'll share the other two cards I made on Thursday; they're totally different! 

You can see this video here; click on this photo below to watch. 

~~~

October Specials

Host code: YYUAWBVA

*click here to order

Get a free package of Gold & Rose Gold Metallic specialty paper from me with a $50 online order in October! 

All online orders will receive my October PDF tutorial free! 

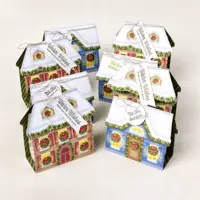
This month it features the Gingerbread & Peppermint suite.

All Posts

  • Save this template! 4 quick cards with the new Iconic Celebrations DSP. Video & free project sheet too


    I have something brilliant to share with you today. How would you like to use two 6" sheets of DSP to make 8 easy but multi-layered cards?  I used an easy template with simple measurements to create some fabulous cards. Here's one of my favorites:

    And here are all of the blue cards in order left to right.  My colors include Misty Moonlight, Boho Blue, Mossy Meadow & White.  

    It starts out with two sheets of 6 X 6" DSP; in this case the new Iconic Celebrations from the Online Exclusives seen here.  *Two sheets of 6" DSP will make 8 cards.  You can opt to use just one sheet and not have any variation.

    You'll cut each 6 X 6" designer paper piece into four 3" squares. Then cut three of those into a few pieces like this (one is left whole):

    The photo above gives you the DSP AND layering cardstock measurement.  You can find the other measurements for the supporting layers on my free project sheet. 

    Click on the following link to see, print or download the project sheet: Download 4 Iconic Celebrations cards with template

    Besides the Iconic Celebrations DSP, I used a few other new Online Exclusives products – the Everyday Greetings stamp set and the Greetings of the Season bundle seen here. 

    Click here or on the video below to watch how these cards are made.  I share a second version in Cherry Cobbler & Mossy Meadow during the video.

    On the project sheet it lists the products I used. The ribbons here are the Iridescent 1/2" striped trim and the Gold & Silver 1/8" trim combo pack from the Annual Catalog. 

    Click on the photo below to watch the video and see how I used the easy template for these multilayered cards. 

    ~~~

    July Specials:

    *current host code link: BDGBJHAE


    Earn $5 coupon for every $50 you spend in July; redeem in August. 

    ~~~

    All online orders will receive my PDF tutorial featuring the Full of Life suite

    Choose a free glue stand from me!

    Leave a Reply

    Your email address will not be published. Required fields are marked *

  • Do you ever make cards made from leftover pieces?


    Today is the last day of the Paper Pumpkin sale – refills and add-ons are up to 75% off! See it all here

    ~~~

    I had a bunch of fussy cut coffee cups leftover from a previous project plus a stack of A Little Latte designer paper layers too.  Here are some of the cards I made with them.  

    Aren't they great?  You'd never know I made these with leftover pieces! It's a fun challenge to put random layers together in a pleasing way. I really enjoyed making these as thank you's for my online orders. 

    Here's a photo of the cute A Little Latte designer paper. There are two sheets of coffee cups you can fussy cut.  Or get the Latte Love bundle that has dies to match. 


     I knew I needed a neutral base to add the layers to so I started out with a textured White layer added to my card bases. I chose the So Swirly embossing folder seen here. After adding the DSP pieces & coffee cups I finished the cards with greetings and a twine bow. 


    I keep a small bag of White die-cut greeting pieces on my desk so I grabbed some of those for my greetings.  Done! 

    I think they turned out great.  Do you ever grab your leftovers to create with? 

    ~~~

    July Specials:

    *current host code link: BDGBJHAE


    Earn $5 coupon for every $50 you spend in July; redeem in August. 

    ~~~

    All online orders will receive my PDF tutorial featuring the Full of Life suite

    Choose a free glue stand from me!

    Leave a Reply

    Your email address will not be published. Required fields are marked *

  • Free Shipping extended! Paper Pumpkin Sale through Thursday, July 25th


    They’re experiencing glitches with the ordering system so they’re extending the free shipping promotion one more day! Yay! 

    Have you considered trying our Paper Pumpkin kits?  Many people love receiving a crafty box each month. 

    Did you know you can pause or skip a shipment at any time?  You're in complete control of what you receive and we get to see sneak peeks almost a month before the kits ship. 

    The next kit in August is called 'Time for Cake' and it will include an extra free numbers stamp set!

    The deadline to opt in to receive this glitzy kit is August 10th.  So be sure to opt in by subscribing here.  Or purchasing a pre-paid subscription here.   **Choosing a 3 month pre-paid will earn you a $5 bonus coupon to redeem in August.

    Did you know that each month I send a bunch of bonus projects to my Paper Pumpkin customers and my Team as well?  Here's a peek at the June projects they received:


    Once you're a subscriber you will receive your crafty box around the 18th of each month. And then you have access to the many refills and add-ons available from the Paper Pumpkin extras!  The refill kits include everything the original kit did except an ink spot and the stamp set. You can see the available extras below. 

    Check out the discounts available through Thursday, July 25th

    (Paper Pumpkin subscribers only) 

    Sale: $10.80

    Price: $12.00

    Sale: $8.40

    Price: $12.00

    Sale: $2.75

    Price: $11.00

    Sale: $2.00

    Price: $4.00

    Sale: $3.25

    Price: $13.00


    ~~~

    July Specials:

    *current host code link: BDGBJHAE


    Earn $5 coupon for every $50 you spend in July; redeem in August. 

    ~~~

    All online orders will receive my PDF tutorial featuring the Full of Life suite

    Choose a free glue stand from me!

    Leave a Reply

    Your email address will not be published. Required fields are marked *


Notice: LeeAnn Greff, Independent Stampin’ Up! Demonstrator, Manager. The content of this website is my sole responsibility as an independent Stampin’ Up! demonstrator and the use of, and content of, the classes, services, or products offered on this website is not endorsed by Stampin’ Up! Copyright 2025