/


Latest Post

3 Flowering Cactus Fun Fold cards with video!


I created these cards on Facebook Live last week using the Flowering Cactus product medley seen on pages 8-9 of the Spring Catalog.  But I purchased the refill kit instead of the main suite because I wanted mostly the paper, twine and felt accents. 

You'll find the video below.  For those of you on Facebook you can see it here.  

I share a FB Live video each Tuesday at 11 am CT.  Join me here! 
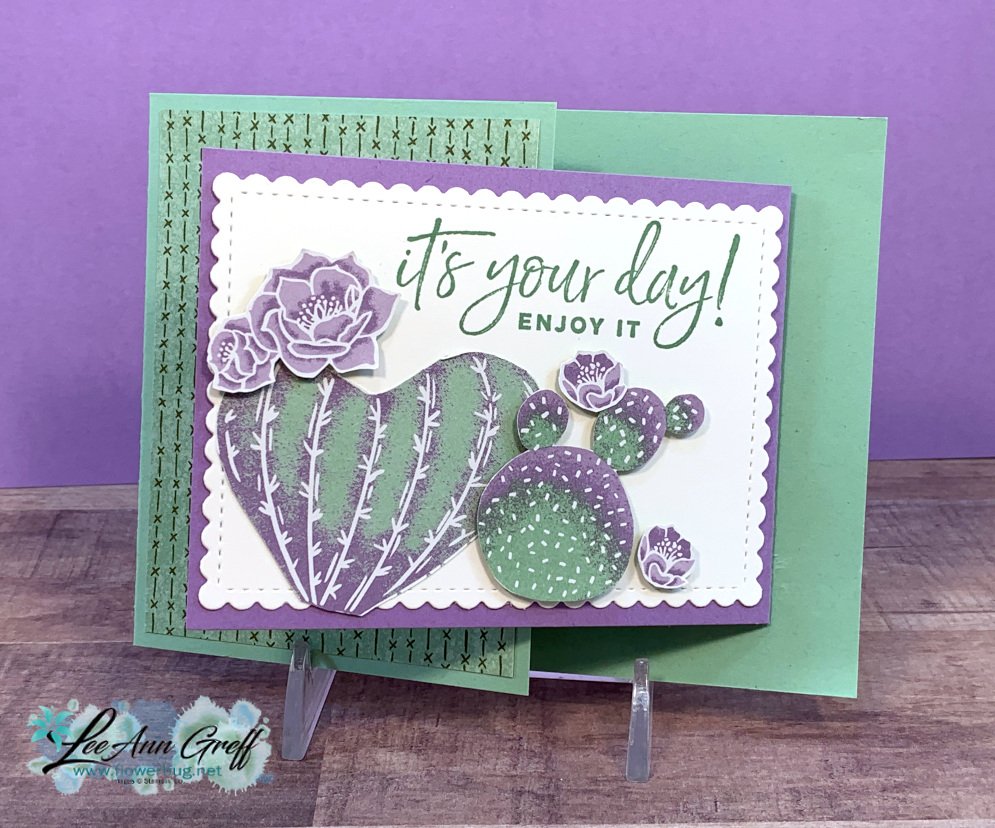
This fold is called a Joy Fold card; a favorite of mine that is basically two half cards folded into one another. 

The colors are Mint Macaron, Highland Heather and White.   The greeting is from Happiest of Birthdays.  The inside greeting is from Happy Thoughts set in the Spring catalog. 
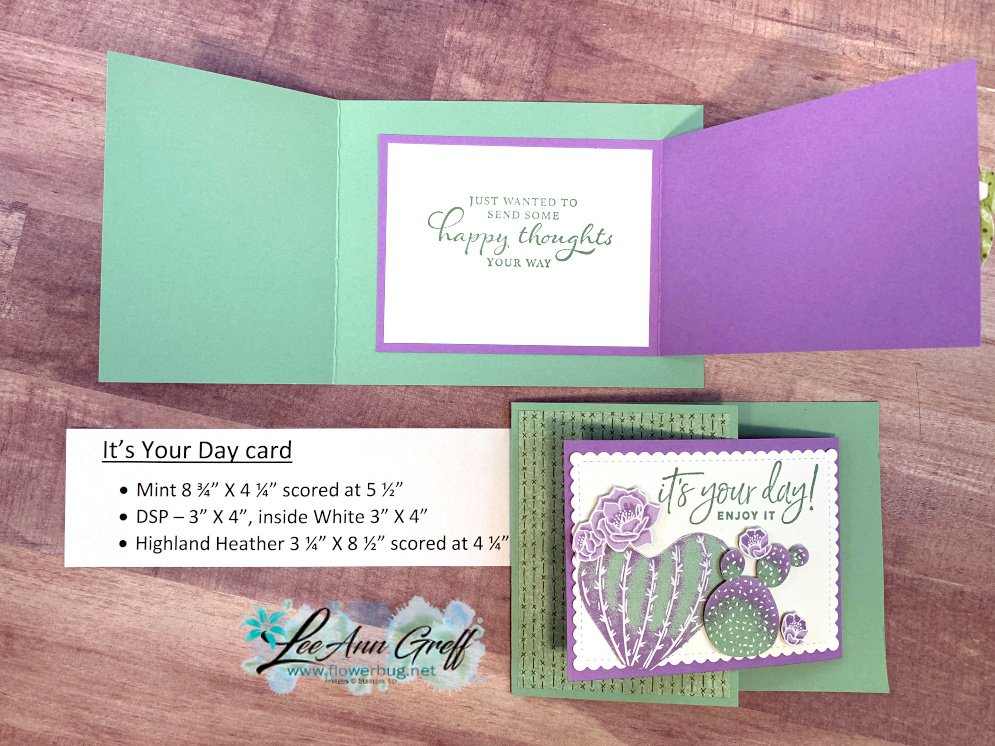
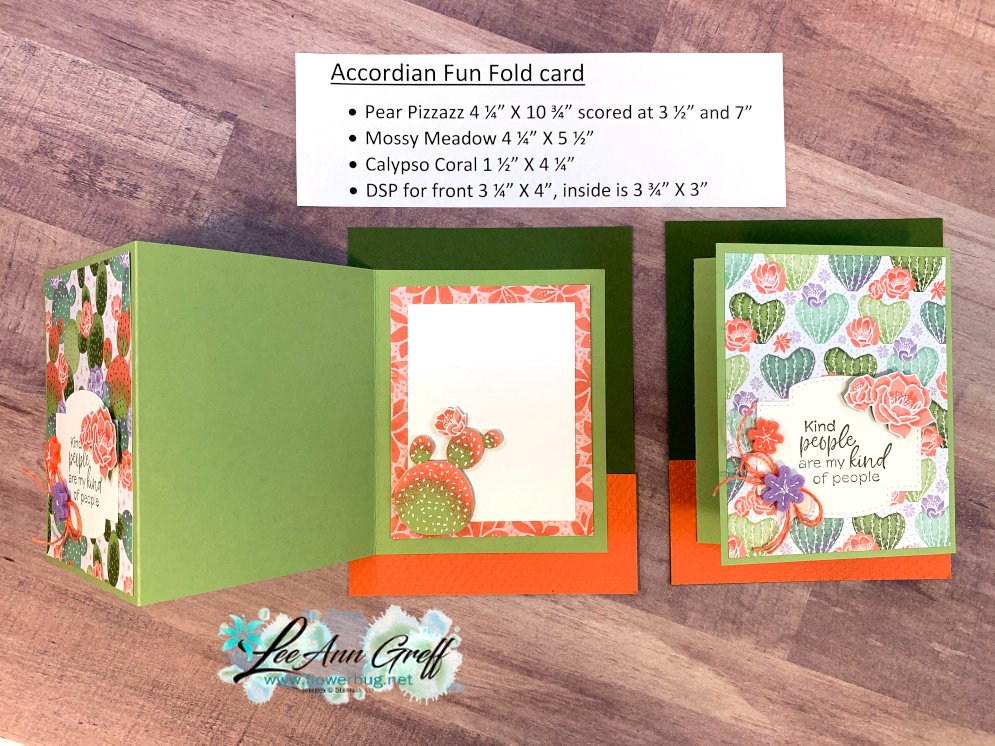
Next is an accordion style card.  I kind of made this one up; trying to use just half of a sheet of card stock for the fold. 
This greeting die-cut is from the Stitched So Sweetly dies and that embossing texture is made with the Tasteful Textile 3D folder.  The greeting is from Simply Succulents stamp set in the Spring catalog. 
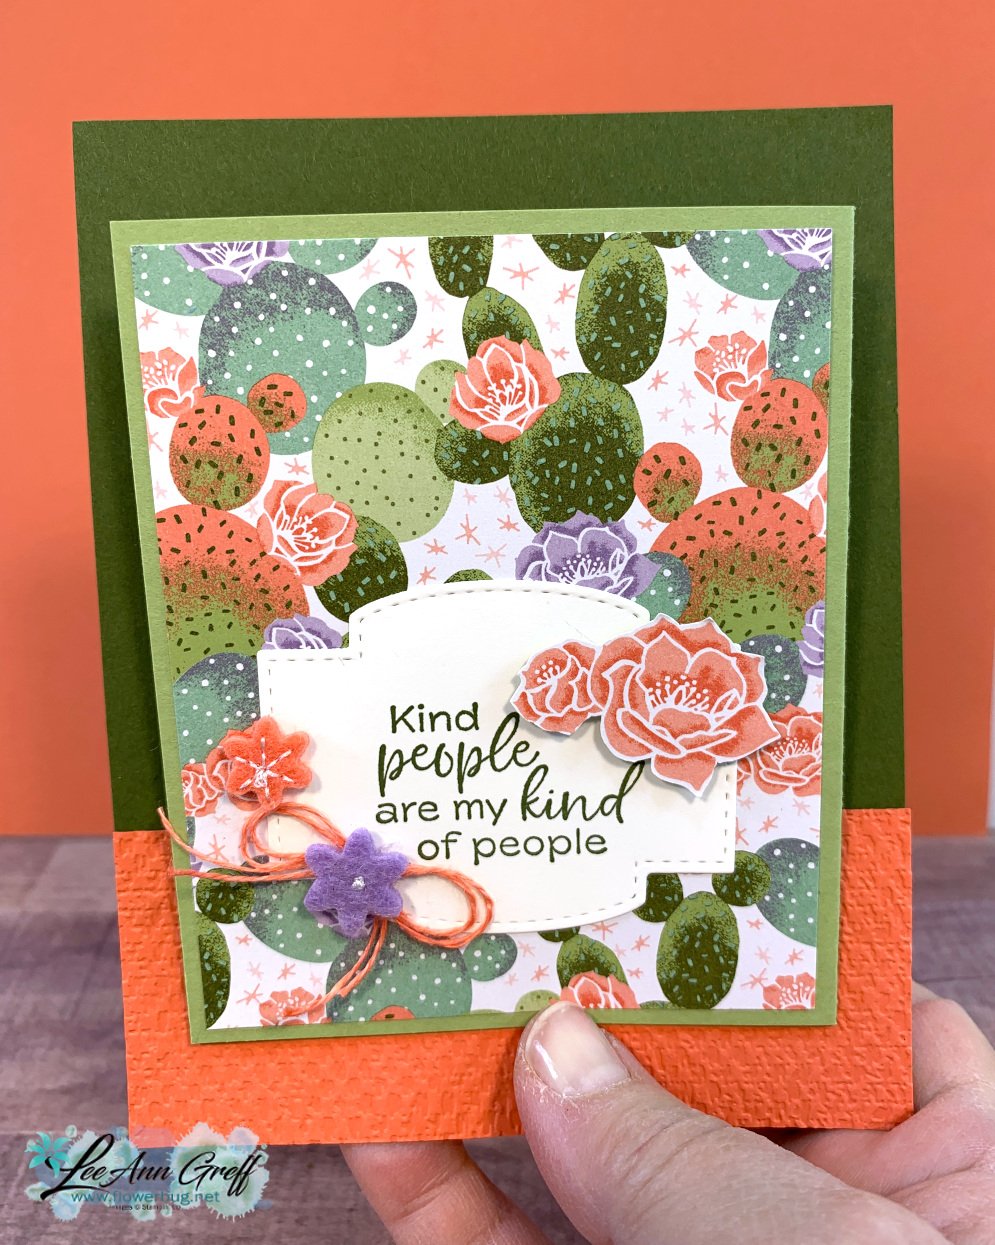
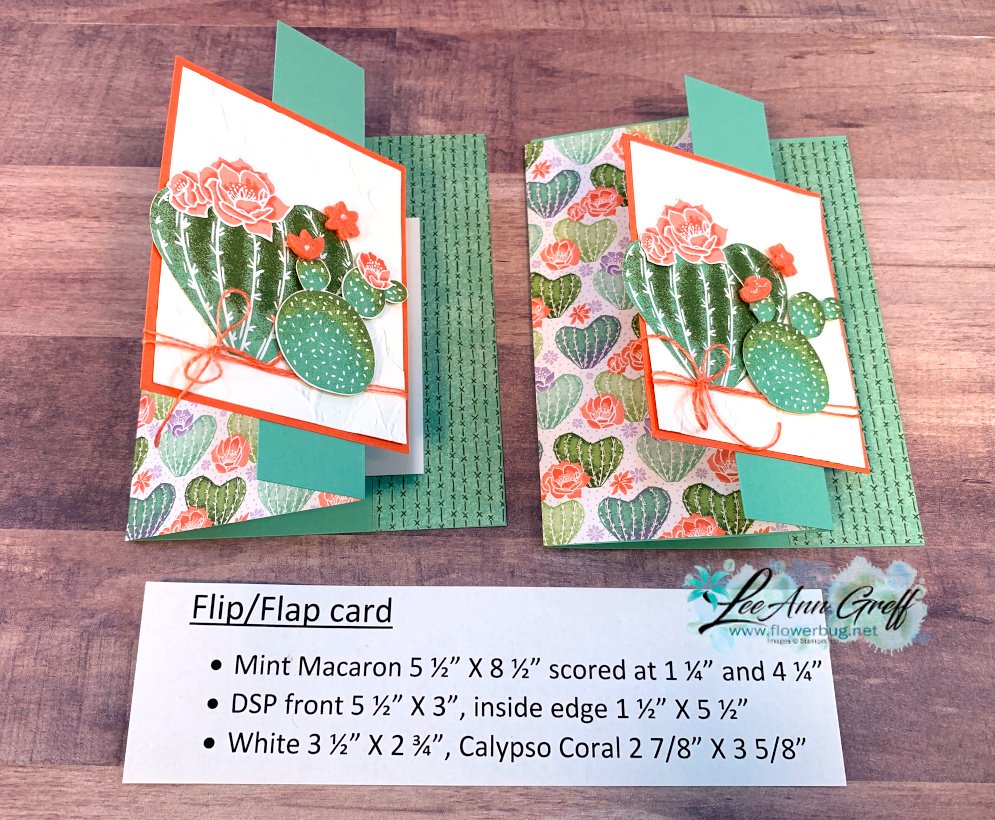
Lastly is a super simple fun fold card that shows off your designer paper well; on the front and the inside of the card. *See measurements in the photo below. 

The colors here are Mint Macaron, Calypso Coral and White.  The pretty Coral twine comes in the refill kit.  
Here's the video for you; enjoy! 

~~~

April Specials!

Click here for the Annual Catalog Retiring List; many discounted items while supplies last! 

Current Host code is 3PA3P32V

Order online here


~~~

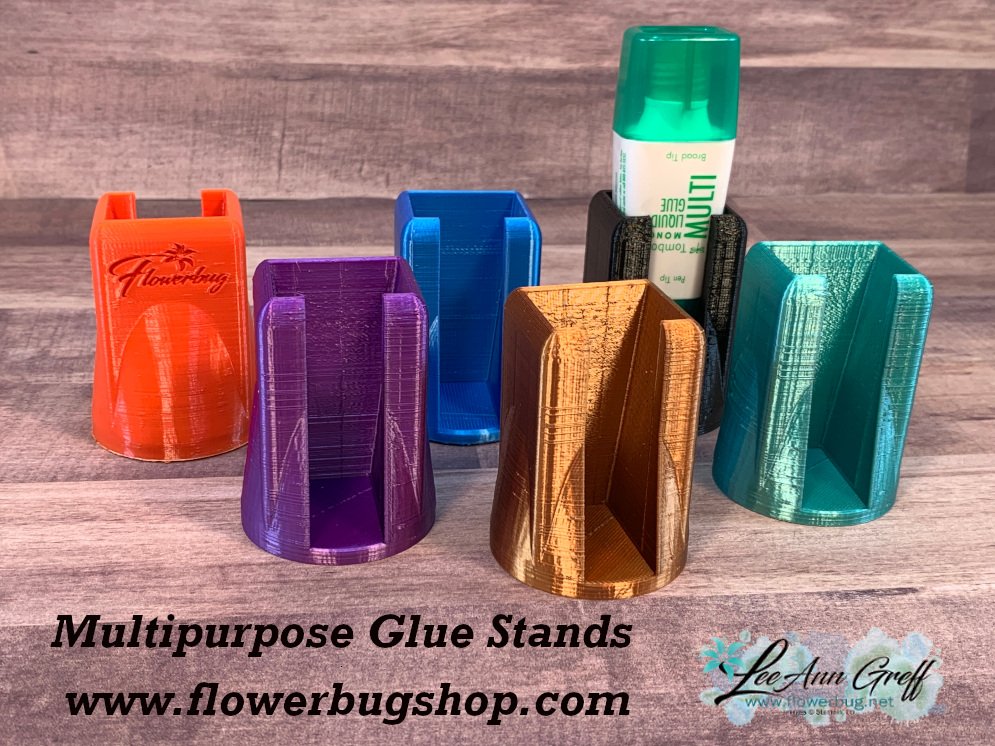
Get a free multipurpose glue stand with an online order over $60 using the host code above. You'll receive a color of my choice unless you let me know your preference. *if you'd rather have gems; let me know.

*If your order is over $150 do not use the code; you'll still receive a gift! 

You can also order them in my Shop here. 
All online orders will receive a free 14 project PDF tutorial

All Posts

  • FREE Shipping starts today through Wednesday!!


    Today through Wednesday is free shipping on Stampin' Up! orders over $75!  It's a great time to pick up those items you've had on your list. 

    There are many products to choose from including:

    • pre-paid Paper Pumpkin subscriptions here
    • Online Exclusives here
    • Holiday catalog items
    • Clearance Rack products seen here

    Plus I still have some Mystery Boxes left!  So combine Free Shipping with a big box of Stampin' Up! from me and it's a no brainer to get an order in by Wednesday! 

    Get a Mystery Box full of Stampin' Up! supplies while they last!

    Each box contains from $180-200 in retired products (new or lightly used)

      1. Place an online Stampin' Up! order over $75 (before tax & shipping) using one of my current host codes to reserve a Mystery Box. *Host code links – W99E4KPB or VEH4FKBV
      2. Send me the $14 shipping fee (PayPal or Venmo). 
      3. I'll send you your Mystery box via Priority Shipping! 

    ~~~

    October Specials: 

    Amazing Starter Kit choices! 

    Choose one and enjoy the 20% discount on all future orders! Click here

    ~~~

    *current host code: W99E4KPB or VEH4FKBV

    *Get free glitter gems with online orders over $55 (Please use a host code)

    Leave a Reply

    Your email address will not be published. Required fields are marked *

  • The easy way to make a shaker card!


    You may think a shaker card needs foam adhesive strips or a die-cut window.  Not true! 

    You can make them easily from clear envelopes!  *did you know we have clear envelopes in our Annual catalog? See them on page 135 or here online.  You get 50 envelopes for just $7. 

    Just add your paper inside the clear envelope (making sure it fits tightly so the shaker pieces don't move behind), pour in some shaker elements like loose sequins or beads, and seal it up.  It's a super fun card to receive; it's a bit addictive to shake!  

    The designer paper is the Walk in the Woods and the stamps are from the More Wishes stamp set; both found in the Holiday catalog. I stamped the greetings on a die-cut from the Nested Essentials dies.  

    These cards are included in one of my Christmas card kits to go.  I have three different kit options to choose from; you can see them all here.  

    The kits include everything you need except stamps, ink and adhesives.  You can add on the stamp set at a 10% savings with the purchased kit. These Christmas card kits are limited; opt in while they're available.   

    ~~~

    October Specials: 

    Amazing Starter Kit choices! 

    Choose one and enjoy the 20% discount on all future orders! Click here

    ~~~

    *current host code: W99E4KPB or VEH4FKBV

    *Get free glitter gems with online orders over $55 (Please use a host code)

    ~~~

    Get a Mystery Box full of Stampin' Up! supplies while they last!

    Each box contains from $180-200 in retired products (new or lightly used)

      1. Place an online Stampin' Up! order over $75 (before tax & shipping) using one of my current host codes to reserve a Mystery Box. *Host code links – W99E4KPB or VEH4FKBV
      2. Send me the $14 shipping fee (PayPal or Venmo). 
      3. I'll send you your Mystery box via Priority Shipping! 

    Leave a Reply

    Your email address will not be published. Required fields are marked *

  • Double-Decker fun fold card with video tutorial and free project sheet


    Here's the second card we made at my September card clubs. It's a 'Double-Decker' fun fold card. 

    It features the pretty All About Autumn specialty paper that is so popular it's been hard to keep in stock! It should be back around the middle of October.  See it here.  

    For the circle die-cuts I chose to use both Stylish Shapes for the Vanilla circles and Deckled circle dies for the Early Espresso circle.  The die-cuts in Vanilla & Copper Clay are from the Magical Meadow dies.

    The greetings are from one of my favorite stamp sets in the Holiday catalog – So Sincere.  

    Here's the free project sheet for you: Download Sept '23 Double Decker card

    A double-decker card is where the center layer is popped up by a small box attached to the inside, back of the card like this.

    You need to adhere the back layer before adding this box. Then you top it with your center layer; for my version it's a piece of designer paper.

    I added a second circle to the inside designer paper layer for signing.  But one of my smart customers thought of adding it to the back so it doesn't cover up any of the pretty paper. A great idea! 

    **Here's the free project sheet: Download Sept '23 Double Decker card

    Below is the video tutorial for this card; I hope you watch! 

    ~~~

    October Specials: 

    Amazing Starter Kit choices! 

    Choose one and enjoy the 20% discount on all future orders! Click here

    ~~~

    *current host code: W99E4KPB or VEH4FKBV

    *Get free glitter gems with online orders over $55 (Please use a host code)

    ~~~

    Get a Mystery Box full of Stampin' Up! supplies while they last!

    Each box contains from $180-200 in retired products (new or lightly used)

      1. Place an online Stampin' Up! order over $75 (before tax & shipping) using one of my current host codes to reserve a Mystery Box. *Host code links – W99E4KPB or VEH4FKBV
      2. Send me the $14 shipping fee (PayPal or Venmo). 
      3. I'll send you your Mystery box via Priority Shipping! 

    Leave a Reply

    Your email address will not be published. Required fields are marked *


Notice: LeeAnn Greff, Independent Stampin’ Up! Demonstrator, Manager. The content of this website is my sole responsibility as an independent Stampin’ Up! demonstrator and the use of, and content of, the classes, services, or products offered on this website is not endorsed by Stampin’ Up! Copyright 2025